
This guide takes you from your first catch to a fully upgraded rod: how the main quests introduce fishing, which bait each fish takes, the rod parts some fishing spots call for, how to get and equip rod parts such as Braided Line, a tier list of every rod setup, and which fish sell for the most.
How fishing works
The main quests teach fishing step by step. Their objectives come in this order, with other quests in between:
- Take a fishing rod: the
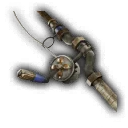 Simple Rod.
- Catch
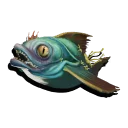 Snapper from the pier, using
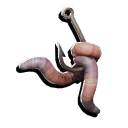 Earthworm as bait. Gill points out there are plenty of worms around.
- Process the catch in the Grinder into fish meat.
- Craft the
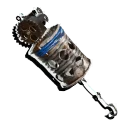 Wind-Up Tin bait at the Craft table and catch
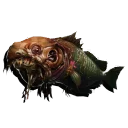 Softgrazer, a peaceful fish.
- Craft the
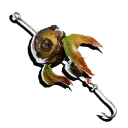 Rainbow Fin bait, catch
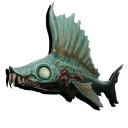 Harpooner, a predatory fish, and sell predatory fish to Gill and Bozur.
Every fish is either peaceful or predatory (9 peaceful and 18 predatory among 27 fish), and each one only takes certain baits. Check the bait before you head out: see “Choosing bait”.
7 of the 28 fishing spots are active only at night, and 7 fish can only be caught at those spots. Gill warns that without repairs, cleaning and reinforcement you have no business being on the water at night; for boat upgrades, see Boat Upgrades.
14 of the 28 spots also have a condition on a rod part (Rod, Reel, Line). See “Rod parts required at fishing spots” for the parts that meet each one and “Rod parts (rod, reel, line) and how to equip them” for how to get them.
All 27 fish are listed in the Fish List, and the fishing spot locations are shown on the Fishing Spots Map.
Rod parts (rod, reel, line) and how to equip them
The Simple Rod has three part slots: Rod, Reel and Line. Each slot holds one of three parts, and each part sets a single stat (Rod: Exhaustion; Reel: Thrust; Line: Line strength). Every slot starts with its basic part.
| Slot | Part | Stat | How to get |
|---|---|---|---|
| Rod | 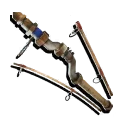 Old Rod | Exhaustion 20 | Starting part |
| Rod | 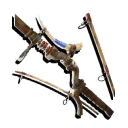 Reinforced Rod | Exhaustion 30 |
|
| Rod | 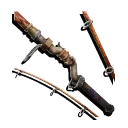 Coral fishing rod | Exhaustion 45 |
|
| Reel | 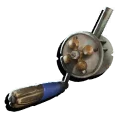 Simple Reel | Thrust 20 | Starting part |
| Reel | 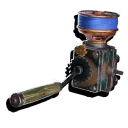 Baitcasting Reel | Thrust 30 |
|
| Reel | 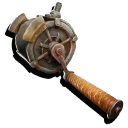 Friction reel | Thrust 45 |
|
| Line | 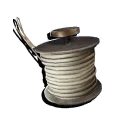 Worn Line | Line strength 20 | Starting part |
| Line | 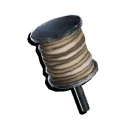 Braided Line | Line strength 30 |
|
| Line | 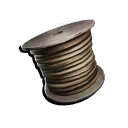 Sliding fishing line | Line strength 45 |
|
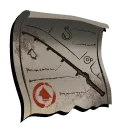
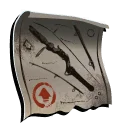
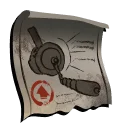
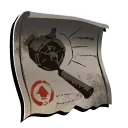
How to equip a part (example: Braided Line)
- Buy
 Blueprint: Braided Line from a vendor (
 300).
- Open the Upgrade Tree and research the blueprint (Braided Line).
- Craft the part at the Craft table (Braided Line).
- Install the part. A main quest has you install a tool part,
 Serrated axe edge, at the Rigging Bench in Betsy (labelled “Upgrades table” in game).
In-game descriptions of the parts
- Old Rod: “A rod that has seen plenty of use and has only avoided breaking by sheer luck.”
- Reinforced Rod: “This rod's flexibility, strength, and comfort let you tire fish out faster.”
- Coral fishing rod: “Upgraded fishing rod built around a coral-fiber core. Increased flexibility and resilience make it easier to haul in larger fish and reduce the risk of line breakage. The design is not particularly durable, however, so it is unlikely to withstand prolonged use.”
- Simple Reel: “A primitive reel assembled by an unknown angler. Slow, with a stiff action.”
- Baitcasting Reel: “A reinforced reel that winds the line faster and pulls the catch toward the boat.”
- Friction reel: “Fishing reel with an adjustable drag system. Allows the line to be released under heavy load, reducing the risk of snapping. An essential piece of tackle for landing large and powerful fish. Handcrafted, and therefore prone to rapid wear.”
- Worn Line: “An old, thin line. Unlikely to hold a strong, heavy fish.”
- Braided Line: “Its special weave makes the line stronger, which means fish will break free less often.”
- Sliding fishing line: “A thin fishing line twisted from hemp fibers and impregnated with a mixture of crushed fish scales and mucus. It becomes almost transparent in water, blending into the murky depths. It helps prevent frequent line breaks.”
Best rod setups: tier list
This tier list ranks all 27 combinations of the nine parts by how many of the 14 fishing spots with a rod part condition they meet, using the same check as the Rod Builder. S meets all 14, A at least 11, B at least 7, C at least 3, and D fewer. Within a tier, setups are sorted by the number of spots, then by the total of the three stats.
Meeting a spot's condition only covers the rod: the time of day and story progress still apply. Spots with no rod part info are not counted. How the conditions are read is explained under “Rod parts required at fishing spots”.
| Tier | Rod | Reel | Line | Exhaustion | Thrust | Line strength | Total | Spots met | Simulator |
|---|---|---|---|---|---|---|---|---|---|
| S | Coral fishing rod | Friction reel | Sliding fishing line | 45 | 45 | 45 | 135 | 14 / 14 | Open |
| A | Coral fishing rod | Friction reel | Braided Line | 45 | 45 | 30 | 120 | 13 / 14 | Open |
| A | Reinforced Rod | Friction reel | Sliding fishing line | 30 | 45 | 45 | 120 | 12 / 14 | Open |
| A | Coral fishing rod | Baitcasting Reel | Sliding fishing line | 45 | 30 | 45 | 120 | 12 / 14 | Open |
| A | Coral fishing rod | Friction reel | Worn Line | 45 | 45 | 20 | 110 | 11 / 14 | Open |
| A | Coral fishing rod | Baitcasting Reel | Braided Line | 45 | 30 | 30 | 105 | 11 / 14 | Open |
| A | Reinforced Rod | Friction reel | Braided Line | 30 | 45 | 30 | 105 | 11 / 14 | Open |
| B | Reinforced Rod | Baitcasting Reel | Sliding fishing line | 30 | 30 | 45 | 105 | 10 / 14 | Open |
| B | Old Rod | Friction reel | Sliding fishing line | 20 | 45 | 45 | 110 | 9 / 14 | Open |
| B | Coral fishing rod | Baitcasting Reel | Worn Line | 45 | 30 | 20 | 95 | 9 / 14 | Open |
| B | Reinforced Rod | Friction reel | Worn Line | 30 | 45 | 20 | 95 | 9 / 14 | Open |
| B | Reinforced Rod | Baitcasting Reel | Braided Line | 30 | 30 | 30 | 90 | 9 / 14 | Open |
| B | Coral fishing rod | Simple Reel | Sliding fishing line | 45 | 20 | 45 | 110 | 8 / 14 | Open |
| B | Old Rod | Friction reel | Braided Line | 20 | 45 | 30 | 95 | 8 / 14 | Open |
| B | Coral fishing rod | Simple Reel | Braided Line | 45 | 20 | 30 | 95 | 7 / 14 | Open |
| B | Old Rod | Baitcasting Reel | Sliding fishing line | 20 | 30 | 45 | 95 | 7 / 14 | Open |
| B | Reinforced Rod | Baitcasting Reel | Worn Line | 30 | 30 | 20 | 80 | 7 / 14 | Open |
| C | Reinforced Rod | Simple Reel | Sliding fishing line | 30 | 20 | 45 | 95 | 6 / 14 | Open |
| C | Old Rod | Friction reel | Worn Line | 20 | 45 | 20 | 85 | 6 / 14 | Open |
| C | Old Rod | Baitcasting Reel | Braided Line | 20 | 30 | 30 | 80 | 6 / 14 | Open |
| C | Coral fishing rod | Simple Reel | Worn Line | 45 | 20 | 20 | 85 | 5 / 14 | Open |
| C | Reinforced Rod | Simple Reel | Braided Line | 30 | 20 | 30 | 80 | 5 / 14 | Open |
| C | Old Rod | Baitcasting Reel | Worn Line | 20 | 30 | 20 | 70 | 4 / 14 | Open |
| C | Old Rod | Simple Reel | Sliding fishing line | 20 | 20 | 45 | 85 | 3 / 14 | Open |
| C | Reinforced Rod | Simple Reel | Worn Line | 30 | 20 | 20 | 70 | 3 / 14 | Open |
| D | Old Rod | Simple Reel | Braided Line | 20 | 20 | 30 | 70 | 2 / 14 | Open |
| D | Old RodStarting setup | Simple Reel | Worn Line | 20 | 20 | 20 | 60 | 0 / 14 | Open |
Upgrading one part at a time
Starting from the basic setup (0 spots met), swapping in a single part adds the spots below. Friction reel adds the most: 6.
| Part | Slot | Spots added | New fishing spots | Prerequisite node | Blueprint price |
|---|---|---|---|---|---|
| Friction reel | Reel | +6 | Rammfish Fishing Spot, Stonegnawer Fishing SpotNight only, Hornhead Fishing Spot, Plasmling Fishing Spot, Bully Fishing Spot, Rivetback Fishing Spot | Baitcasting Reel | 1700 |
| Coral fishing rod | Rod | +5 | Swallower Fishing SpotNight only, Stormfin Fishing Spot, Gravedigger Fishing SpotNight only, Shardback Fishing Spot, Bonescar Fishing Spot | Reinforced Rod | 1150 |
| Baitcasting Reel | Reel | +4 | Stonegnawer Fishing SpotNight only, Hornhead Fishing Spot, Bully Fishing Spot, Rivetback Fishing Spot | — | 600 |
| Reinforced Rod | Rod | +3 | Swallower Fishing SpotNight only, Gravedigger Fishing SpotNight only, Bonescar Fishing Spot | — | 450 |
| Sliding fishing line | Line | +3 | Greasechar Fishing Spot, Glowbug Fishing Spot, Cryptmaw Fishing SpotNight only | Braided Line | 800 |
| Braided Line | Line | +2 | Greasechar Fishing Spot, Cryptmaw Fishing SpotNight only | — | 300 |
Choosing bait
Each fish only bites on certain baits. Below are all the baits, with their in-game descriptions and the fish they work on.
- Earthworm — “A common earthworm. Universal bait for the simplest fish.”
Works on:Snapper 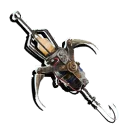 Clinging Pincer — “Improved bait for bony fish, both predatory and peaceful. A special expanding system of struts and hooks catches larger specimens more securely.”
Works on: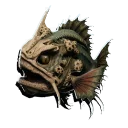 Rammfish,
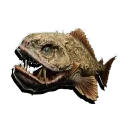 Stonegnawer,
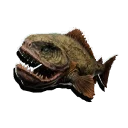 Bully,
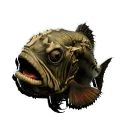 Bonescar
Unlocked in the Upgrade Tree: Clinging Pincer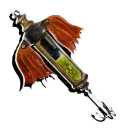 Flaming Belly — “Bait for predatory fish. The color of the phosphorescent slime and the movement of the lure's fins mimic the behavior of Snapper. Large predators attack it without hesitation, only to become prey themselves. Increases the chance of catching a trophy fish.”
Works on: 14 fish (Predatory 14) · full list: Bait Guide
Unlocked in the Upgrade Tree: Flaming Belly- Wind-Up Tin — “Bait for non-predatory fish. Meat rots inside the clattering can, attracting small scavengers.”
Works on: 8 fish (Peaceful 8) · full list: Bait Guide
Unlocked in the Upgrade Tree: Wind-Up Tin - Rainbow Fin — “Bait for predatory fish. As you reel in the line, the bright plumage flutters, provoking local predators to attack. Its array of hooks digs securely into the throat or cheeks.”
Works on: 14 fish (Predatory 14) · full list: Bait Guide
Unlocked in the Upgrade Tree: Rainbow Fin 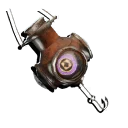 Pipecross — “Universal bait for any bony fish. Its unusual shape lets the hooks catch on the hard growths around their lips.”
Works on:Rammfish, Stonegnawer, Bully, Bonescar
Unlocked in the Upgrade Tree: Pipecross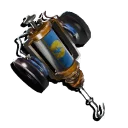 Sturdy Earcrawler — “Bait for non-predatory fish. The contraption emits distinct sound vibrations that attract larger specimens. Increases the chance of catching a trophy fish.”
Works on: 8 fish (Peaceful 8) · full list: Bait Guide
Unlocked in the Upgrade Tree: Sturdy Earcrawler
In the Bait Guide, pick a fish to see its baits, or a bait to see every fish it catches.
Rod parts required at fishing spots
14 of the 28 fishing spots have a condition on one rod part. The table lists the parts that meet each condition, with the condition's stat and value in parentheses. The first part listed has exactly that value, and better parts for the same slot have higher values (the check is the same as in the Rod Builder). Treat the conditions as a guide. The other 14 spots have no rod part info, which does not mean any rod will do.
| Slot | Required parts | Fishing spots |
|---|---|---|
| Rod | Reinforced Rod or Coral fishing rod (Exhaustion 30) | Swallower Fishing SpotNight only, Gravedigger Fishing SpotNight only, Bonescar Fishing Spot |
| Rod | Coral fishing rod (Exhaustion 45) | Stormfin Fishing Spot, Shardback Fishing Spot |
| Reel | Baitcasting Reel or Friction reel (Thrust 30) | Stonegnawer Fishing SpotNight only, Hornhead Fishing Spot, Bully Fishing Spot, Rivetback Fishing Spot |
| Reel | Friction reel (Thrust 45) | Rammfish Fishing Spot, Plasmling Fishing Spot |
| Line | Braided Line or Sliding fishing line (Line strength 30) | Greasechar Fishing Spot, Cryptmaw Fishing SpotNight only |
| Line | Sliding fishing line (Line strength 45) | Glowbug Fishing Spot |
What to do with your catch: sell or grind
You can sell your catch or process it in the Grinder. As Gill puts it: “If you caught extras, we'll buy the rest. If you won't sell, process them. You'll need the ingredients.”
Each fish sells for a different price, even within the same kind. Ranked by their highest sell price, these are the top 5:
| Fish | Type | Sell price | Spot and required parts | Grinder materials |
|---|---|---|---|---|
| Rammfish | Predatory | 74–159 | Rammfish Fishing Spot Friction reel (Thrust 45) |  Mutant Fish Meat×2, 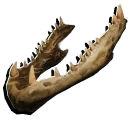 Jaws×1, 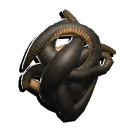 Leeches×3, 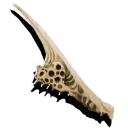 Bony Horn×1, 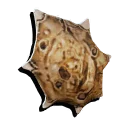 Bone Plate×2 |
| Stonegnawer | Predatory | 66–142 | Stonegnawer Fishing SpotNight only Baitcasting Reel or Friction reel (Thrust 30) | Bone Plate×3, Jaws×2, Leeches×3, Mutant Fish Meat×2 |
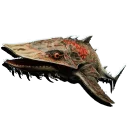 Gravedigger | Peaceful | 60–139 | Gravedigger Fishing SpotNight only Reinforced Rod or Coral fishing rod (Exhaustion 30) |  Chromatic Scales×3, Leeches×2, Bone Plate×2, Mutant Fish Meat×2 |
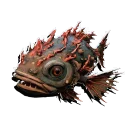 Shardback | Predatory | 59–138 | Shardback Fishing Spot Coral fishing rod (Exhaustion 45) | Jaws×1, Leeches×2,  Coral Tail×1, Mutant Fish Meat×2 |
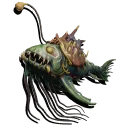 Glowbug | Predatory | 57–132 | Glowbug Fishing Spot Sliding fishing line (Line strength 45) | Jaws×2, Leeches×3,  Glowbug×1, Mutant Fish Meat×2 |
Grinder materials are used for crafting, including rod parts and bait; see Crafting Recipes. Prices and materials for every fish are in the Fish List.
Summary and related tools
In short: match the bait to the fish, check each spot's time of day and required parts, and upgrade the rod one part at a time. These tools help with each step:
- Fish List: every fish with its bait, spots, sell price and grinder materials
- Fishing Spots Map: map of the fishing spots with time of day and required parts
- Bait Guide: which bait works on which fish
- Rod Builder: combine rod parts and see which spots' conditions they meet
- Fishing Upgrades: what each node unlocks and the blueprint it needs
- Crafting Recipes: materials for rod parts and bait
- Boat Upgrades: boat parts for each slot, with ratings, crafting materials and how to unlock them