
This DREADMOOR walkthrough lists every main quest in story order, from “After the Catastrophe” to “Big Water”. The 164 quests are split into 10 chapters, and each one shows its objectives plus tips on what to gather, which fish to catch and what to craft.
For quests that need fishing, the fish, bait and spot conditions are in Fish to Catch for Quests. The recommended rod parts, bait, tools and boat parts for the main quests are on Fishing Upgrades, Tool Upgrades and Boat Upgrades.
Walkthrough Overview
For each chapter, the upgrades its quests need (rod parts and things to craft) and the fish you catch. Select a chapter to jump to its quest list.
Objective counts and rewards may change with updates.
Chapter 1: Escaping the Church Settlement
The prologue: get the 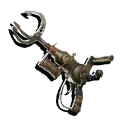 Hook Gun in the abandoned house and head for the Church Settlement. The control panel that lowers the boat into the water needs power, so first find a fuel can, refuel the generator and start it. The map in our Fuel Can Map & How to Get shows where fuel cans are. Once aboard, fish out consumables (
 Metal Plate) with the hook gun, repair the engine and leave the Church Settlement.
| # | Quest | Objectives | Tips & Links |
|---|---|---|---|
| 1 | After the Catastrophe | Get to the abandoned house | — |
| 2 | The Chest Washed Away | Get to the abandoned house | — |
| 3 | Hook Gun | Take the hook gun from the ghoul's claws | |
| 4 | Find the Exit | Find a new way out to the veranda | — |
| 5 | The Heart of the House | Drop the crane's load onto the heart of the house | — |
| 6 | The Church Settlement | Head for the settlement | — |
| 7 | Strange Voices | Find the source of the sound in the settlement | — |
| 8 | Dead Control Panel | Use the control panel to lower the boat into the water | — |
| 9 | Power Source | Find the generator | — |
| 10 | Empty Tank | Find a fuel can | See also: Fuel Can Map & How to Get |
| 11 | Refueling | Refuel the generator | — |
| 12 | Let There Be Power | Start the generator | — |
| 13 | Launch the Boat! | Use the control panel to lower the boat into the water | — |
| 14 | Aboard the Boat | Inspect the boat | — |
| 15 | A Voice on the Air | Tune the radio and contact Gill | — |
| 16 | Crafting Materials | Fish out the consumables with the hook gun ×3 | |
| 17 | Engine Repair | Repair the boat's engine | — |
| 18 | Escape | Leave the Church Settlement | — |
| 19 | Precious Junk | Use the hook to retrieve your chest from the water and place it in the boat's wheelhouse. | — |
Chapter 2: The First Gates and the Anglers' Cabin
Head for the river gates, moor nearby and configure the waterway to open them. Past the gates, find the angler brothers' cabin and take the 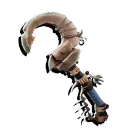 Axe. You will also need the axe later in “Coral Harvesting” to gather
 Coral fibers. Sleep in the cabin's bed until 10 AM to start the next quest.
| # | Quest | Objectives | Tips & Links |
|---|---|---|---|
| 20 | The First Gates | Head for the river gates | — |
| 21 | Mooring | Moor by the gates | — |
| 22 | Old Instructions | Configure the waterway to open the gates | — |
| 23 | Waterway | Configure the waterway to open the gates | — |
| 24 | A Breather | Find the angler brothers cabin | — |
| 25 | Weapon? |
| |
| 26 | Overnight Stay | Lie down in bed and sleep until 10 AM | — |
Chapter 3: The Trading Post and Your First Fish
Return to the boat at the pier, sail straight to the trading post, ring the bell and meet the merchants Gill and Bozur. Fishing starts once you take the fishing rod in the flophouse. Your first catch from the pier, the 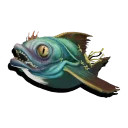 Snapper, bites on
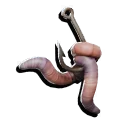 Earthworm. Process the fish in the Grinder into
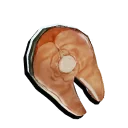 Fish Meat, feed the meat to the fuel larva, then refuel the boat with the fuel gun. Our How to Fish guide covers the fishing basics.
| # | Quest | Objectives | Tips & Links |
|---|---|---|---|
| 27 | Boat | Return to the boat at the pier | — |
| 28 | Trading Post | Sail straight toward the strangers' trading post | — |
| 29 | Mooring | Moor at the trading post dock | — |
| 30 | Bell | Ring the bell | — |
| 31 | Merchants | Enter the shop and talk to the merchants | — |
| 32 | Personal Belongings | Take the chest from the pier | — |
| 33 | Away from Prying Eyes | Take the chest to the flophouse | — |
| 34 | Flophouse Door | Open the flophouse door with the key | — |
| 35 | Place for Personal Belongings | Place the chest at the designated spot | — |
| 36 | You Are Not Welcome Here | Patch the hole in the wall | — |
| 37 | Overnight Stay | Lie down in bed and sleep until 10 AM | — |
| 38 | Radio | Listen to the radio to find out what Gill wants | — |
| 39 | Fishing Rod | Take the fishing rod from the table | See also: How to Fish |
| 40 | Beautiful View | Step out onto the balcony | — |
| 41 | Talk to Gill and Bozur | Speak with the merchants on the platform near the Dry Dock | — |
| 42 | Catch Snappers | Catch Snappers from the pier ×3 | |
| 43 | Talk to Gill and Bozur | Find out if the fish is enough to cover the debt | — |
| 44 | Talk to the Engineer | Check if the Engineer is awake | — |
| 45 | Talk to the Merchants | Find Gill and Bozur at the central pier | — |
| 46 | Grinder | Process the Snappers in the Grinder ×3 | |
| 47 | Fuel Larva | Feed the fuel larva with fish meat ×3 | |
| 48 | Fuel Gun | Take the fuel gun | — |
| 49 | Refueling the Boat | Take the fuel gun and refuel the boat before setting sail | — |
Chapter 4: Repairing the Boat in the Dry Dock
On the neighboring Anglers Island, gather Coral fibers with the axe and  Bug slime and Metal Plate with the hook, then repair the moonshine still. After telling John the Fifth, open the door to the Dry Dock. Inside, turn on the lights, raise the boat to the second level, clean the polyps off its bottom with the water cannon, lower it to the first level and fix each hull section with the repair tool loaded with bug slime.
| # | Quest | Objectives | Tips & Links |
|---|---|---|---|
| 50 | Anglers Island | Head to the neighboring Anglers Island | — |
| 51 | Coral Harvesting | Gather coral fiber using the axe ×5 | |
| 52 | Crafting Materials |
| |
| 53 | Moonshine Still | Repair the moonshine still | — |
| 54 | The Joy of a Drunkard | Tell John the Fifth that you've fixed the still | — |
| 55 | Dry Dock Opens! | Open the door to the Dry Dock | — |
| 56 | Too Dark | Find the switch and turn on the lights in the Dry Dock | — |
| 57 | Broken Fuse Box | Repair the Fuse Box using consumables | — |
| 58 | Let There Be Light! | Use the switch to supply power to the Dry Dock | — |
| 59 | Into the Dry Dock | Moor the boat in the Dry Dock | — |
| 60 | Boat Hoist | Use the control panel to raise the boat to the second level | — |
| 61 | Air Pressure | Pressurize the cleaning system | — |
| 62 | Cleaning Tool | Take the water cannon | — |
| 63 | Cleaning | Clean the boat's bottom of polyps | — |
| 64 | Correct Height | Lower the boat to the first level | — |
| 65 | Repair Kit | Load the repair tool with bug slime | See also: Bug slime |
| 66 | Repair the Boat |
| — |
| 67 | Talk to the Engineer | Tell the Engineer that you've cleaned and repaired the boat | — |
Chapter 5: Paying the Debt and the Upgraded Engine
To pay off the debt, fishing and crafting begin in earnest. The “About the debt...” reward unlocks  Wind-Up Tin, so craft
 Wind-Up Tin and catch the peaceful
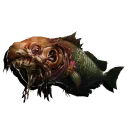 Softgrazer. In “Scraps of Knowledge”, research the
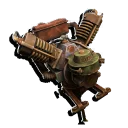 Upgraded Engine and
 Hull Protection blueprints in the Upgrade Tree (where to find
 Scraps of Knowledge: Torn Pages Map). Once the “Searching for a carburetor” reward unlocks
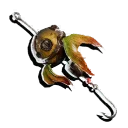 Rainbow Fin, use
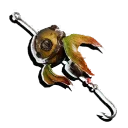 Rainbow Fin to catch and sell the predatory
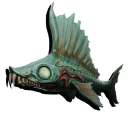 Harpooner, then buy a
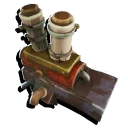 Carburetor and build the new engine.
| # | Quest | Objectives | Tips & Links |
|---|---|---|---|
| 68 | About the debt... | Ask Gill and Bozur how to repay the debt | |
| 69 | The First Lure | Use the workbench to craft a "Wind-Up Tin" | |
| 70 | Catch Peaceful Fish | Catch Softgrazer ×3 | Bait: Wind-Up Tin |
| 71 | A Peaceful Catch | Process Softgrazer in the Grinder ×3 | — |
| 72 | Secrets of the Trade | Talk to the Engineer about upgrading the boat | — |
| 73 | Scraps of Knowledge |
| |
| 74 | Dock the boat | Dock the boat inside the Dry Dock | — |
| 75 | The Right Height | Raise the boat to the second level of the Dry Dock | — |
| 76 | Hull Protection |
| |
| 77 | About the Engine | Talk to the Engineer about the new engine | — |
| 78 | Searching for a carburetor | Ask Gill and Bozur about the carburetor | Quest Reward: Rainbow Fin |
| 79 | Bait for Predatory Fish | Craft the "Rainbow Fin" bait | |
| 80 | Predatory Fish | Catch Harpooner ×3 | Bait: Rainbow Fin |
| 81 | Trading | Sell predatory fish to Gill and Bozur ×3 | See also: Money Making Guide |
| 82 | Buy a carburetor | Buy a carburetor from Gill and Bozur | |
| 83 | To the Dry Dock | Moor the boat at the Dry Dock | — |
| 84 | Boat Lift | Use the control panel to raise the boat to the second level | — |
| 85 | Engine Removal | Remove the old engine from the motorboat | |
| 86 | Module Storage | Take the old engine to storage | |
| 87 | Upgraded Engine | Craft the "Upgraded Engine" at the Lathe Workbench | |
| 88 | Install the Upgraded Engine | Install the "Upgraded Engine" in place of the old one | |
| 89 | Talk to the Engineer | Tell John the Fifth that you installed the "Upgraded Engine" | — |
Chapter 6: The Three Tuning Forks and the Beaver
After the engine swap, repair the locator on the tower and pick up the signal from Sludge Bet. Talk to the Engineer and install the  Serrated axe edge at the rigging bench in Betsy to start the tuning fork quests. For the church's tuning fork, catch the three
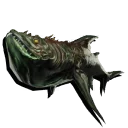 Bloodgill Father Matthias asks for and give them to him first. If a generator needs fuel, see our Fuel Can Map & How to Get. Once the tuning forks are repaired, report to the Engineer, install the klaxon you find in Lilo's Cave on the boat and drive off the beaver.
Finishing “The Rigging Bench” starts 3 quests at the same time: “The Tower Tuning Fork”, “The First Tuning Fork” and “The Ghoul Tower”.
| # | Quest | Objectives | Tips & Links |
|---|---|---|---|
| 90 | Locator on the Tower | Check whether the locator is working | — |
| 91 | Radio Repairs | Repair the radio locator | — |
| 92 | A Signal from Sludge-Beth | Tune the locator | — |
| 93 | In Search of the Sound | Talk to the Engineer | — |
| 94 | The Rigging Bench | Install the Serrated Axe Edge at the rigging bench in Betsy | |
| 95 | The Tower Tuning Fork |
| — |
| 96 | The First Tuning Fork | Repair the first tuning fork | — |
| 97 | Catch Fish for Father Matthias |
| Bait: Rainbow Fin |
| 98 | Find the Resonance | Obtain and install the tuning fork prongs | — |
| 99 | Hymn to Ugliness | Turn the tuning fork into a Hymn to Ugliness | — |
| 100 | The Joy of the Father | Tell Matthias that the Hymn to Ugliness is ready | — |
| 101 | The Ghoul Tower | Repair the second tuning fork | — |
| 102 | Empty Tank | Start the generator | See also: Fuel Can Map & How to Get |
| 103 | Maintenance | Tell the Engineer about the repaired tuning forks | — |
| 104 | An Important Addition | Find the klaxon in Lilo's Cave | — |
| 105 | So the Whole Area Hears | Install the klaxon on the boat | — |
| 106 | Territory of Someone Else | Head to the zone where the tuning forks' sound wave converges | — |
| 107 | Sweet Revenge | Drive the beaver off with the sound of the klaxon | — |
Chapter 7: Opening the Throat and Leaving the Slough
At the Throat, refuel the generator from a fuel can, start it and use the control panel on the gates — and something breaks. Inspect the damaged areas, attach buckets to the water wheel, fit a replacement axle and repair the water pump. The pump repair takes  Gear, Metal Plate,
 Machine oil and
 Thermo Coil, so gather them in advance. Finally, use the sluice control panel to send water to both water wheels; the Throat's gates open and you can leave the Slough.
| # | Quest | Objectives | Tips & Links |
|---|---|---|---|
| 108 | To the Throat | Sail to the Throat to escape the Slough | — |
| 109 | Generator | Start the generator | — |
| 110 | Fuel for the Generator | Find a fuel can to refuel the generator | See also: Fuel Can Map & How to Get |
| 111 | Refueling the Generator | Refuel the generator using the fuel can | — |
| 112 | Start the Generator | Start the generator to power the system | — |
| 113 | Gate Control Panel | Open the gate using the control panel | — |
| 114 | It Is Broken! | Inspect the damaged areas | — |
| 115 | Water wheel | Find buckets and attach them to the wheel | — |
| 116 | Water Wheel Axle | Find a replacement water wheel axle | — |
| 117 | Replace the axle. | Install a new shaft on the water wheel | — |
| 118 | Water Pump |
| |
| 119 | Waterway | Use the sluice system control panel | — |
| 120 | Troubleshooting the Waterway | Configure the waterway system so that water flows to both water wheels | — |
| 121 | Open the gates of "The Throat" | Use the control panel to open the gates | — |
| 122 | Set out! | Board the motorboat and leave the Slough | — |
Chapter 8: Big Hollow and the Drying House
Through the Throat lies Big Hollow. Answer the Baron on the radio, then at the Big Hollow trading post craft a medkit for the larva and deliver 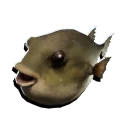 Bellybulge and
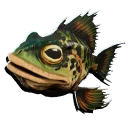 Toadling. The medkit needs
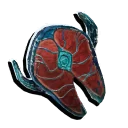 Mutant Fish Meat, which you get by putting mutant fish in the Grinder (see Mutant Fish List). On Mad Nick's island, catch
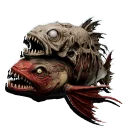 Cryptmaw at night; its spot has a line condition, so get
 Braided Line ready first. The reward unlocks
 Crude Lockpick: craft lockpicks, open the Drying House control room and take the
 Harpoon Gun. Finally, process mutant fish for
 Leeches and bring them to Donald.
| # | Quest | Objectives | Tips & Links |
|---|---|---|---|
| 123 | Big Hollow | Sail through the Throat into Big Hollow | — |
| 124 | A Deal with the Baron | Answer the Baron on the radio | — |
| 125 | Talk to Gill and Bozur | Head for the trading post in Big Hollow | — |
| 126 | First Aid | Craft a medkit and give it to the larva | |
| 127 | Catch the Local Fish |
| |
| 128 | Talk to the Engineer | Find John the Fifth at the Big Hollow trading post | — |
| 129 | Find Mad Nick | Head for Mad Nick's island | — |
| 130 | Catch a Mutant Fish |
| CryptmawNight only Bait: Rainbow FinRequired rod parts: Braided Line or  Sliding fishing line (Line strength 30) See also: Mutant Fish List Quest Reward: Crude Lockpick |
| 131 | Craft Lockpicks | Craft three lockpicks ×3 | |
| 132 | Break into the Control Room | Head for the Drying House and force the control room door | — |
| 133 | Lower the Gate | Lower the Drying House gate using the control panel | — |
| 134 | Anybody Here? | Search the Drying House | — |
| 135 | Take the Harpoon Gun | Take the harpoon gun lying in the control room | |
| 136 | Find Out Who Is Screaming | Find the source of the screams and talk to it | — |
| 137 | A Section of Pipe | Find a replacement pipe section to repair the air duct | — |
| 138 | The Broken Pump | Repair the pump | — |
| 139 | Pumping Out | Start the air cleaning to get rid of the Blight | — |
| 140 | The Stuck Man | Talk to the man stuck in the pipe | — |
| 141 | Bring the Leeches to Bubtitsky | Gather leeches ×6 | See also: Mutant Fish List |
Chapter 9: Jacqueline's Grotto and the Observatory
Sail to Jacqueline's grotto and bring her 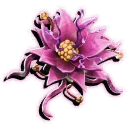 Swamp Lily and the predatory
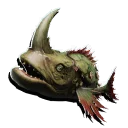 Hornhead; she gives you the
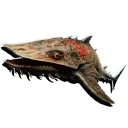
 Star Key, which opens the Observatory door. Shoot the lilies floating on the water with the Hook Gun and pull them in. The Hornhead spot has a reel condition. After finding Junior in the Observatory, catch
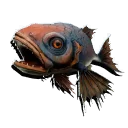 Tileback,
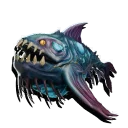 Greasechar and, at night,
 Gravedigger for “The Experimenters”.
To get Swamp Lily, pull in the flower on a lily pad floating on the water with the Hook Gun. It is hard to spot, so use the location map and this in-game footage as a guide.
- Swamp Lily
Positions are a guide; the plant may not actually be at every spot. Fog, discovered areas and plants you have already harvested are not reflected.
| # | Quest | Objectives | Tips & Links |
|---|---|---|---|
| 142 | Head for the Grotto of Jacqueline | Sail to the grotto of the singer Jacqueline | — |
| 143 | The Big Stage | Moor inside the grotto | — |
| 144 | Talk to the Mistress of the Grotto | Step onto the pier and talk to Jacqueline | — |
| 145 | Lilies and Fish |
| Bait: Rainbow FinRequired rod parts: 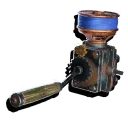 Baitcasting Reel or 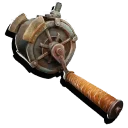 Friction reel (Thrust 30)Swamp Lily ×3: shoot the lilies floating on the water with the Hook Gun, pull them in and pick them up. A predator may be hiding among the lilies (Harvest Locations Map). Quest Reward: Star Key |
| 146 | To the Observatory | Open the river gates with Jacqueline's key | — |
| 147 | Search the Observatory | Find Uno | — |
| 148 | Repair the Junction Box | Repair the broken junction box to open the doors | — |
| 149 | On the Trail of Junior | Find Junior in the Observatory | — |
| 150 | Return to Gill and Bozur | Tell Gill and Bozur what you learned about the Essence recipe | — |
| 151 | The Experimenters |
| Bait: Wind-Up TinBait: Rainbow FinRequired rod parts: Braided Line or Sliding fishing line (Line strength 30)GravediggerNight onlyBait: Wind-Up TinRequired rod parts: 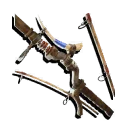 Reinforced Rod or 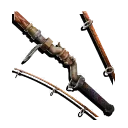 Coral fishing rod (Exhaustion 30) |
| 152 | The Healer | Contact Estelle on the radio | — |
Chapter 10: From the Bone Reef to Sludge Bet
Before heading to the Bone Reef, install 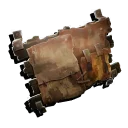 Plated Hull Protection on the boat. The Essence needs
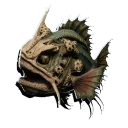 Rammfish from the lake at Bone Reef,
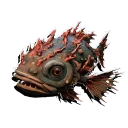 Shardback from Jacqueline's grotto and
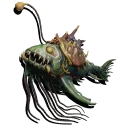 Glowbug from Lilo's Cave; their spots call for the Friction reel, the Coral fishing rod and the Sliding fishing line, so prepare them early. Finally, kill the dam-building beaver and sail through the open gates to Sludge Bet.
Where to Catch the Fish for “Fish for the Essence” (Map)
- Rammfish Fishing Spot
- Shardback Fishing Spot
- Glowbug Fishing Spot
- Base
Tap a marker to see the fishing spot.
Positions are a guide to where fishing spots appear. The in-game map has no fishing spot markers, and fog, discovery state and how many spots appear at the same time are not reflected.
Blueprint Costs for the Rod Parts
These spots need the rod parts below. Each part is crafted from a blueprint the Vendor sells (materials are needed too).
| Part | Blueprint | Shop price |
|---|---|---|
| Friction reel | 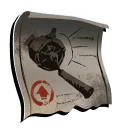 Blueprint: Drag Reel |  1700 |
| Coral fishing rod | 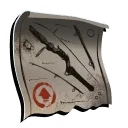 Blueprint: Coral Fishing Rod | 1150 |
| Sliding fishing line | 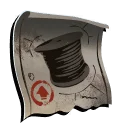 Blueprint: Armored Fishing Line | 800 |
| Total | 3650 |
Short on money? See Money Making Guide.
| # | Quest | Objectives | Tips & Links |
|---|---|---|---|
| 153 | Too Tough to Bite... | Install Plated Hull Protection on the boat ×2 | Research:  Plated Hull Protection |
| 154 | Where the Bones Gleam White | Head for the Bone Reef | — |
| 155 | The Search for the Recording | Explore the Bone Archipelago | — |
| 156 | The Broken Altar | Restore the altar | |
| 157 | A Door to the Past | Open the door to Adehi's house | — |
| 158 | Songs of Adehi | Find and listen to the recording of Adehi's songs | — |
| 159 | The Moral of All Songs | Tell Estelle what you heard on the recording | — |
| 160 | The Essence Recipe | Find out the missing part of the recipe | — |
| 161 | Fish for the Essence |
| Required rod parts: Friction reel (Thrust 45)Bait: Rainbow FinRequired rod parts: Coral fishing rod (Exhaustion 45)Bait: Rainbow FinRequired rod parts: Sliding fishing line (Line strength 45) |
| 162 | The Essence Batch Is Ready | Contact the Baron on the radio | — |
| 163 | Rematch | Kill the dam-building beaver so the Baron opens the gates | — |
| 164 | Big Water | Head through the open gates to Sludge-Beth | — |
Fish to Catch for Quests
The main quests ask you to catch 14 kinds of fish. Select a fishing spot to open where-to-catch (with a map) on the fish's page.
The figure in parentheses is the rod stat and value the fishing spot calls for. The first part listed has exactly that value, and better parts for the same slot have higher values. Treat the condition as a guide.
“No info”: there is no rod part information for the spot. It does not mean any rod will do.
Related Tools and Guides
Tools and guides that are handy alongside this walkthrough.