
Operation: Egg Heist is an extraction mode where your team hunts for rare Eggs and has to get them out alive. This guide covers the latest updates and the new PvP mode, how the mode unlocks, how each difficulty works, the rewards from Eggs, Lucky Chests, and Collectibles, the best teams, the enemies to watch for, and tips for keeping your loot.
Operation: Egg Heist Latest Updates
The latest update adds a PvP mode, Season Challenges, and new Lost Sanctum maps, along with balance changes and quality-of-life fixes.
| Change | Details |
|---|---|
| New PvP Mode | A fair competitive PvP mode where 3 teams fight for control of a Giga-Egg. |
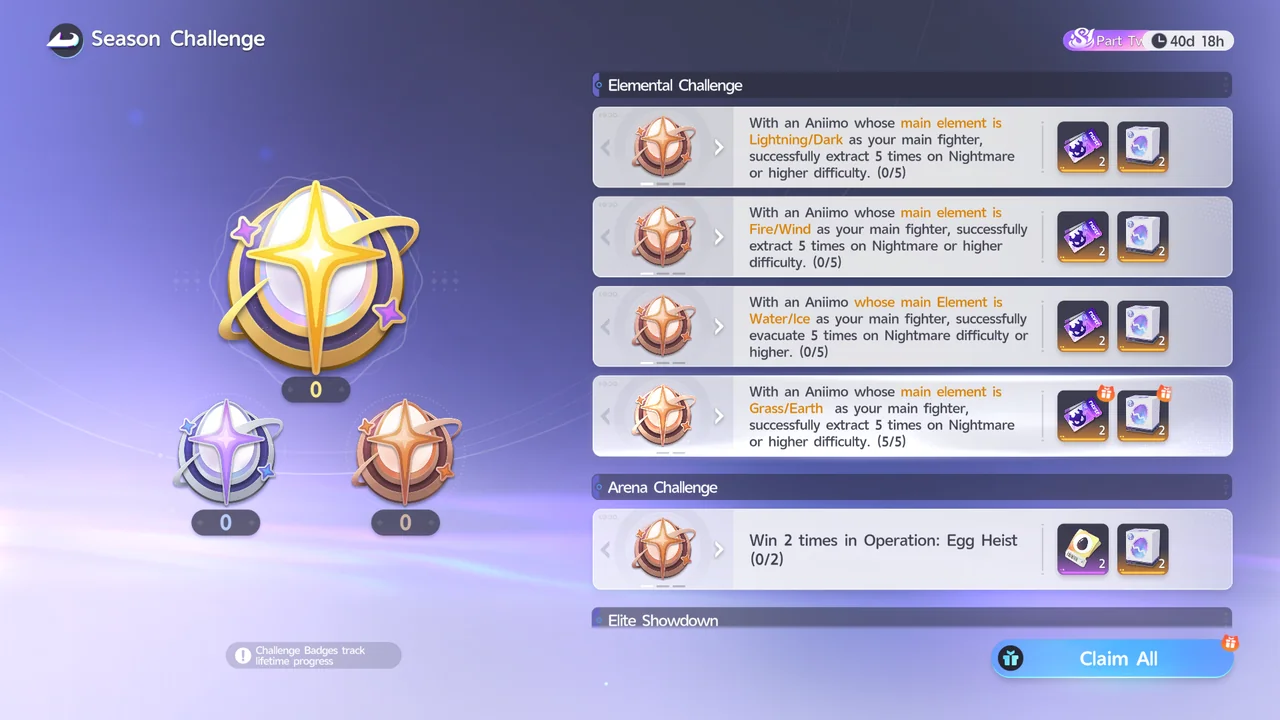
| Season Challenges | Complete seasonal challenge quests in Operation: Egg Heist Team Mode or PvP to earn milestone rewards. The gold egg challenge reward is the Departure with the Wind: Collectible Blind Box. |
| New Lost Sanctum Maps | New Nightmare and Chaos maps join the rotation. |
| Combat and Balance | All Umbral Aniimo in the Lost Sanctum have lower P.DEF, so melee Aniimo fight more smoothly, and Protective Units use up less durability. |
| Eggs and Loot | Prismatic Chests drop better rewards. Mysterious Prismana Eggs, Umbral Aniimo Eggs, and Ruins Aniimo Eggs obtained after the update can also hatch Aniimo from the Whisperwake Isles. |
| New Shop Item | The Egg Heist Shop now sells the Basic Berserker Chip, which restores your Pathfinder's HP whenever you deal damage to nearby enemies. |
| Quality of Life | Eggs from a run now skip the in-game mail, show up on the settlement screen, and go straight to your Inventory Warehouse. Ongoing Skill durability costs are optimized, and an Unstuck option is now available on outer islands. |
What Is Operation: Egg Heist?
Operation: Egg Heist is an extraction-style mode, and Operation: Egg Heist Team Mode is for 1 to 3 players. You collect Eggs and other items during the run and try to bring them back safely.
According to the mode screen, your team explores the ruins of the Lost Isles to find the entrance to the Lost Sanctum, searches its labyrinth for rare Eggs, then escapes with them and evacuates by boat.
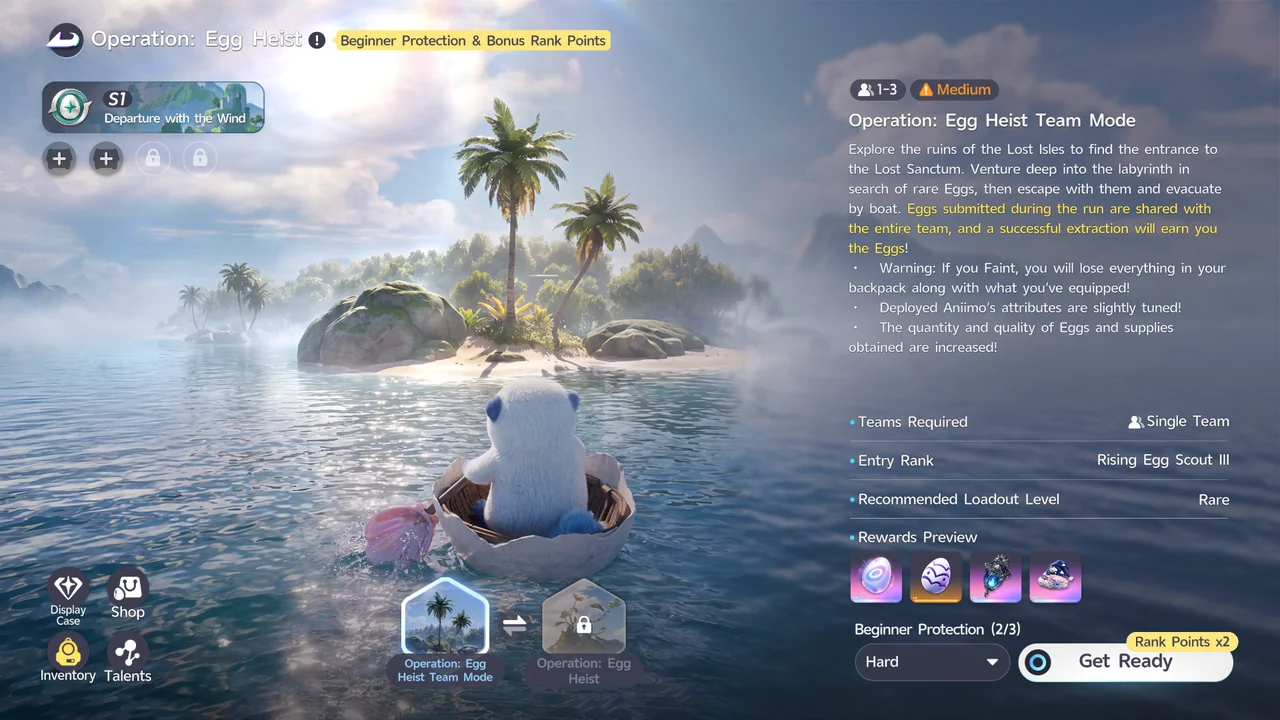
The same screen states that Eggs submitted during the run are shared with the entire team, and that a successful extraction earns you the Eggs.
Difficulties include Normal, Hard, Nightmare, and Chaos, and the Rewards Preview changes with the difficulty you pick.
How to Unlock Operation: Egg Heist
Operation: Egg Heist is reportedly unlocked once you reach character level 50 and complete the Assessment from Dr. Lewis. Level 50 is also one of the requirements for the III Wayfarer promotion.

Promoting to III Wayfarer needs character level 50 and the 4 required Chapter 5 quests. The Rainbow of the Ground walkthrough covers those steps.
Operation: Egg Heist Team Mode Mechanics
In Operation: Egg Heist Team Mode, you enter the Lost Sanctum to collect Aniimo Eggs and other loot, then escape on the Egg Boat. The Lost Sanctum map for each run is picked at random from a set of maps. Locked rooms have higher-rarity chests and a better chance of an Aniimo Egg, but you need the right key to open them.
Team Mode has four difficulties. Each one sets the key you need, the escape condition, and the time limit:
| Difficulty | Details |
|---|---|
| Normal | Rusted Iron Key for locked rooms. Escape: submit 1 Egg and earn 20,000 Eggshell Coins in loot. Time limit: 20 minutes. |
| Hard | Silver-Plated Key for locked rooms and challenges. Escape: submit 1 Egg and earn 60,000 Eggshell Coins in loot. Time limit: 15 minutes. |
| Nightmare | Gilded Key for locked rooms and challenges. Escape: submit 1 Egg and earn 150,000 Eggshell Coins in loot. Time limit: 15 minutes. |
| Chaos | Gilded Key for locked rooms and challenges. Escape: earn 300,000 Eggshell Coins in loot (no Egg needed). Time limit: 15 minutes. You need a Chaos Ticket to enter. |
Chaos Tickets are sold in the Egg Heist Shop, and the price rises with each purchase that day: 20k for the first, 50k for the second, and 100k from the third, climbing as high as 400k per ticket.
Eggs vs. Backpack Loot
There are two kinds of loot. Aniimo Eggs have no sell value and are only used for hatching. They don't take up backpack space or add weight; instead, you Twine with the Egg and roll it to the Egg Boat. Eggs you extract successfully are shared with the whole team.
Since the latest update, Aniimo Eggs from a successful run appear on the end-of-match screen and go straight to your Inventory Warehouse, so you no longer need to claim them from in-game mail.
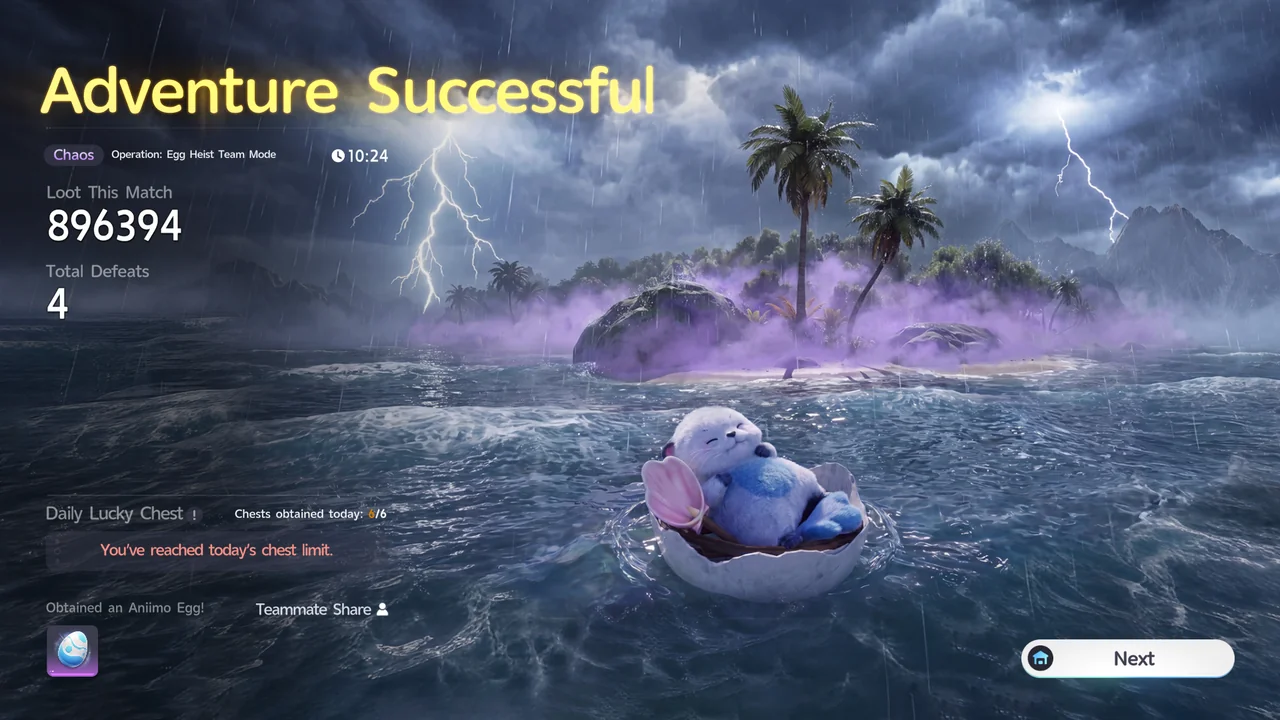
Backpack loot (consumables, keys, equipment, and Collectibles) has a coin value and a weight. It is individual: each player keeps only what is in their own backpack and Egg Boat Safe when they extract.
Beginner Protection and Fainting
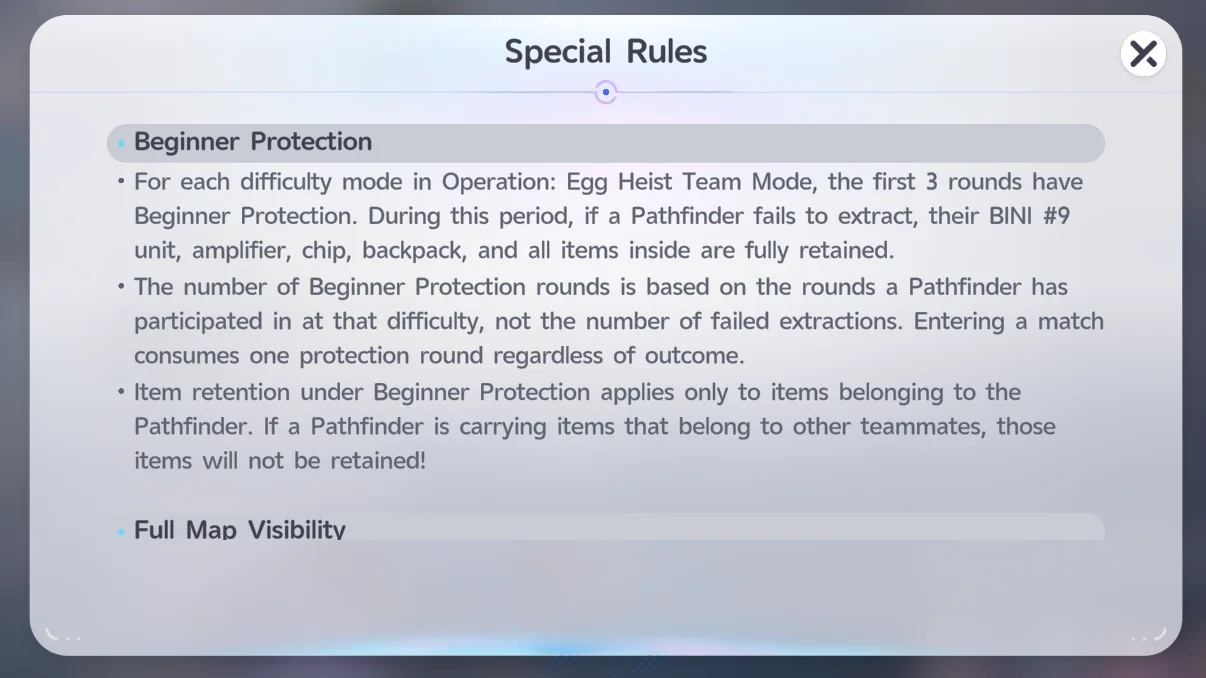
Your first 3 runs on each difficulty have Beginner Protection. If you fail to extract during that period, you keep your BINI #9 Unit, Amplifier, chips, backpack, and everything inside it. Every match you enter uses up one protected run whatever the result, and only your own items are protected, not items that belong to teammates.
Once Beginner Protection runs out, Fainting costs you all your gear and loot except what you stored in the Egg Boat Safe. If a player is fully eliminated and not revived in time, the unsecured items in their backpack drop on the ground for anyone in the session to pick up. In solo runs, being eliminated sends you straight to the match end screen.
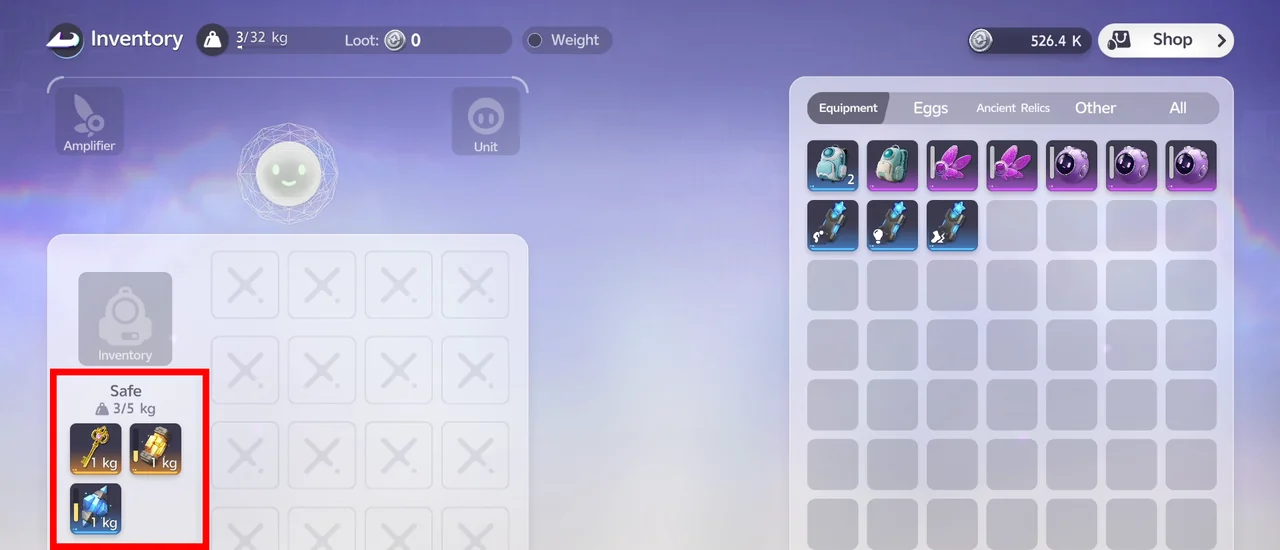
In public matchmaking, our player suggests storing valuable Collectibles and chips in the Egg Boat Safe right away in case you get separated from your team, or playing with a pre-made group.
Equipment and Durability
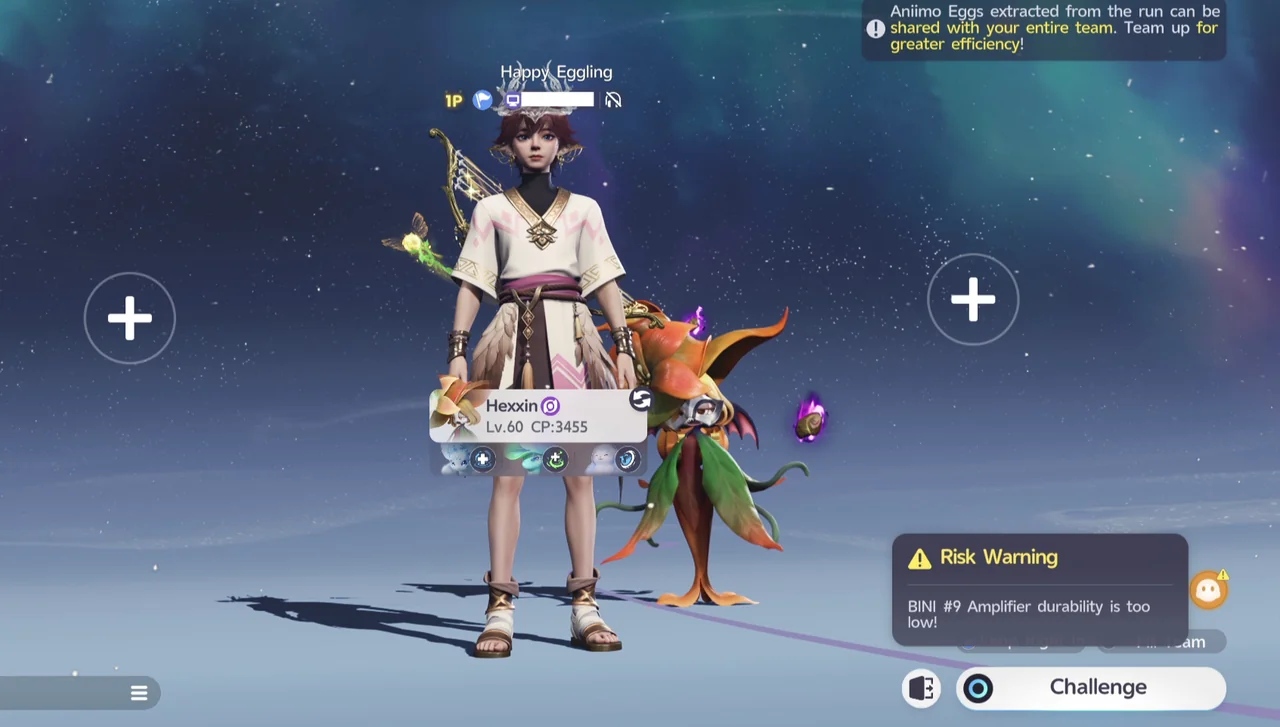
You go in with three pieces of equipment: a Backpack for your loot, an Amplifier that raises the damage you deal, and a BINI Unit that reduces the damage you take. The Amplifier and BINI Unit both have durability. Attacking and using Skills wears down the Amplifier, and taking hits wears down the BINI Unit.
If you try to enter without one of the three, a Risk Warning appears. At 0 durability the Amplifier or BINI Unit doesn't break, but your attacks deal very little damage (Amplifier) or you take much more damage (BINI Unit).
Equipment Rarities
| Rarity | Details |
|---|---|
| Uncommon | The Amplifier and BINI Unit have no chip slots, and their description says they only work on Beginner targets; in practice they are meant for Normal. Backpack: 10 slots. |
| Rare | The Amplifier and BINI Unit have 1 chip slot and work on Hard difficulty or lower. Backpack: 14 slots. |
| Epic | The Amplifier and BINI Unit have 2 chip slots and work up to Nightmare and Chaos. Backpack: 18 slots. |
| Legendary | Only a backpack has been found so far, with 22 slots. There is no Legendary Amplifier or BINI Unit yet. |
Chips have rarities too. Only Rare and Epic chips have been found so far, and Epic chips have stronger effects.
Item Weight
Every piece of loot and unequipped item in your backpack has a weight. Going over your base load limit stacks Load debuffs that slow your movement and stamina recovery, and each stage is worse than the last. At 5 stacks you can't move at all until you discard items. High-tier Collectibles are especially heavy and can push you into a higher stage as soon as you pick them up.
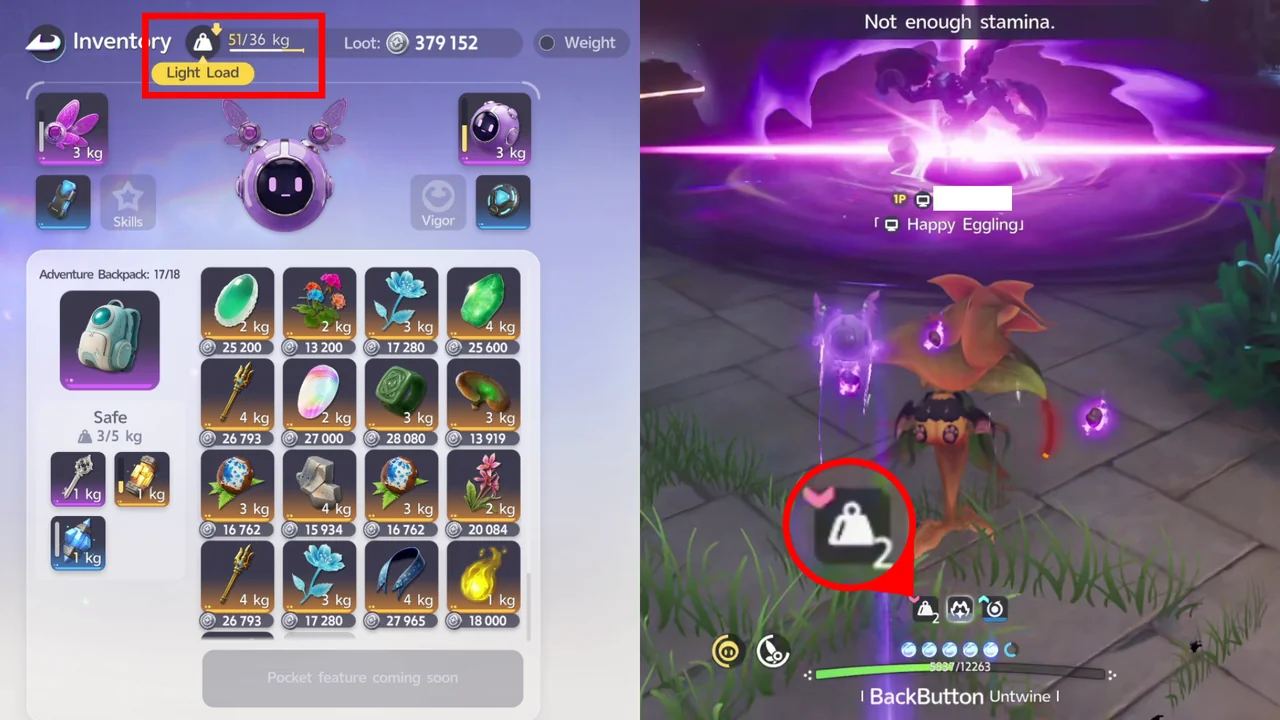
You can raise your load limit with the Personal Growth talent branch and with Expansion or Resistance chips. Equipped BINI Units, Amplifiers, Backpacks, and installed chips weigh nothing; they only count while loose in your backpack.
Map Visibility
The Lost Sanctum map is covered in fog until you explore its routes and rooms. While Beginner Protection is active the whole map is revealed, so your first runs are a good time to learn the layouts. After that, a Lighting Chip on your Amplifier widens your vision so you uncover the map faster.

Operation: Egg Heist (PvP Mode)
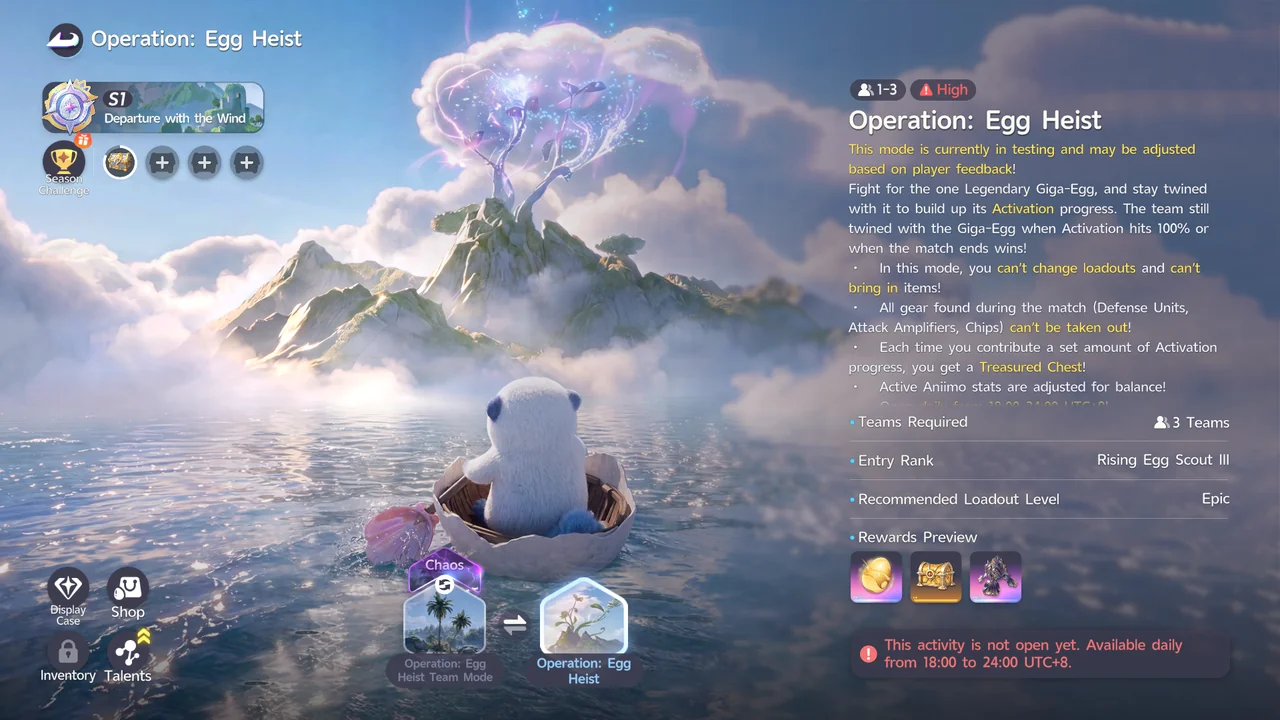
Operation: Egg Heist now has a fair competitive PvP mode where 3 teams fight over the Legendary Giga-Egg. The mode is currently in testing.
| Info | Details |
|---|---|
| Availability | Daily, 18:00 to 24:00 (UTC+8) |
| Entry Requirements | Character level 50 and the Rising Egg Scout III Egg Heist rank |
| Recommended Loadout Level | Epic |
How PvP Mode Works
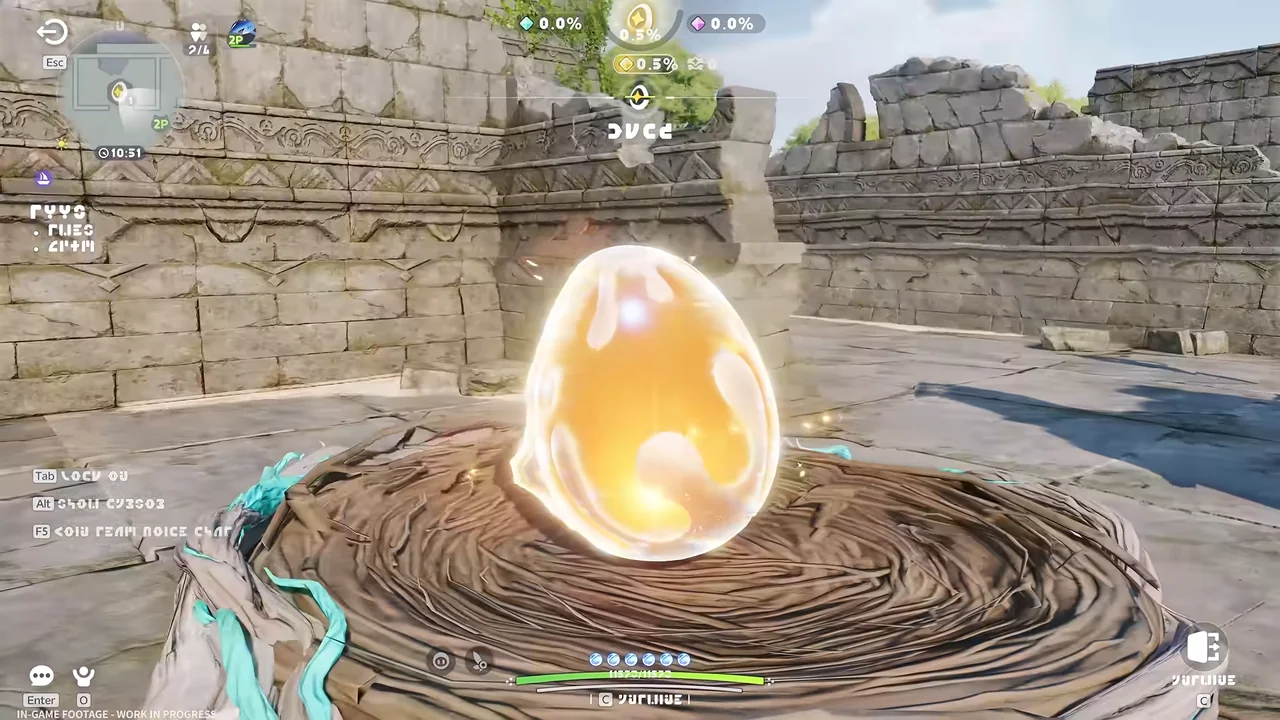
On a mysterious island, 3 teams compete to capture and hold the dormant Giga-Egg. Staying Twined with the Giga-Egg fills its Activation progress. The team that pushes Activation to 100%, or holds the Giga-Egg when time runs out, wins.
You can't bring in outside items or set up preset loadouts. Gear you find during the match (Defense Units, Attack Amplifiers, and Chips) is temporary and can't be taken out, and the stats of your deployed Aniimo are adjusted for balance.
PvP mode is still in testing, and its balance will be adjusted based on player feedback.
PvP Mode Rewards
Every member of the winning team gets 1 Giga-Egg, which guarantees an Umbral Aniimo Egg and has a small chance of giving a Prismana Egg.
Teams that contribute set amounts of Activation progress also earn chests at the end of the match, including Treasured Chests that can contain seasonal Collectibles.
Operation: Egg Heist Rewards
The main rewards are Eggs, including the Ruins Aniimo Egg and the Umbral Aniimo Egg.
Mysterious Prismana Eggs join the rewards on Hard difficulty and above. On Normal, the Rewards Preview does not show them.
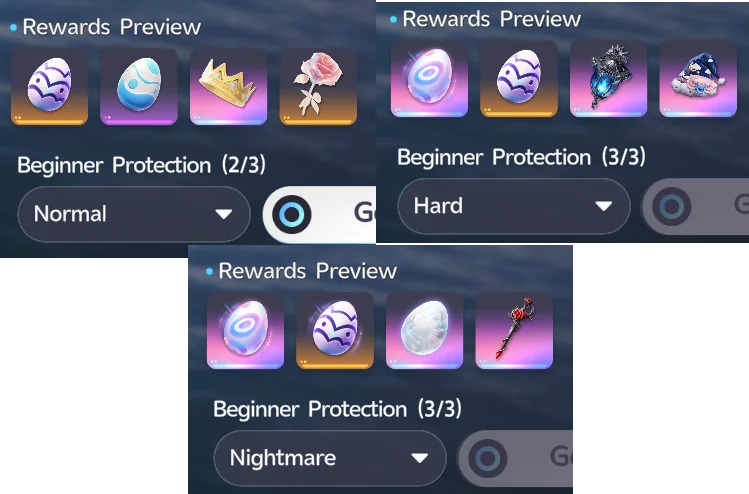
The Rewards Preview shows these Eggs for each difficulty:
| Difficulty | Eggs in the Rewards Preview |
|---|---|
| Normal | Umbral Aniimo Egg, Ruins Aniimo Egg |
| Hard | Mysterious Prismana Egg, Umbral Aniimo Egg |
| Nightmare | Mysterious Prismana Egg, Umbral Aniimo Egg, and a white egg we have not identified yet |
| Egg | Details |
|---|---|
| Ruins Aniimo Egg | Hatches in the Outpost Hatchinator and Home Hatchinator. Hatching also leaves 1 Prismana Shell Shard. |
| Umbral Aniimo Egg | Hatches in the Outpost Hatchinator and Home Hatchinator into an Umbral Aniimo with Perfect potential. Hatching also leaves 3 Prismana Shell Shards. |
| Mysterious Prismana Egg | Hatches in the Outpost Hatchinators and Home Hatchinators and is guaranteed to hatch into a Prismana Form Aniimo. Using a Sparkling Cube on it may grant the Shadow Sparkling mutation. |
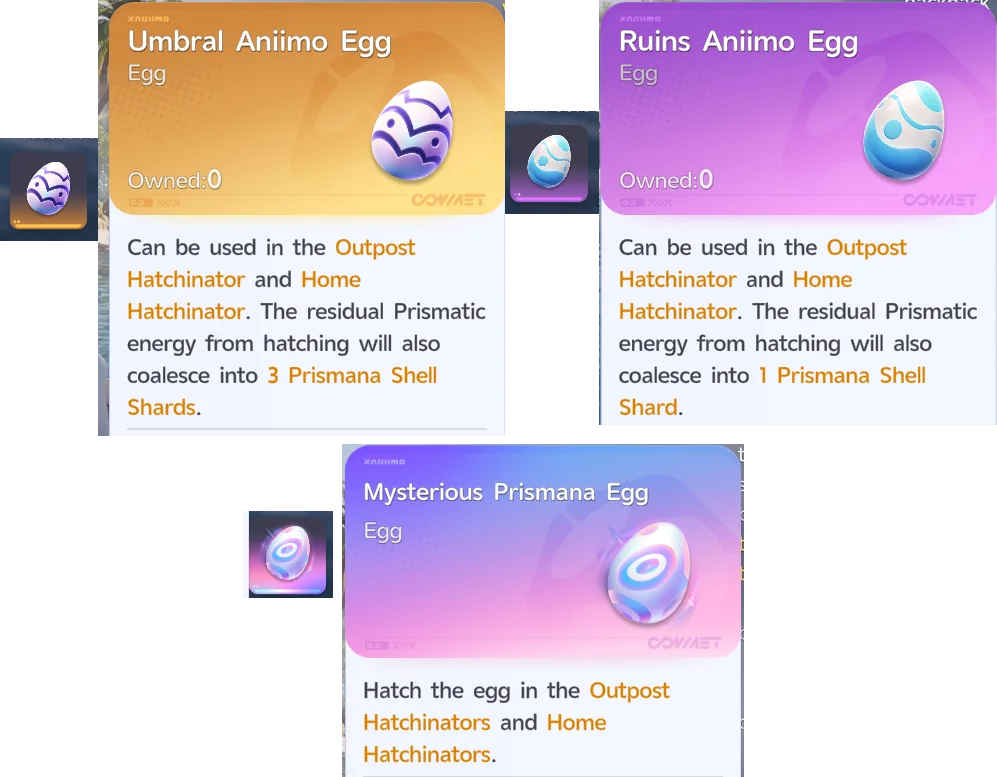
The Umbral Aniimo Egg and the Mysterious Prismana Egg both list Operation: Egg Heist and Dig Up Egg Nests as their sources.
Operation: Egg Heist also reportedly earns Eggshell Coin, which is spent at the Egg Heist Shop on Gear, Imprints, eggs, and keys.
Daily Bonuses and Lucky Chests
Operation: Egg Heist rewards your first few runs each day, so a short daily session goes a long way.
Daily First-Run Bonus
Your first successful run of the day gives double Rank Points, which speeds up your climb through the Egg Heist ranks.
Lucky Chests
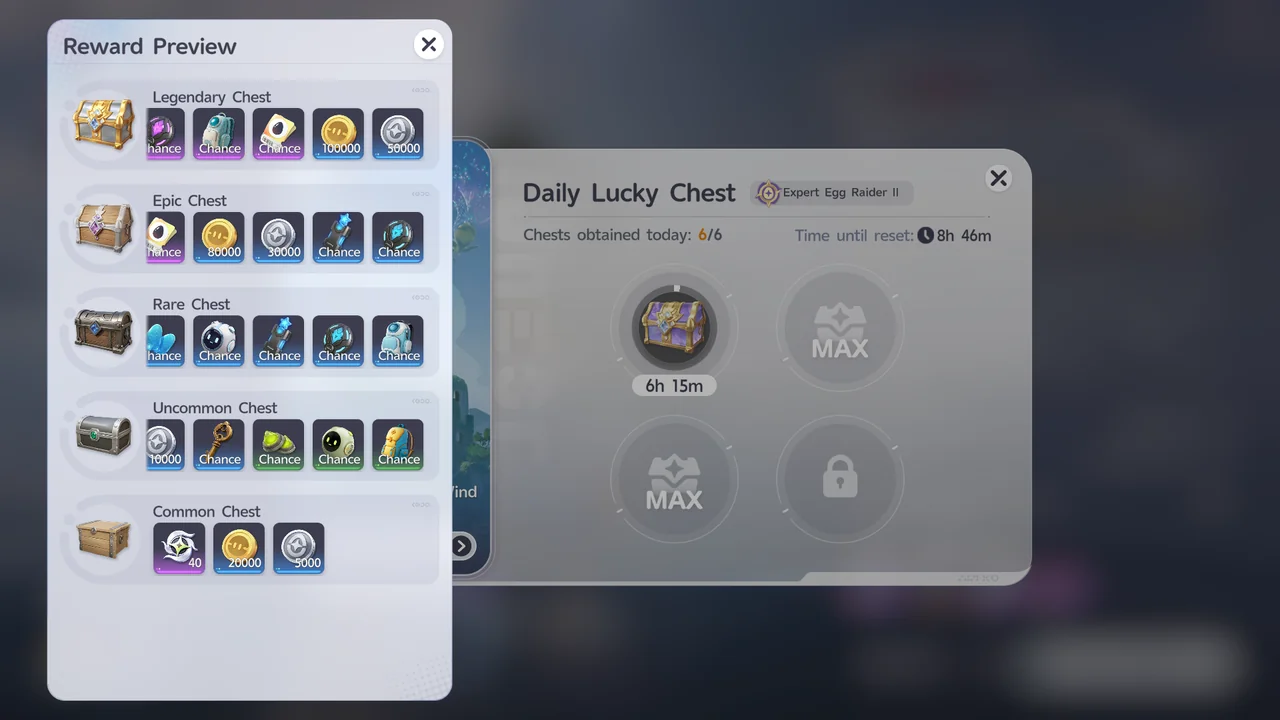
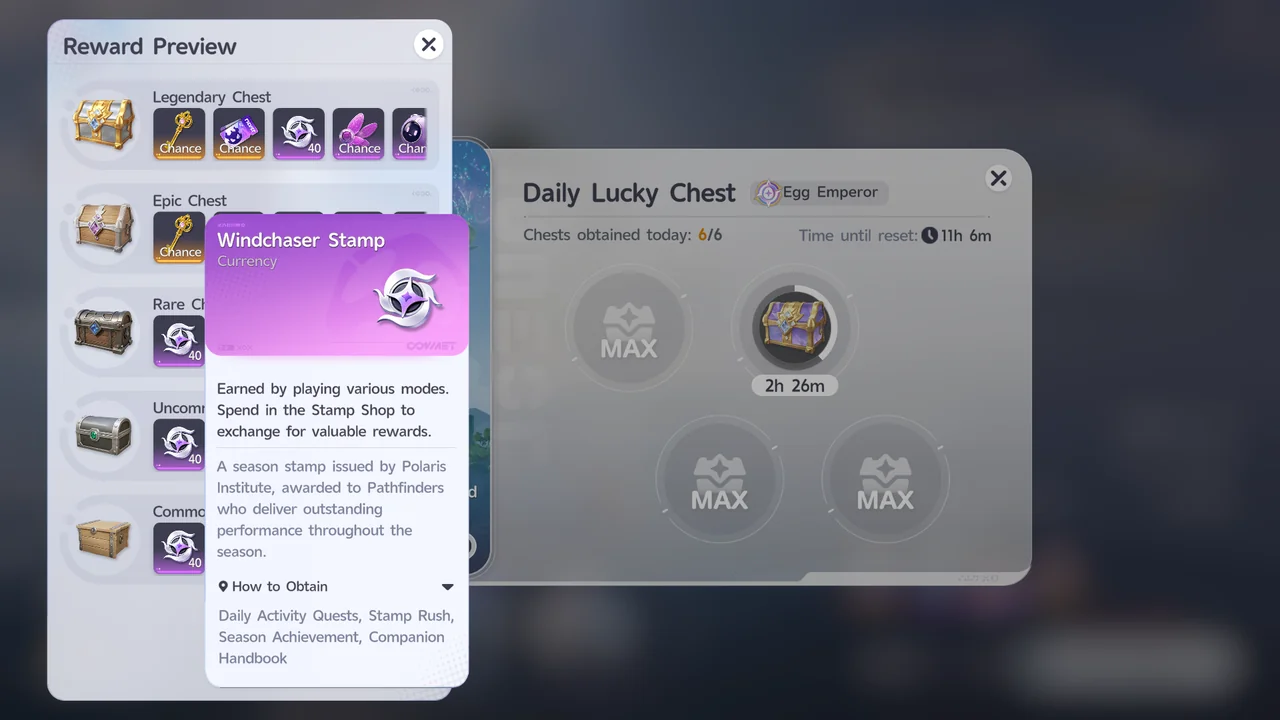
You also get a Lucky Chest from each of your first few successful extractions per day, up to 4 a day at the start. Each chest goes into a Lucky Chest Slot and starts an unlock countdown.
At the starting rank, Rookie Egg Hunter, you have only 1 Lucky Chest Slot. To avoid missing a chest, our player suggests waiting for the current one to finish unlocking before your next run, or using unlock speed-ups.
Rank Progression and Chest Limits
Ranking up gives you more slots and a higher daily cap, and raises the best chest rarity you can get:
| Rank | Lucky Chests |
|---|---|
| Rookie Egg Hunter | 1 slot, 4 chests a day, up to Rare Chests |
| Rising Egg Scout | 2 slots, 5 chests a day, up to Rare Chests |
| Pro Egg Snatcher | 2 slots, 5 chests a day, up to Epic Chests |
| Elite Egg Seeker | 3 slots, 5 chests a day, up to Epic Chests |
| Expert Egg Raider | 3 slots, 6 chests a day, up to Legendary Chests, faster unlocking |
| Egg Heist Master | 4 slots, 6 chests a day, up to Legendary Chests, faster unlocking |
| Egg Emperor | 4 slots, 6 chests a day, much faster unlocking |
At Egg Heist Master, our player got a Legendary Chest from every successful run over two or more days of runs.
Chest Contents
Every chest gives 40 Windchaser Stamps plus Credits and Eggshell Coins, with larger amounts from rarer chests. On top of that, each rarity can contain:
| Chest | Possible contents |
|---|---|
| Common Chest | Currency only (no equipment) |
| Uncommon Chest | Rusted Iron Key, Uncommon equipment |
| Rare Chest | Silver-Plated Key, Rare equipment and chips |
| Epic Chest | Gilded Key, Chaos Ticket, Arena Ticket, Epic equipment, Rare chips |
| Legendary Chest | Gilded Key, Chaos Ticket, Arena Ticket, Epic equipment, Epic chips |
Collectible Display Case and Milestone Rewards
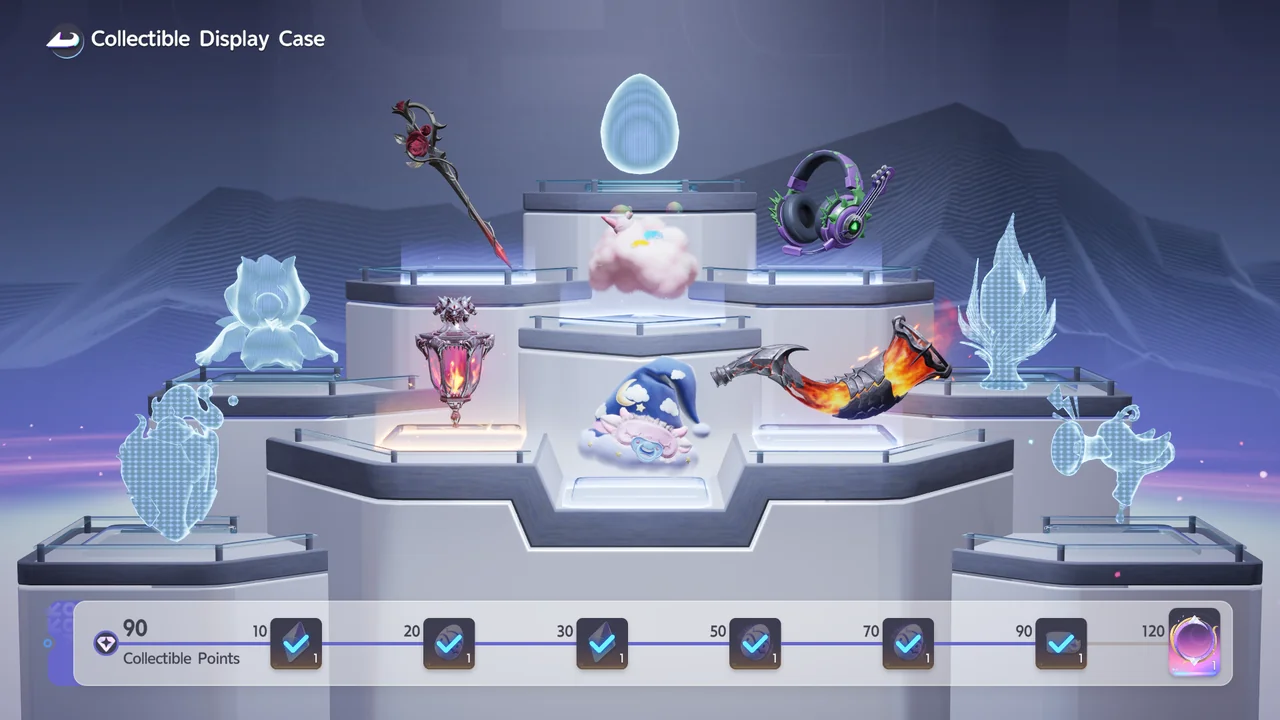
The Collectible Display Case in the Egg Heist lobby shows off the Collectibles you bring back from high-difficulty runs. Operation: Egg Heist is a permanent mode, but its Collectibles change each season.
Collectible Points
Placing a Collectible in the case gives you Collectible Points toward the seasonal milestone track at the bottom of the screen. The points are permanent: you can take the Collectible back out and sell it for Eggshell Coins without losing them, though the pedestal goes back to empty.
Collectibles sell for more coins than anything else in the mode, so they make a good emergency fund after a string of failed runs. Bringing one back also unlocks its matching accessory for both your character and your Aniimo.
Egg Boat Safe
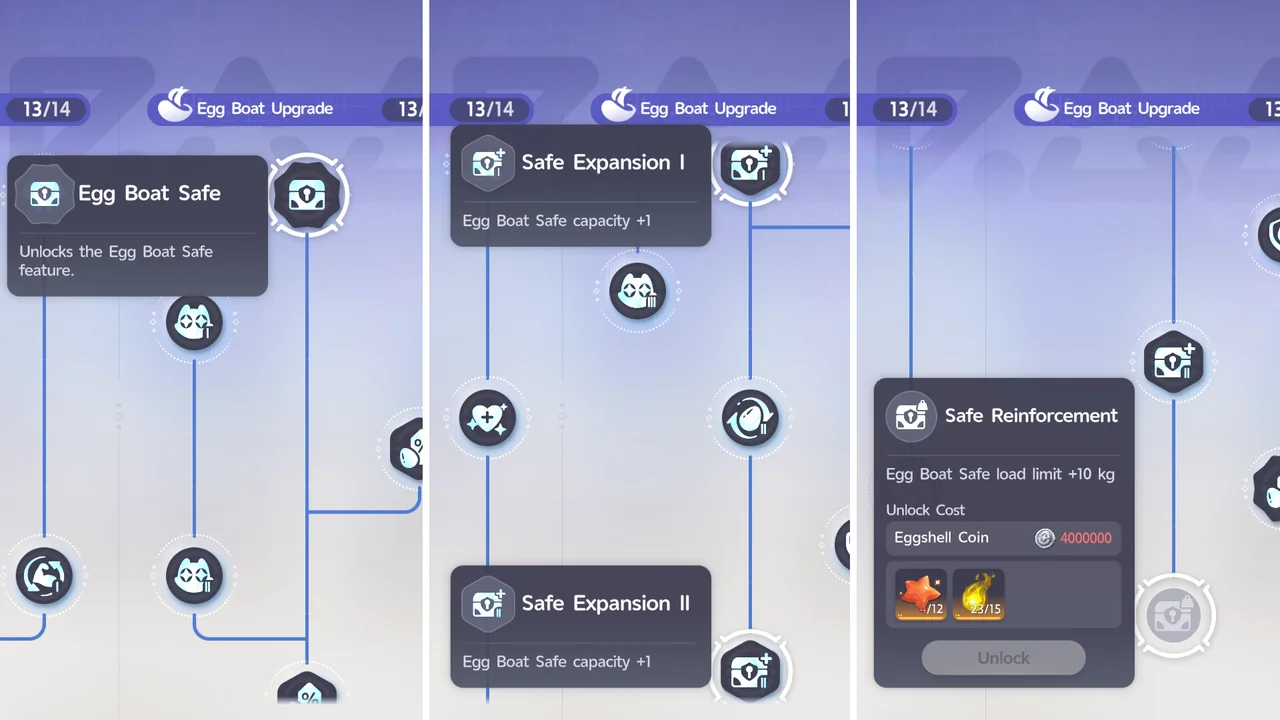
Collectibles are very heavy, so our player recommends investing in the Egg Boat Safe talents. Items in the safe come back with you even if your team is wiped out or fails to extract. Safe Expansion I and II each add +1 safe capacity, and Safe Reinforcement adds +10 kg to the safe's 5 kg load limit, for 15 kg in total.
Milestone Rewards
Milestone rewards unlock at these Collectible Point totals:
| Collectible Points | Rewards |
|---|---|
| 10 | 80 Glimmer and a Mystery Egg Box (chance of an Umbral Egg or Prismana Egg) |
| 20 | 80 Glimmer and an Umbral Egg |
| 30 | 80 Glimmer and a Mystery Egg Box (chance of an Umbral Egg or Prismana Egg) |
| 50 | 100 Glimmer and a Fragrant Umbral Egg |
| 70 | 100 Glimmer and a Large Umbral Egg (hatches into a Nova-stage Umbral Aniimo) |
| 90 | The "Windchaser Egg Tales" chat bubble and a Large Umbral Egg |
| 120 | The seasonal avatar frame and a Prismana Egg (final reward) |
Operation: Egg Heist Tips
Once Beginner Protection has ended, Fainting makes you lose everything in your backpack along with everything you have equipped. Only the items in the Egg Boat Safe are kept.

Prioritize safety. Because Fainting costs you your items, our player recommends putting your own survival first while you explore.
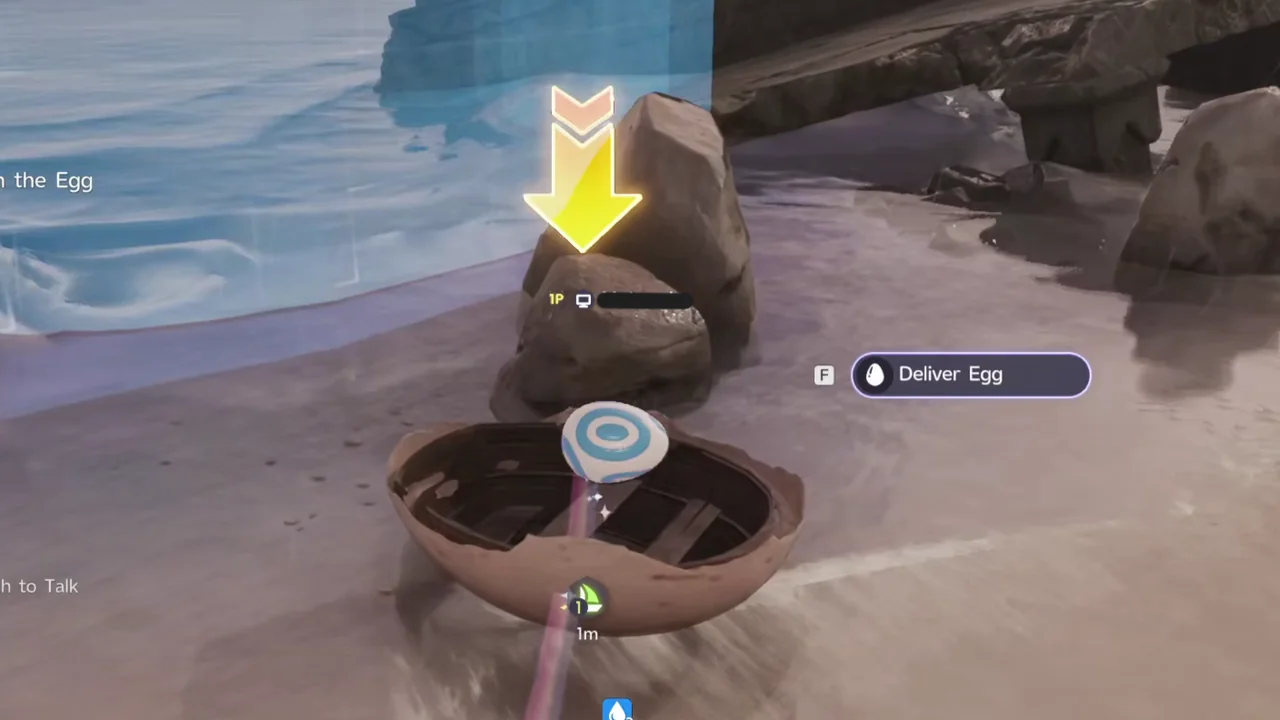
Move Eggs with Twine. To get an Egg to the Egg Boat, you Twine with it and roll it there, and the Deliver Egg prompt appears when you arrive. Carrying an Egg only happens in co-op, where another player can carry an Egg that a teammate has Twined with.
Bring a healer. There is no natural healing in Operation: Egg Heist, so our player recommends always including an Aniimo with the Heal role, such as Glacy, to keep your HP topped off.

Level talents for buffs. Egg Heist has its own talents, and they help a lot on harder difficulties:
| Talent type | Effects |
|---|---|
| Stamina | More max stamina and faster recovery. The mode gives you less stamina than the open world. |
| Combat | Damage Reduction and Damage Amp, plus more movement speed and damage reduction while Twined with an Egg |
| Utility | Faster item searches, and the Egg Boat Safe, which keeps its items even if you Faint |
| Co-op | More movement speed and slower HP loss while downed, and a self-revive if one teammate is still alive |
If you play solo, our player says you can skip the co-op talent branch.
Best Teams for Operation: Egg Heist
Our player finds that the common Egg Heist teams don't change much between solo and co-op, but matching what your teammates bring makes runs smoother.

On-Field Mains
| Aniimo | Notes |
|---|---|
| Hexxin | Strong crowd control on a 1s cooldown that comes with a backward dash for mobility, and it can regenerate EP for your off-field supports' Skills. |
| Irisalis | A self-revive on a 3-minute cooldown for when you get swarmed, plus a dash Skill and ranged attacks. Its exclusive Bonded Held Item makes Fire and Grass enemies much easier. |
| Rookey | Dark type, so few hard counters: Light enemies don't spawn in the Lost Sanctum, though Wind and Water enemies do. Ballistic Guard lets it slip past enemies unnoticed unless you interact with an item. |
| Stellarys | Dark type with few hard counters, and its Clone and Dash Skill gives both mobility and damage. |
| Lunara | Healing and EP REGEN, ranged attacks for avoiding damage, and great mobility from its Hustle exploration ability. |
Lunara is only available as a Starter Aniimo, so you can't get it if you picked Helion as your Starter.
Off-Field Supports
| Aniimo | Notes |
|---|---|
| Besauce (REGEN) | The best general EP REGEN support. Use its REGEN Skill below 20 EP to get more EP back. |
| Leafy (REGEN) | A hybrid EP REGEN support for Grass mains. Its Core Skill regenerates EP and HP over time, and the boosted version also restores Ultimate Energy. |
| Somniwing (REGEN) | Its passive can raise EP by 10, and its Core Skill speeds up EP regeneration and blocks incoming projectiles. |
| Glacy (Healer) | Heals 8% of its HP instantly, plus 10% (12% boosted) of its HP over 5 seconds (2.5 seconds boosted). |
| Gracewing (Healer) | Heals 9% of its HP over time, and its passive heals 0.5% of its HP whenever an ally uses a Skill or Ultimate. |
| Tromber (Damage) | A 0 EP Core Skill that raises CRIT DMG. |
| Turbo (Damage) | A 10 EP (0 EP boosted) Core Skill that raises damage and BREAK efficiency. |
| Panpanta (Mobility) | Its Core Skill rolls you around quickly, which helps when weight debuffs slow you down. It works best boosted, since the boosted Core Skill moves faster. |
Off-Field DPS
Bring an off-field DPS if your main has low damage or struggles against an element that spawns in the Lost Sanctum:
| Aniimo | Notes |
|---|---|
| Lunara | Ranged Light attacks, countered mainly by Lightning enemies. |
| Helion | Melee Light attacks, countered mainly by Lightning enemies. |
| Irisalis | Its summoned Clones let it work as an off-field DPS too. |
Check each off-field Aniimo's Core Skill before picking it. Hexxin is great at crowd control, for example, but its Core Skill is its REGEN Skill, not the Control Skill. The Aniilog Skills screen marks the Core Skill with a gold border.
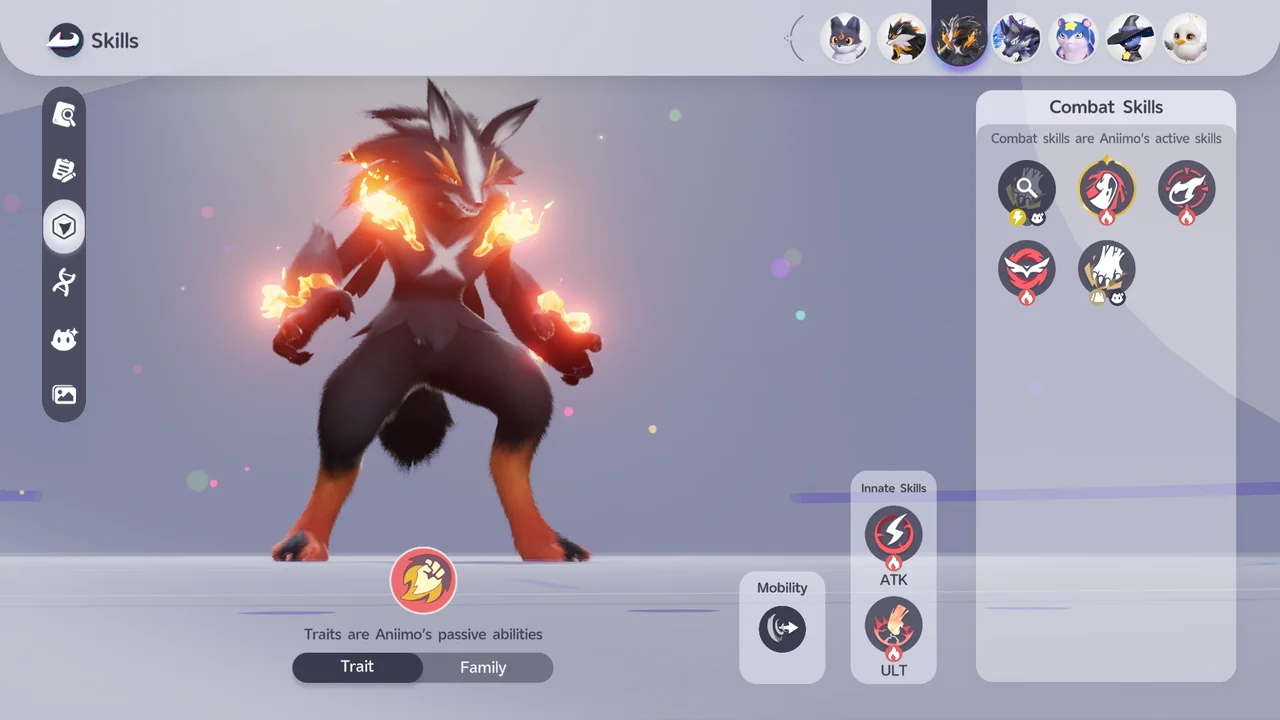
Held Items work for off-field supports too, Bonded or not. A Bonded Held Item, or an Alpha Aniimo in an off-field slot, can do more than a non-boosted Core Skill.
Sample Team Setups
| Team | Notes |
|---|---|
| Irisalis / Healer / REGEN / Flex | Irisalis covers ranged attacks and some mobility with its dash Skill, while the healer and REGEN support keep its HP up and its Skills ready. Irisalis already deals good damage, so the Flex slot can go to Panpanta if you'd rather not wear down your Amplifier by dashing around. |
| Hexxin / Healer / REGEN / Flex | One of the most comfortable teams to use. Erlath can now shut down Hexxin's Control effect, but the AoE of its Black Hole Domain Skill still deals decent damage. |
| Rookey / Off-field DPS / REGEN / Healer | Ballistic Guard gives Rookey some mobility, but its damage can be on the low side, so it needs an off-field DPS. |
| Stellarys / Off-field DPS / REGEN / Healer | Stellarys has mobility and ranged damage, so it avoids getting swarmed. An off-field DPS covers the Wind and Water enemies it struggles with. |
| Lunara / Healer / REGEN / Flex | Lunara has some self-healing, REGEN, and mobility through Hustle, but dedicated supports cover you when that isn't enough. |
For solo runs, our player recommends a main with high mobility and survivability plus heal and REGEN supports. With teammates, you can bring a more damage-focused main if someone else brings a utility main, so damage dealers not listed here still work.
Notable Enemies and Bosses in the Lost Sanctum
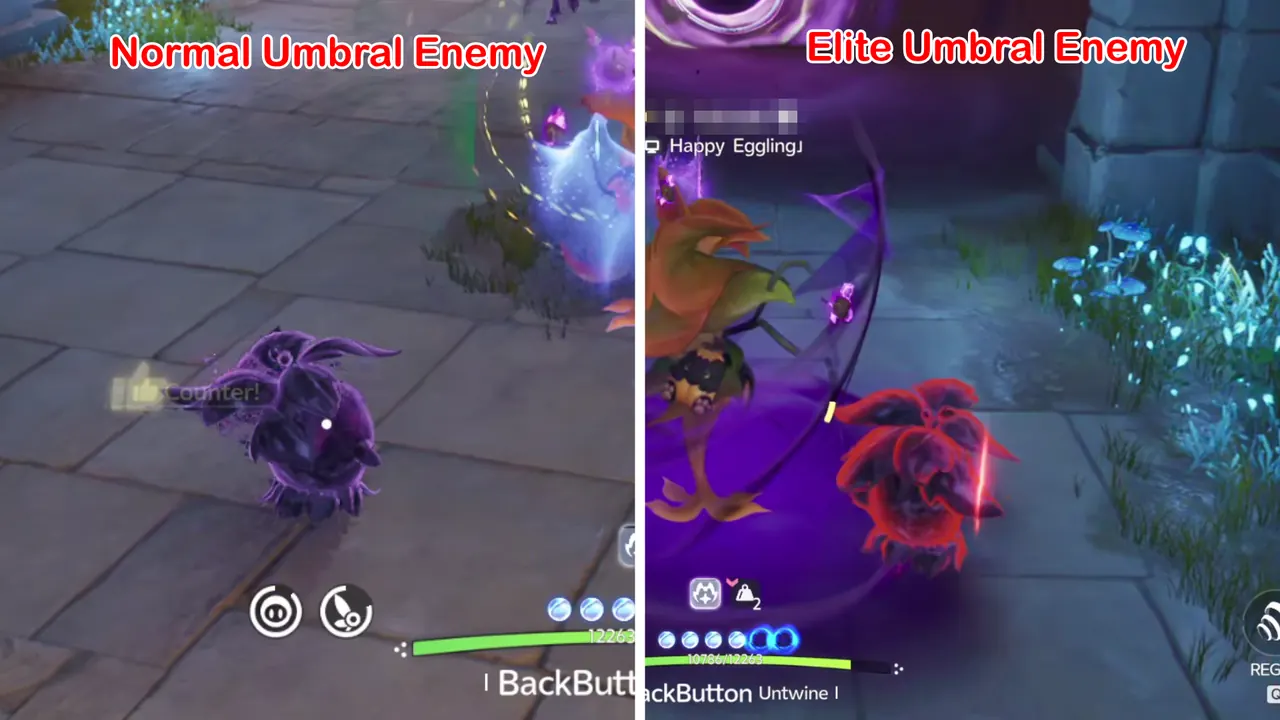
The Lost Sanctum has standard Umbral enemies and Alpha bosses. Any standard Umbral enemy can also spawn as an Elite with a glowing red aura, which can drop better loot.
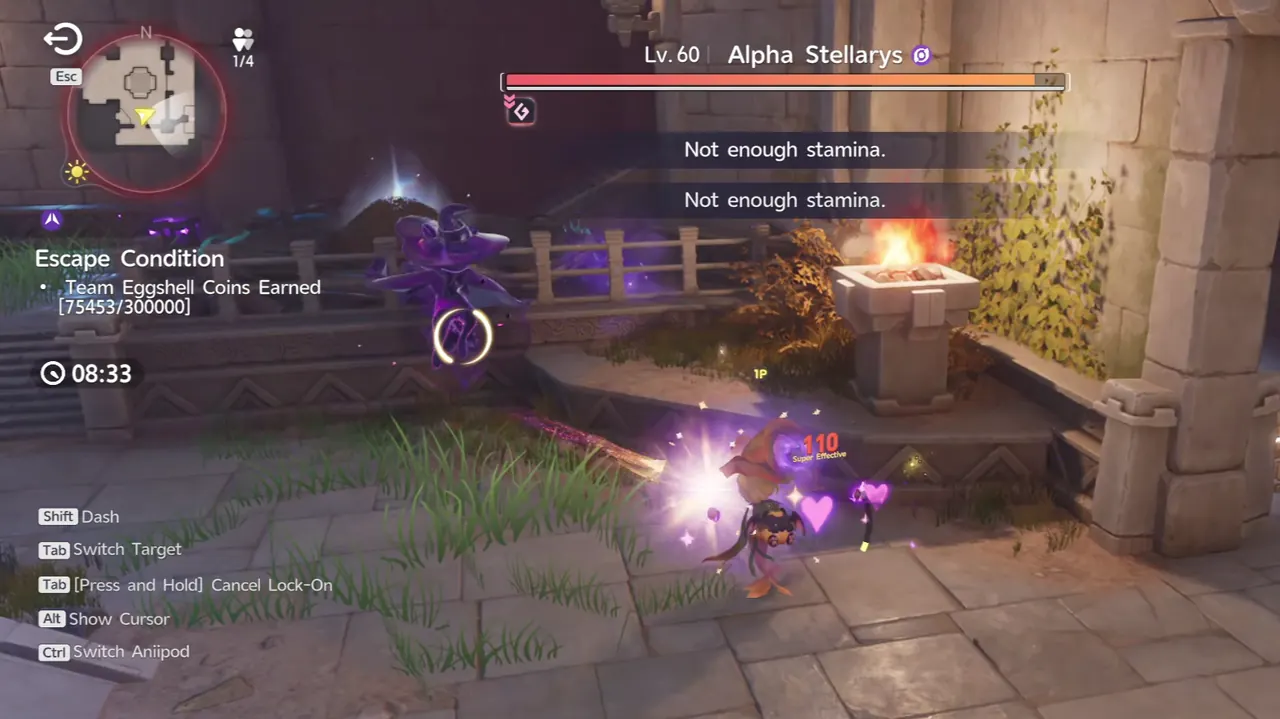
Alpha Stellarys (Boss)
Its Dark attacks hit Lightning, Grass, and Light Aniimo hard, which puts popular mains like Irisalis, Hexxin, and Lunara at a big disadvantage. It spawns at fixed spots, uses the same moves as the open-world version, and drops high-tier Talent materials and Legendary loot. Position carefully so you don't pull nearby enemies into the fight.
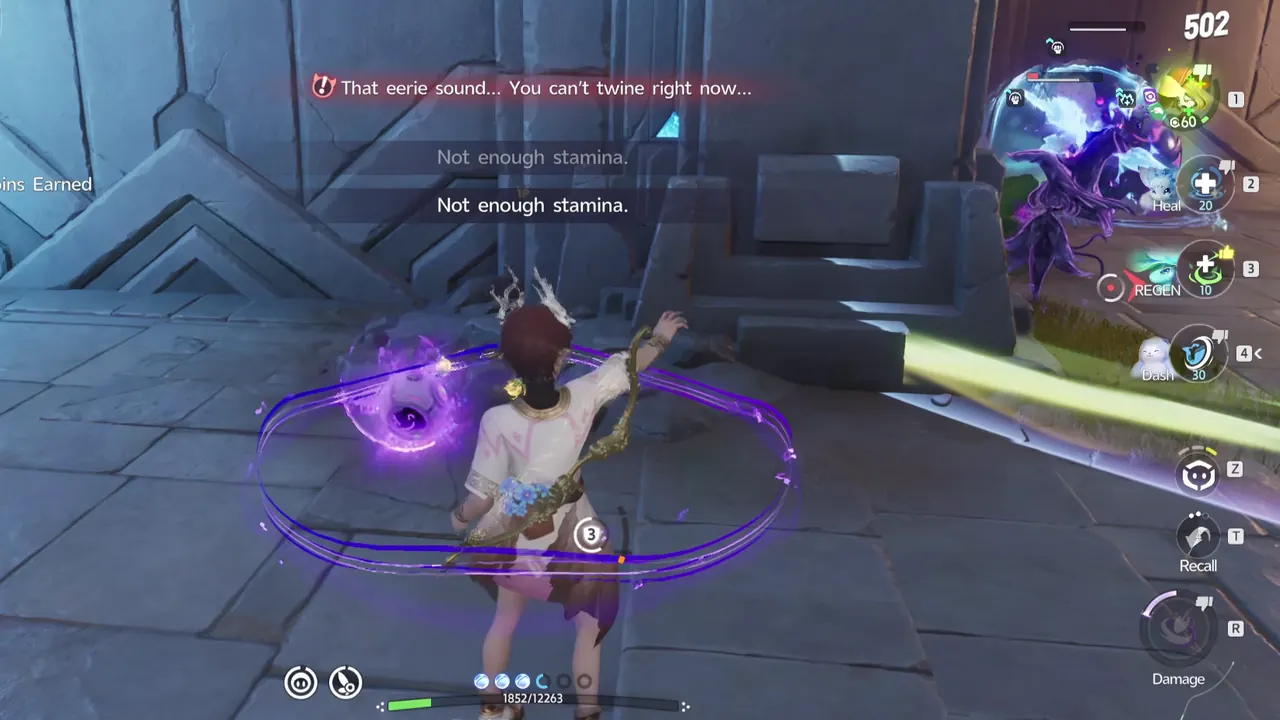
Umbral Hexxin
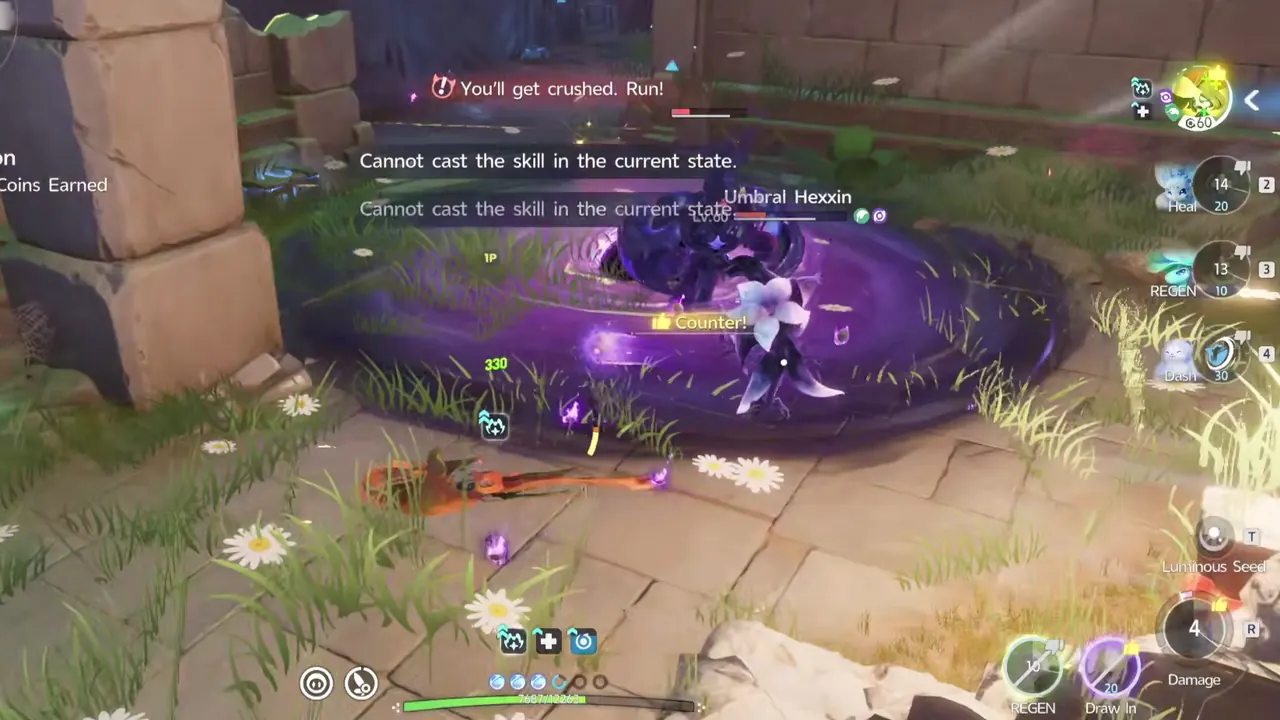
Its point-blank Euphoric Sonic Blast stops you from Twining for a while, forcing control back to your character, who is then exposed to enemies. You'll hear singing when one is nearby. Keep your distance and take it down with ranged attacks.
Umbral Budsquire
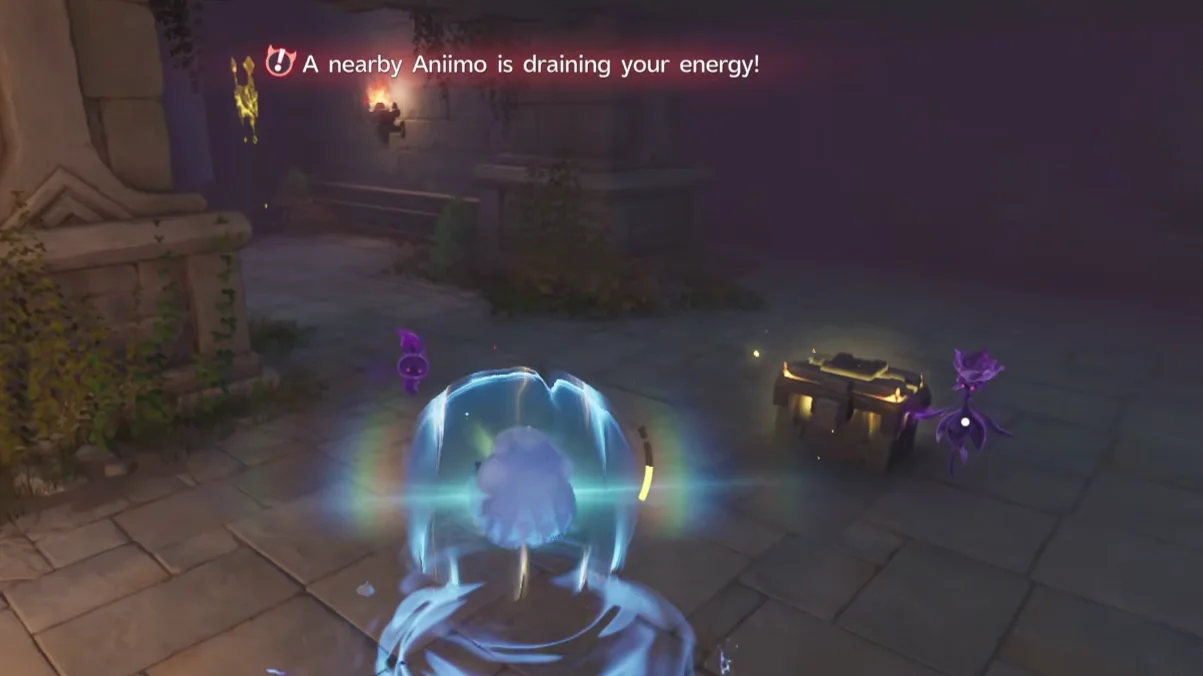
It drains your EP just by being close, faster than a REGEN support can restore it, so you can't use Skills while it's near. Listen for crying sounds.
Umbral Baleetle
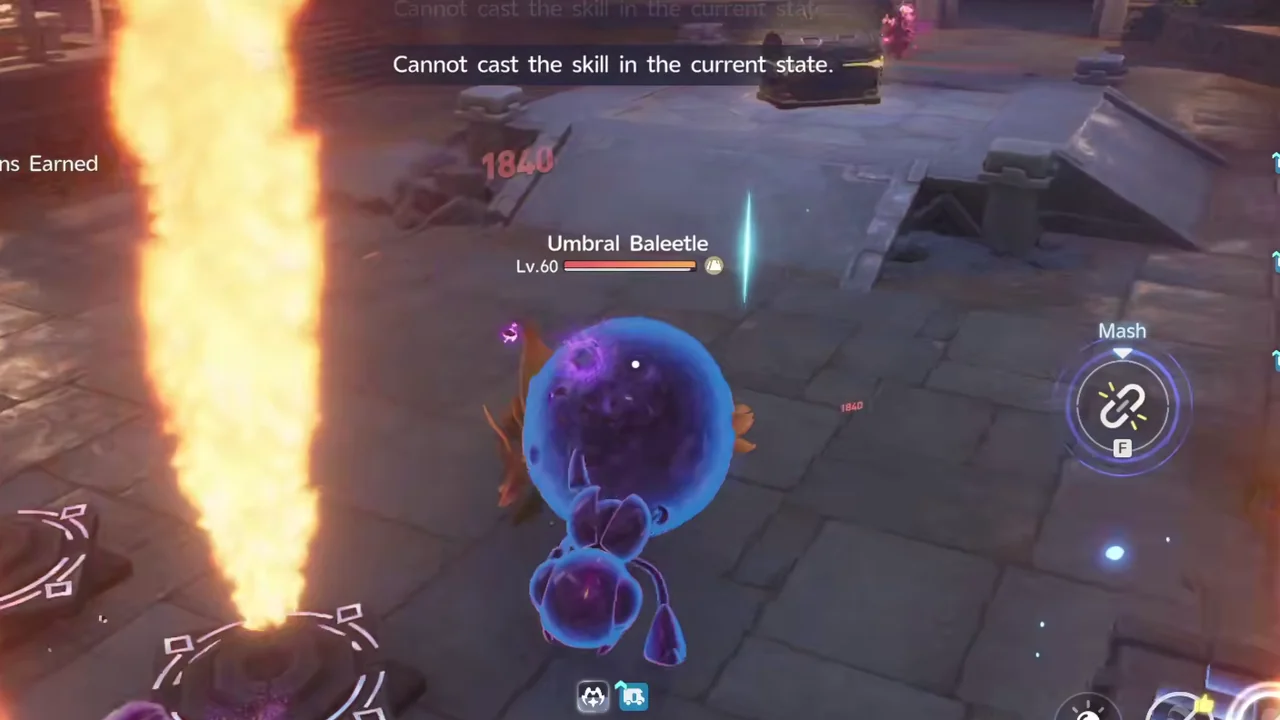
Get inside its detection range and it charges at you in a mudball. If it hits, your active Aniimo is trapped until you mash the button to break free. The trap ignores type advantages and took even Grass mains like Irisalis and Hexxin from 100% to about 33% HP in one hit. Listen for scuttling sounds. Hexxin's Black Hole Domain Skill stops the charge before it connects.
Since the latest update, breaking free from its mudball fully restores your Pathfinder's HP.
Umbral Ignitis
It turns invisible and then bursts you down with a heavy dash attack. It's fragile against ranged attacks, but its dash closes distance fast, so keep moving while you fight it.
Umbral Pawney and Umbral Rookey
Both deal extra damage to Grass mains and have disruptive melee effects. Pawney stuns you. Rookey flattens your active Aniimo so it can't use Skills, but using an off-field support's Skill clears the flattened state right away.
Umbral Erlath
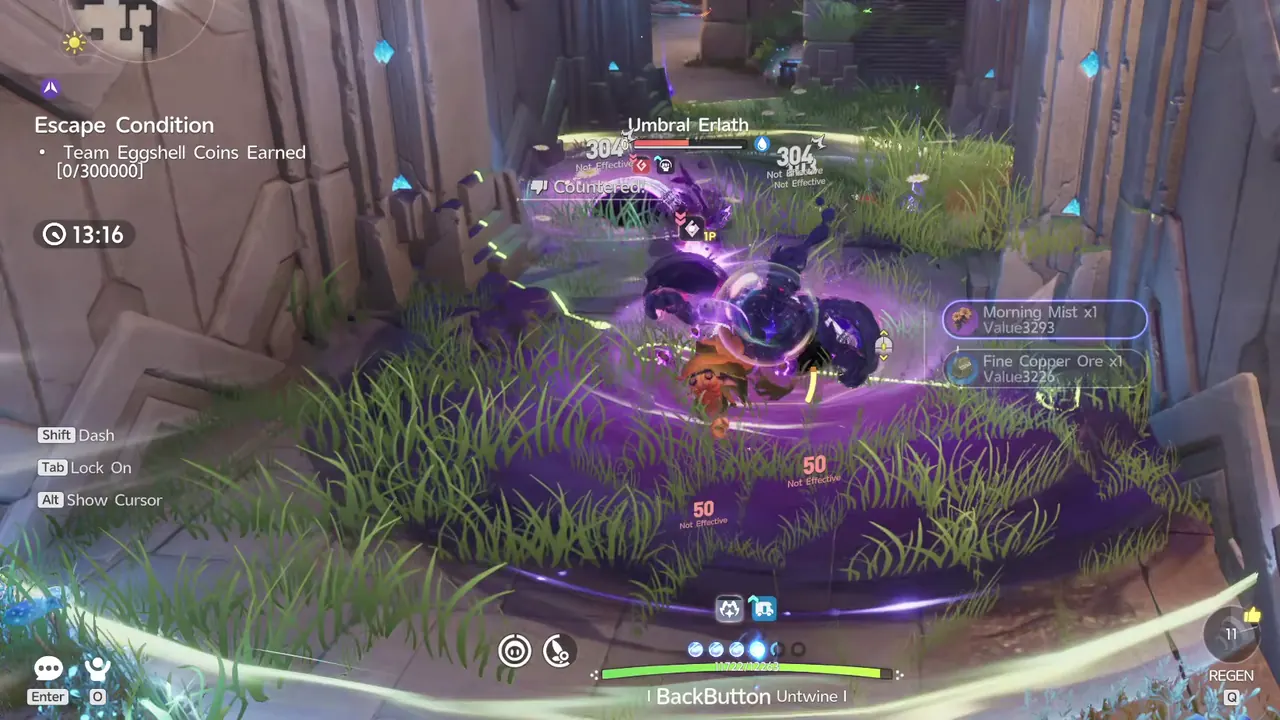
It makes nearby enemies immune to crowd control, which shuts down tools like Hexxin's Black Hole Domain. There's no real counter beyond its weakness to Grass, so the safest approach is to lure the enemies around it out of its detection range and defeat them first.
Umbral Melloblum
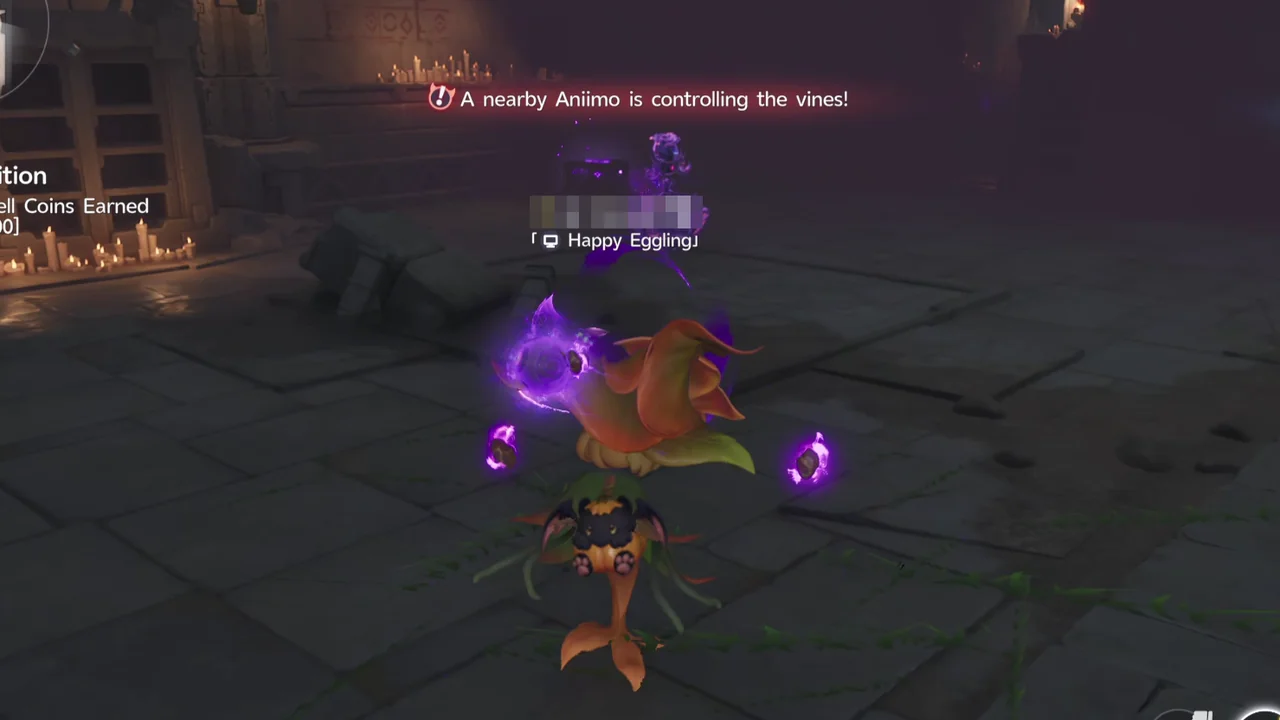
Its vines root your active Aniimo in place and lock out attacks and Skills, and it can do this again and again, so defeat it first. The alert that a nearby Aniimo is controlling the vines tells you one is close.
Umbral Sparki
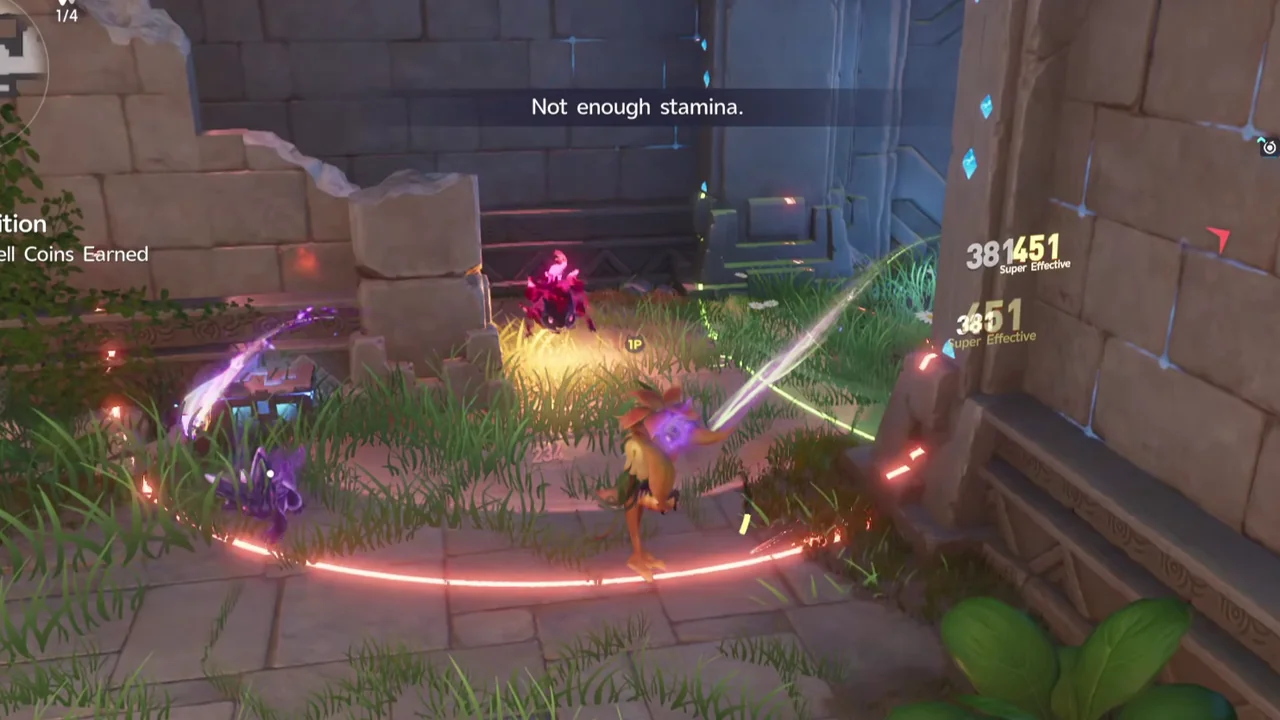
Enter its detection range and it chases you, then starts a self-destruct countdown. You can lure it into other enemies for heavy damage, as long as you dash out of the red area before it explodes.
Its HP was lowered in the latest update, so you can defeat it faster before it explodes.
Umbral Hummin
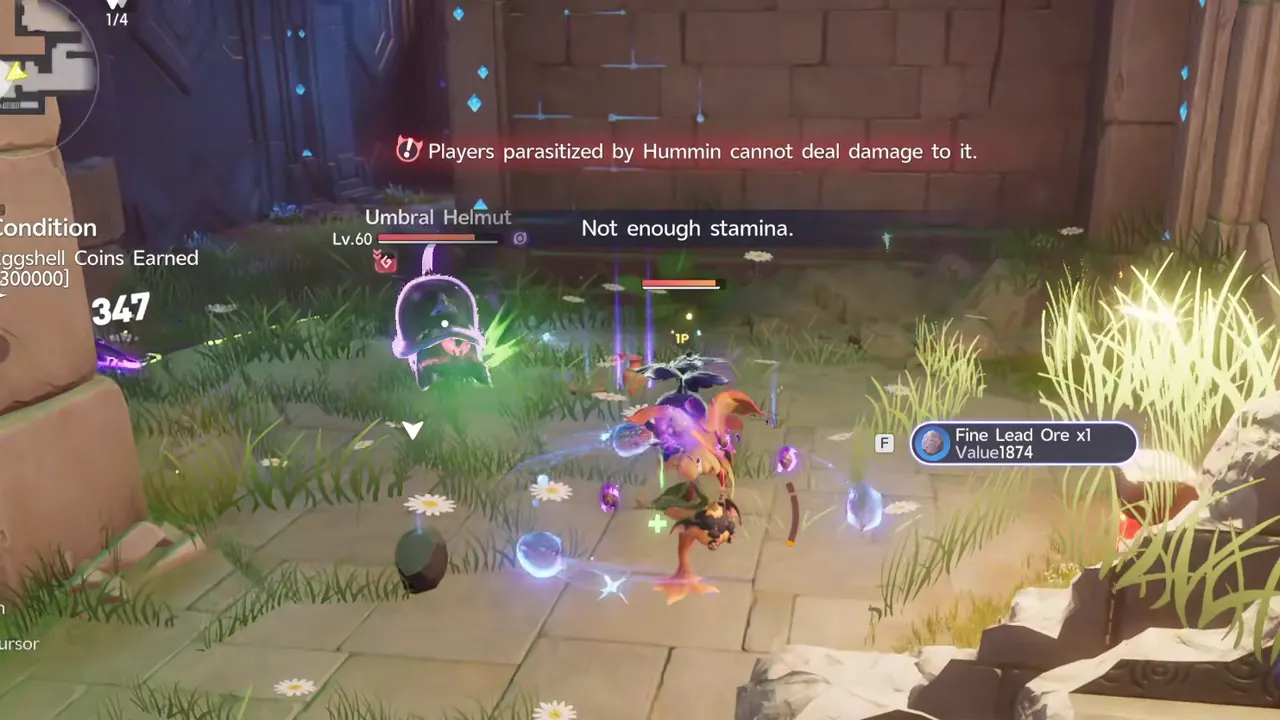
It latches onto your active Aniimo without dealing damage, and the game warns that players it latches onto can't damage it. Our player also couldn't target it while it was attached. It keeps buffing nearby enemies, so the room hits much harder. Keep your distance, and if it latches on, defeat the buffed enemies around you before backing off.
Umbral Bouldus (Alpha Boss)
A new Alpha boss that appears in its own fixed spawn room in the Lost Sanctum.
Umbral Bubbeep
A new mechanic enemy. Defeating it gives your Pathfinder continuous HP regeneration, so take it out first during a run.
The update also adds more standard Umbral Aniimo without special mechanics to the spawn tables, so each Lost Sanctum run has more variety in encounters.
How to Hatch Eggs · How to Get an Umbral Aniimo: Spawns and Eggs · Rainbow of the Ground Walkthrough · Money Farming Guide · Team Comps · Alpha Stellarys