
A party is four Aniimo, and you swap between them in the middle of a fight. Each comp below is built around one attacker, with the other three slots covering BREAK, buffs, sustain and energy. Hitting a weakness deals 1.6x damage, so start from the element the enemy is weak to and fill the rest of the slots around it.
The comps are based on play in a pre-release test build, so they can differ from the live version.
Best Fire Team Comp




Open with Magmarex's Lava Breath to build BREAK while the Fire Debuff goes up, then switch to Scorchhowl for a fully charged hit once the enemy is down. Lava Breath is the rare skill that does BREAK and the element debuff at the same time, but it eats 10 energy per second while it is active, so do not hold it longer than you need.
Why this comp works
- Scorchhowl (Prismana Form) carries, and its fully charged hit is what the comp is built around.
- Magmarex's Lava Breath pushes BREAK and applies the Fire Debuff in one skill.
- Lava Breath drains 10 energy per second while it is running, so keep it short.
- Turbo (Rainstorm Form) and Besauce cover sustain and energy.
Squashel also works as the breaker
| Swap out | Swap in |
|---|---|
| BreakerBasic FormMagmarex | BreakerBasic FormSquashel |

If you do not have Magmarex yet, Squashel goes in the breaker slot instead. It builds BREAK mostly off fire attacks, so it is easy to fit into a comp aimed at a fire-weak enemy.
Best Water Team Comp




This comp keeps damage and energy moving on top of the puddles. Piopiota makes the puddles, Panpanta applies the Water Debuff and pushes BREAK. Erlath's Bubbles stores bubbles whenever a water skill goes off, so cycle each Aniimo's skill to bank energy and hand it back to Sherro.
Why this comp works
- Piopiota lays down puddles to raise the comp's water damage.
- Panpanta (Prismana Form) applies the Water Debuff and works on BREAK.
- Erlath turns the water skills you are already using back into energy.
- Water skills feed each other, so energy keeps circulating on its own.
Take Glacy if you want the safer build
| Swap out | Swap in |
|---|---|
| SustainPrismana FormPanpanta | SustainPrismana FormGlacy |

If you want healing and a damage buff in the same slot, swap Panpanta (Prismana Form) for Glacy (Prismana Form). Glimmer Shot raises the whole team's damage and the heal keeps HP topped up, so it suits players who would rather not lose runs.
Best Grass Team Comp


Set up with Melloblum and Turbo, then give Thornblade the field. Once you have contracted its core skill, Thorny Rain grants Sword Dance and feeds straight into the normal attack chain, which is where the damage comes from. When energy runs low, cut to Besauce and hand the field back.
Why this comp works
- Melloblum buffs Thornblade's grass damage.
- Turbo (Rainstorm Form) covers damage, sustain and healing in a single slot.
- Besauce covers the energy gap.
- Front-load the support so Thornblade gets as much field time as possible.
Use Lightning Impact before the core skill contract
Until Thornblade's core skill is contracted, the bonus on Thorny Rain does nothing for you, so use Lightning Impact for the crit rate instead. After the contract, switch to the Thorny Rain into Sword Dance into normal attack loop.
Take Pomawk if you want more BREAK
| Swap out | Swap in |
|---|---|
| SustainRainstorm FormTurbo | SustainBasic FormPomawk |

If you have survivability to spare, swap Turbo (Rainstorm Form) for Pomawk. Wild Show adds extra BREAK damage on a just input, so it breaks enemies faster as long as you can hit the timing consistently.
Best Electric Team Comp



Bring Dazmand in for a moment to push BREAK, add Luminelle's support, then switch to Fulmintis and stay on it. Only cut to Besauce when energy actually runs out, and Fulmintis keeps the field time it needs.
Why this comp works
- Dazmand's skill is cheap to use right after it comes in, so it is easy to fit.
- Luminelle covers electric damage and healing.
- Besauce covers the energy gap.
- The support side barely spends energy, which is what keeps the attacker fed.
Take Turbo if you need to survive
| Swap out | Swap in |
|---|---|
| DMG BuffBasic FormDazmand | DMG BuffRainstorm FormTurbo |
If you are taking too much damage in harder content, swap Dazmand for Turbo (Rainstorm Form). BREAK gets slower, but one slot then covers a damage buff, a shield and healing, and the comp gets a lot safer.
Best Ice Team Comp


Geoclaw breaks the enemy while Glacy (Prismana Form) keeps HP and damage up, which makes this the safest comp of the nine. Glimmer Shot raises the whole team's damage by 15%, so you are still buffing Glynsera while you heal.
Why this comp works
- Glynsera is the main attacker and takes most of the field time.
- Geoclaw handles BREAK.
- Glacy (Prismana Form) covers healing and a damage buff from the same slot.
- Besauce covers the energy gap.
Take Turbo if you want more damage
| Swap out | Swap in |
|---|---|
| SustainPrismana FormGlacy | SustainRainstorm FormTurbo |
If healing is not what is holding you back, swap Glacy (Prismana Form) for Turbo (Rainstorm Form). It buffs damage and sustain together, which turns this into a more aggressive comp.
Best Wind Team Comp



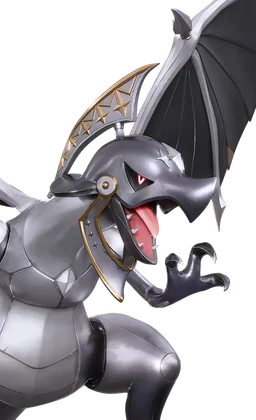
Eklue and Tromber set Cornet up, and you answer enemy attacks with Helgon's Wind Counter. A just-timed counter raises BREAK efficiency and can stun as well, so this comp pays off for players comfortable with the timing.
Why this comp works
- Tromber covers wind damage and energy from a single slot.
- Eklue lowers the enemy's wind resistance.
- Time Helgon's Wind Counter on the just input to push BREAK.
- The wind Aniimo share synergies, so energy keeps flowing.
Tubster is the breaker that needs no timing
| Swap out | Swap in |
|---|---|
| BreakerBasic FormHelgon | BreakerBasic FormTubster |

If just inputs are not your thing, put Tubster in as the breaker. While shielded its BREAK efficiency is 40% higher, so once the condition is up it builds BREAK steadily without any timing.
Take Turbo if you need to survive
| Swap out | Swap in |
|---|---|
| BreakerBasic FormHelgon | BreakerRainstorm FormTurbo |
If you are getting hit too often, put Turbo (Rainstorm Form) in Helgon's slot. You trade BREAK for survivability while keeping the energy support, which can be easier to play in long fights.
Best Rock Team Comp
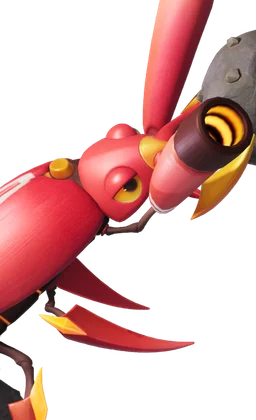
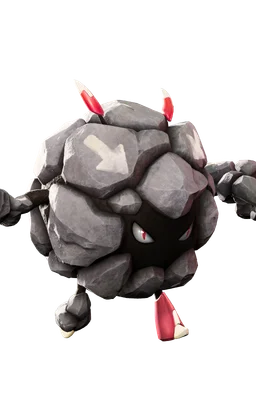

The point is to destroy the Rock Piles Bouldus creates with Waleetle's Stone Ball Drift, which applies Disintegration. That is what lowers rock resistance, so keep Budclaw working on BREAK in between and go in with Waleetle once the setup is done. Besauce covers the energy.
Why this comp works
- Break the Rock Piles Bouldus creates with Waleetle to lower the enemy's rock resistance.
- Budclaw (Mudflat Form) helps push BREAK.
- Besauce covers Waleetle's energy gap.
- Take Waleetle's own synergy over a generic support.
Take Turbo if you need to survive
| Swap out | Swap in |
|---|---|
| BreakerMudflat FormBudclaw | BreakerRainstorm FormTurbo |
For hard content where survivability comes first, swap Budclaw (Mudflat Form) for Turbo (Rainstorm Form). You lose a BREAK source, but you add a shield and healing while the Bouldus and Waleetle synergy stays intact.
Best Holy Team Comp


Glacy and Turbo do the setup and the holy attacker you chose does the work. Holy has few dedicated energy suppliers of its own, so Besauce carries that side and buys your attacker the field time it needs.
Why this comp works
- Run whichever starter you picked, Lunara or Helion, as the attacker.
- Glacy (Prismana Form) covers a damage buff and healing at once.
- Take Turbo's Rainstorm Form: it has fewer weaknesses, so it takes less damage while supporting.
- Besauce covers the energy gap.
You only ever get one of Lunara and Helion
You pick one of the two early in the story, so they can never be in the same party. Whichever you chose goes straight into the attacker slot.
Best Dark Team Comp




Turbo (Prismana Form) covers dark damage and BREAK efficiency, and Rookey does the breaking. Rookey stacks Guardbreak Resonance and Bouncy Sling to push its BREAK higher, so enemies go down fast and Stellarys gets clean damage windows.
Why this comp works
- Turbo (Prismana Form)'s Nebula Burst buffs dark damage.
- Nimbi Burst adds damage and BREAK efficiency on top.
- Rookey's BREAK is high enough to crack anything open.
- Witchin covers energy so Stellarys can keep attacking.
Take Dreaple if you want more damage
| Swap out | Swap in |
|---|---|
| BreakerBasic FormRookey | BreakerBasic FormDreaple |

Against enemies you do not need to break, or in fights that end quickly, put Dreaple in instead. You trade BREAK for more dark damage support and Stellarys hits noticeably harder.
How to Build a Party
Four elements cover every weakness
You do not need a comp for all nine elements. Grass, rock, dark and holy between them hit every element's weakness, so if you want to keep your levelling costs down, raise attackers of those four first.
| Element you raise | Weaknesses it hits |
|---|---|
| grass | rock, water |
| rock | electric, ice |
| dark | grass, fire, holy |
| holy | wind, dark |
Lead with an attacker that has the advantage
Check what the enemy is weak to first, then build around an attacker of that element. A weakness hit deals 1.6x damage, which is far more than you get from forcing a neutral attacker through.
Pick supports around your attacker
Once the attacker is decided, pick the supports that sharpen what it already does. Do not read only the size of the element buff or the debuff. How much energy a support needs to deliver it matters just as much, because a heavy buff can choke the whole rotation.
Always bring a way to BREAK
Breaking an enemy early buys your attacker more safe time to deal damage. A dedicated breaker is one answer, but an Aniimo that pushes BREAK on very little energy is just as good. Look at whether the slot leaves enough energy for the attacker as well.
Put energy efficiency first
Energy efficiency is the thing to watch most when you build. An attacker that cannot fire a skill at the moment it matters loses a lot of damage, so make use of energy recovery, skills that cost no energy at all, cost reductions and effects that keep supporting for a long time on very little.
Bring sustain to hard content
In hard content, a heal or a shield often keeps you attacking longer than another damage slot would. Just do not spend so much energy on the sustain slot that the attacker starves. Aniimo that cover several jobs at once, like a damage buff plus healing plus a shield, are the easiest way to keep a comp together.