
Mysterious Presence is a Journey Quest in Astra where you investigate glitched displays and solve puzzles around Northside to collect 9 Voxel Cubes. Here's how to start it, each objective of the main quest in order, where to find all 9 Voxel Cubes with their map coordinates, and the rewards.
How to Unlock Mysterious Presence
The quest starts from the Clue "Mysterious Presence", shown as a lightbulb icon on the map in Astra's Northside, at map coordinates 0019, 0424. Its details read: "Lately, holo-equipment failures have been occurring frequently across Astra, and people have even reported seeing something... strange. Just what is going on?" The task is "Repair the malfunctioning equipment in Astra's Northside."
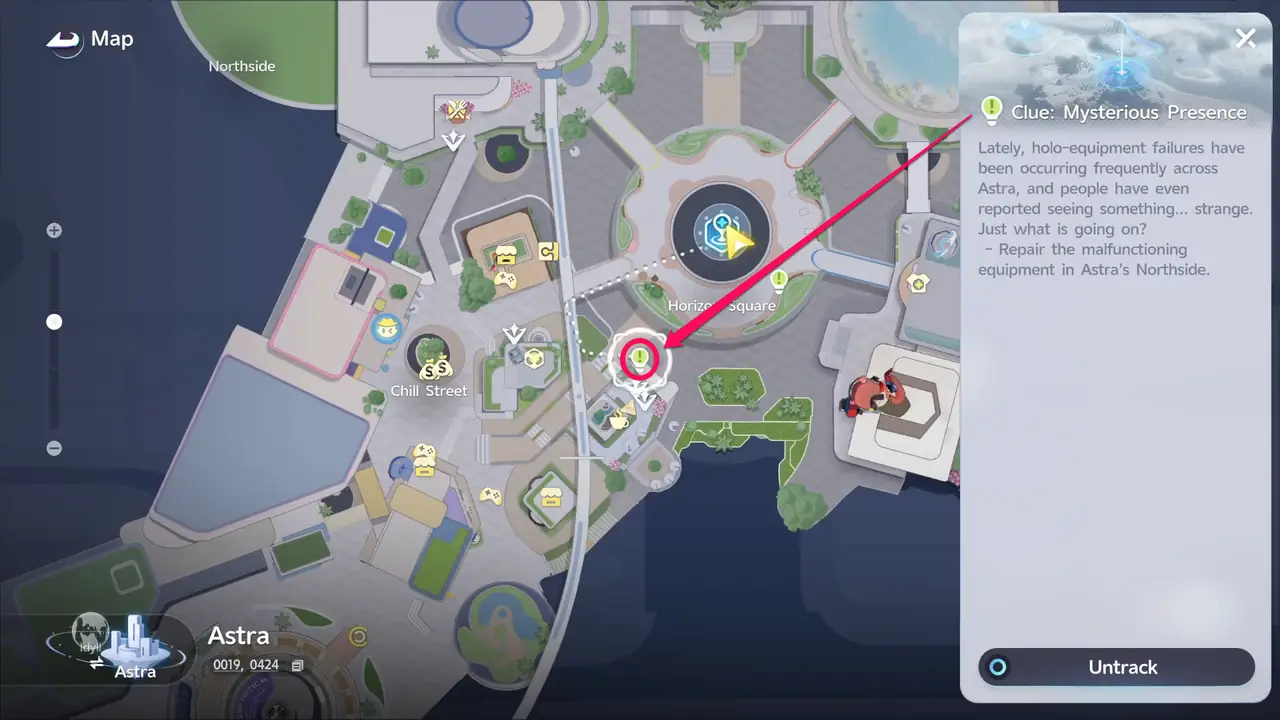
Go to the glitched display outside ChillBeanz and choose "Try fixing the glitched display".
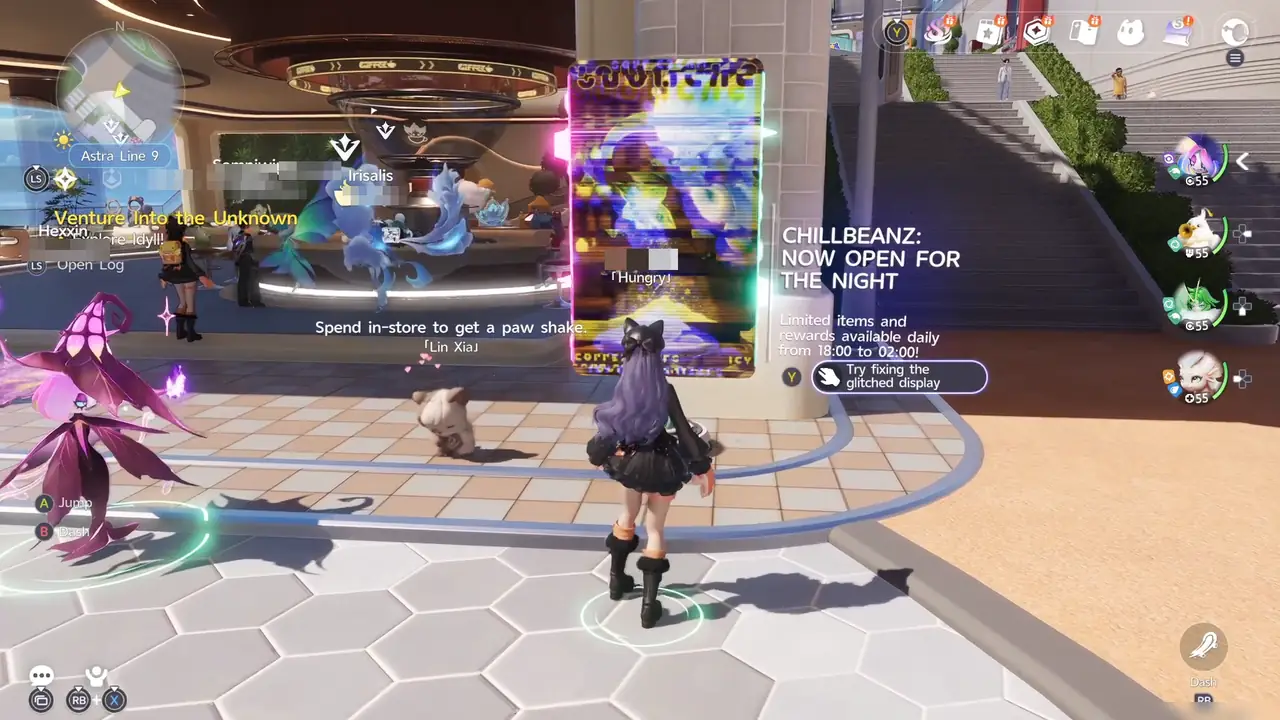
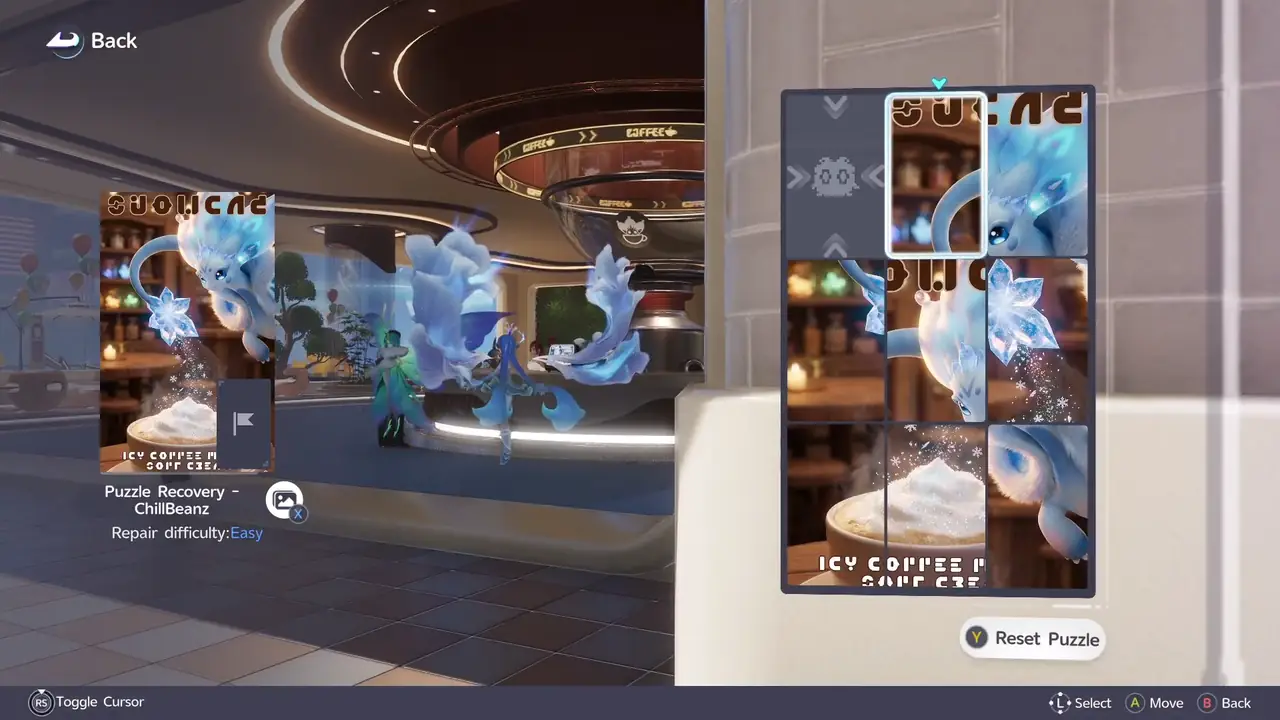
Fixing a display is a 3x3 sliding tile puzzle. The one at ChillBeanz is "Puzzle Recovery - ChillBeanz", with a repair difficulty of Easy.
Solve the puzzle and a giant Voxel Cube appears. Touch it and enter the mysterious space to start Mysterious Presence.
Quest Overview
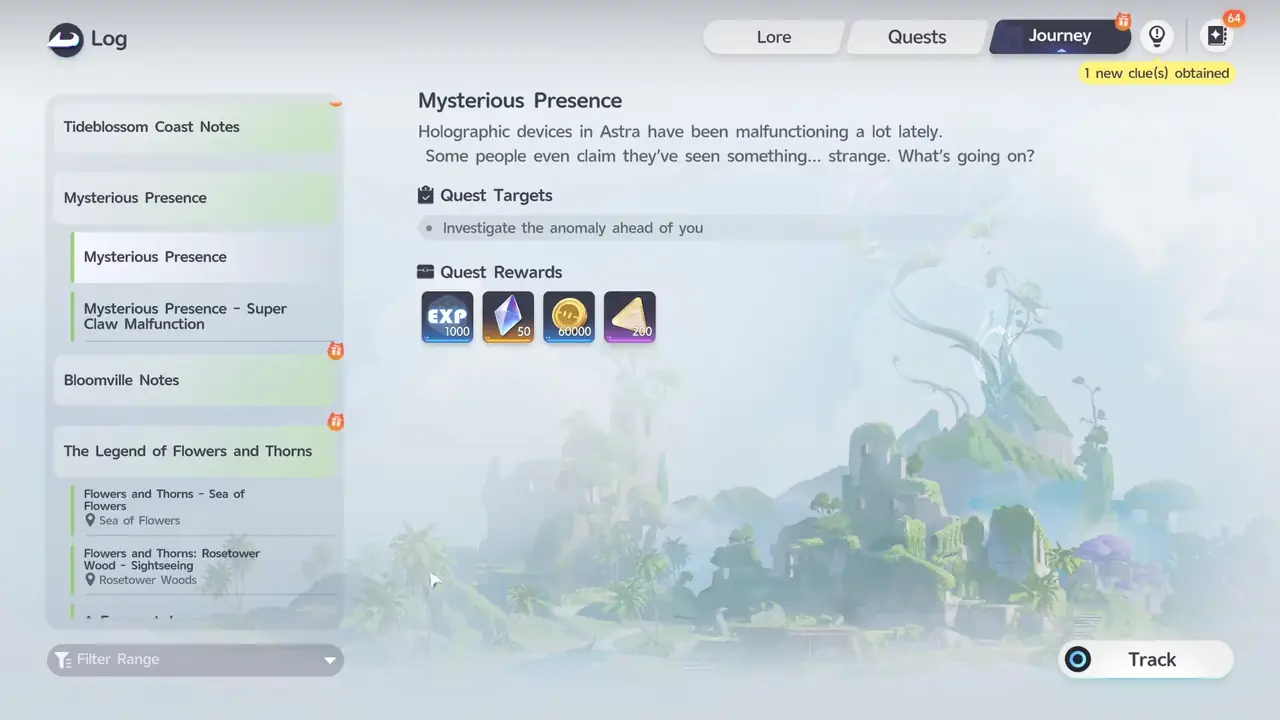
Mysterious Presence is a Journey Quest in Astra and part of the Mysterious Presence series, which also includes Mysterious Presence - Super Claw Malfunction. Its Log entry reads: "Holographic devices in Astra have been malfunctioning a lot lately. Some people even claim they've seen something... strange. What's going on?" Over the quest, you investigate glitched displays across Astra's Northside and solve puzzles and anomalies to collect 9 Voxel Cubes.
For every Journey Quest and how each one starts, see: Journey Quests Guide: Unlock, Rewards, and List
Mysterious Presence Walkthrough
- Investigate the Anomaly Ahead of You
For the first objective, "Investigate the anomaly ahead of you", walk up to the giant cube in the center of the mysterious space and choose the "? ? ? ? ? ?" prompt. After a short conversation, you're sent back to Astra's Northside automatically.
- Ask the Repairer Nearby
For "Ask the repairer nearby.", talk to Reno, who is standing right in front of you when you leave the mysterious space.
- Go to the Institute and Ask Dr. Bohr
For "Go to the Institute and ask Dr. Bohr for more information.", open the map and teleport to the Polaris Institute waypoint.
- Ask Prof. Bohr for Advice
For "Ask Prof. Bohr for advice", find Dr. Bohr inside Polaris Institute and talk about the Voxel Cube and the mysterious space.
- Go to the Holo-Lab
For "Go to the Holo-Lab", cross the corridor from where Dr. Bohr stands and go through the Holo-Lab door.
- Ask the Holo-Tech Engineer
For "Ask the holo-tech engineer", talk to Nova, the Holo-Tech Engineer inside the Holo-Lab.
- Go Back to the Northside
For "Go back to the Northside.", leave the Holo-Lab for the hallway.
- Go to Northside and Continue Collecting Voxel Cubes
The next objective is "Go to Northside and continue collecting Voxel Cubes." Search Astra's Northside for hidden Voxel Cubes. On this first search, the displays that hold them have no map markers. Collect 2 more Voxel Cubes to reach 3 in total.
- Unlock Mysterious Presence - Super Claw Malfunction
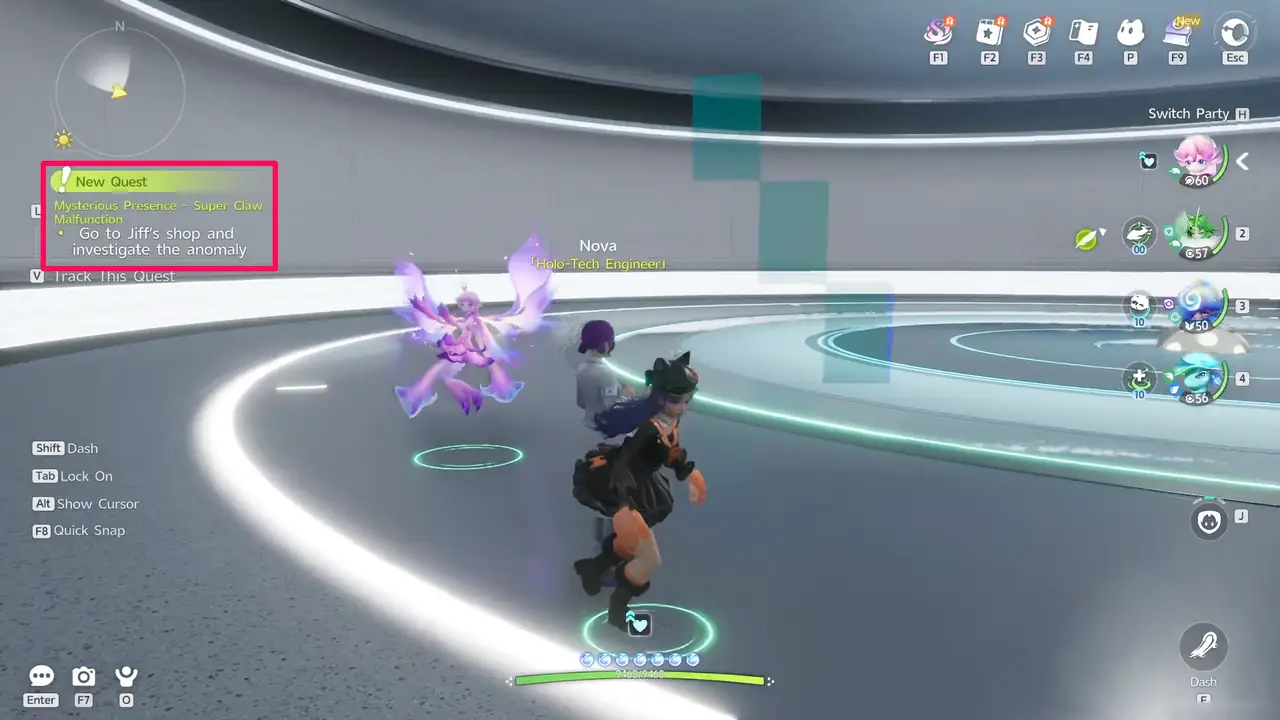
When you get your 3rd Voxel Cube, Nova contacts you about device failures in Northside. The Journey Quest Mysterious Presence - Super Claw Malfunction doesn't unlock yet at this point: it unlocks with a New Quest pop-up once you talk to Nova in the Holo-Lab in the next step. Its first objective is "Go to Jiff's shop and investigate the anomaly".
- Ask Nova What Happened
The objectives then go "Go to the Holo-Lab", "Ask Nova what happened", and "Go back to the Northside". Return to the Holo-Lab and talk to Nova about Jiff's Gear Shop, then head back out and keep collecting until you have all 9 Voxel Cubes. Their locations are listed below.
- Go to the Holo-Lab Immediately
Once you have all 9 Voxel Cubes, Nova messages you that a new doorway has opened. For "Go to the Holo-Lab immediately.", fast travel to Polaris Institute and enter the Holo-Lab again.
- Ask Nova About the Anomaly
For "Ask Nova about the anomaly.", talk to Nova inside the Holo-Lab.
- Go into the Unknown Space
For "Go into the unknown space.", walk through the glowing door beside Nova's workstation.
- Go to the Center to Investigate
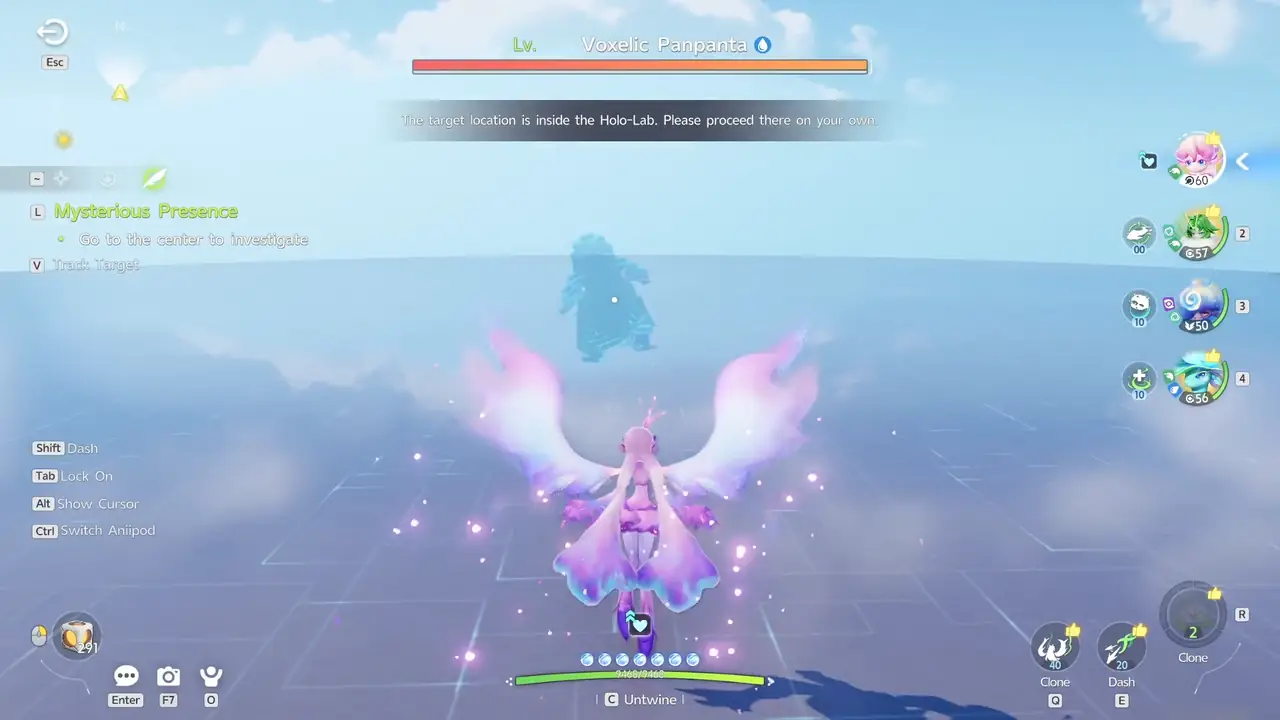
For "Go to the center to investigate.", walk to the center of the mysterious space. The Voxel Cubes you collected come together into a Voxelic boss that changes form across 3 phases in a row: Voxelic Panpanta (Water), then Voxelic Geoclaw (Ice), then Voxelic Stellarys (Dark).
- Investigate the Voxel Core
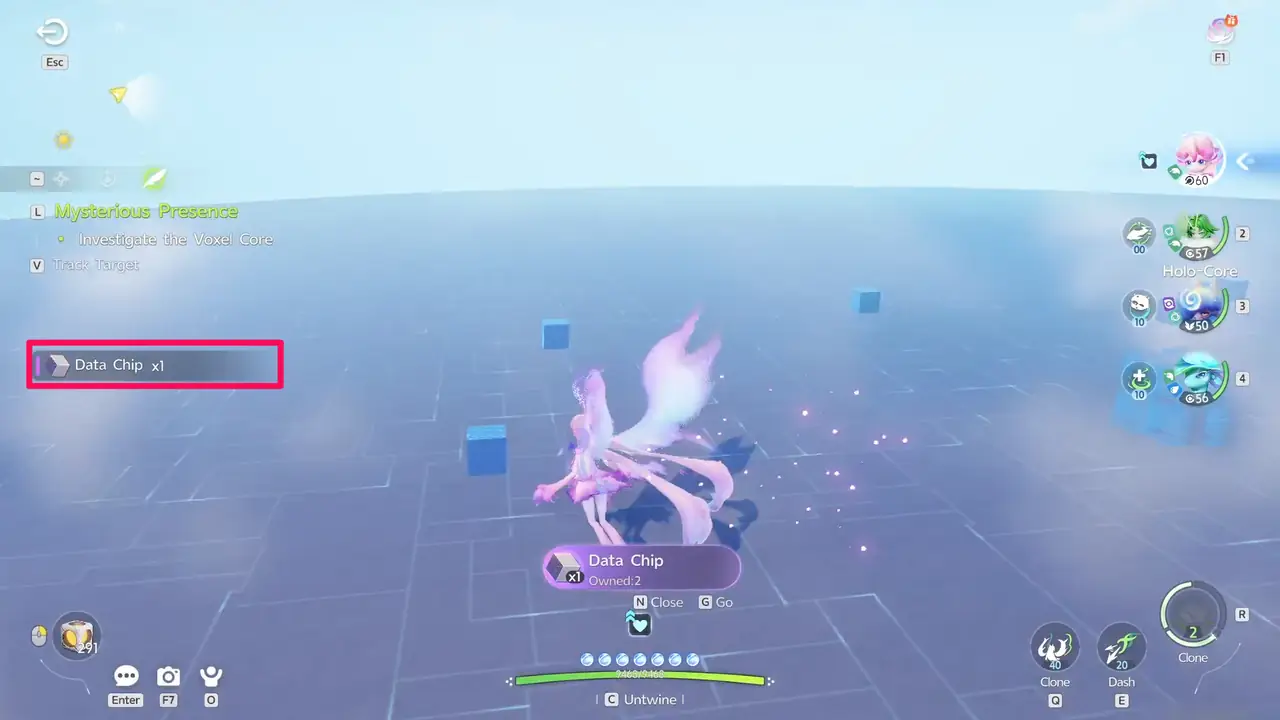
For "Investigate the Voxel Core", pick up the 9 Voxel Cubes scattered across the floor after the boss. Each one plays a short memory scene and gives you 1 Data Chip, for 9 in total. Then walk up to the Holo-Core in the center and interact with it.
- Transmit Data to the Voxel Core
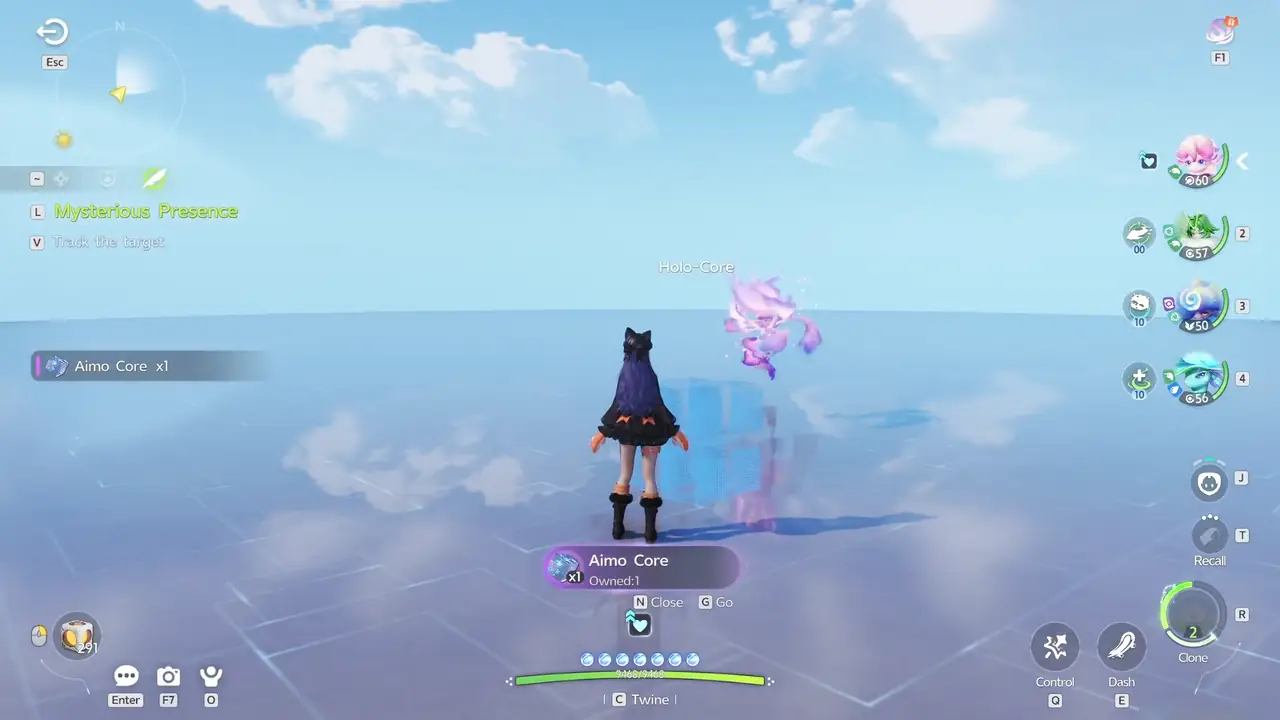
For "Transmit data to the Voxel Core", hand all 9 Data Chips to the Holo-Core. In the conversation, name the core Aimo to receive the key item Aimo Core x1. You're then sent back to the Holo-Lab.
- Report to Principal Oswen
The last objectives are "Talk to Nova", "Talk to Prof. Bohr", and "Report to Principal Oswen". Talk to Nova in the Holo-Lab and Dr. Bohr in the main hall, then follow the quest marker to Principal Oswen's office. Your report finishes the quest and gives you the rewards.
To check which elements work well against each boss phase, see the element chart: Element Chart
All 9 Voxel Cube Locations
The displays that hold Voxel Cubes have no map markers on your first search, so use the map coordinates below.
| Location | Map Coordinates |
|---|---|
| 1. Glitched display outside ChillBeanz | 0019, 0424 |
| 2. Glitched display near Starwish Gacha | -0070, 0393 |
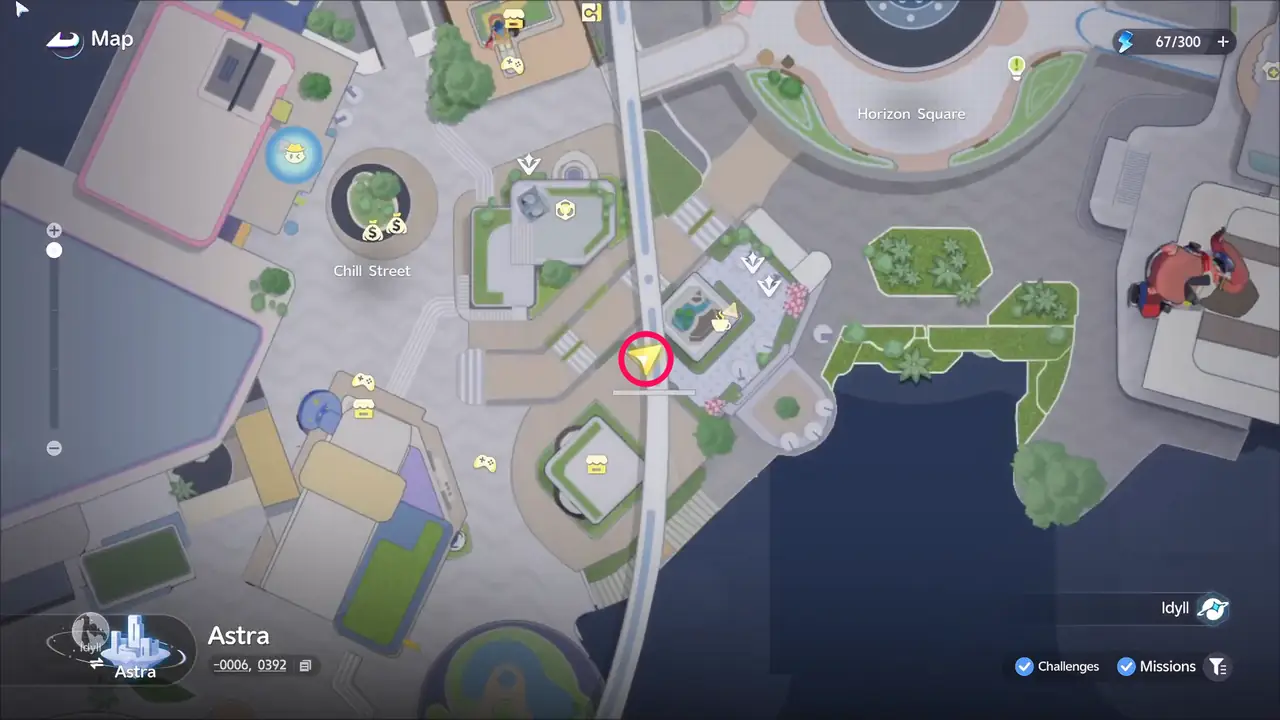
| 3. Glitched display near Mementos | -0006, 0392 |
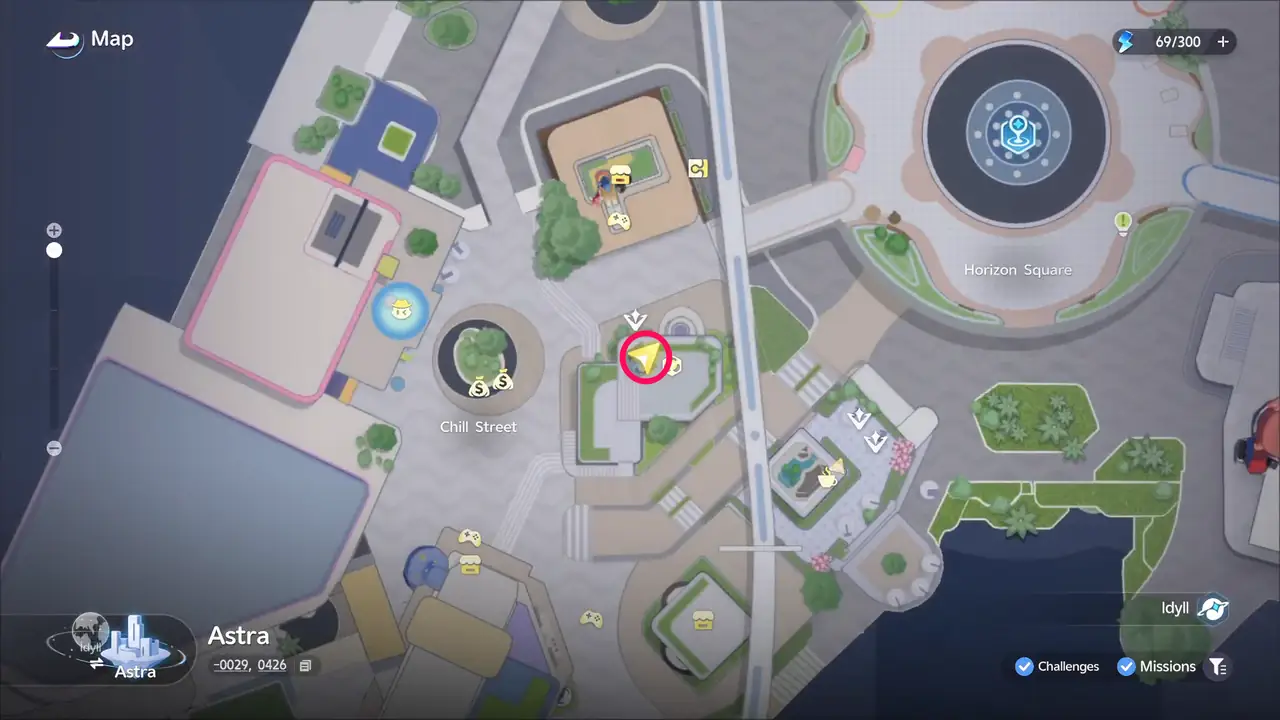
| 4. Super Claw at Jiff's Gear Shop | -0029, 0426 |
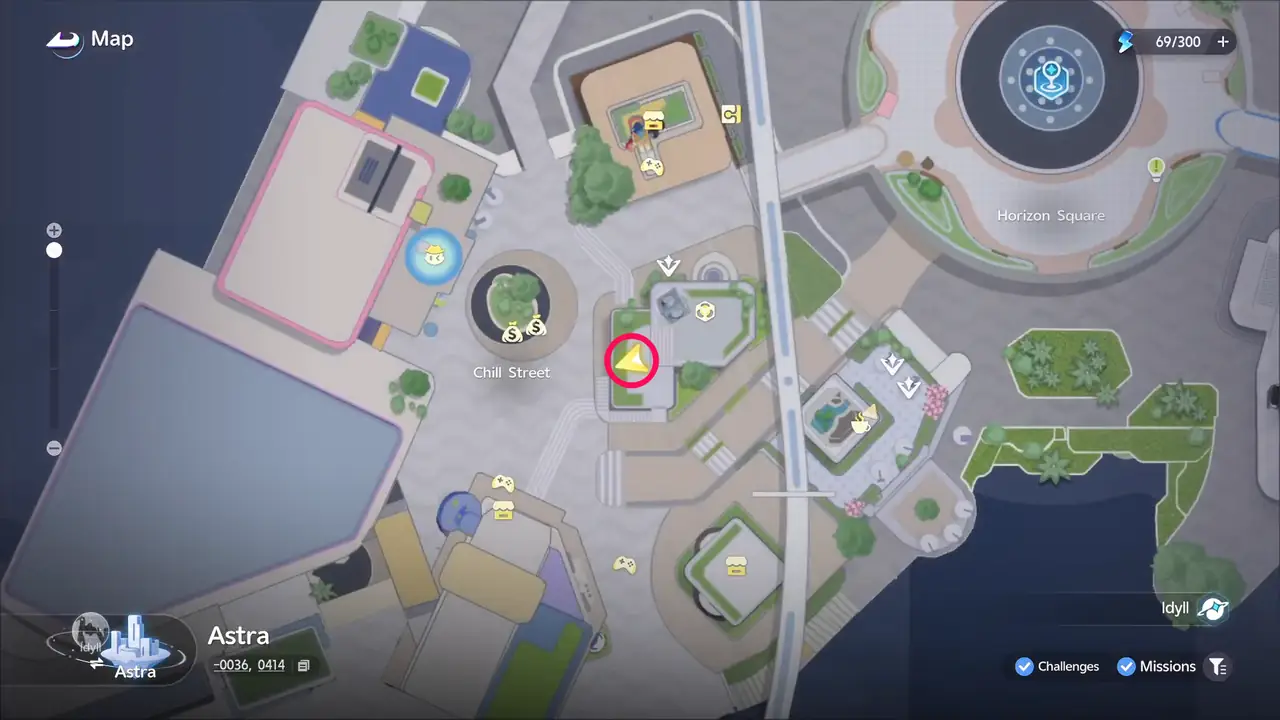
| 5. Swing | -0036, 0414 |
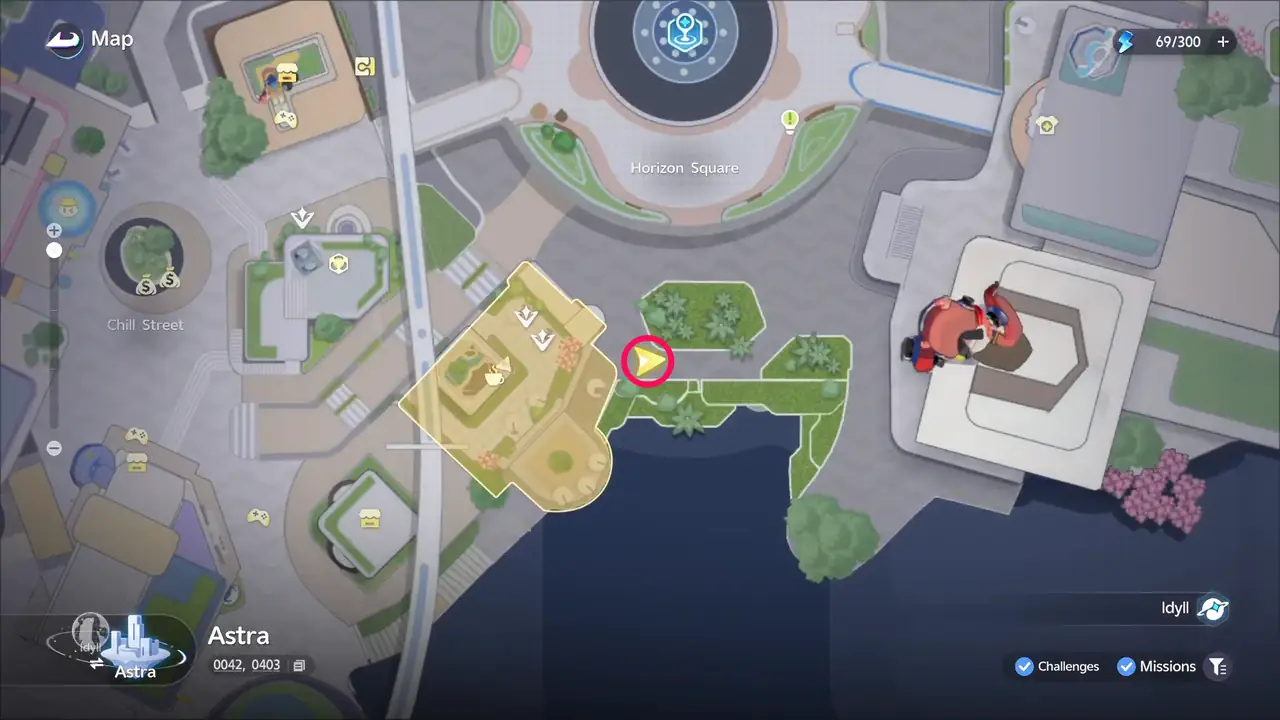
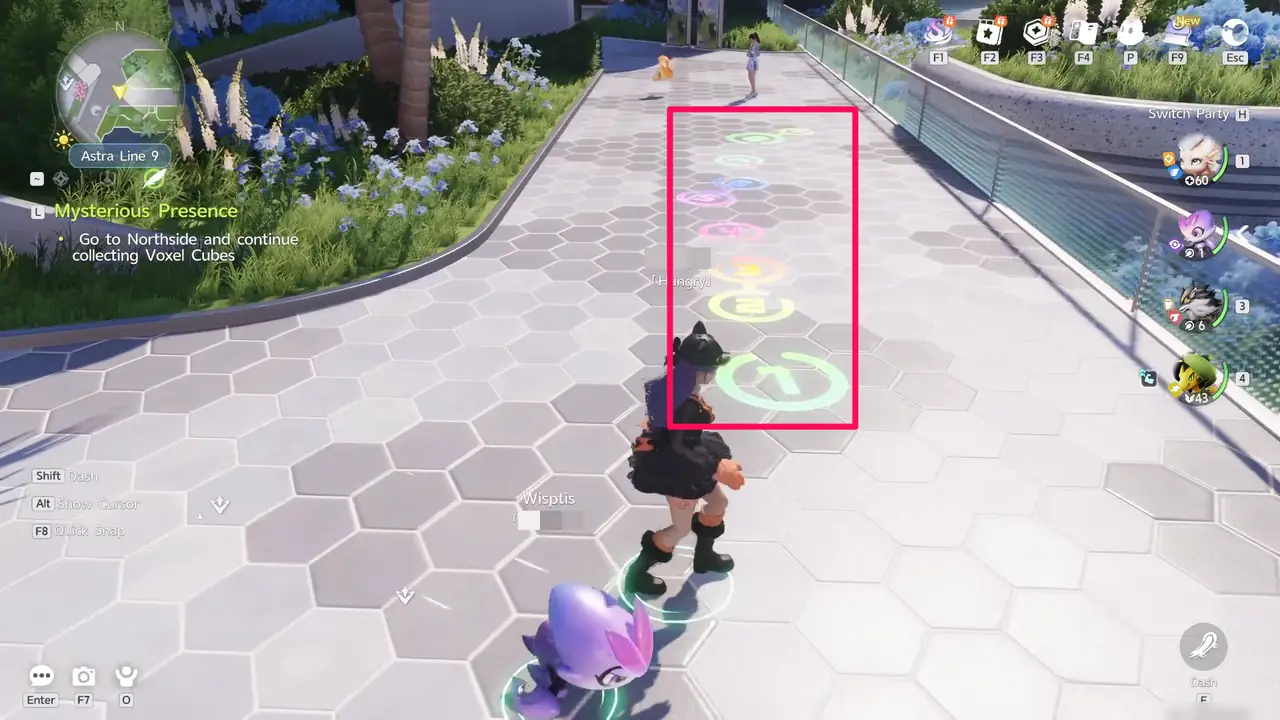
| 6. Numbers on the ground behind ChillBeanz | 0042, 0403 |
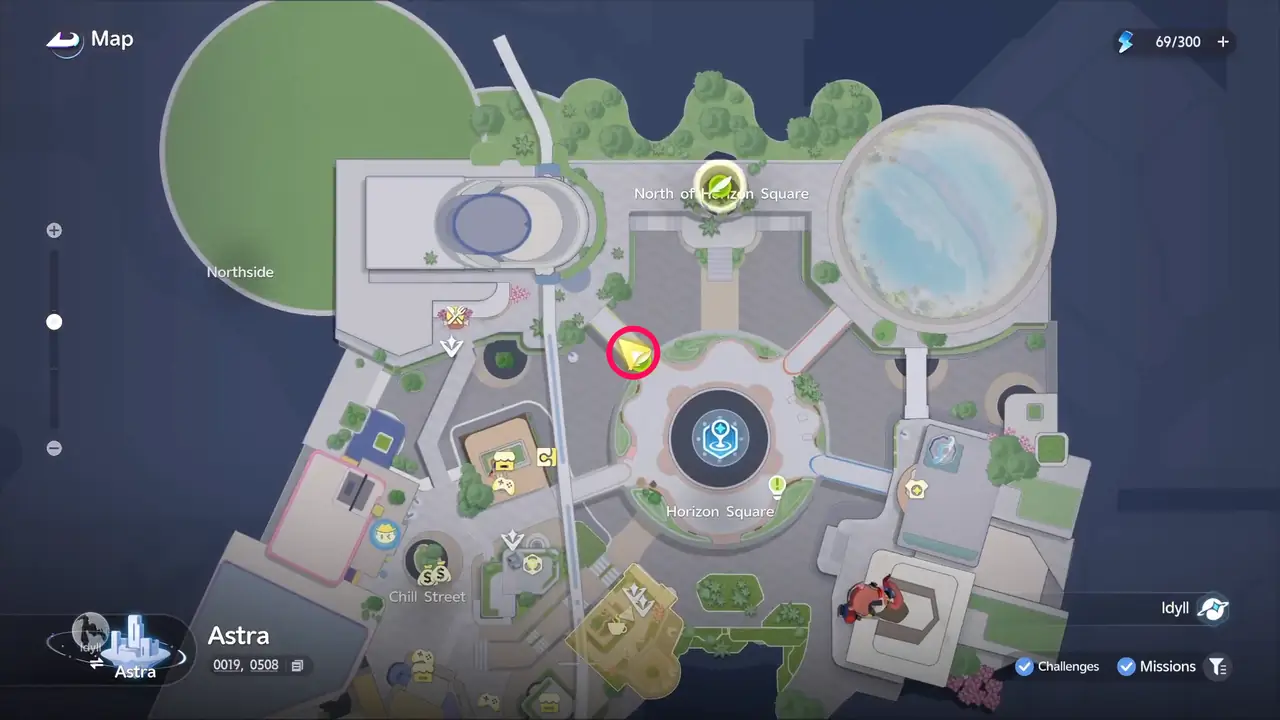
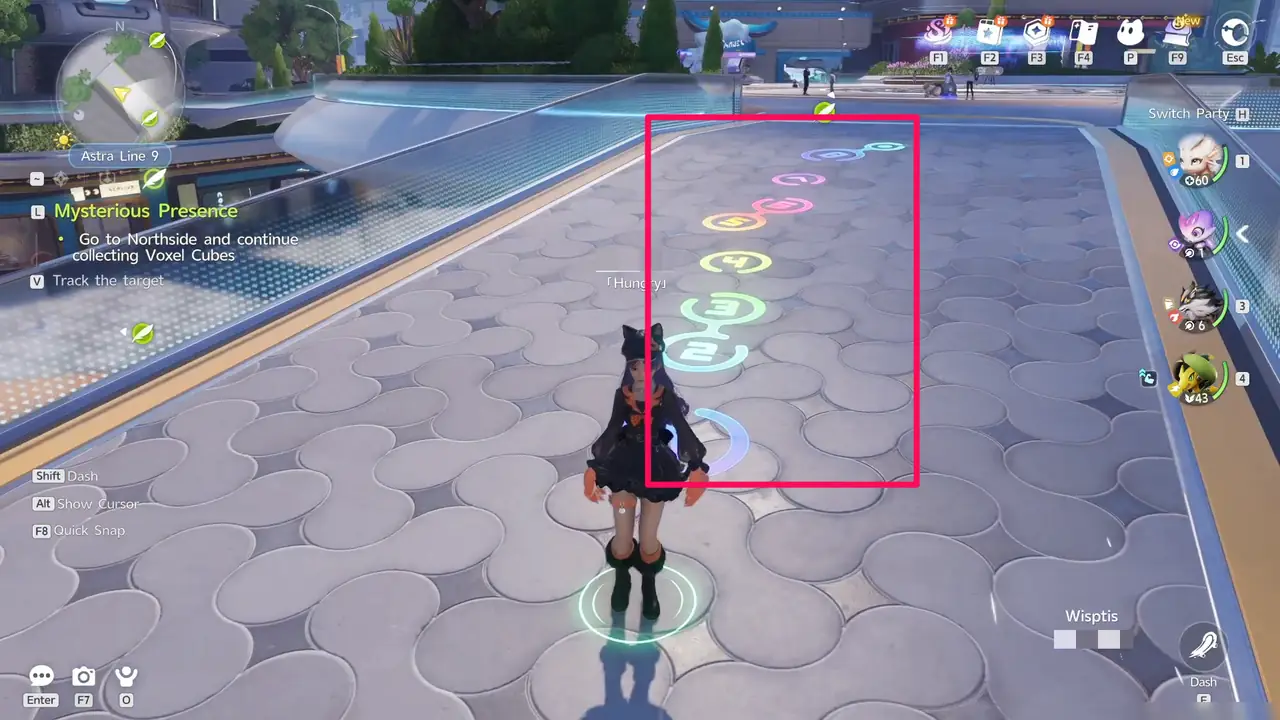
| 7. Numbers on the ground near Horizon Square | 0019, 0508 |
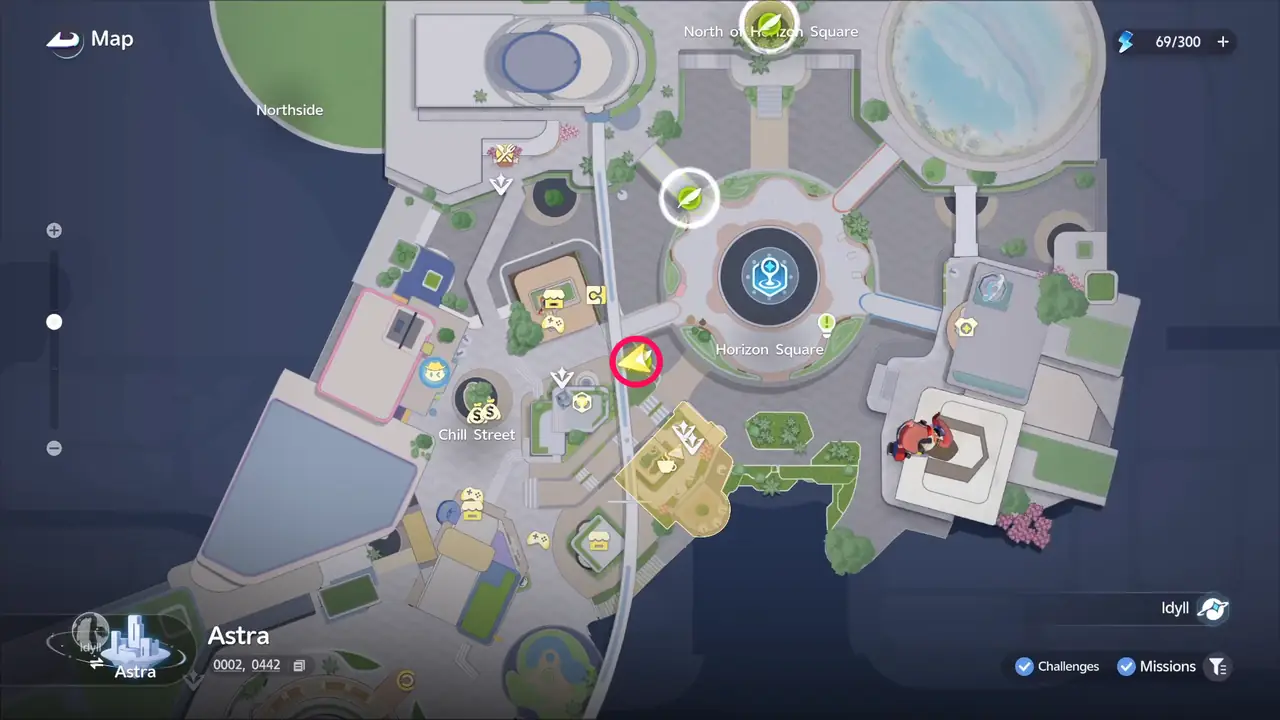
| 8. Seesaw near Horizon Square | 0002, 0442 |
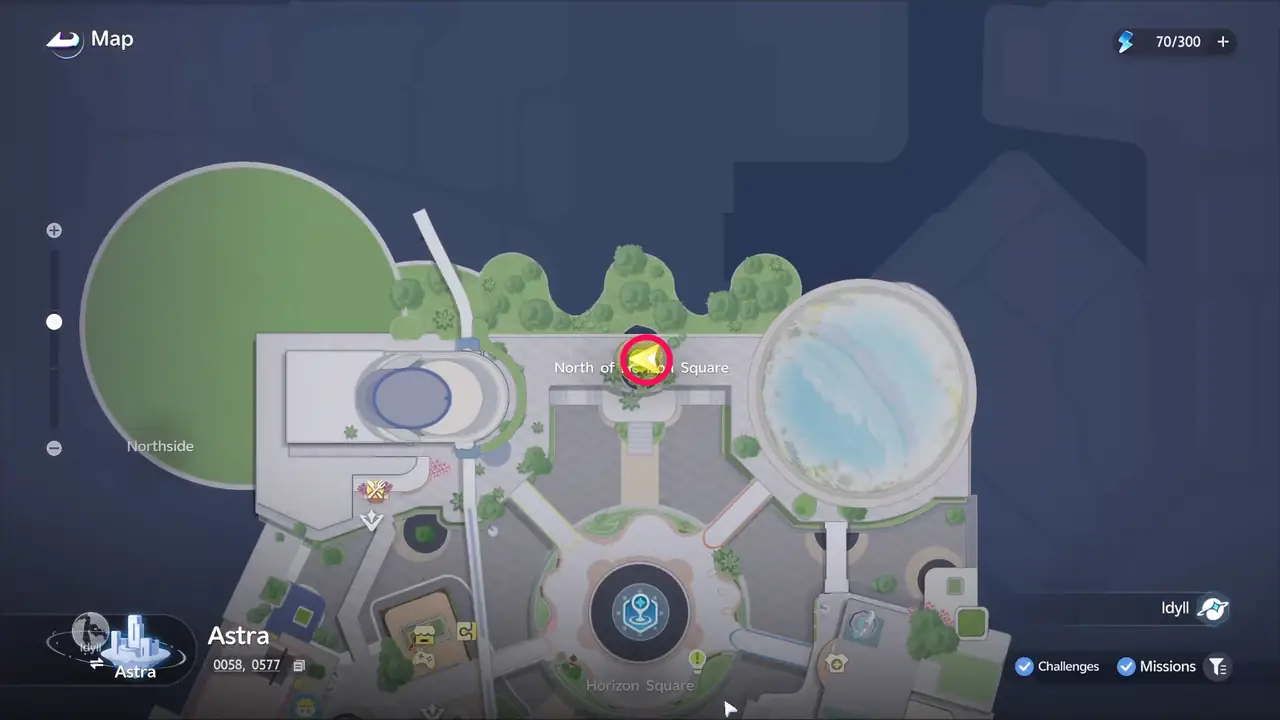
| 9. Bird band north of Horizon Square | 0058, 0577 |
Glitched Display Outside ChillBeanz
Voxel Cube 1 is the one you get when you fix the first glitched display outside ChillBeanz to start the quest (map coordinates 0019, 0424). See How to Unlock Mysterious Presence above.
Glitched Display Near Starwish Gacha
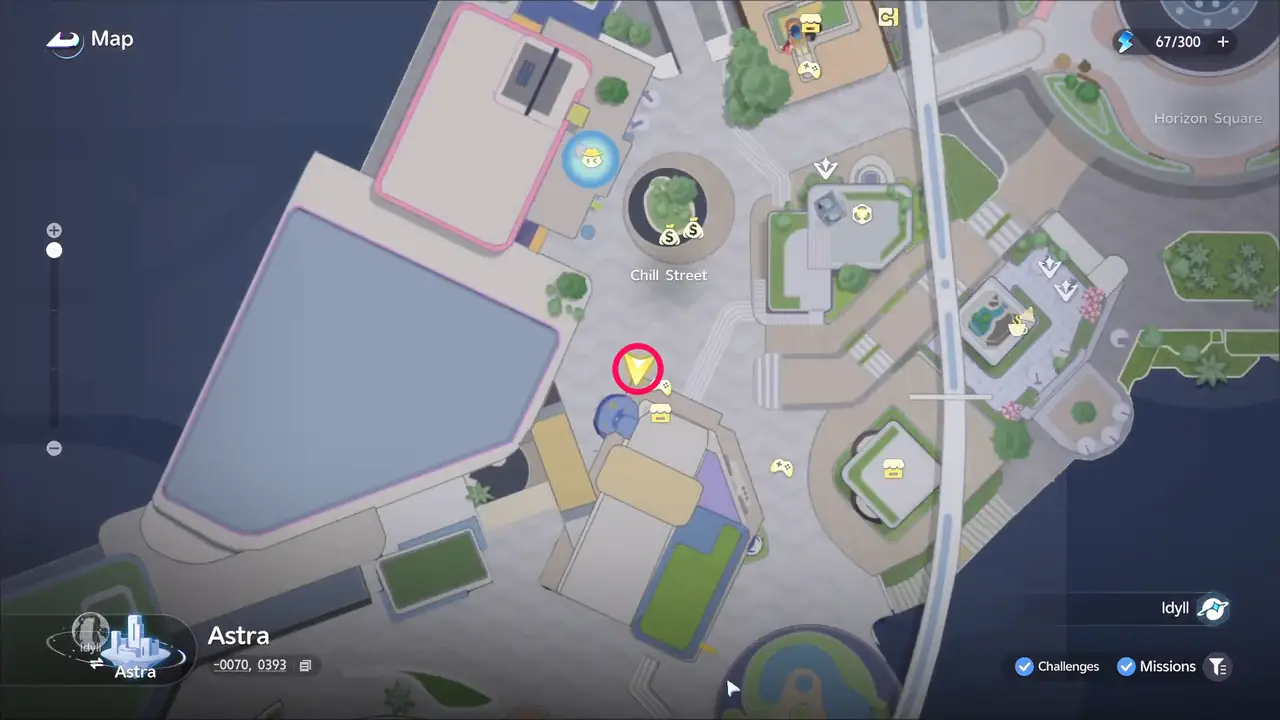
Voxel Cube 2: solve the puzzle to fix the glitched display near Starwish Gacha (map coordinates -0070, 0393).
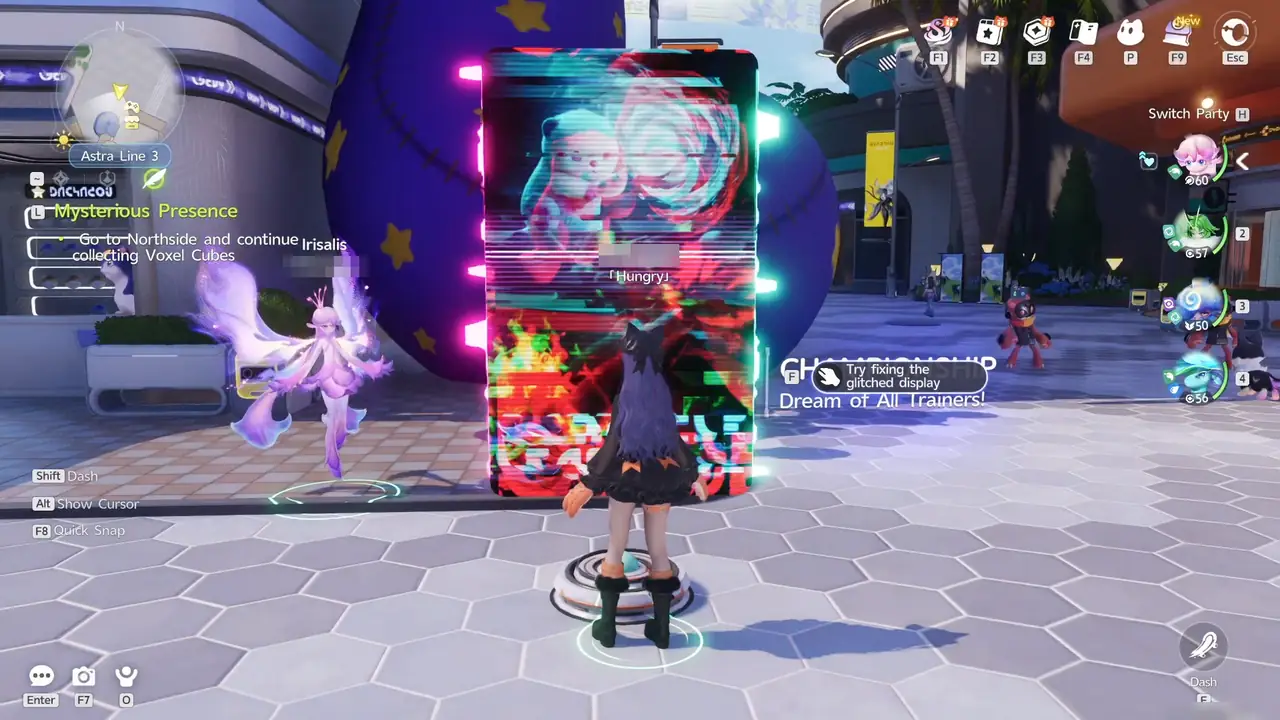
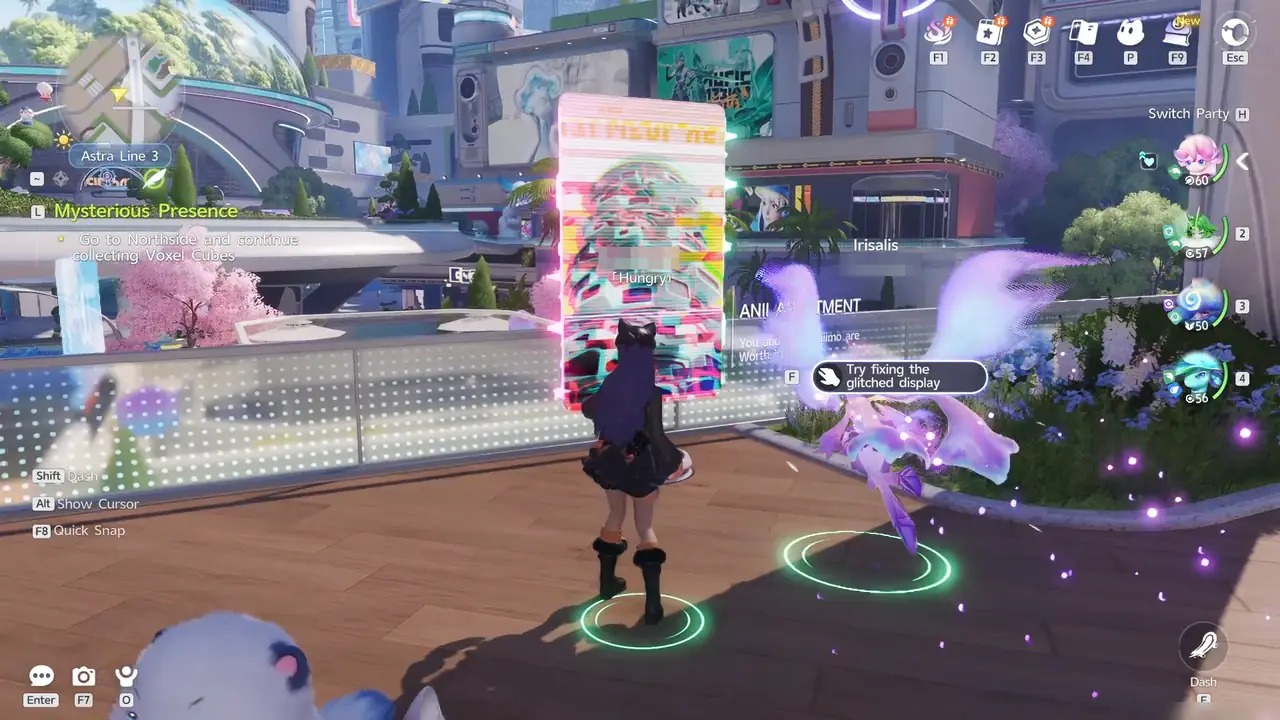
Glitched Display Near Mementos
Voxel Cube 3: solve the puzzle to fix the glitched display near Mementos (map coordinates -0006, 0392).
Super Claw at Jiff's Gear Shop
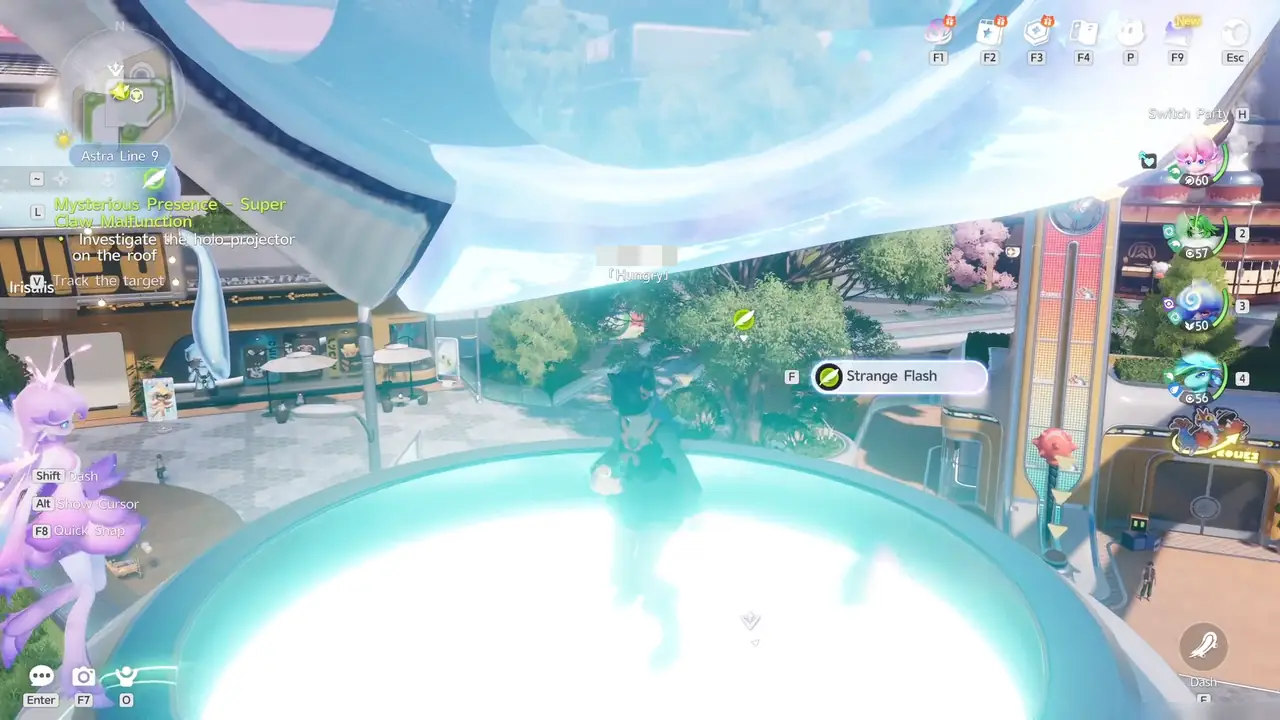
Voxel Cube 4 comes from the Journey Quest Mysterious Presence - Super Claw Malfunction. Go to the Super Claw at Jiff's Gear Shop (map coordinates -0029, 0426) and climb onto its roof. Interact with the "Strange Flash" there (the objective reads "Investigate the holo-projector on the roof") to see the anomaly and get the Voxel Cube.
Swing
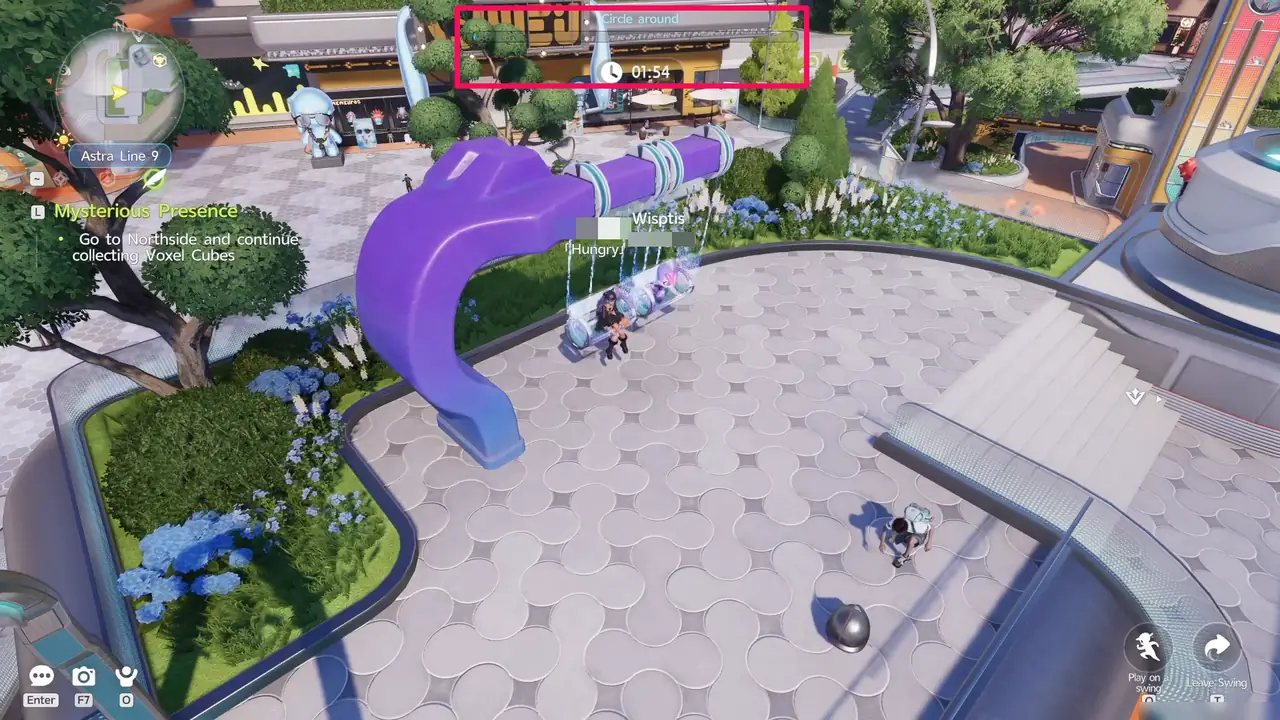
Voxel Cube 5: sit on the swing (map coordinates -0036, 0414) and spin it all the way around. A "Circle around" gauge and a timer appear at the top of the screen, and the anomaly appears once the gauge fills. In our run, the gauge filled after 3 full spins.
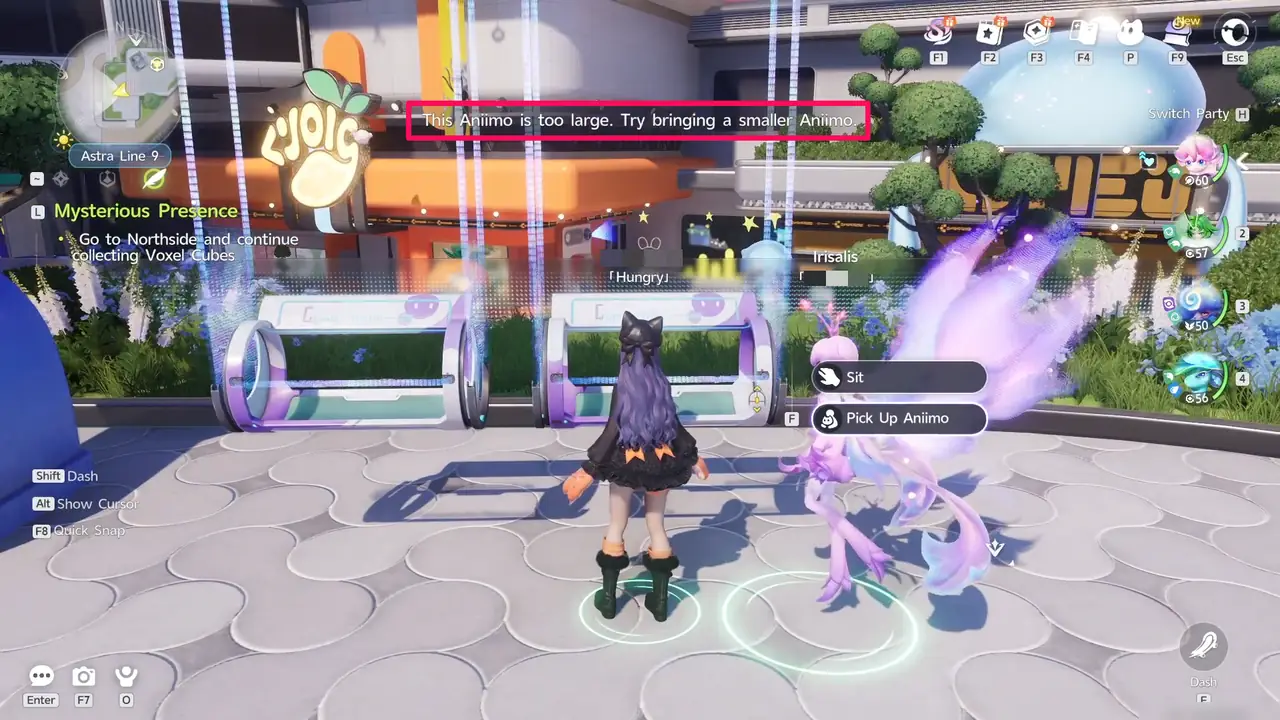
Bring a small Aniimo. If yours is too large, the game shows "This Aniimo is too large. Try bringing a smaller Aniimo." Any small Aniimo works, for example a small Lumin Stage Aniimo such as Wisptis.
Numbers on the Ground Behind ChillBeanz
Voxel Cube 6: step on the numbers on the ground behind ChillBeanz (map coordinates 0042, 0403) in order from 1 to 8 to make the anomaly appear.
Numbers on the Ground Near Horizon Square
Voxel Cube 7: step on the numbers on the ground near Horizon Square (map coordinates 0019, 0508) in order from 1 to 8 to make the anomaly appear.
Seesaw Near Horizon Square
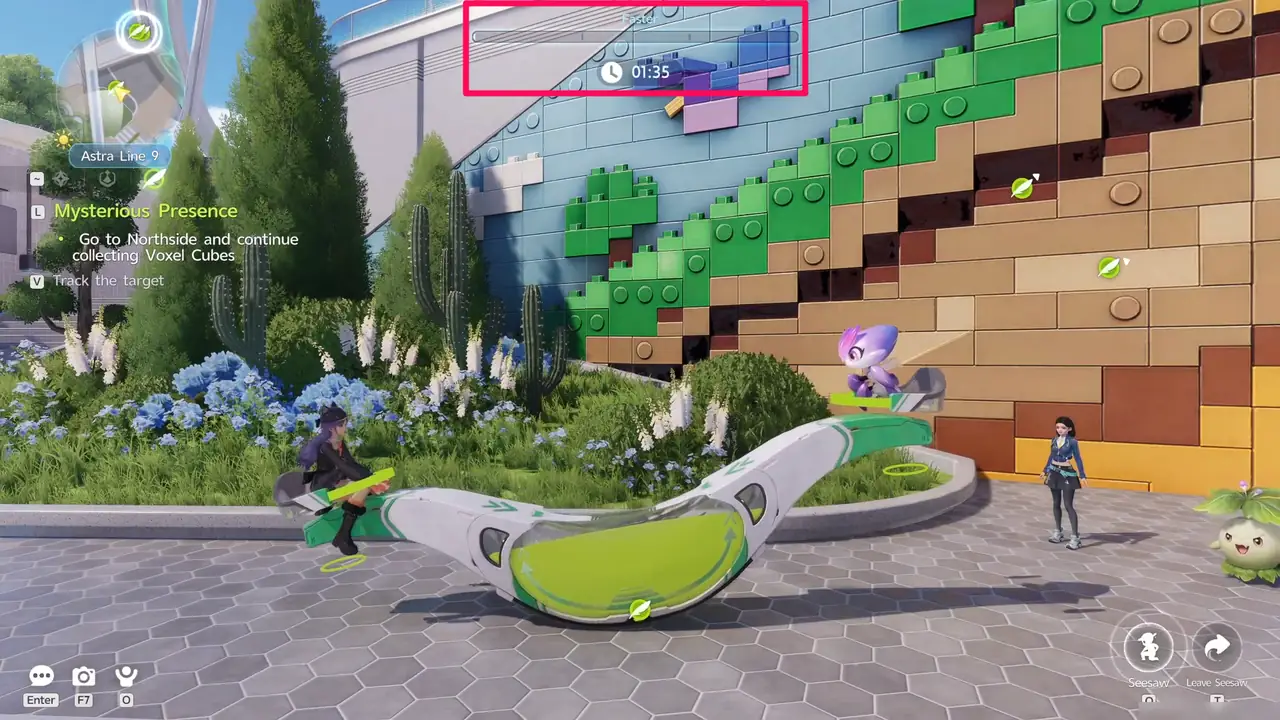
Voxel Cube 8: bring a small Aniimo and get on the seesaw near Horizon Square (map coordinates 0002, 0442). Press the Seesaw button each time your side goes up to speed up. A "Faster" gauge and a timer appear at the top of the screen, and you get the Voxel Cube once the gauge is full.
Bird Band North of Horizon Square
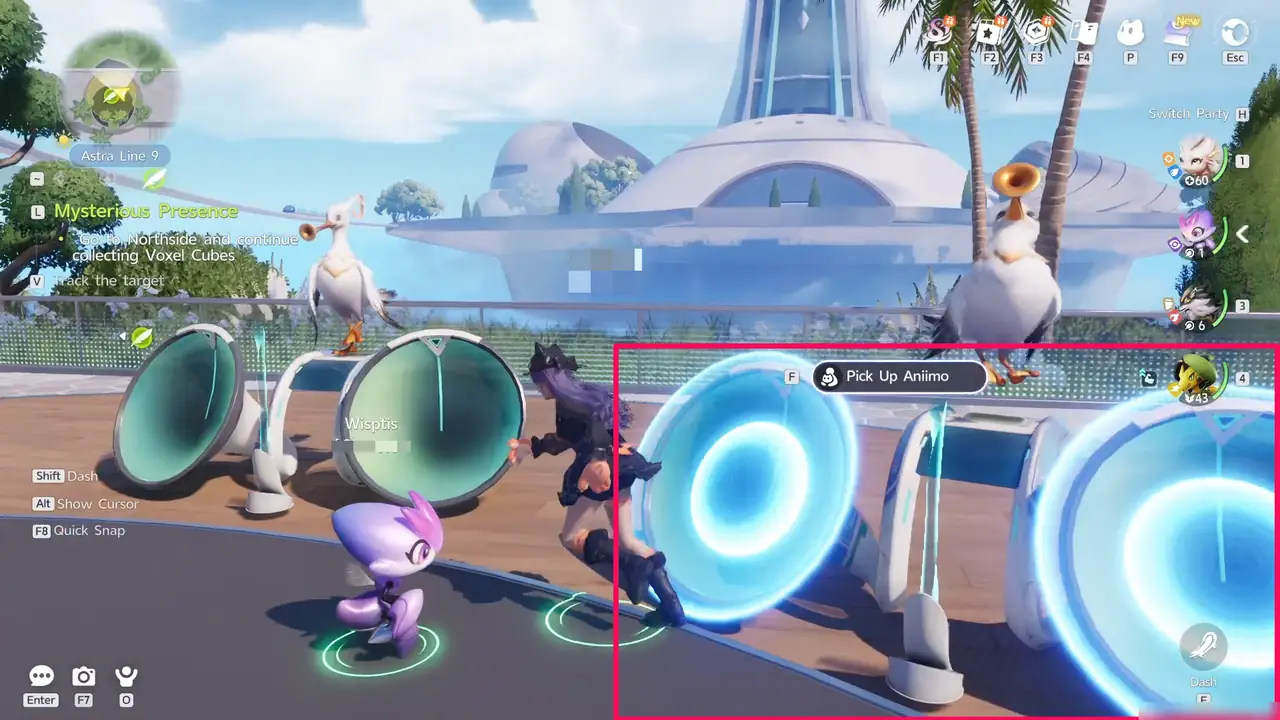
Voxel Cube 9: north of Horizon Square (map coordinates 0058, 0577), talk to Judy, then approach Cornet, Tromber, and Chirpi. Each bird gives you 2 options, and you should always pick the one with "Hey". The speakers light up when you pick correctly. The order you talk to the birds in doesn't matter.
Mysterious Presence Rewards
Completing Mysterious Presence gives you the following rewards:
| Reward | Amount |
|---|---|
| Safaris | x1000 |
| Glimmer | x50 |
| Credits | x60000 |
| Voxel Coin | x200 |
For what Voxel Coins can be spent on, see: Currency Guide: Every Currency and What It Buys
Journey Quests Guide: Unlock, Rewards, and List · Currency Guide: Every Currency and What It Buys · All Guides