
Blooms are where you Nurture an area's ecosystem. This guide covers how to activate a Bloom, what unlocks Nurture, each step of a Nurture and its Wild Surge, how free Nurtures and Vein Essence work, and how Prismatic Energy leads to Prismana Aniimo.
What Is a Bloom?
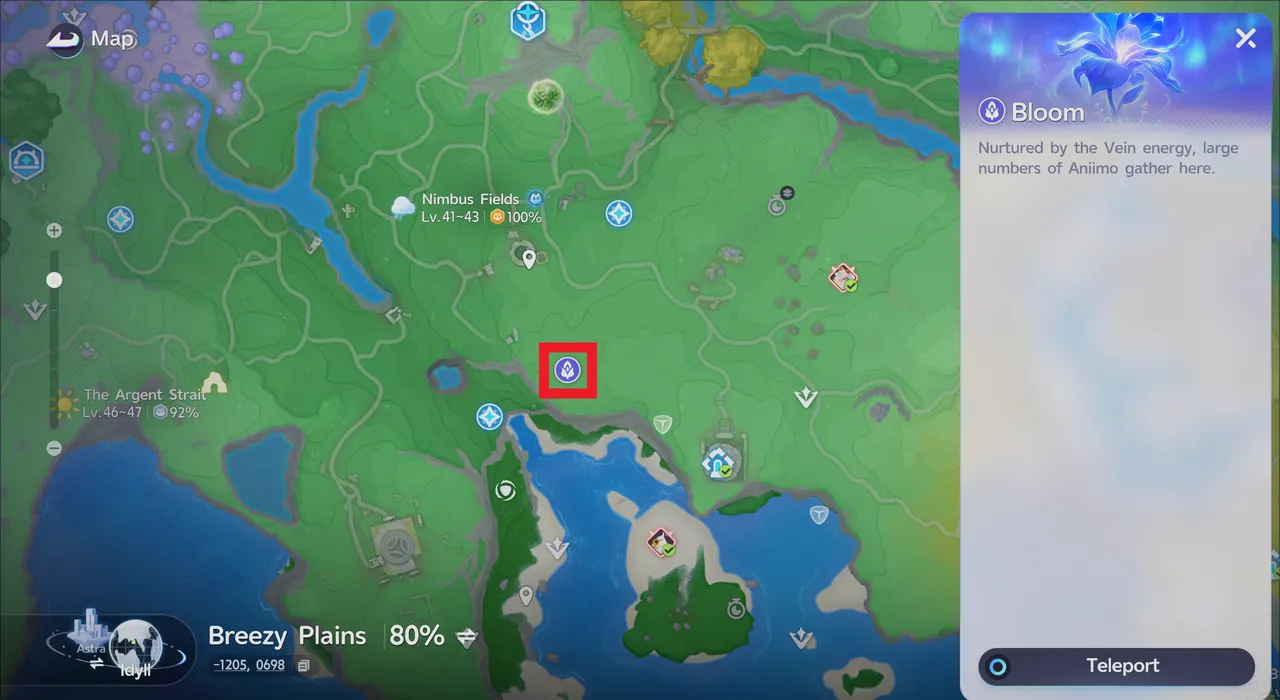
A Bloom is marked on the map with a purple flower icon. Select one and its panel reads "Nurtured by the Vein energy, large numbers of Aniimo gather here." with a Teleport button below. Every region has at least one Bloom, and a Bloom works as a map sync and fast travel point as well as the place where you Nurture.
Prismatic Energy: What a Bloom Builds Up
Each region's Bloom also builds up Prismatic Energy, and that energy is what brings out the region's Prismana Aniimo. Understanding it helps you see why you'd keep Nurturing the same Bloom.
How Prismatic Energy Rises
Prismatic Energy is tracked per region and rises each time you finish a Nurture (covered below) and harvest its Veinfruit. It moves through the states Empty, Very Low, Slight, Abundant, Very High, and Full, and once it reaches Full, the region's Prismana Aniimo appears.
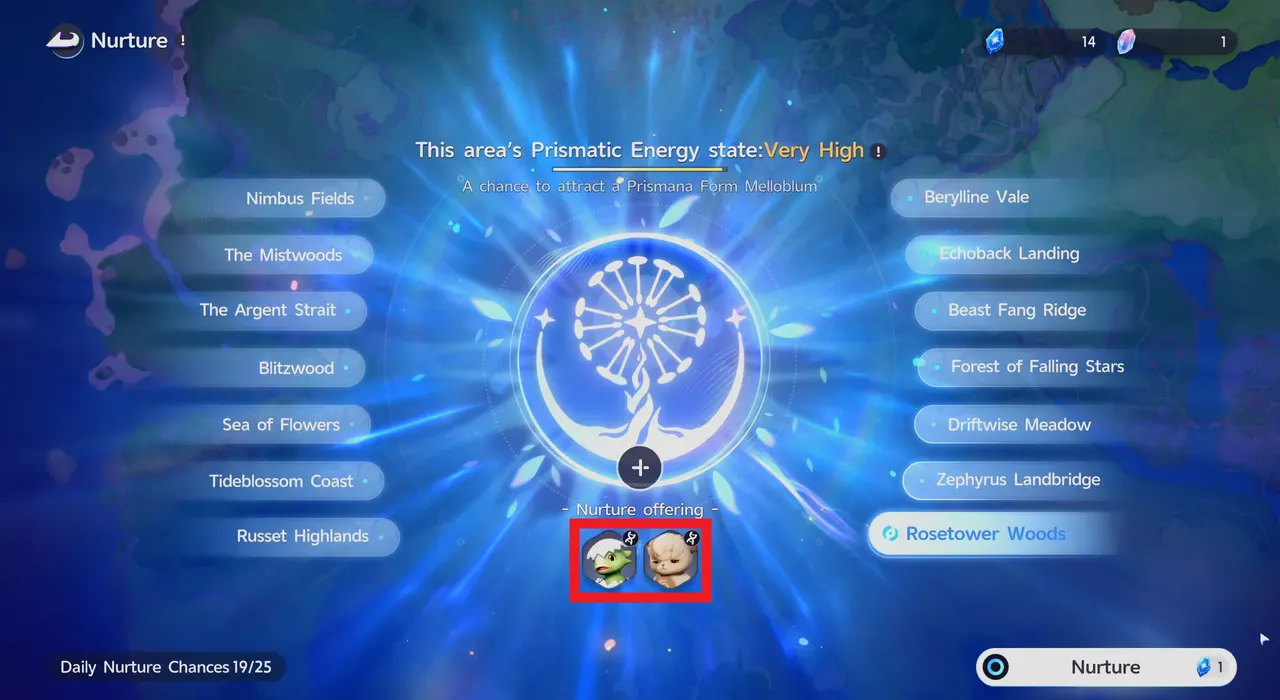
Check the State on the Nurture Screen
The top of the Nurture screen shows the region's current state and its possible Prismana, such as "This area's Prismatic Energy state: Very High" and "A chance to attract a Prismana Form Melloblum". When the state reaches Full, the game shows "This area's Prismatic Energy state: Full" and the region's Prismana Aniimo appears.
How to Activate a Bloom
Walk up to the Bloom and interact with it to activate it. Activating a Bloom adds the surrounding area to your map, and from then on you can teleport to it from its map panel.
How to Unlock Nurture
Earn the Bronze Collection Badge
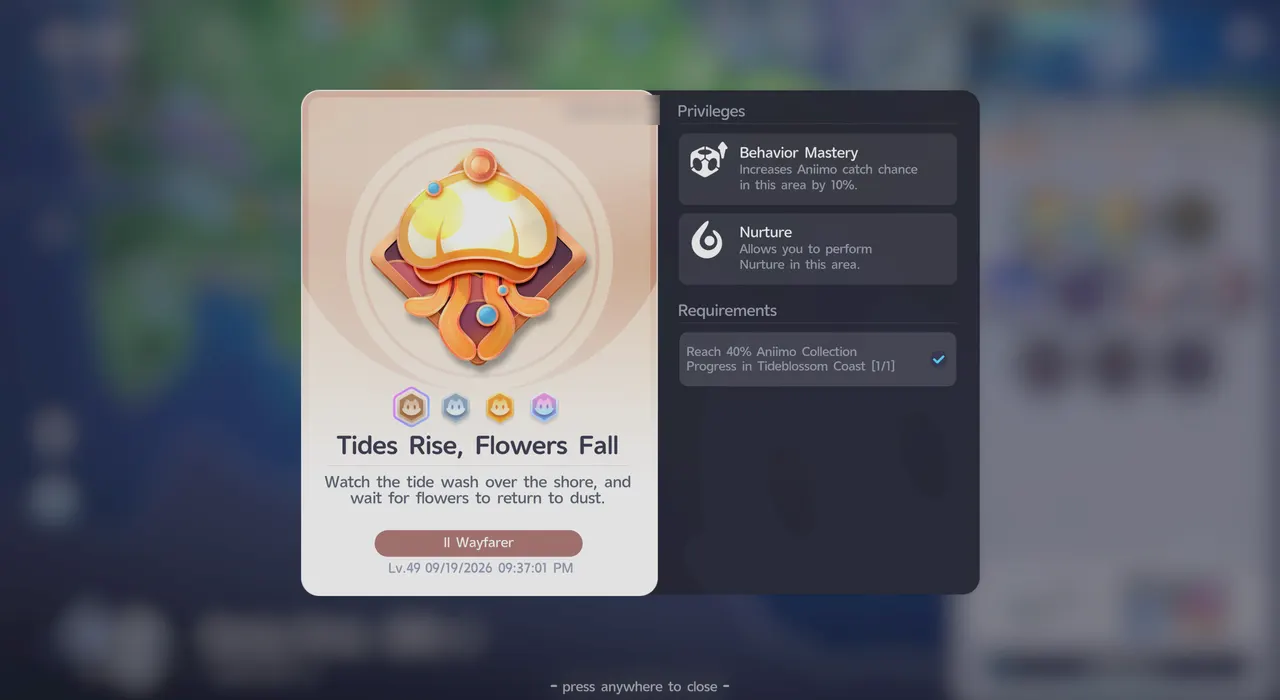
Nurture opens up in a region once you earn that region's Bronze Collection Badge. You don't need to infuse any Lumin Amber first. A Collection Badge marks an exploration milestone in a region, and the Bronze one requires "Reach 40% Aniimo Collection Progress". Along with Nurture, it grants Behavior Mastery, which increases Aniimo catch chance in that area by 10%.
Check Your Collection Progress
To check your progress, select a region on the map. Its Aniimo Collection Progress gauge appears in the panel on the right, with marks at 70% and 100%.
How to Nurture a Bloom
- Go to a Bloom or open the Breezy Plains Branch
Teleport to an activated Bloom in the region you want, or open the Breezy Plains Branch screen and select Nurture.

- Select Nurture at the Bloom
Interact with the Bloom and select Nurture.

- Catch every Aniimo in the Wild Surge
A Wild Surge begins, and 20 Aniimo that live in the region gather in a circle around the Bloom. Your goal is to catch all of them before the 3-minute timer runs out. Aniimo inside the circle don't attack or flee, and you can use any Aniipod.

- Release the Prismatic Energy
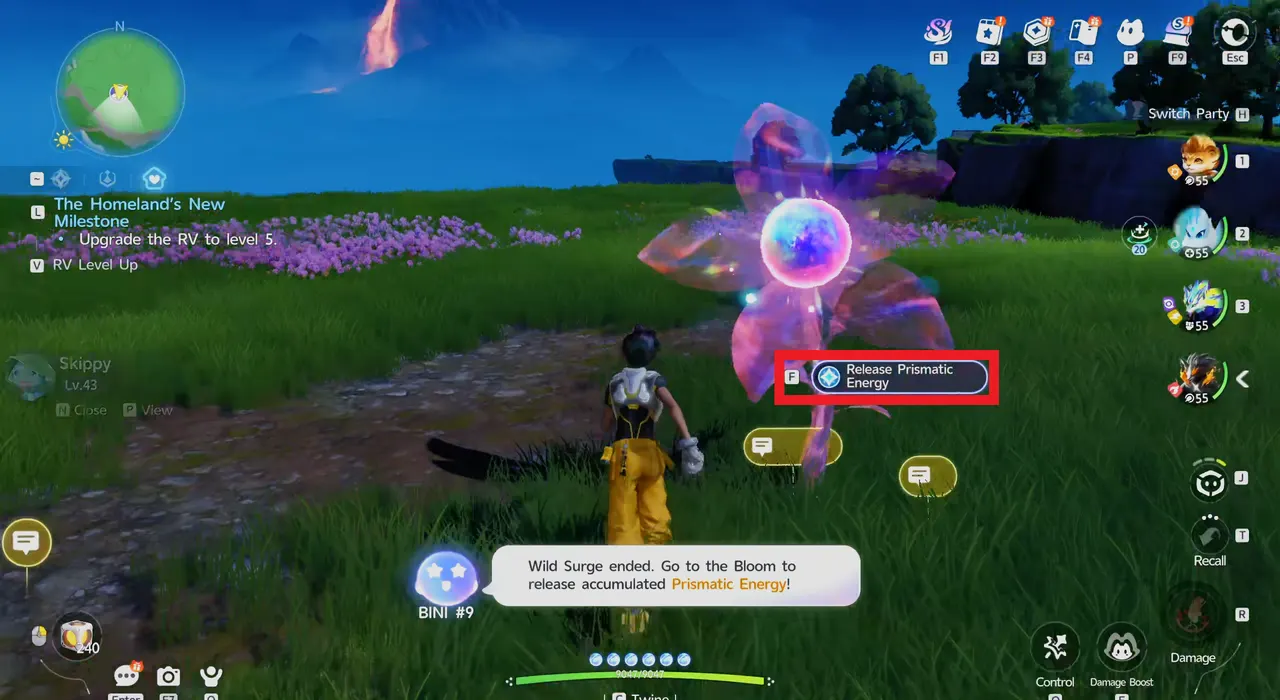
When the surge ends, the game tells you "Wild Surge ended. Go to the Bloom to release accumulated Prismatic Energy!" Interact with the Bloom and select Release Prismatic Energy. This raises the Bloom's level and makes a Prismana Aniimo more likely on your next Nurture.
Prismana and Lucky Strikes
Once a Prismana Aniimo appears, the Bloom's energy goes back to empty, so you need to Nurture it again. Triggering a Lucky Strike while catching also adds Prismatic Energy to the region's Bloom, and the game shows: "Congratulations on triggering a Lucky Strike! The added Prismatic Energy has a chance to draw out Prismana Aniimo!"
Tip: Raise Your Daily Nurture Cap with Prospering Clusters
Infusing 30 Lumin Amber into the Breezy Plains Branch unlocks Prospering Clusters. Its description reads: "In the Breezy Plains, the daily Nurture Ecosystem cap is raised by 10."
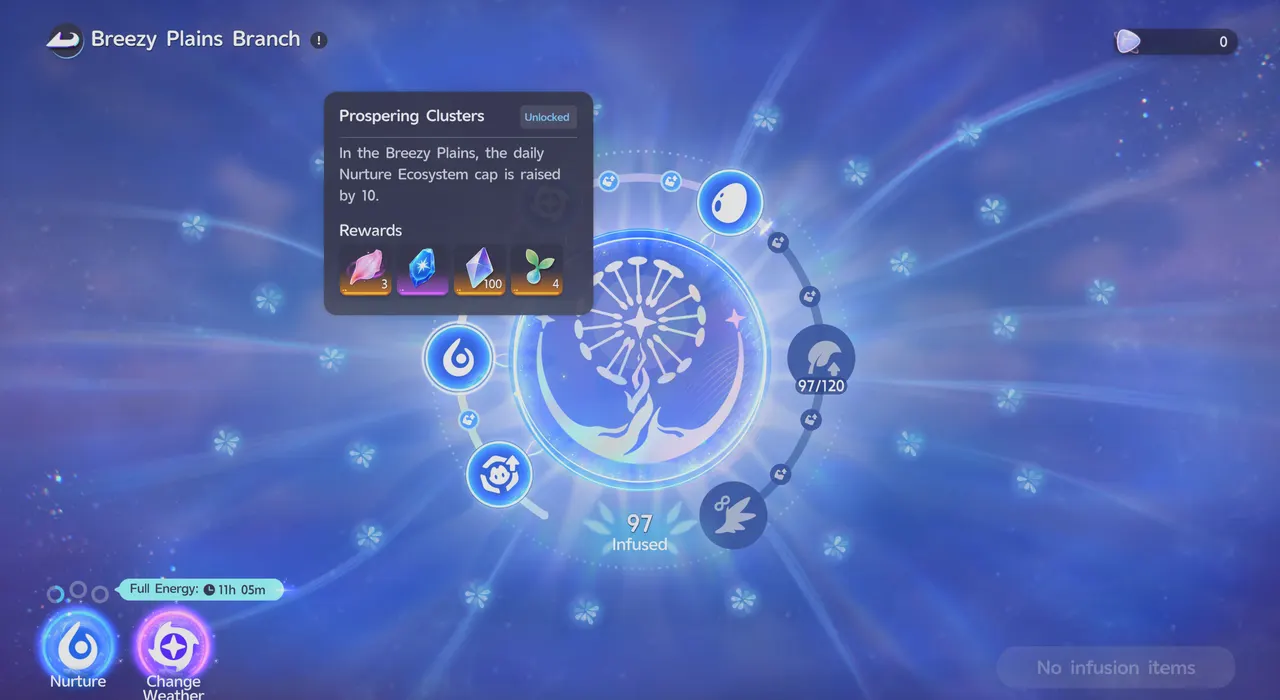
That gives you more room to Nurture. The Nurture screen counts your Nurtures for the day against a daily cap, shown as "Daily Nurture Chances 19/25", and Prospering Clusters raises that cap by 10.
Tip: Use Your Free Nurtures Before They Cap Out
Use your free Nurtures regularly. One free Nurture comes back each day at 04:00 server time, and unused ones only bank up to 3, so once you have 3, new ones stop building up. The timer on the Breezy Plains Branch screen shows how long until the next one comes back (11h 57m in the screenshot), and the Nurture screen shows how many you have left, such as "2 free chance(s)".
Tip: Keep Vein Essence in Stock
After the free ones are gone, each Nurture costs 1 Vein Essence, so keep some in stock if you want to Nurture more. The Stamp Shop's Weekly tab sells Vein Essence for 50 Windborn Stamps, up to 10 per week, and because that limit is weekly, buying your 10 each week keeps a steady supply. Vein Essence also comes from Elite Training, Catch Completion, Nurture Branch, and Holo-Battle Interlink.
Use a Nurturing Offering to Attract Specific Aniimo
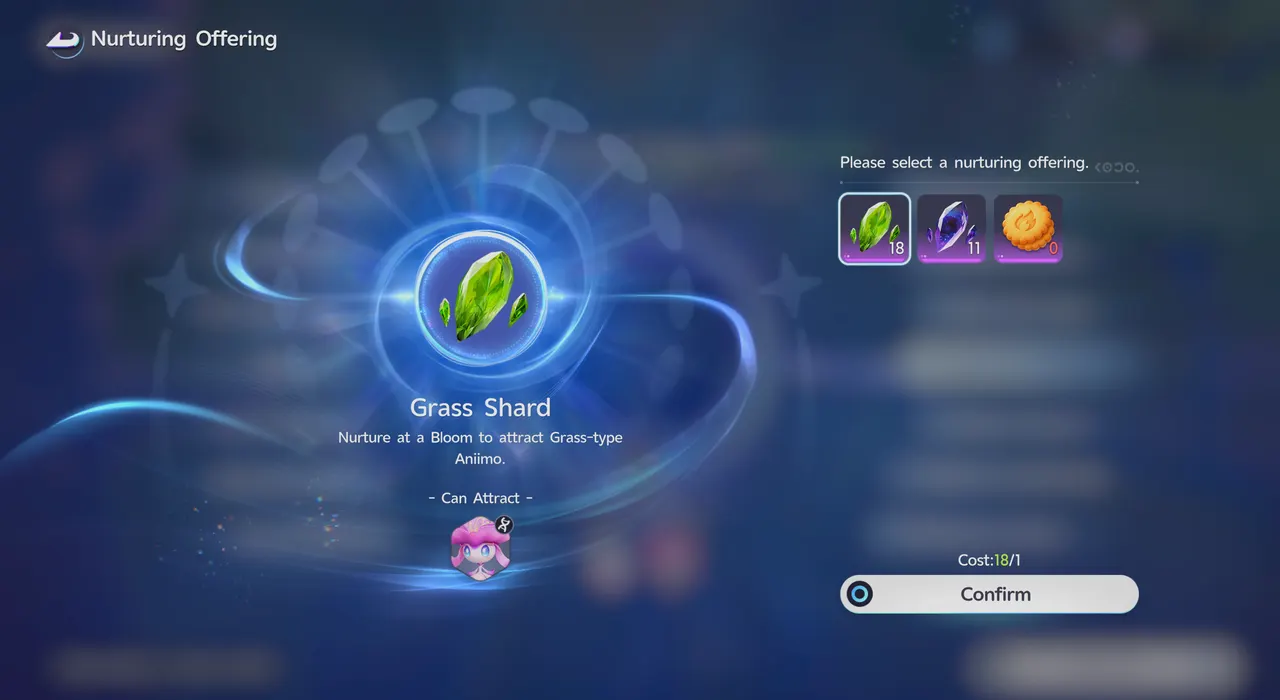
Before a Nurture, you can place a Nurturing Offering to steer which Aniimo gather in the Wild Surge. Select the + icon in the middle of the Nurture screen and pick an elemental shard. For example, the Grass Shard reads "Nurture at a Bloom to attract Grass-type Aniimo.", costs 1 shard per use, and shows the Aniimo it can attract under Can Attract.
What Offerings Can't Do
Offerings only attract families that already live in that region. They don't change which Prismana appears, and they don't guarantee one.
Where to Get Shards
There are 8 shards: Fire, Water, Wind, Ice, Lightning, Earth, Grass, and Dark. Each costs 5,000 Credits in the Shop's Nurture tab, and they can also come from Field Containers.
Tips on Catching Aniimo in a Wild Surge
Check the Portraits Before You Nurture
Wild Surge Aniimo come from the region's own population, and the Aniimo portraits on the Nurture screen show which ones can appear in that Nurture. Look at them before you start so you know what you're about to catch.
Keep Using Your Usual Catch Boosts
Backstab, sleep, and your Aniipod type still raise your catch chance during a Wild Surge (for example x1.5 Backstab, x100 In deep sleep, and x2 Aniipod Mega), and states that normally block catching, such as Rampaging, don't apply. Keep an eye out for Umbral and Sparkling Aniimo as well, since they can show up.

Use Tumblers for the Wild Surge
A Tumbler normally gets a 2x catch rate, but against Aniimo drawn in by Nurture it gets 6x, and one Tumbler can catch up to 10 Aniimo. With 20 Aniimo gathered around the Bloom, a Wild Surge is where a Tumbler pays off most.
Have a Sparkling Cube Ready for the Prismana
The best Aniipod to use on a Prismana Aniimo is a Sparkling Cube. It guarantees the catch ("Guaranteed Success" appears when you aim it), and the Aniimo you catch with it always has a Perfect potential rating and is Sparkling.

Best Prismana Pact Pick and Why · How to Catch Aniimo: Controls and Catch Rate · How to Get Sparkling Aniimo (Shiny) · Aniimo Index · All Guides