
Holo-Battle Interlink is a team challenge where Stars unlock seasonal rewards. Here's how to unlock it, whether you can play solo, how to build your team, the best teams for the Phase 4 Alphas, what you can earn, and tips for clearing it.
What Is Holo-Battle Interlink
Holo-Battle Interlink is a team challenge for 1 to 4 players. You earn Stars based on how well you do, and rewards unlock once your Stars reach set thresholds.
You can queue solo and be matched with other players, or go in with a premade party of 2 to 4 players.
The mode has 3 routes, each led by an Alpha that changes with each phase, and each route has its own Star cap. The recommended level shown on the mode screen is Lv. 60.
| Route | Star cap |
|---|---|
| Alpha Irisal (Left) | Up to 15 Stars |
| Alpha Panpanta (Middle) | Up to 30 Stars |
| Alpha Rookey (Right) | Up to 15 Stars |
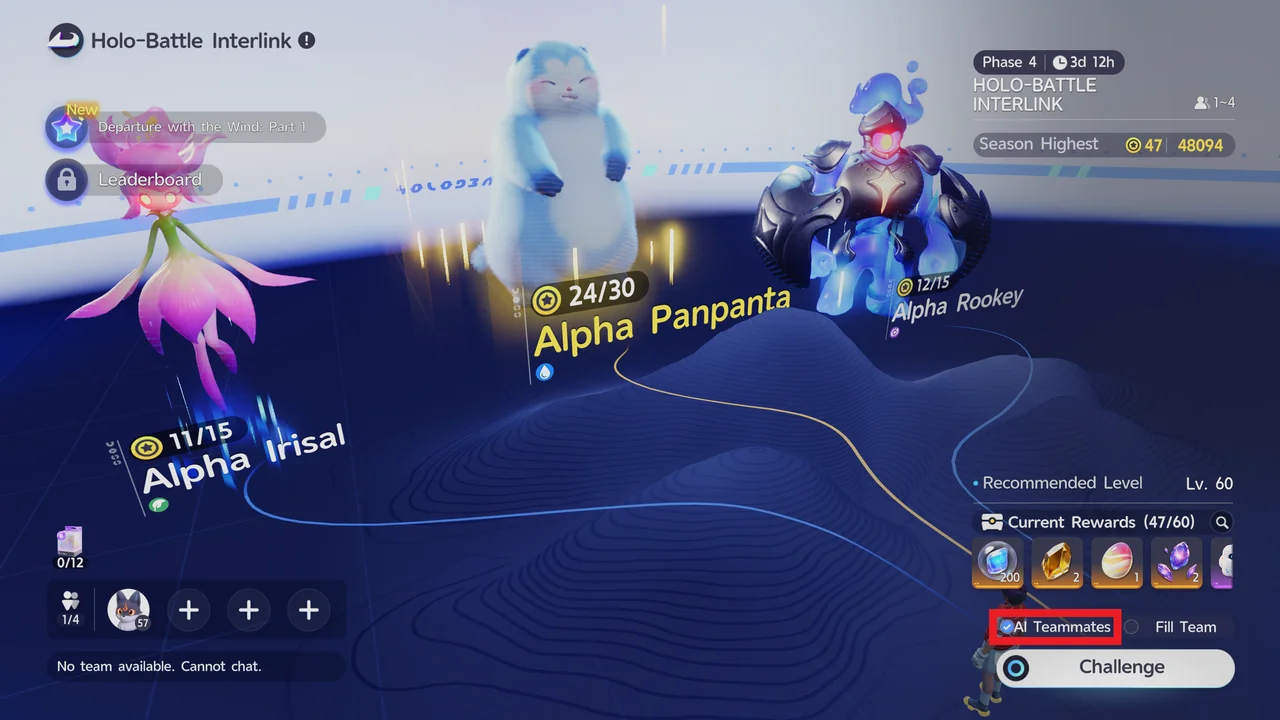
The three routes add up to 60 Stars, which matches the 60 shown next to Current Rewards (47/60 in our screenshot).
Holo-Battle Interlink Team Formation
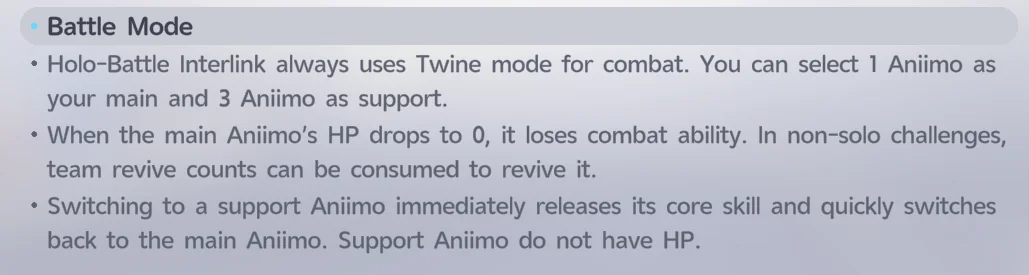
Teams work the same way as in Operation: Egg Heist. The first Aniimo in your party is your main Aniimo and fights on the field. The other 3 Aniimo act as support: they come in briefly to use their core skills, and then you switch back to your main Aniimo automatically.
The in-game Battle Mode rules add a few more details. Holo-Battle Interlink always uses Twine mode for combat. When your main Aniimo's HP drops to 0, it loses combat ability, but in non-solo challenges you can use up the team's revive counts to revive it. The support Aniimo have no HP.
How to Unlock Holo-Battle Interlink
Holo-Battle Interlink unlocks after you clear the Lv. 55 Title Promotion Assessment.
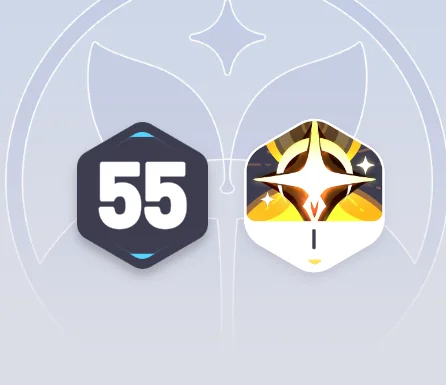
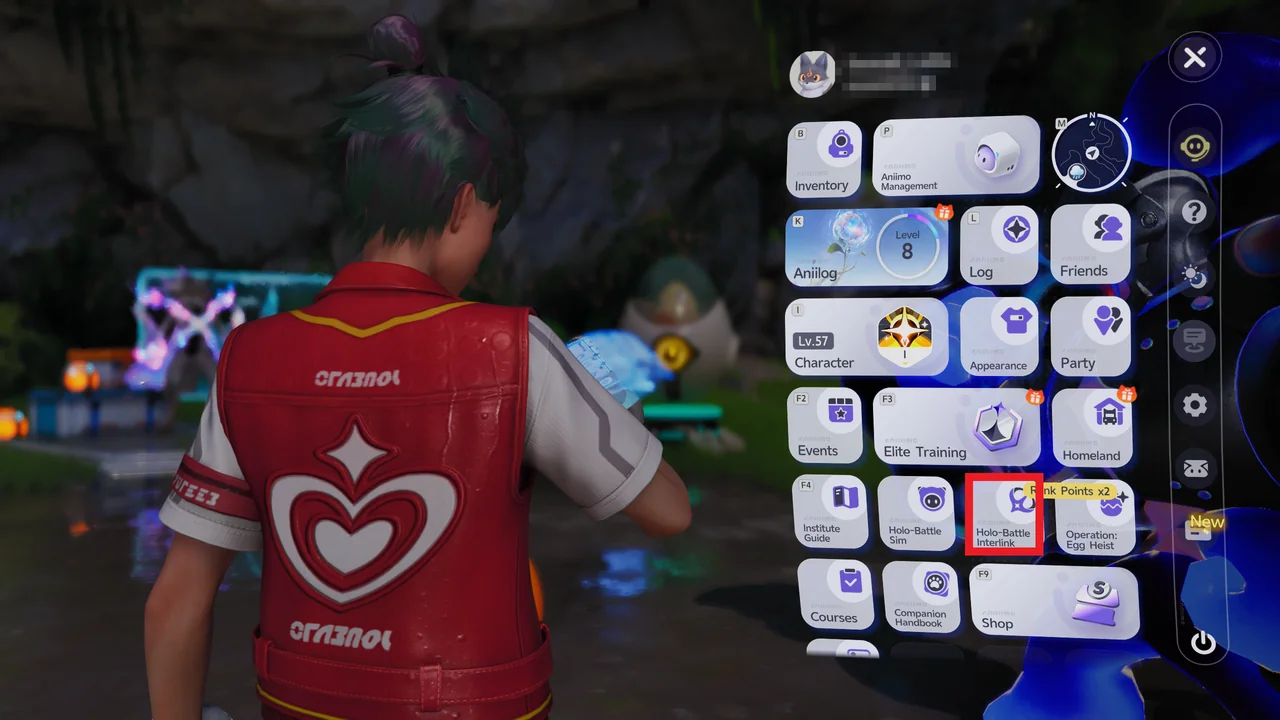
Clearing this assessment promotes you to the I Trailblazer Title. Once the mode is open, you can enter it at the hall of the Polaris Institute in Astra, or open it straight from the main menu.
Can You Play Holo-Battle Interlink Solo?
Yes. Check AI Teammates on the mode screen before you press Challenge, and the empty slots in your four-player squad are filled with AI teammates. You can see the option at the bottom right of the mode screen above.
AI teammates also help with the Chainbot challenge. In our runs, when a chain linked our recorder, the AI teammates quickly moved in to break it and free them.
How to Build Your Team
Only your main Aniimo stays on the field for most of the fight. The other three step in briefly to use their core skills. In non-solo challenges, you can revive if you get knocked out, and the team has 4 revives in total. A Pathfinder who passes out also revives automatically once the other team members finish the battle.
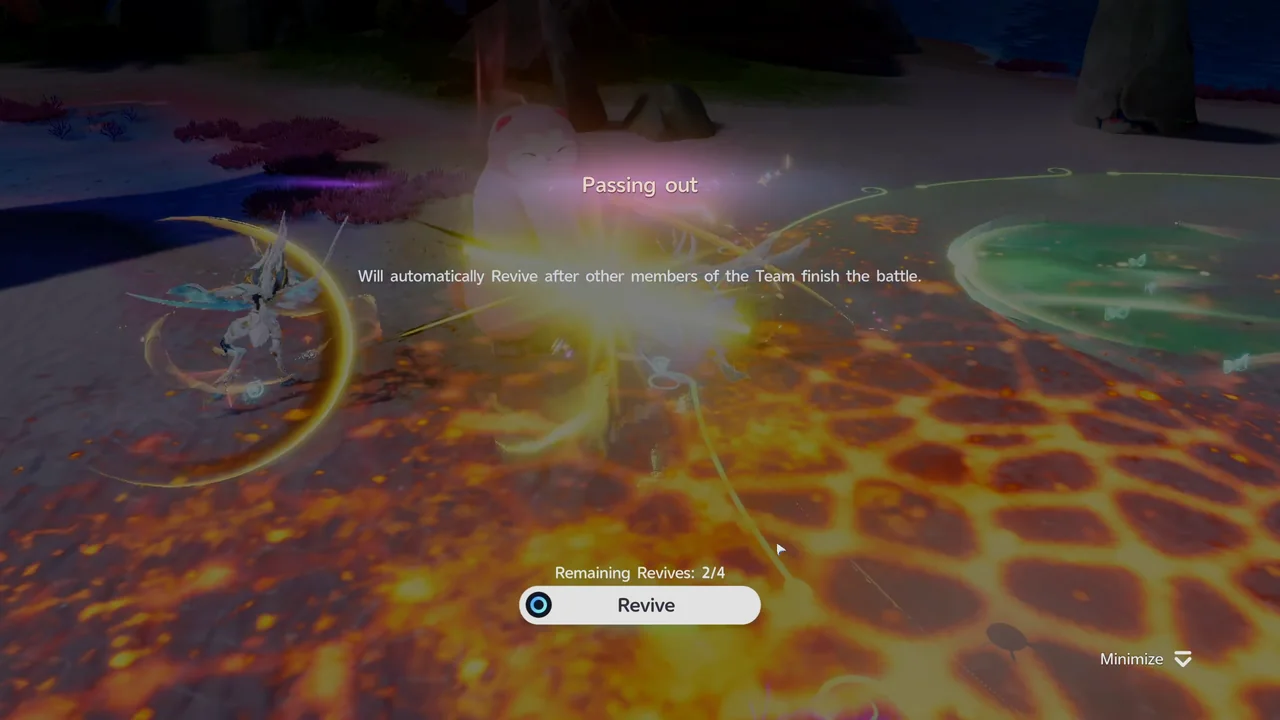
Pick a DPS or BREAK Aniimo as Your Main
Your main Aniimo is the only one that uses its full set of skills, so make it a DPS or BREAK Aniimo. Pick one whose element counters the Alpha you are facing. For example, against Alpha Irisal, a Fire, Wind, or Dark DPS or BREAK Aniimo works better.
The other three slots only cast their core skill and then switch back, so fill them with Support, REGEN, or Heal Aniimo.
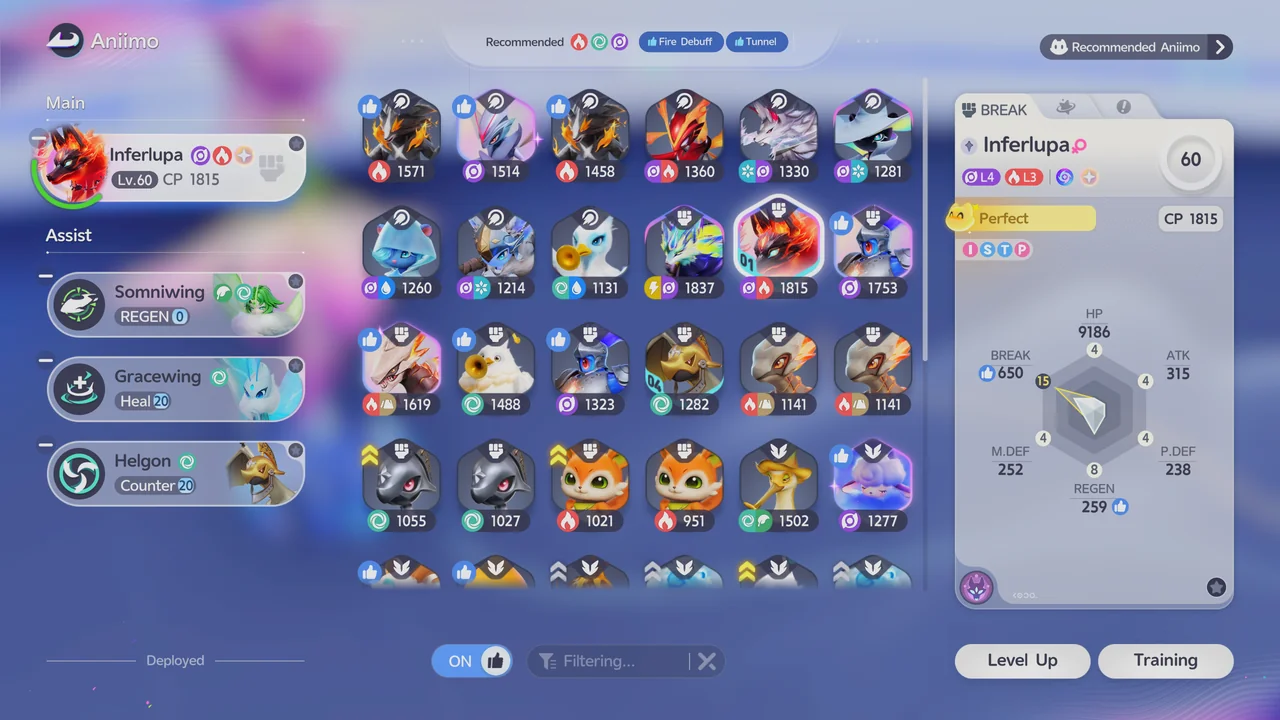
Bring Support Aniimo That Can Heal
Bring a support Aniimo that can heal during battle. Whenever you can, include Somniwing and Glacy for better survivability.
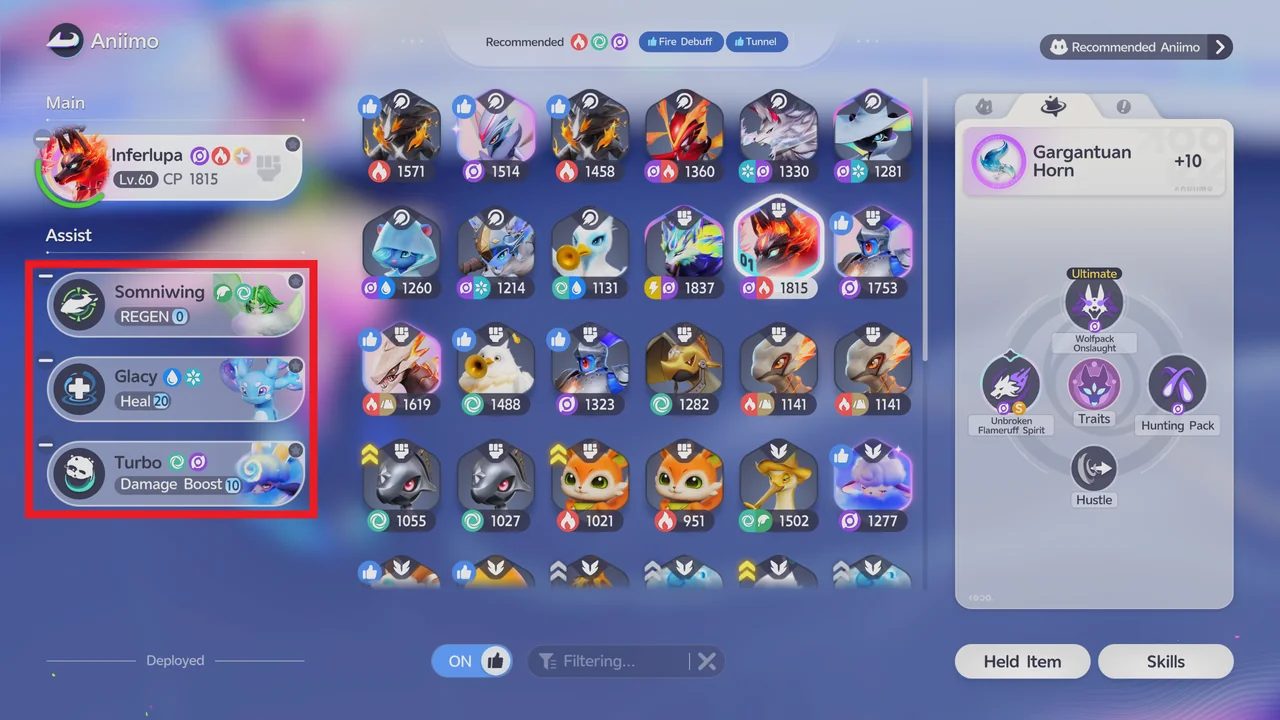
Add an Aniimo That Can Use Counter
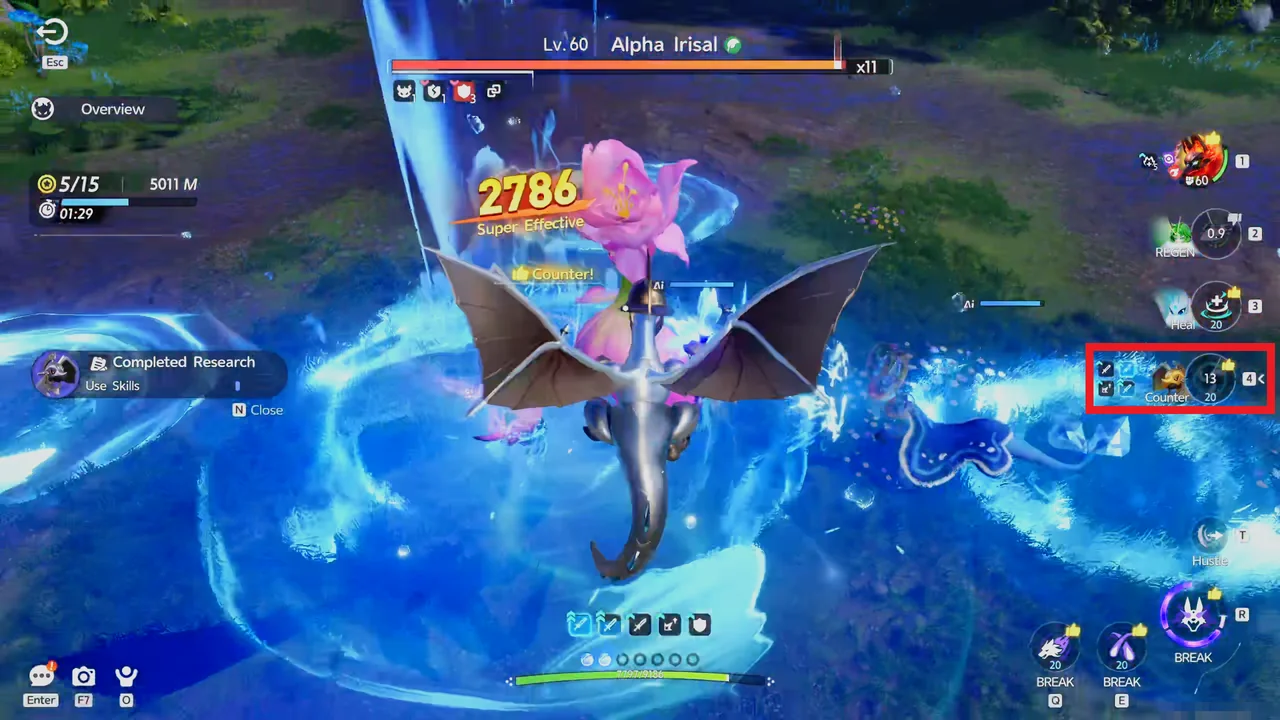
Add an Aniimo that can use Counter, such as Helgon. Counter protects you from incoming damage while returning damage to the enemy, which helps most when your healing skills are on cooldown.
Challenges and Special Offerings
Challenge Details are extra modifiers on each Alpha. They bring effects such as increased damage, buffs, debuffs, and status effects. Each Alpha's are listed in the best teams section below.
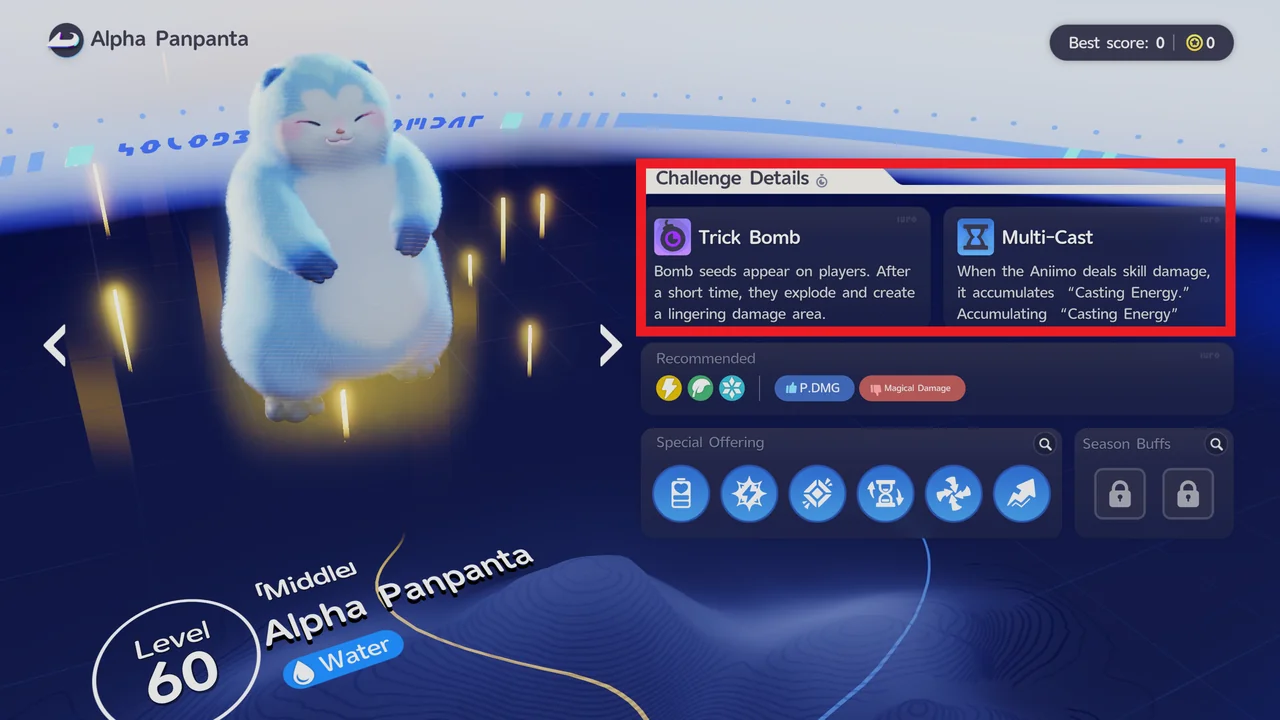
Special Offerings are team buffs, such as more damage, faster Ultimate charge, or a weaker boss. In a party, only the team leader can pick them.
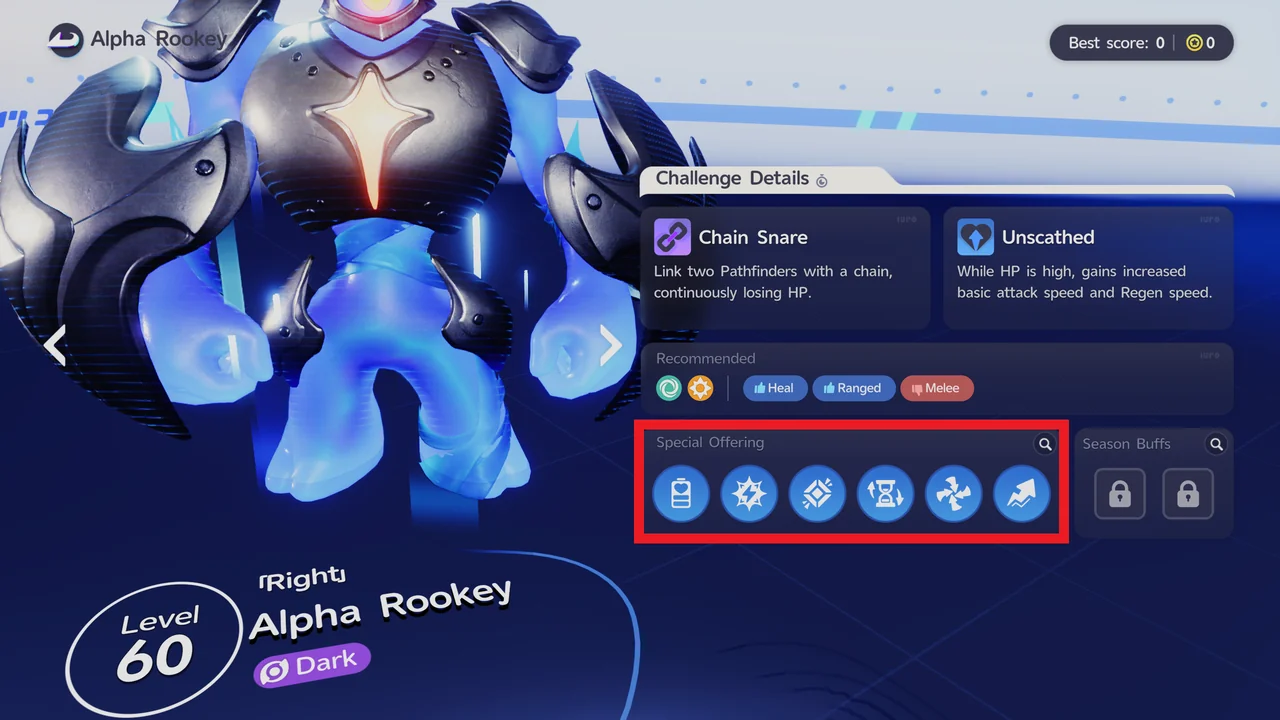
Support Rewards go to players who help with other Pathfinders' runs and push up their Star Ranks.
Best Teams for Holo-Battle Interlink (Phase 4)
The three Alphas change with each phase. These are the Phase 4 Alphas we recorded on 10/13/2026, so check the mode screen for the current lineup. The team picks are our recorder's recommendations.
Alpha Irisal (Left Route)
| Info | Details |
|---|---|
| Element | Grass |
| Weakness | Fire, Wind, and Dark |
| Recommended | Fire Debuff, Tunnel |
| Chainbot | Every 45s, 1 robot appears on the field (up to 3 at a time) and fires a chain that links 1 Pathfinder and stuns them. Destroying the robot breaks the chain and removes the stun. |
| BREAK Crit | Damage dealt to Alphas in Break State is always a Crit. |
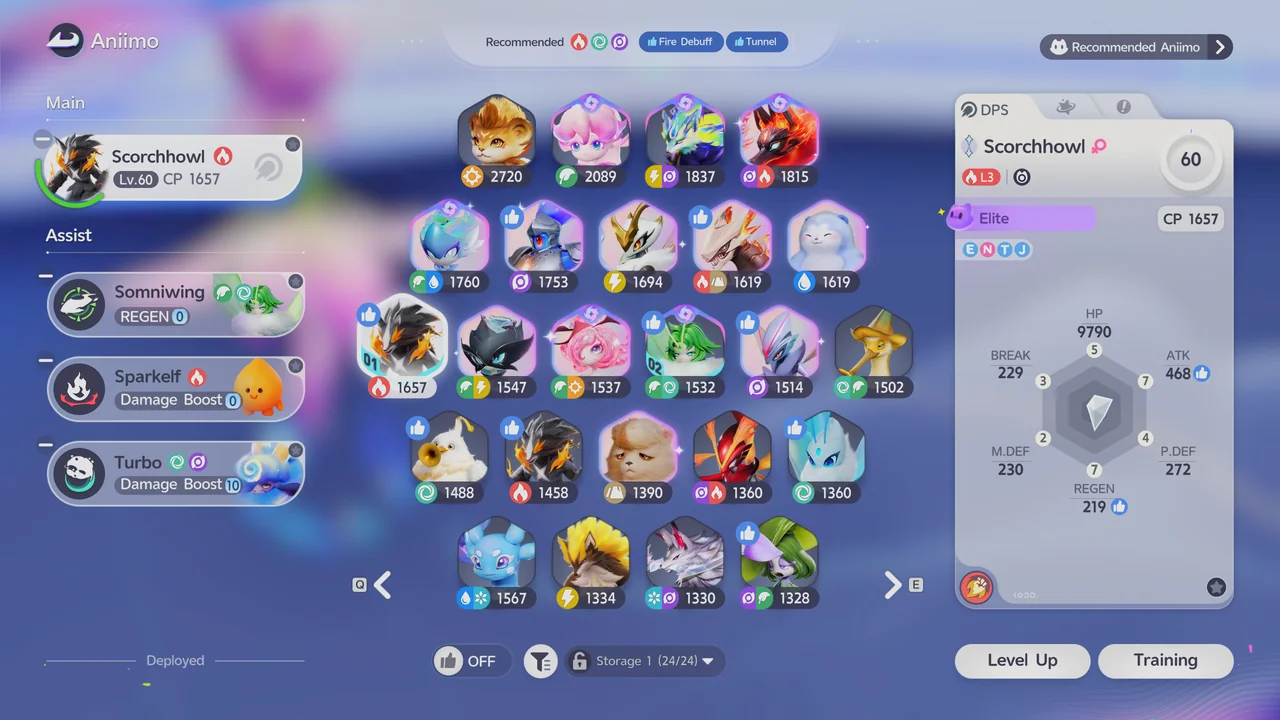
| Main Aniimo | Scorchhowl, Inferlupa, or Magmarex |
| Support Aniimo | Somniwing, Sparkelf, Turbo |
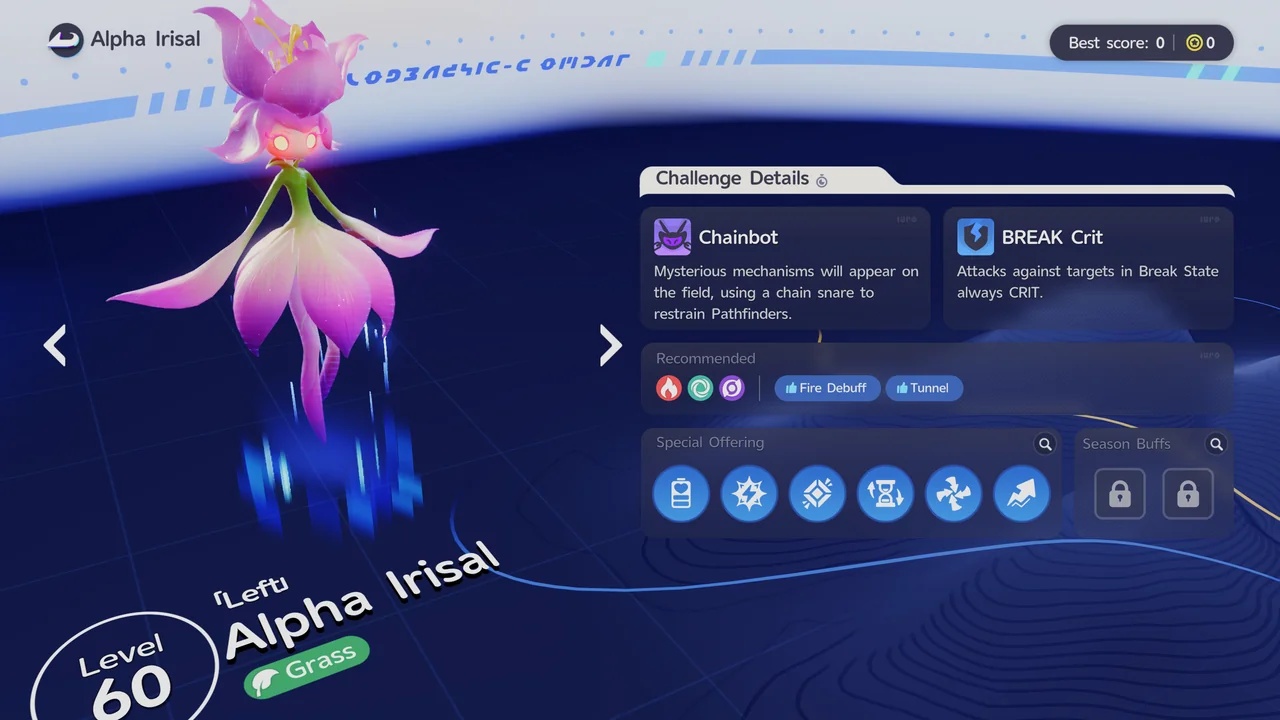
Choose Inferlupa or Magmarex if your team has no BREAK Aniimo. Otherwise, choose Scorchhowl. Somniwing is great for EP recovery, while Sparkelf or Turbo gives a damage boost.
Alpha Panpanta (Middle Route)
| Info | Details |
|---|---|
| Element | Water |
| Weakness | Lightning, Grass, and Ice |
| Recommended | P.DMG (Magical Damage is not recommended) |
| Trick Bomb | Every 45s, a bomb seed appears on a random Pathfinder. After 5s, the seed lands and shows a bomb warning. After 2s more, the bomb explodes and leaves a damage zone on the ground for good. |
| Multi-Cast | Each time the Aniimo deals skill damage, it gains 1 Casting Energy. At 12 Casting Energy, its next skill costs 0 EP and has no cooldown. |
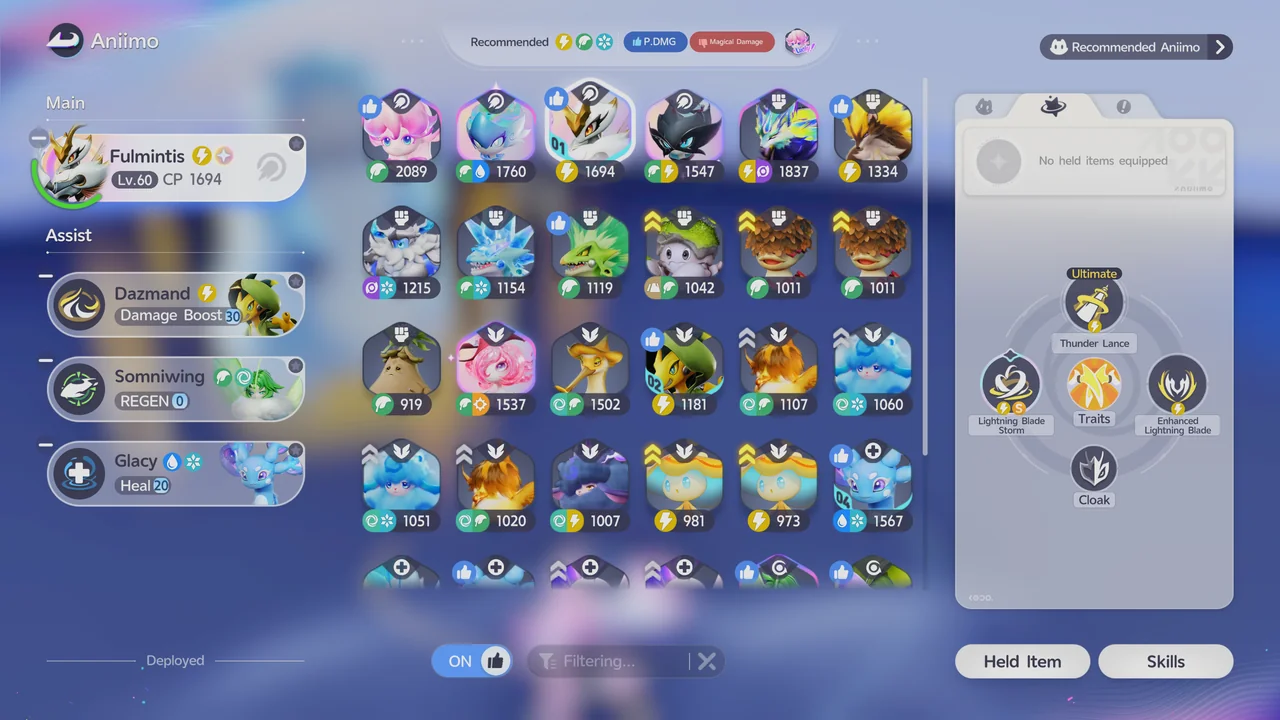
| Main Aniimo | Fulmintis, Blazen, or Irisal |
| Support Aniimo | Somniwing, Dazmand or Turbo, Glacy |
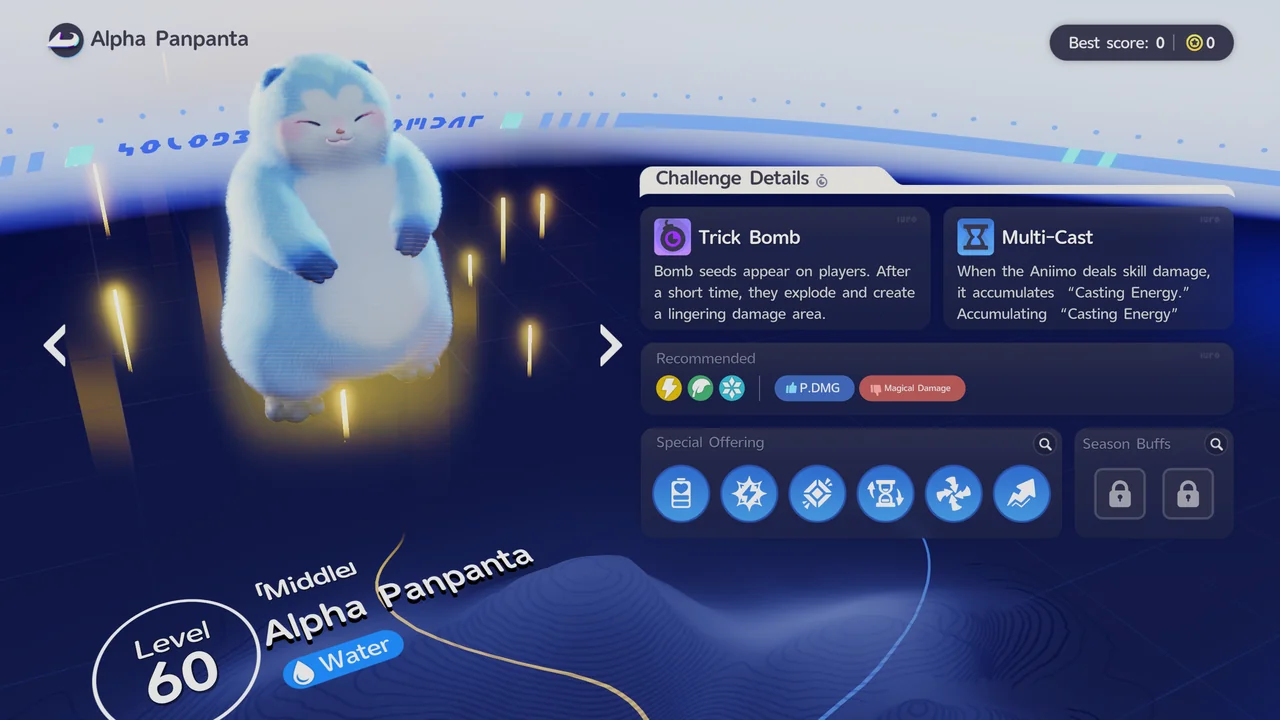
Our recorder rates Fulmintis as one of the best DPS Aniimo in the game, and with Somniwing it can keep its Energy-based attacks going for longer. Choose Irisal if you prefer a ranged playstyle, or Blazen if your team needs a BREAK Aniimo. Somniwing is great for EP recovery, Dazmand or Turbo gives a damage boost, and Glacy provides much-needed healing.
Alpha Rookey (Right Route)
| Info | Details |
|---|---|
| Element | Dark |
| Weakness | Wind and Light |
| Recommended | Heal, Ranged (Melee is not recommended) |
| Chain Snare | At regular intervals, chains link 2 random players on the field, and linked players keep losing HP. When the chains touch the Alpha, they bind it for 1s, briefly stopping it and dealing BREAK damage. The chains then break. |
| Unscathed | While the Aniimo's HP is above 80%, its basic Attack Speed rises by 60% and its REGEN speed rises by 40%. |
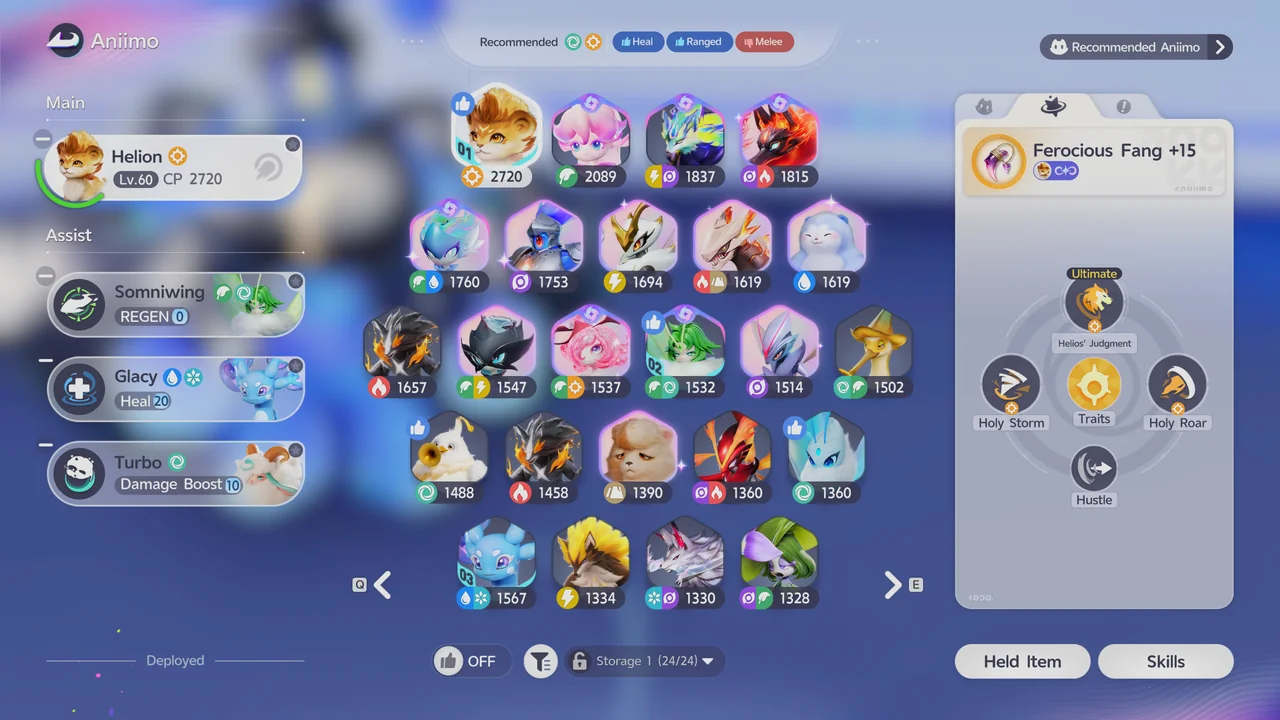
| Main Aniimo | Helion or Lunara, Helgon |
| Support Aniimo | Somniwing, Turbo, Glacy |
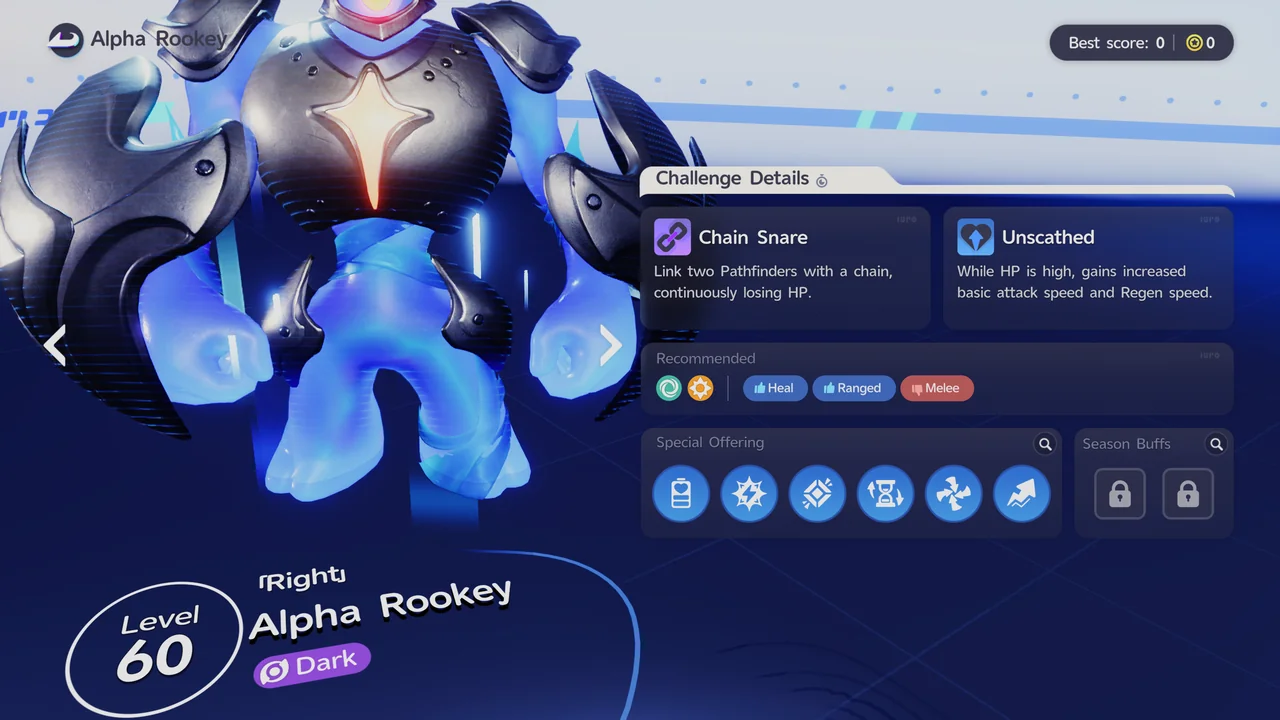
Helion or Lunara are solid choices that work best against Dark types, while Helgon is a BREAK Aniimo that also works against Alpha Rookey. Somniwing is great for EP recovery, Turbo gives a damage boost, and Glacy provides much-needed healing.
Tips for Clearing Holo-Battle Interlink
Some of these tips follow from the mode's rules, and the rest are our recorder's own suggestions.
| Tip | Details |
|---|---|
| Use Aniimo that get the Season Journey buffs | This is one of the key ways to clear Holo-Battle Interlink. The Season Journey buffs give your team extra damage and extra damage reduction against elements your team members counter, so bring Aniimo with an element advantage over the enemies to get the full effect. |
| Come back to raise your best | Only your best Stars on each route are recorded, and rewards unlock from the sum of those bests across all 3 routes. You can return to a route later to raise its best. |
| Power up your Aniimo | This is a high difficulty challenge. We recommend raising your Aniimo to their max and boosting their potential to get the most damage out of them. |
| Keep your main Aniimo standing | Your support Aniimo have no HP, so the fight rests on your main Aniimo. When its HP drops to 0 it loses combat ability, and only non-solo challenges let you spend the team's revive counts to bring it back. |
| Queue with a premade party | Our recorder suggests going in with a premade party of 2 to 4 players, which lets you plan your team together. |
| Put team synergy first | Our recorder suggests putting team synergy ahead of individual power. |
| Check enemy weaknesses and resistances | Our recorder suggests noting each enemy's weaknesses and resistances before you go in. |
Season Journey Buffs
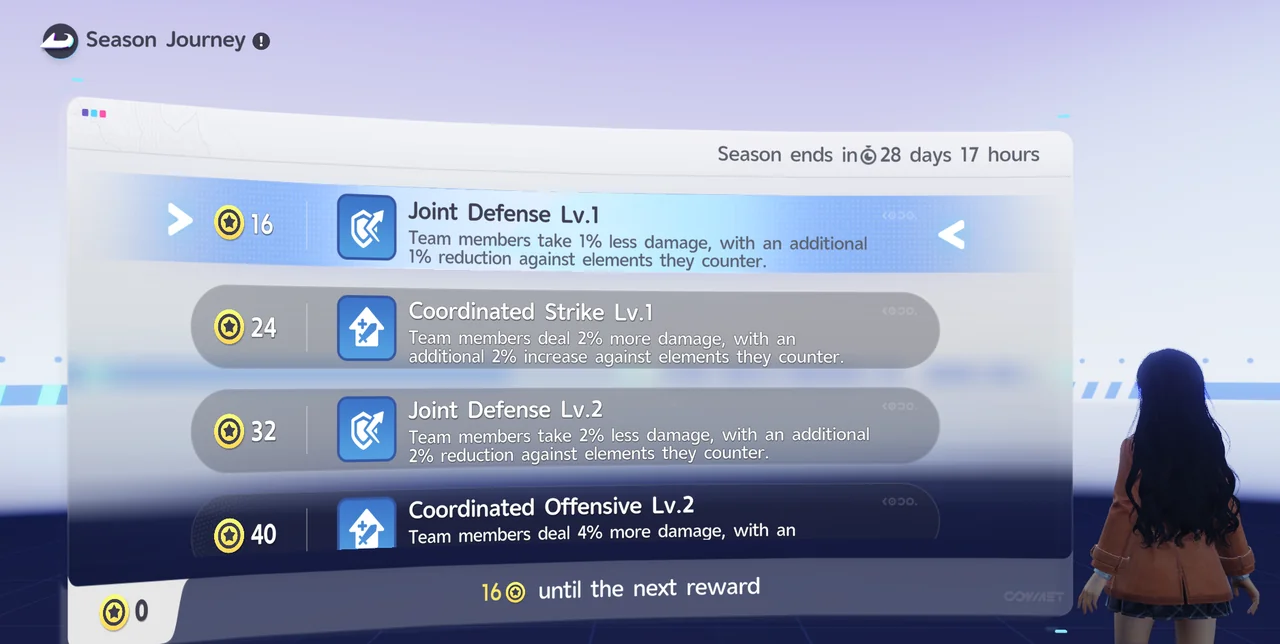
The Season Journey screen lists team buffs that unlock as you collect Stars during the season. Make use of these buffs for smoother progress in Holo-Battle Interlink.
| Stars | Buff |
|---|---|
| 16 Stars | Joint Defense Lv.1: team members take 1% less damage, with an additional 1% reduction against elements they counter. |
| 24 Stars | Coordinated Strike Lv.1: team members deal 2% more damage, with an additional 2% increase against elements they counter. |
| 32 Stars | Joint Defense Lv.2: team members take 2% less damage, with an additional 2% reduction against elements they counter. |
| 40 Stars | Coordinated Offensive Lv.2: team members deal 4% more damage. The rest of the description was cut off in our screenshot. |
Holo-Battle Interlink Rewards
Rewards run on a seasonal basis, and each reward needs a set number of Stars. When we recorded this, the current season was set to end on 10/29/2026.
Your best Stars and score are recorded separately for each route. The period rewards unlock based on the sum of your best Stars across all 3 routes, and the rewards are handed out when you exit the mode.

Here is every reward on the Challenge Rewards list, from 4 Stars to 60 Stars.
| Stars | Reward |
|---|---|
| 4 Stars | Sparkling Crystal x20, Gift of Encounter x1 |
| 8 Stars | Sparkling Crystal x20 |
| 12 Stars | Sparkling Crystal x20 |
| 16 Stars | Sparkling Crystal x20 |
| 20 Stars | Sparkling Crystal x20, Windborn Stamps x50 |
| 24 Stars | Sparkling Crystal x20 |
| 28 Stars | Sparkling Crystal x20, Windborn Stamps x50 |
| 32 Stars | Sparkling Crystal x30 |
| 36 Stars | Sparkling Crystal x30, Windborn Stamps x50 |
| 40 Stars | Starcryst Essence x1 |
| 44 Stars | Starcryst Essence x1, Windborn Stamps x50 |
| 48 Stars | Wonder Egg x1, Windborn Stamps x100 |
| 52 Stars | Advanced Held Item Core x2 |
| 56 Stars | Tumbler x2 |
| 60 Stars | Tumbler x2 |
Holo-Battle Interlink Rewards List
Here is what each reward is for, based on its in-game description.
| Reward | What it is for |
|---|---|
| Sparkling Crystal | Currency. Collect 1,000 to exchange for 1 Sparkling Cube at an outpost vendor. |
| Windborn Stamps | Currency. Earned by playing various modes and spent in the Stamp Shop on rewards. |
| Starcryst Essence | Training item. An extremely rare crystal used to raise an Aniimo's Acquired Potential. |
| Advanced Held Item Core | Held Item material. A crystal core full of energy, used to enhance Held Items. |
| Wonder Egg | Egg. Hatch it in an Outpost Hatchinator or the Hatchinator in your RV. |
| Tumbler | An extremely rare Aniipod. Roll it and it catches any Aniimo it passes, at twice the usual catch rate, or six times the rate on Aniimo drawn together by nurturing. |
| Gift of Encounter | Giftbox. You get 1 at 4 Stars. When you gift it, the recipient and you each receive 6,000 Credits, and gifting it to a friend adds 10 Affinity. |
Title and Rank Guide · Operation: Egg Heist Guide · Holo-Battle Sim Guide · All Guides