
Winning fights comes down to a few systems working together. This guide covers how BREAK works, how elemental and spatial counters change your damage, how to dodge boss attacks, which roles to bring, and how to manage skills, EP, Held Items, and Traits.
Combat Tips at a Glance
Here are the key combat tips in one place. Select a tip to jump to its section.
| Tip | What to Do |
|---|---|
| Break the Enemies | Drain the BREAK gauge to stun the enemy, then hit hard while it takes 250% damage. |
| Use Elemental and Spatial Counters | Attack with an elemental advantage, and match your attack to where the target is so you don't hit Immune. |
| Dodge Telegraphed Boss Attacks | Save Stamina and sprint out of red danger zones in boss fights. |
| Build a Balanced Team with Roles | Bring a DPS, a BREAK, and a Support or Heal Aniimo. |
| Manage Skills, Cooldowns, and EP | Weave in normal attacks to restore EP, and bring a REGEN Aniimo to keep skills coming. |
| Boost Your Team with Held Items and Traits | Check that Held Items suit the Aniimo's role, and look for Traits that buff the whole team. |
| Strengthen Your Team When You Keep Losing | Swap to defensive Held Items against sustained damage, or raise your Aniimo's CP. |
Break the Enemies
Drain the BREAK Gauge
Every enemy has a yellow BREAK gauge under its HP bar, and every attack you land drains it. Keep the pressure on until it hits 0: the enemy then enters BREAK state and is stunned, and a big "BREAK" appears on screen.
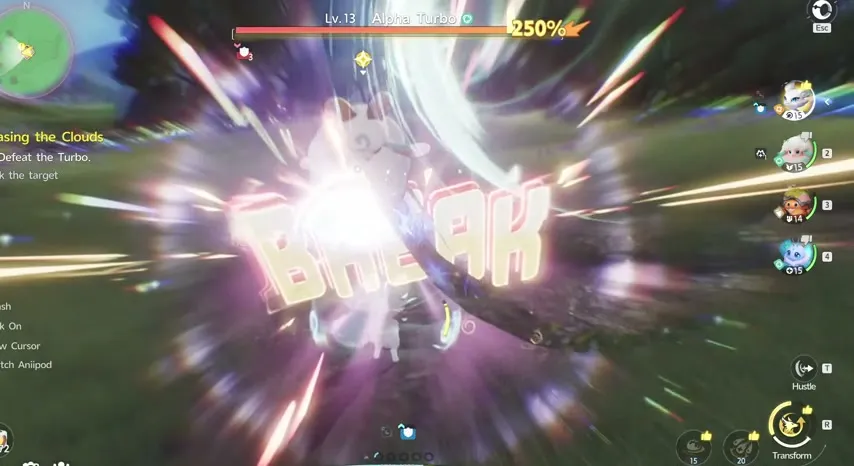
Bring a BREAK Aniimo to Break Faster
BREAK Aniimo specialize in draining the BREAK gauge quickly, so having one on your team gets enemies into BREAK state sooner.
Hit Hard While the Enemy Is in BREAK
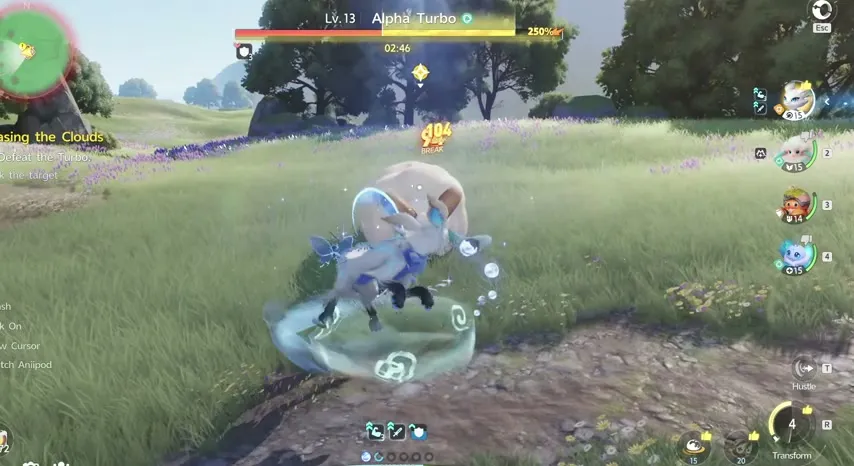
An enemy in BREAK takes increased damage, and the HP bar shows the multiplier as "250%". Save your strongest hits for this window, and switch in a DPS Aniimo, since DPS Aniimo work best when switched in while the target is in BREAK.
The window doesn't last. After BREAK, a BREAK Recovery timer appears under the HP bar (02:46 in the clip) while the yellow gauge refills, so make your damage count before it comes back.
Use Elemental and Spatial Counters
Elemental Counters Raise or Lower Damage
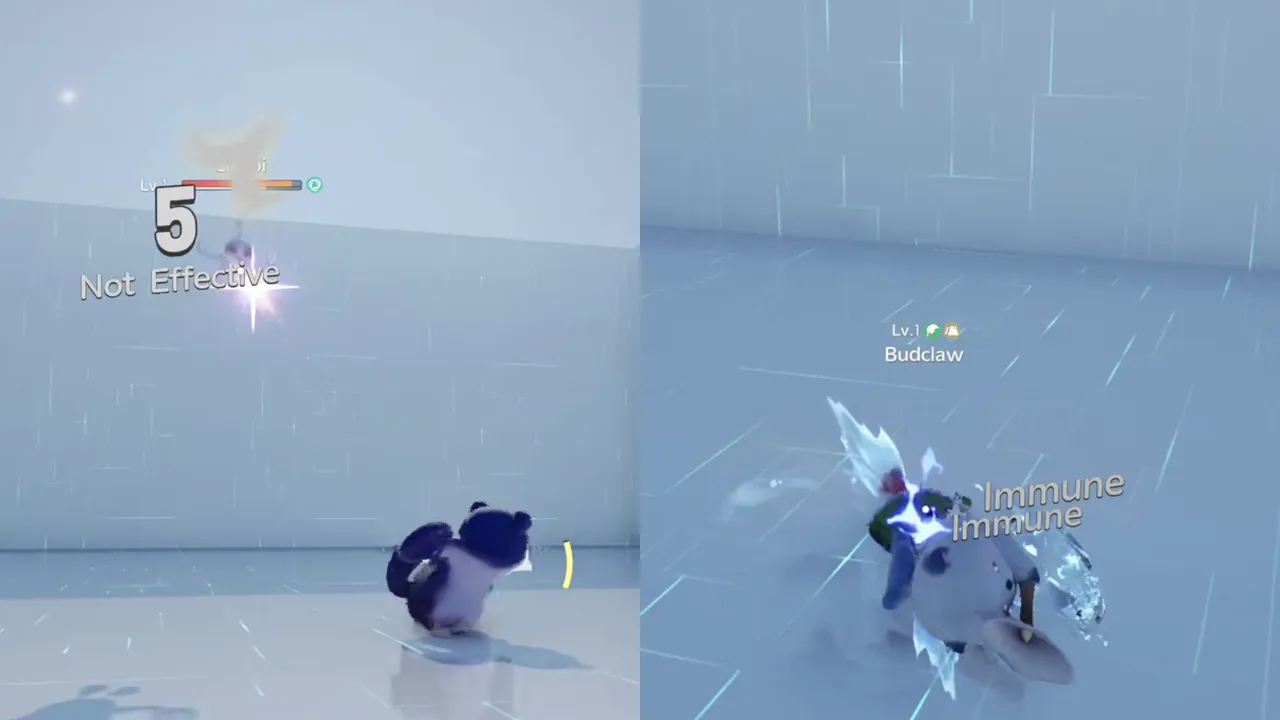
Attacking with an elemental advantage increases your damage and shows "Super Effective". Attacking at a disadvantage reduces it and shows "Not Effective" (the hit in the screenshot dealt only 5).
Spatial Counters Can Block Damage Completely
Spatial counters are harsher. At a spatial disadvantage your attack deals no damage at all and the game shows "Immune", so if you see Immune, change your attack instead of pressing on.
Spatial relations depend on where an Aniimo is and what state it's in. Pound attacks easily hit enemies that are burrowed underground and pull them back above ground, while flying enemies are hit by ranged attacks, so match your attack to where the target is.
Stack Elemental Debuffs
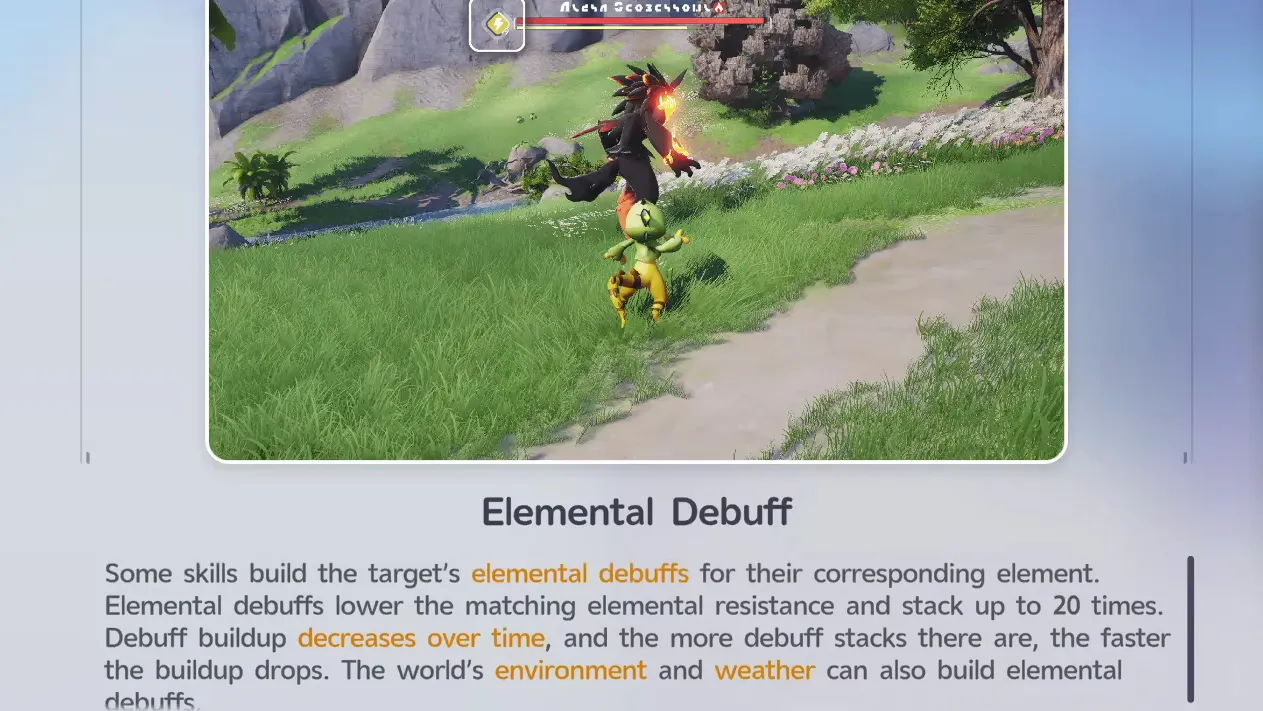
Some skills build an Elemental Debuff on the target, which lowers its resistance to that element and stacks up to 20 times. The buildup fades over time, and the more stacks there are, the faster it drops, so keep applying it. The environment and weather can also build Elemental Debuffs.
Dodge Telegraphed Boss Attacks
In boss fights, a red danger zone appears on the ground before a major attack. Save some Stamina so you can sprint out of the zone as soon as it shows up.

When a boss enters a special state, a hint appears at the top of the screen telling you what to do. Following it helps you avoid a party wipe.
Build a Balanced Team with Roles
Every Aniimo has a role, and there are 5 in total. For a solid base, bring a DPS, a BREAK, and a Support or Heal Aniimo.
| Role | What It Does |
|---|---|
| DPS | Deals heavy HP damage. Works best when switched in while the target is in BREAK. |
| BREAK | Drains the target's BREAK gauge quickly, so it enters BREAK state sooner. |
| Support | Buffs your team's damage or debuffs the target to improve the party's performance. |
| REGEN | Raises the team's REGEN rate so everyone can use skills more often. |
| Heal | Restores HP for the whole party, keeping everyone safer. |
Manage Skills, Cooldowns, and EP
Pick Skills That Fit Your Team
Each Aniimo has several skills you can swap freely. Choose the ones that fit your team rather than only the strongest on paper, especially skills that build Elemental Debuffs your teammates can take advantage of.
Watch Your Cooldowns and EP
Skills have a cooldown and an EP cost. Using a skill drains the EP orbs at the bottom of the screen, and a skill on cooldown or without enough EP can't be used. The small number on a skill button is its EP cost (20 for Draw In in the screenshot).
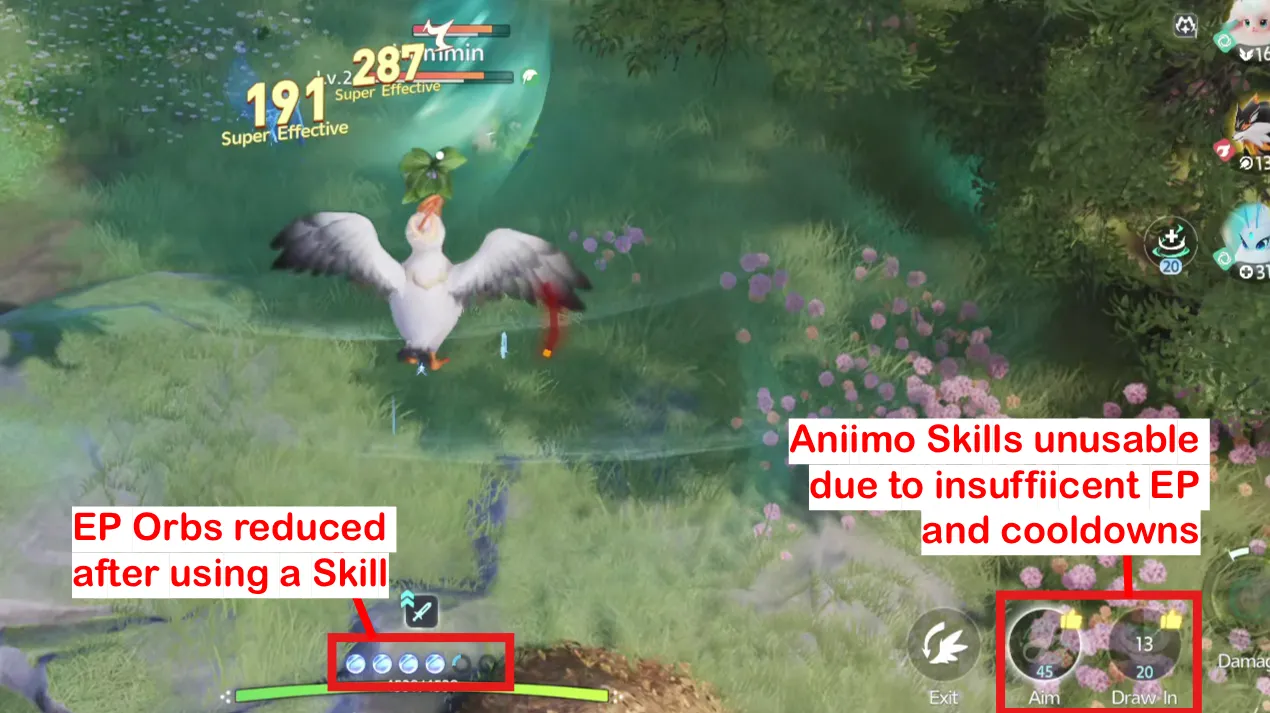
Normal attacks restore EP, so weave them in between skills when you run low. Using skills, in turn, fills your Ultimate gauge, so keeping your skills going also gets your Ultimate ready sooner.
Without a good REGEN Aniimo, cooldowns and EP quickly become what limits your team, so bring one to keep your skills coming.
Boost Your Team with Held Items and Traits
Check Held Items Before Equipping
Held Items give the Aniimo holding them unique buffs and boosts. Some have role-specific effects, so check that an item suits the Aniimo's role before you equip it.
Combine Traits for Team-Wide Buffs
Aside from skills, each Aniimo has Traits, special buffs tied to its family. Some only affect certain elements or families, but many buff the whole team, so look for ones that help everyone.
Strengthen Your Team When You Keep Losing
Swap to Defensive Held Items
If a boss keeps wiping your party with sustained damage, your team needs to hold up better, not hit harder. Trade your offensive Held Items for defensive ones.
Raise Your Aniimo's CP
If you're already using every tip above and still struggling, the problem is likely your Aniimo's stats. Battle knowledge can't make up for stats that are too low, so raise your Aniimo's CP.
Element Counter Chart · Best Team Comps · Best Held Items to Equip · How to Get, Change, and Enhance Aniimo Skills · What Is CP? Meaning and How to Raise It · All Guides