How to use the Hammer in Monster Hunter Outlanders: its features and controls, how to build Stun on the head, the best combos such as the Big Bang combo, the best craftable Hammers, and the adventurers who wield it (as of October 31, 2026).
Hammer Features
High damage while inducing Stun and exhaustion
The Hammer is a blunt weapon, and hitting the monster's head makes it easy to cause Stun and exhaustion. The Hammer's attacks leave big openings, so pour high-damage combos into the big openings that Stun and similar states create.
Stopping the monster is strong support in multiplayer
Holding the monster in place with Stun and exhaustion is very strong support in multiplayer, since it creates openings for your allies. As a rule, aim mainly at the head to cause Stun and exhaustion quickly.
Deal big damage in the monster's openings
When the monster is stunned, exhausted, or in a long move, actively land your big attacks. In Monster Hunter Outlanders, Buddies and adventurers' Ultimates can also leave monsters suppressed, so building your Buddies and team with that in mind makes the Hammer easier to play.
Hammer Controls
| Button | What it does |
|---|---|
| Basic Attack | Overhead Smash, up to 3 hits. |
| Skill 1 | Charge. Press Basic Attack to release a charged attack that depends on the charge level. |
| Skill 2 | Charge: Resolute while charging. At max charge, Charge: Breakthrough raises the charge level one more step. |
| Skill 3 | Big Bang, up to 5 hits. While charging, Spinning Bludgeon spins and holds the charge level while you move. |
| Sheathe | Sheathe your weapon. |
| Evade | Evade. After a Perfect Evade, Skill 1 starts charging from charge level 2. |
| Ultimate | Ultimate. What it does depends on the adventurer and type. |
The moves are the Fated Adventurer's. Rhodes has different moves on some buttons (see Hammer Adventurers).
How to Play the Hammer
Build up Stun by aiming at the head
The footage is from the Japanese version of the game.
The basic Hammer playstyle is to keep hammering the monster's head and build up Stun. It also pushes the monster toward exhaustion and can cause Stun, so land as many hits on the head as you can.
Use charged attacks when the monster moves a lot
Input: Skill 1(charge to max)Skill 2(charge to max)
The footage is from the Japanese version of the game.
When the monster moves around a lot and is hard to approach, avoid its attacks while charging Skill 1 to the max, then go for Charge: Breakthrough with Skill 2 and land the hit. Evading during the first charge can reset it, so you need to read the monster's attack range.
Tip Evading during the second charge doesn't make you charge again from scratch.
Go for the Big Bang combo in openings
Input: Skill 3Skill 3Skill 3Skill 3Skill 3
The footage is from the Japanese version of the game.
The Big Bang combo is for when the monster is stunned or exhausted. It stops if you miss and leaves big openings, but it has the highest damage of any Hammer combo, so use it actively when you have an opening.
Counter after a Perfect Evade
Input: Basic AttackBasic AttackEvade(Perfect Evade)Basic AttackBasic Attack
The footage is from the Japanese version of the game.
To deal with the monster's attacks, use the Basic Attack combo, Overhead Smash, and avoid hits with Perfect Evade. When charged attacks are hard to use, this lets you add damage and Stun while staying safe.
Tip The third hit of the Basic Attack combo Overhead Smash leaves a big opening, so it's best to stop at the second hit and watch the monster.
Rhodes plays differently
Rhodes also uses the Hammer, but Rhodes's own moves change the playstyle a little, such as Skating Charge, and Steam Stance, which converts Steam Energy. The Hammer's big damage is still there. See Hammer Adventurers.
Best Hammer Combos
These combos use the Fated Adventurer's skills. Text in parentheses after a button is how to press it.
| Combo | Rating | Input |
|---|---|---|
| Charge: Resolute combo | Skill 1(charge to max)Skill 2(charge to max)Basic Attack | |
| Big Bang combo | Skill 3Skill 3Skill 3Skill 3Skill 3 | |
| Overhead Smash combo | Basic AttackBasic AttackBasic Attack or Evade | |
| Basic charge | Skill 1Basic Attack | |
| Evading while charging | Skill 1Evade(Perfect Evade)Skill 1 |
Charge: Resolute combo
Input: Skill 1(charge to max)Skill 2(charge to max)Basic Attack
The footage is from the Japanese version of the game.
A combo that raises the Hammer's charge level to the max. You can move around while charging, so you can also get out of the monster's attack range. At max charge, Skill 2 becomes Charge: Breakthrough and raises the charge level one more step, so Basic Attack then releases Charged Smash.
Big Bang combo
Input: Skill 3Skill 3Skill 3Skill 3Skill 3
The footage is from the Japanese version of the game.
The Hammer's highest-multiplier combo, but it stops as soon as you miss a single hit. If you land Precise Tap 4 or more times, the last hit turns into Charged Smash and deals more damage.
When you miss Precise Tap
The footage is from the Japanese version of the game.
In the Big Bang combo, pressing Skill 3 just before the circles overlap tends to count as Precise Tap. The sound changes slightly between success and failure, so you can tell whether you missed.
Overhead Smash combo
Input: Basic AttackBasic AttackBasic Attack or Evade
The footage is from the Japanese version of the game.
The Overhead Smash combo, mashing Basic Attack. The third Basic Attack leaves a big opening afterward, so depending on the situation, a Perfect Evade instead helps you avoid getting hit.
Basic charge
Input: Skill 1Basic Attack
The footage is from the Japanese version of the game.
A normal charged attack. It deals less damage than the Charge: Resolute combo, so usually press Skill 2 at max charge (Charge: Breakthrough) and move into the Charge: Resolute combo.
Evading while charging
Input: Skill 1Evade(Perfect Evade)Skill 1
The footage is from the Japanese version of the game.
You can evade while charging. After a Perfect Evade, Skill 1 starts charging from charge level 2, but you still have to charge again, so evading is best saved for while you're in Charge: Resolute.
Best Craftable Hammers
These are the weapons in our Hammer builds. Stats are for the rarity 7 version. The builds article has the full armor and skills.
| Build | Weapon | Element | Attack |
|---|---|---|---|
| General(Stamina-Consuming Attacks) | Guild Crimson Crest Hammer (Ice) III |  Ice | 328 |
| Fire Element | Radiant Blazing Hammer II |  Fire | 274 |
| Thunder Element | Radiant Lightning Bash III |  Thunder | 282 |
| Dragon Element | Blacksteel Hammer II |  Dragon | 268 |
Hammer Adventurers
These adventurers use the Hammer. Their rank and review come from our adventurer tier list; each adventurer's own moves are below the table.
| Adventurer | Rank and review |
|---|---|
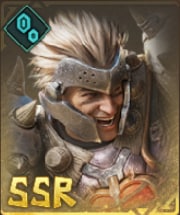 Rhodes | Overall rank: S
|
 Fated Adventurer (Hammer) | Overall rank: B
|
Rhodes
Rhodes has two gauges, Steam Energy and Core Energy. Skating Charge and Steam Stance build or convert energy, and with Core Energy full, Skill 3 becomes Steam Skyrender for huge damage. Rhodes's adventurer page has a full guide: Rhodes.
Fated Adventurer (Hammer)
The moves in this guide are the Fated Adventurer's. You can choose any type, and your Ultimate changes with it. The element comes from your weapon, so pick one from the weapons above. For the Insights to take, see Best Weapon Tier List.
Teams for Rhodes
Rhodes leads the ice team in Best Team Comps and Party Guide. For the Fated Adventurer, the weapon decides the element, so pick a Hammer whose element matches your team.