
EDITORIAL TIER LIST
Build Tier List
S tier for Version 1.0: Crash Down Two-Hander, Explosive Arrow Bow, and Blizzard Staff.
Every build we rate for Version 1.0 in one list, ranked as a class and weapon pair. Each build shows the fights it wins and loses, the order to take skills, the must-have skills and a link that opens it in the Skill Tree Planner.
- Game version:
- Version 1.0
- Reviewed:
- Author:
- GameWith Enshrouded Editorial
Tier board
- S Tier
Strong almost everywhere. If you are unsure, start here.
- A Tier
As strong as S once the setup or the skill is there.
- B Tier
Excellent at one job, mostly in co-op. Weaker on its own.
- C Tier
Works in the right place only. Fun, but not where we would start.

Which build for which fight
Our call for each situation. Upkeep shows how much crafting a build needs to keep going.
| Build | Early game | Groups | Bosses | Flying | Solo | Co-op | Upkeep | Points to core | Total |
|---|---|---|---|---|---|---|---|---|---|
| S TierCrash Down Two-Hander | Strong | Strong | OK | Weak | Strong | OK | Light | 12 | 57 |
| S TierExplosive Arrow Bow | OK | Strong | OK | Strong | Strong | Strong | Heavy | 27 | 49 |
| S TierBlizzard Staff | OK | Strong | OK | Weak | Strong | Strong | Moderate | 15 | 64 |
| A TierOne-Hander and Shield Parry | Strong | OK | Strong | Weak | Strong | OK | Light | 20 | 61 |
| A TierEternal Arrow Sniper | Strong | Weak | Strong | Strong | OK | Strong | Light | 17 | 39 |
| A TierAerial Wand Battlemage | Strong | OK | OK | Strong | Strong | OK | Light | 17 | 58 |
| A TierDecoy Summoner | OK | OK | Strong | OK | Strong | OK | Moderate | 19 | 54 |
| B TierGuardian Tank | OK | OK | OK | Weak | Weak | Strong | Light | 27 | 62 |
| B TierDual Daggers | Strong | Weak | OK | Weak | OK | Strong | Light | 18 | 49 |
| B TierHealer Support | OK | Weak | OK | OK | Weak | Strong | Moderate | 11 | 39 |
| C TierBeastmaster | Strong | OK | Weak | OK | OK | OK | Light | 12 | 37 |
| C TierShroud Caster | Weak | Strong | OK | OK | OK | OK | Moderate | 20 | 49 |
- Early game
- Works before the late-game unlocks
- Groups
- Packs of regular enemies
- Bosses
- Bosses and large elite enemies
- Flying
- Enemies in the air
- Solo
- Playing alone
- Co-op
- Playing in a group
- Upkeep
- Crafting needed to keep it running
S Tier
Strong almost everywhere. If you are unsure, start here.
Crash Down Two-Hander
- Barbarian
- Athlete
- Two-Handed Hammer
- Two-Handed Club
- Two-Handed Axe
- Two-Handed Greatsword
The strongest melee build in 1.0. Double jump, slam, repeat: it flattens groups, breaks guards and costs nothing to run.
Jump, jump again with Double Jump, then hold attack to slam down with Crash Down Attack. The slam adds 50% weapon damage in a small blast, and from a double jump Crash Down: Force adds another 20%. It also fills a guarding enemy's Stun Bar twice as fast, so shields stop mattering. Take Two-Handed Specialization to unlock the Special Abilities of two-handed weapons and Heavy Hitter for 10% faster swings between slams.
- Early game
- Strong
- Groups
- Strong
- Bosses
- OK
- Flying
- Weak
- Solo
- Strong
- Co-op
- OK
- Upkeep
- Light
Strengths
- No upkeep. No arrows, no spell charges, just Stamina.
- The blast hits everything under you, and Blood Rage adds 15% melee damage for 10 seconds after a nearby kill, so packs fall in chains.
- A weapon with Health Leech restores Health with every hit, which is a real advantage in group fights.
- Block Breaker fills a guarding enemy's Stun Bar twice as fast. Once the enemy is overpowered, Breach adds +100% melee physical damage for 3 seconds.

Weaknesses
- Stamina is the limit. Each slam costs 35 to 60 Stamina depending on the weapon, plus 10 for the second jump.
- Flying enemies are out of reach of the slam. Take Upwards Slash Attack to meet them in the air or Grounding Hook to pull them down.
- Low cave ceilings leave little room to jump.
Must-have skills
Gear and items
 Gem of Aerobatics fires homing projectiles whenever you attack in the air, and every slam counts. With a hammer or club, add
 Gem of Fracturing for bone shards on blunt kills. With a greatsword, take Titan Edge and Slasher in place of Brute.
Recommended weapons
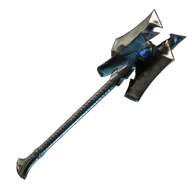 Misfortune MaceTwo-Handed ClubCommon, Uncommon, Rare, Epic, Legendary
- Power
- 179.4
- Legendary · Level 55
- Attack Speed
- 0.7 sec
- Blunt Damage×3
- +3 Health Leech
- +3% Health Leech
All three damage enhancements are Blunt Damage, which Brute raises, and with two Health Leech, every slam restores part of its damage as Health.
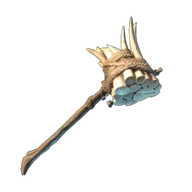 SoothsayerTwo-Handed HammerRare, Legendary
- Power
- 179.4
- Legendary · Level 55
- Attack Speed
- 0.7 sec
- Blunt Damage×3
- +3% Health Leech
- +5% Critical Strike Chance
Craft at BlacksmithRare · Power 148.8
Top Power and three Blunt Damage for Brute at Legendary. The
 Blacksmith crafts it at Rare, and even the Rare one has Health Leech, so you can slam with it long before you find a Legendary one.
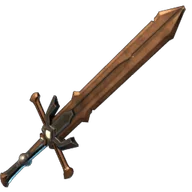 Fine Copperblade GreatswordTwo-Handed GreatswordCommon, Uncommon, Rare, Epic, Legendary
- Power
- 179.4
- Legendary · Level 55
- Attack Speed
- 0.7 sec
- Cutting Damage×3
- +5 Health Leech×2
For a greatsword: it has two Health Leech, and all three damage enhancements are Cutting Damage.


Skill order
- 1Core+12 points (12 total)
- Double Jump
- Runner
- Finesse
- Crash Down Attack
- Crash Down: Force
- +2 attribute nodes
- 2Damage+26 points (38 total)
- 3Staying power+7 points (45 total)
- AthleteLevel 3
- Vigorous DeflectionLevel 3
- +1 attribute nodes
- 4Finishing touches+12 points (57 total)
- Bash
- Breach
- Upwards Slash Attack
- Giant Slayer Hook
- +1 attribute nodes
- Skill Points
- 57
Opens with every node above already taken. Change it from there and share your own version.
Explosive Arrow Bow
- Ranger
- Assassin
- Bow
The most damage against groups in the game, paid for in Black Powder. If you are willing to farm, nothing clears faster.
Multi Shot gives regular arrows a 20% chance to fire a flurry, and Multi Shot Trigger lets Special Arrows such as  Explosive Arrow I trigger it too. With Shrapnel Blast, every enemy caught in the blast raises that arrow's damage by 10%, and Echoing Explosives gives each enemy hit a 40% chance to set off a second blast for 50% damage. Aim for the middle of the pack, not the closest enemy.
- Early game
- OK
- Groups
- Strong
- Bosses
- OK
- Flying
- Strong
- Solo
- Strong
- Co-op
- Strong
- Upkeep
- Heavy
Strengths
- Nothing clears groups faster: one arrow can turn into a flurry, and every blast grows with each enemy it hits.
- Shell Shock stuns every enemy in the blast for 2 seconds at 8 Mana each. Packs rarely reach you, and it works on most bosses too, so you can shut a boss down while you deal damage.
- It starts early: Explosive Arrow I needs level 15 and is made from
 Tar and
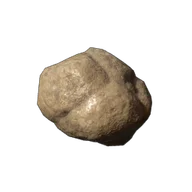 Lump of Clay.
Weaknesses
- The crafting is brutal. 100
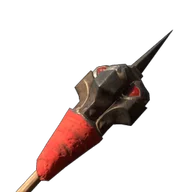 Explosive Arrow III take 12
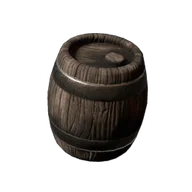 Black Powder, 8
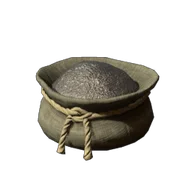 Iron Dust, 20
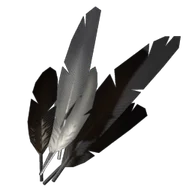 Feather and 100
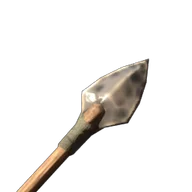 Flint Arrow, and those 12 Black Powder alone need 84
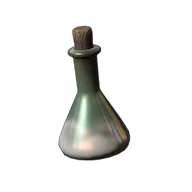 Nitrate, 12
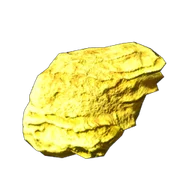 Sulfur and 24
 Coal Powder.
- Multi Shot Trigger makes flurries spend Special Arrows too, so a long fight empties the quiver fast. Plan on using 500 or more arrows per dungeon run.
- Against a lone boss, Shrapnel Blast adds just 10%. Unless Shell Shock stuns that boss, a sniper bow does more there.
Gear and items
Use Explosive Arrow I until level 44, then move to Explosive Arrow III, and to  Exploding Arrow IV at level 50. Skip
 Explosive Arrow II: it takes 5 Black Powder per 25 arrows, more than the 3 that III needs. Black Powder is the bottleneck, and each one takes 7 Nitrate.
Recommended weapons
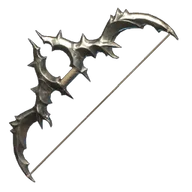 Fell Sentinel BowBowCommon, Uncommon, Rare, Epic, Legendary
- Power
- 82.8
- Legendary · Level 55
- Draw Speed
- 0.6 sec
- +20% Arrow Speed
- Piercing Damage×2
- +20% Critical Strike Damage
- +40 Reaping
- +6% Critical Strike Chance
Ties for the most Power among bows that draw in 0.6 seconds. Critical Strike Chance makes crits more frequent, and bow crits trigger Blessed Arrows, whose Mana pays for Shell Shock. Critical Strike Damage makes crits hit harder, and Reaping gives a Stamina Regeneration buff on kills.
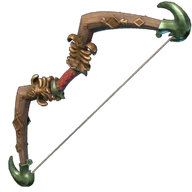
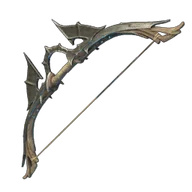 Fell Marksman BowBowCommon, Uncommon, Rare, Epic, Legendary
- Power
- 82.8
- Legendary · Level 55
- Draw Speed
- 0.6 sec
- +20% Arrow Speed
- Magic Shroud Damage×2
- +10 Headseeker
- +30 Reaping
- +9% Damage against Scavenger
The other bow with that Power and Draw Speed. Headseeker restores Stamina on Skillshots, and Reaping gives a Stamina Regeneration buff on kills.
 Breaching BowBowRare, Legendary
- Power
- 65
- Legendary · Level 55
- Draw Speed
- 0.6 sec
- +20% Arrow Speed
- Piercing Damage×3
- +24% Critical Strike Damage
- +7% Critical Strike Chance
Craft at HunterRare · Power 54
The
 Hunter crafts it at Rare, so you can start with it long before you find a Legendary bow. At Legendary it carries three Piercing Damage plus Critical Strike Damage and Critical Strike Chance.


Skill order
- 1Core+27 points (27 total)
- 2Damage+6 points (33 total)
- 3Crowd control+7 points (40 total)
- Slice And Dice
- Shell Shock
- +1 attribute nodes
- 4Staying power+9 points (49 total)
- Skill Points
- 49
Opens with every node above already taken. Change it from there and share your own version.
Blizzard Staff
- Trickster
- Wizard
- Staff
Eternal Blizzard II slows a whole pack and keeps damaging it. On a spell crit, Terror stuns the enemy and Bloodletting spawns orbs, and Gem of Storm's Eye sends bolts that chain between the enemies in the storm.
Cast  Eternal Blizzard II into the middle of the pack: the storm keeps damaging every enemy inside it and slows them by 80%, and Iceman raises Ice damage by 10% per level. Each level of Terror and Bloodletting gives a spell crit a 20% chance to trigger them: Terror stuns the target for 2 seconds, and Bloodletting spawns 2 Health, Mana or Stamina orbs, each restoring 10% of that resource. With
 Gem of Storm's Eye in the staff, every enemy the storm hits gets marked, and hitting a marked enemy sends a bolt to another marked one.
- Early game
- OK
- Groups
- Strong
- Bosses
- OK
- Flying
- Weak
- Solo
- Strong
- Co-op
- Strong
- Upkeep
- Moderate
Strengths
- Strong against packs: the storm of Eternal Blizzard II keeps hitting every enemy inside it and slows them by 80%, so you wear down a whole group while it can barely move.
- At level 3, Terror and Bloodletting each have a 60% chance on every spell crit, and Wizard raises the crit chance of staves by 2% per level, so enemies keep stopping for 2 seconds while orbs refill you.
- With Gem of Storm's Eye, bolts chain between the marked enemies in the storm, and the more enemies the storm holds, the more targets the bolts have.
Weaknesses
- Eternal Blizzard II costs 287 Mana per cast. Without orbs you run dry, so raise Mana Currents to level 3 and upgrade Eternal Blizzard II at the
 Alchemist to lower its Mana Cost.
- Against a lone enemy such as a boss, Gem of Storm's Eye has no other marked enemy to send its bolts to, and the storm's wide area goes to waste.
- Weak against flying enemies, and ranged enemies spread out beyond a single storm.
- Once enemies surround you and keep hitting you, the staff gets interrupted and you can't fire. Cast Eternal Blizzard II before the pack reaches you: it slows the enemies inside the storm by 80%.
Must-have skills
Gear and items
 Blizzard I (level 15) is made at the Alchemist, 20 charges per craft. Eternal spells use no charges:
 Eternal Blizzard I needs level 28, and Eternal Blizzard II level 45. Put Gem of Storm's Eye in the staff's gem slot.
Recommended weapons
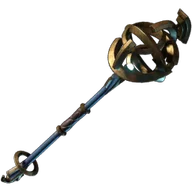 Eldermere's StaffStaffCommon, Uncommon, Rare, Epic, Legendary
- Power
- 55.2
- Legendary · Level 55
- Magic Ice Damage×2
- +3% Mana Leech
- +7% Critical Strike Chance
- +10% All Magic Ice Damage
Ties for the most Power among staves with All Magic Ice Damage, which stacks with Iceman, and has the highest Critical Strike Chance of them, so Terror and Bloodletting trigger more often.
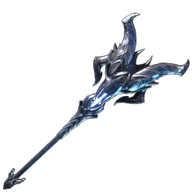 MirageStaffCommon, Uncommon, Rare, Epic, Legendary
- Power
- 55.2
- Legendary · Level 55
- Magic Ice Damage×2
- +5% Critical Strike Chance
- +3% Mana Leech
- +10% All Magic Ice Damage
The same Power with All Magic Ice Damage and the next-highest Critical Strike Chance. Mana Leech also returns Mana on hits.
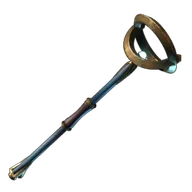 Luminary StaffStaffCommon, Uncommon, Rare, Epic, Legendary
- Power
- 55.2
- Legendary · Level 55
- Magic Ice Damage×2
- +9 Mana Leech
- +3 Mana Currents
- +10% All Magic Ice Damage
The same Power with All Magic Ice Damage, the highest Mana Leech of these staves, and Mana Currents, which raises the skill of the same name. Pick it when Mana runs short.



Skill order
- 1Core+15 points (15 total)
- 2Elements+7 points (22 total)
- IcemanLevel 3
- +1 attribute nodes
- 3Critical Strikes+12 points (34 total)
- 4Damage+22 points (56 total)
- Frost
- WizardLevel 3
- ThunderLevel 3
- Chain Hit
- Mass Destruction
- +2 attribute nodes
- 5Mobility+8 points (64 total)
- Mana CurrentsLevel 3
- Healer
- Blink
- +1 attribute nodes
- Skill Points
- 64
Opens with every node above already taken. Change it from there and share your own version.
A Tier
As strong as S once the setup or the skill is there.
One-Hander and Shield Parry
- Guardian
- Warrior
- One-Handed Club
- One-Handed Sword
- One-Handed Axe
Turns defense into the biggest hits a warrior gets. Parry, overpower, then a Merciless Attack for +500%. It asks for timing and pays for it in every fight.
Block just as the enemy flashes to parry. Each parry fills its Stun Bar, and Power Parry adds 10% Parry Power per level. When the bar is full the enemy is overpowered: use Merciless Attack for +500% damage, with Opportunity raising the multiplier by 40% per level. Breach adds +100% melee physical damage for 3 seconds on overpowered enemies, and Vigorous Deflection gives back 15 Stamina per level on every parry.
- Early game
- Strong
- Groups
- OK
- Bosses
- Strong
- Flying
- Weak
- Solo
- Strong
- Co-op
- OK
- Upkeep
- Light
Strengths
- Defense is offense: every parry also fills the Stun Bar.
- Bosses are where it shines. Big, slow attacks are the easiest to parry, and the Merciless Attack window lines up with Breach.
- No upkeep, and any melee weapon can parry, so it works from the first hours of the game.
Weaknesses
- Timing is everything. Miss the flash and you take the hit.
- Groups are slow work, since you parry one enemy at a time. Shockwave helps by pushing the others back.
Gear and items
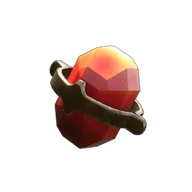 Gem of Overpowering adds Stamina damage when you hit a guarding enemy, and
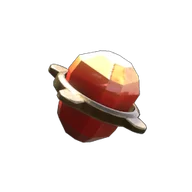 Gem of Retaliation gives blocking a chance to add bonus blunt damage to your next attack.
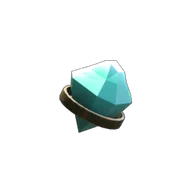 Gem of Skulls can summon a companion skull after Merciless Attack kills.
Recommended weapons
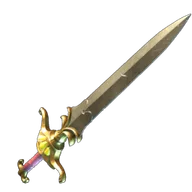 Bright Hope SwordOne-Handed SwordCommon, Uncommon, Rare, Epic, Legendary
- Power
- 119.6
- Legendary · Level 55
- Attack Speed
- 0.6 sec
- Cutting Damage×2
- +7% Critical Strike Chance
- +9 Health Leech
- Magic Fire Damage
Has Health Leech, its two Cutting Damage are raised by Slasher, and Critical Strike Chance makes crits more frequent.
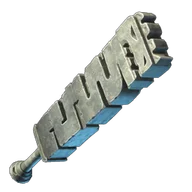 Freshblood MaceOne-Handed ClubCommon, Uncommon, Rare, Epic, Legendary
- Power
- 119.6
- Legendary · Level 55
- Attack Speed
- 0.6 sec
- +8 Health Leech
- Blunt Damage×2
- Magic Shock Damage
- +3% Health Leech
Has two Health Leech, and its two Blunt Damage are raised by Brute.
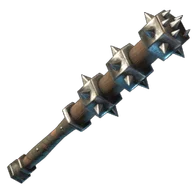 Iron Claw ClubOne-Handed ClubCommon, Uncommon, Rare, Epic, Legendary
- Power
- 119.6
- Legendary · Level 55
- Attack Speed
- 0.6 sec
- Blunt Damage×3
- +6 Health Leech
- +3% Health Leech
All three damage enhancements are Blunt Damage, which Brute raises, plus two Health Leech.


Skill order
- 1Core+20 points (20 total)
- 2Parry+9 points (29 total)
- Steadfast
- Vigorous DeflectionLevel 3
- Shockwave
- +1 attribute nodes
- 3Damage+25 points (54 total)
- 4Staying power+7 points (61 total)
- Skill Points
- 61
Opens with every node above already taken. Change it from there and share your own version.
Eternal Arrow Sniper
- Beastmaster
- Ranger
- Bow
The bow build for bosses. No arrows to craft, headshots for up to double base damage, and you stay out of reach. A pack that closes in is its problem.
Aim with Eagle Eye and go for heads. A Skillshot deals +100% base damage to enemies without helmets and +50% to helmeted ones, and Skill Shot adds 20% per level on top. Arrows such as  Eternal Voltaic Arrow I use Mana instead of ammo, and Blessed Arrows restores 8 Mana per level on every bow critical strike, so the quiver never runs dry. Sniper adds 2% critical chance per level.
- Early game
- Strong
- Groups
- Weak
- Bosses
- Strong
- Flying
- Strong
- Solo
- OK
- Co-op
- Strong
- Upkeep
- Light
Strengths
- Arrows that cost Mana instead of ammo are crafted once and never run out, and the first ones unlock at levels 10 to 20.
- Switching elements is just switching arrows: use Eternal Voltaic Arrow I or
 Eternal Ember Arrow I, whichever the enemy is weak to.
- Flying enemies take 10% more damage per level from Eagle's Bane.
Weaknesses
- No area damage. When a pack reaches you, you are fighting it one arrow at a time.
- Missing the head loses the Skillshot bonus, so it asks for steady aim.
Gear and items
Make Eternal Voltaic Arrow I, Eternal Ember Arrow I and  Eternal Frost Arrow I at the Hunter and switch between them.
Recommended weapons
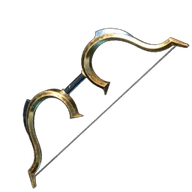 Lunar Tides BowBowCommon, Uncommon, Rare, Epic, Legendary
- Power
- 89.7
- Legendary · Level 55
- Draw Speed
- 1 sec
- +33% Arrow Speed
- Magic Ice Damage×3
- +9 Mana Leech
- +7% Critical Strike Chance
A long bow at the top Power for the biggest hit per arrow. Mana Leech returns Mana on hits, and Critical Strike Chance triggers Blessed Arrows more often, so arrows that cost Mana keep firing.
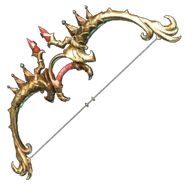 Firefeather BowBowCommon, Uncommon, Rare, Epic, Legendary
- Power
- 89.7
- Legendary · Level 55
- Draw Speed
- 1 sec
- +33% Arrow Speed
- Magic Fire Damage×3
- +3% Health Leech
- +7% Critical Strike Chance
The same top Power. Critical Strike Chance adds crits, which also restore Stamina through Vitality Surge, and Health Leech returns Health on hits.
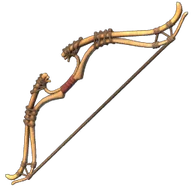 Brisk BowBowCommon, Uncommon, Rare, Epic, Legendary
- Power
- 89.7
- Legendary · Level 55
- Draw Speed
- 1 sec
- +33% Arrow Speed
- Piercing Damage×3
- +30 Reaping
- +16% Critical Strike Damage
Top Power with three Piercing Damage. Critical Strike Damage adds to Fatal Precision for harder crits, and Reaping gives a Stamina Regeneration buff on kills.

Skill order
- 1Core+17 points (17 total)
- MarksmanLevel 3
- Eagle Eye
- Counter Battery
- Skill ShotLevel 3
- SniperLevel 3
- +1 attribute nodes
- 2Mana+5 points (22 total)
- 3Damage+12 points (34 total)
- 4Mobility+5 points (39 total)
- Skill Points
- 39
Opens with every node above already taken. Change it from there and share your own version.
Aerial Wand Battlemage
- Wizard
- Battlemage
- Wand
Strong and safe at once. You fight from the air with a wand and a shield, and totems draw the fire of ranged enemies.
Equip a wand and hold attack in mid-air: Aerial Wand Attack fires a shot that adds 50% weapon damage in a small blast, so you hit the pack below while melee enemies swing at nothing. Arcane Proliferation gives wand attacks a 30% chance to fire twice the projectiles, with the extras at half damage. In the air you can dodge enemy melee attacks, but not ranged ones. Use the wand's strength and block them with a shield in your other hand, or switch to a staff and place totems as decoys. With Totem Mastery you can place up to 4 totems at once, and enemies go after the totems while you attack from above.
- Early game
- Strong
- Groups
- OK
- Bosses
- OK
- Flying
- Strong
- Solo
- Strong
- Co-op
- OK
- Upkeep
- Light
Strengths
- Wand attacks are fast, so you keep firing even while enemies surround you and hit you. A staff gets interrupted and can't fire.
- Little to craft. Wands need no ammo and refill Mana as you fight, and
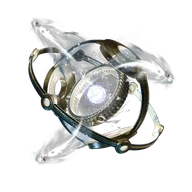 Eternal Ice Totem I places totems without spending charges.
- A wand leaves your other hand free, so you can carry a shield. Block a strong enemy's ranged attacks with it and you take no damage, only spending Stamina.
- The build we would hand a new player: you spend much of each fight out of melee reach.
Weaknesses
- Wands hit softer than staves, so bosses with a lot of Health take a while.
- Tight caves and low ceilings take away the jump, and with it most of your safety.
- Totems are cast with a staff, so you switch weapons each time you place them.
Must-have skills
Gear and items
Gem of Aerobatics adds homing projectiles to every attack in the air. For totems, equip 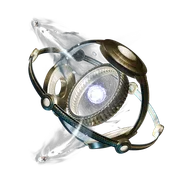 Ice Totem I and cast it with a staff: it slows enemies by 50%. Eternal Ice Totem I casts them without spending charges.
Recommended weapons
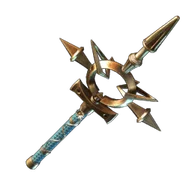 Darya's RemorseWandRare, Legendary
- Power
- 79.3
- Legendary · Level 55
- Attack Speed
- 0.6 sec
- 30% Overcharge
- +16 Mana Regeneration
- +1 Multishot
- +30% Ethereal Duplication
- Magic Shroud Damage×3
- +7% Critical Strike Chance
- +24% Critical Strike Damage
Craft at AlchemistRare · Power 66
The top wands all tie on Power, so their effects decide. This one has Overcharge and Mana Regeneration at their highest, plus Multishot and Ethereal Duplication. The
Alchemist crafts it at Rare.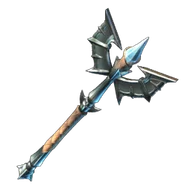 VoidcallerWandCommon, Uncommon, Rare, Epic, Legendary
- Power
- 79.3
- Legendary · Level 55
- Attack Speed
- 0.6 sec
- 30% Overcharge
- +12 Mana Regeneration
- +1 Multishot
- +30% Ethereal Duplication
- Magic Shroud Damage×3
- +3% Mana Leech
- +7% Critical Strike Chance
The same four effects with a little less Mana Regeneration, and Mana Leech returns Mana on hits. Shroud Imbued adds heavy Shroud damage. It is found only inside Shroud Lairs.
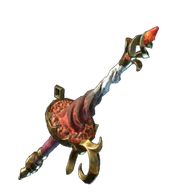 Candlelight WandWandCommon, Uncommon, Rare, Epic, Legendary
- Power
- 79.3
- Legendary · Level 55
- Attack Speed
- 0.6 sec
- 30% Overcharge
- +16 Mana Regeneration
- +1 Multishot
- +3% Health Leech
- Magic Fire Damage×3
- +7% Critical Strike Chance
Overcharge and Mana Regeneration at their highest, plus Multishot. Three Magic Fire Damage add Fire damage, which Arsonist raises, and Critical Strike Chance adds crits.
Skill order
- 1Core+17 points (17 total)
- 2Damage+8 points (25 total)
- 3Mana+6 points (31 total)
- UnityLevel 3
- Mana CurrentsLevel 3
- +1 attribute nodes
- 4Summons+11 points (42 total)
- Mage Apprentice
- Arsonist
- Totem MasteryLevel 3
- +2 attribute nodes
- 5Finishing touches+16 points (58 total)
- Wand Evasion Attack
- WizardLevel 3
- +2 attribute nodes
- Skill Points
- 58
Opens with every node above already taken. Change it from there and share your own version.
Decoy Summoner
- Wizard
- Healer
- Staff
Totems and Hollow allies take the hits, up to 8 summons at once. Slow to set up, very safe once it is, and the best answer to bosses that hit too hard.
Before you pull a fight, place totems and summon Hollow allies. You start with room for 1 totem and 1 Hollow ally, and Totem Mastery and Advanced Necromancy each add 1 per level, up to 4 of each. 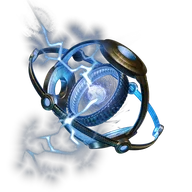 Shock Totem I fills the Stun Bar, Ice Totem I slows enemies, and
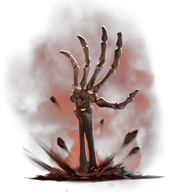 Hollow Wretch I attacks enemies and gives them another target. Enemies split their attacks across your summons while you cast from behind.
- Early game
- OK
- Groups
- OK
- Bosses
- Strong
- Flying
- OK
- Solo
- Strong
- Co-op
- OK
- Upkeep
- Moderate
Strengths
- Bosses split their attacks between you and up to 8 summons.
- Shock Totem I also deals Stamina Damage, filling the Stun Bar while you cast.
- Necromancer adds a 5% chance per level to summon a skull ally on magic kills, free extra decoys.
Weaknesses
- Slow to start. You need a few seconds of setup, which hurts when you are ambushed.
- Totems stay where you put them, so moving through a dungeon means placing them again.
- Until you make Eternal versions, every cast costs a charge: 20 per craft for totems and 100 for Hollow Wretch.
Gear and items
- Eternal Ice Totem I
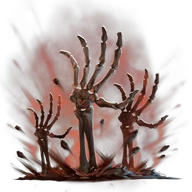 Eternal Hollow Wretch I
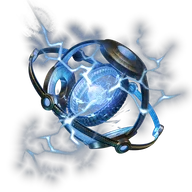 Eternal Shock Totem
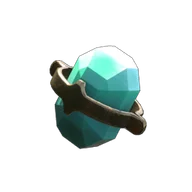 Gem of Lesser Necromancy
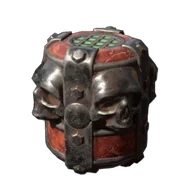 Skull Summoning Vessel I
Eternal versions remove the charge cost: Eternal Ice Totem I at level 20, Eternal Hollow Wretch I at level 28 and Eternal Shock Totem at level 45. Gem of Lesser Necromancy can raise up to 4 more Hollow Wretches from kills, and Skull Summoning Vessel I throws a temporary skull ally for any build.
Recommended weapons
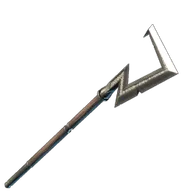 Dark StaffStaffCommon, Uncommon, Rare, Epic, Legendary
- Power
- 59.8
- Legendary · Level 55
- Magic Shock Damage×3
- +2 Mana Currents
- +10% All Magic Shock Damage
Ties for the most Power a staff reaches. Three Magic Shock Damage and All Magic Shock Damage add to the Shock damage that Thunder already raises.
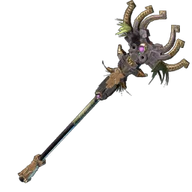 Staff Of The MoorStaffCommon, Uncommon, Rare, Epic, Legendary
- Power
- 55.2
- Legendary · Level 55
- +2 Necromancer
- Magic Shroud Damage×2
- +3% Mana Leech
- +10% All Magic Shroud Damage
Necromancer adds two skill levels, the most on any staff: each level gives Magic weapon kills a 5% chance to summon a Skull Companion, one more decoy.
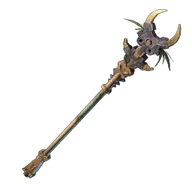 Staff Of ReedsStaffCommon, Uncommon, Rare, Epic, Legendary
- Power
- 55.2
- Legendary · Level 55
- +1 Necromancer
- Magic Shroud Damage×2
- +8 Mana Leech
- +10% All Magic Shroud Damage
Necromancer adds one skill level, and Mana Leech returns Mana on hits while you recast totems.






Skill order
- 1Core+19 points (19 total)
- 2Summons+13 points (32 total)
- 3Elements+13 points (45 total)
- Frost
- Wizard
- ThunderLevel 3
- Quick ChargeLevel 3
- +1 attribute nodes
- 4Defense+9 points (54 total)
- Healer
- Life EssencesLevel 3
- Blink
- +1 attribute nodes
- Skill Points
- 54
Opens with every node above already taken. Change it from there and share your own version.
B Tier
Excellent at one job, mostly in co-op. Weaker on its own.
Guardian Tank
- Guardian
- Warrior
- One-Handed Sword
- One-Handed Club
- One-Handed Axe
Makes co-op easy: enemies chase you, and allies near you take less damage. On its own it kills slowly, which is why it sits in B.
Stand in front. Nemesis raises the attention you draw from enemies by 10% per level, and Earth Aura gives you and every ally within 4 meters per level 10% more Physical and Magical Resistance. With three or more enemies within 20 meters, Tower and Warden add another 10% each. Parry when you can: Shockwave pushes the enemies around you back.
- Early game
- OK
- Groups
- OK
- Bosses
- OK
- Flying
- Weak
- Solo
- Weak
- Co-op
- Strong
- Upkeep
- Light
Strengths
- Everyone near you takes less damage without you doing anything.
- With Martyr, if you die, allies within 30 meters are healed for 50% of their max Health and gain 100 max Health for 15 minutes.
- No upkeep, and very forgiving of mistakes.
Must-have skills
Gear and items
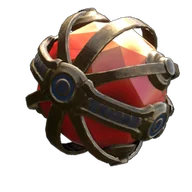 Gem of Armoring drops an orb on every kill that lets you resist all damage for a short time, and Gem of Retaliation gives blocking a chance to add bonus blunt damage to your next attack.
Recommended weapons
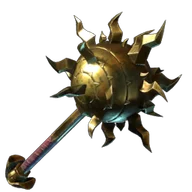 Solar MaceOne-Handed ClubCommon, Uncommon, Rare, Epic, Legendary
- Power
- 119.6
- Legendary · Level 55
- Attack Speed
- 0.6 sec
- Blunt Damage
- +20% Retaliation
- Magic Fire Damage×2
- +9 Health Leech
Retaliation deals part of the melee damage you take back to the attacker, and Health Leech returns Health on hits.
- Freshblood MaceOne-Handed ClubCommon, Uncommon, Rare, Epic, Legendary
- Power
- 119.6
- Legendary · Level 55
- Attack Speed
- 0.6 sec
- +8 Health Leech
- Blunt Damage×2
- Magic Shock Damage
- +3% Health Leech
Has two Health Leech, so the hits you land at the front restore Health.
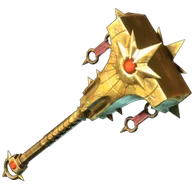 Sunset MaceOne-Handed ClubCommon, Uncommon, Rare, Epic, Legendary
- Power
- 119.6
- Legendary · Level 55
- Attack Speed
- 0.6 sec
- Blunt Damage
- +20% Retaliation
- Magic Fire Damage×2
- +3% Health Leech
Has the same enhancements as
Solar Mace, except that its Health Leech is +3%.

Skill order
- 1Core+27 points (27 total)
- Warrior's Path
- NemesisLevel 3
- Earth AuraLevel 3
- Soul Leech
- Tower
- Warden
- +6 attribute nodes
- 2Defense+10 points (37 total)
- Heavy PlatesLevel 3
- Shiny PlatesLevel 3
- Martyr
- +1 attribute nodes
- 3Parry+18 points (55 total)
- Power ParryLevel 3
- Wet Dog
- Vigorous DeflectionLevel 3
- Battle Heal
- Shockwave
- +4 attribute nodes
- 4Party support+7 points (62 total)
- Skill Points
- 62
Opens with every node above already taken. Change it from there and share your own version.
Dual Daggers
- Survivor
- Assassin
- Daggers
Huge burst from behind: a Sneak Attack starts at +900%, and backstabs keep paying once the fight starts. Shines when someone else holds the enemy's attention.
Open with Sneak Attack on an unaware enemy for +900% damage, and Cutthroat adds 100% more per level. Once the fight starts, lock on and use Strategic Maneuver to roll around the target for backstabs, which Backstab Mastery boosts by 20% per level. Dagger critical strikes with Expose Weakness make the target take 25% more physical damage for 5 seconds, which helps your whole group.
- Early game
- Strong
- Groups
- Weak
- Bosses
- OK
- Flying
- Weak
- Solo
- OK
- Co-op
- Strong
- Upkeep
- Light
Strengths
- The biggest opening hit of any build on this page.
- With Venomous Blades and Venom Mastery, daggers with the Venomous Blades perk poison 30% of the time and the poison deals 100% more damage.
- Daggers come with Riposte Kick: a kick after a parry that fills the Stun Bar, so even a frontal fight has a plan.

Weaknesses
- Sneak Attack only works on enemies that have not noticed you, so the big opener happens once per fight.
- Solo, everything faces you. Backstabs are much easier when an ally holds the enemy's attention.
- Groups are dangerous, since daggers hit one target at a time.
Must-have skills
Gear and items
 Gem of Toxic Betrayal poisons on every backstab, and
 Gem of Bleeding makes cutting critical strikes bleed.
Recommended weapons
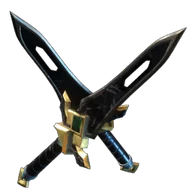 Grey BladesDaggersCommon, Uncommon, Rare, Epic, Legendary
- Power
- 70.8
- Legendary · Level 55
- Attack Speed
- 0.4 sec
- +8% Venomous Blades
- +20% Backstab Damage
- Piercing Damage
- +7 Health Leech
- Poison Damage
Has Health Leech. Backstab Damage adds to Backstab Mastery for the backstabs after your opener, and with Venomous Blades, Venomous Blades and Venom Mastery work too.
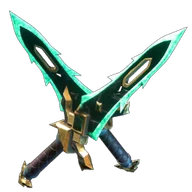 Crystal KnivesDaggersCommon, Uncommon, Rare, Epic, Legendary
- Power
- 70.8
- Legendary · Level 55
- Attack Speed
- 0.4 sec
- +8% Venomous Blades
- +20% Backstab Damage
- Poison Damage×2
- +3% Health Leech
Has Health Leech too, with the same Backstab Damage and Venomous Blades as
Grey Blades, plus two Poison Damage.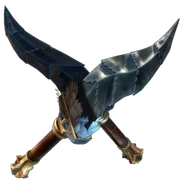 Horn DaggersDaggersCommon, Uncommon, Rare, Epic, Legendary
- Power
- 84.5
- Legendary · Level 55
- Attack Speed
- 0.4 sec
- Piercing Damage
- +8% Critical Strike Chance×2
- Magic Ice Damage×2
Ties for the most Power among daggers, and two Critical Strike Chance make crits frequent. Each dagger crit triggers Expose Weakness, and Slice And Dice too when you carry a bow.
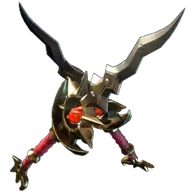 Solstice DaggersDaggersCommon, Uncommon, Rare, Epic, Legendary
- Power
- 78
- Legendary · Level 55
- Attack Speed
- 0.4 sec
- +24% Backstab Damage
- +9% Critical Strike Chance×2
- Piercing Damage
- Magic Fire Damage
Backstab Damage adds to Backstab Mastery for the backstabs after your opener, and two Critical Strike Chance keep the crits coming.


Skill order
- 1Core+18 points (18 total)
- 2Damage+19 points (37 total)
- 3Defense+7 points (44 total)
- 4Finishing touches+5 points (49 total)
- Skill Points
- 49
Opens with every node above already taken. Change it from there and share your own version.
Healer Support
- Healer
- Battlemage
- Staff
A dedicated healer turns hard fights into easy ones for a group. Solo you are a mage with fewer damage skills, so it stays in B.
Water Aura heals you and every injured ally within 5 meters per level, and Waters Of Life doubles it to 2 Health per 2 Intelligence. Healer adds 15% healing per level. In a fight, keep  Chain Heal I going for the group and get fallen allies up fast: Saviour cuts the 6-second revive by 1 second per level.
- Early game
- OK
- Groups
- Weak
- Bosses
- OK
- Flying
- OK
- Solo
- Weak
- Co-op
- Strong
- Upkeep
- Moderate
Strengths
- Water Aura heals without casting anything, so you can attack while it works.
- Revived allies come back with 8% more Health per level of Healing Revive, on top of the default 10%.
- Divine Surge lets healing spells crit, and Righteous Fire turns every heal into Fire damage against nearby Fell enemies.
Weaknesses
- Solo, there is little to heal but yourself, and your damage is low.
 Heal Beam has to be held to channel, so you are not attacking while you use it.
Must-have skills
Gear and items
Chain Heal I seeks out allies by itself, and  Protective Barrier blocks projectiles while giving everyone inside 25% more Physical Resistance.
Recommended weapons
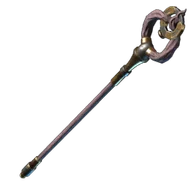 Clearwater StaffStaffCommon, Uncommon, Rare, Epic, Legendary
- Power
- 55.2
- Legendary · Level 55
- +3 Mana Currents
- Magic Fire Damage×2
- +1 Healer×2
The most Power among staves with Healer: two of them add two skill levels, 15% more healing each. Mana Currents keeps you casting.
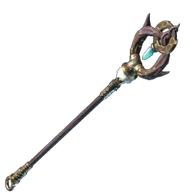 Crystalwater StaffStaffCommon, Uncommon, Rare, Epic, Legendary
- Power
- 50.6
- Legendary · Level 55
- +3 Mana Currents
- Magic Fire Damage
- +2 Healer
- +3% Mana Leech
- +6% Critical Strike Chance
A single Healer adds two skill levels, and Mana Currents and Mana Leech keep Mana flowing while you heal.
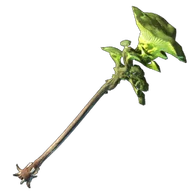 Beastmaster Shaman StaffStaffCommon, Uncommon, Rare, Epic, Legendary
- Power
- 46
- Legendary · Level 55
- +1 Healer
- +2 Mana Currents
- +5% Critical Strike Chance
- +10% Damage against Wildlife
- +2 Healer
Less Power, but its two Healer enhancements add three skill levels, the most on any staff.



Skill order
- 1Core+11 points (11 total)
- HealerLevel 3
- Water AuraLevel 3
- Waters Of Life
- +3 attribute nodes
- 2Party support+12 points (23 total)
- Life Essences
- Healing ReviveLevel 3
- SaviourLevel 3
- Divine Surge
- +1 attribute nodes
- 3Mana+4 points (27 total)
- Mana CurrentsLevel 3
- +1 attribute nodes
- 4Defense+12 points (39 total)
- Skill Points
- 39
Opens with every node above already taken. Change it from there and share your own version.
C Tier
Works in the right place only. Fun, but not where we would start.
Beastmaster
- Beastmaster
- Ranger
- Bow
- Daggers
Animals and Vukah within 50 meters fight for you. Great in the open world, but it does little in dungeons and boss fights where no animals are around.
Calm Spirit stops wild animals within 50 meters from attacking you unless provoked, and Beast Master sends them after whatever attacks you. Vukah Language and Vukah Culture do the same with Vukah. Fight where animals and Vukah live, and let them swarm your target while you shoot.
- Early game
- Strong
- Groups
- OK
- Bosses
- Weak
- Flying
- OK
- Solo
- OK
- Co-op
- OK
- Upkeep
- Light
Strengths
- Exploring gets calmer: wild animals and Vukah leave you alone unless you start it.
- Cheap: the core and the Vukah skills cost 19 points together, so they fit into other builds as a side pick.
Weaknesses
- Calm Spirit does not work on animals corrupted by the Shroud.
- No help where there are no animals, such as most dungeons and boss fights.
- The damage skills only count against certain enemies: Cull the Herd against wildlife and Primal Force against Vukah.
Must-have skills
Gear and items
No special gear. Use a bow or daggers, since Survival Instinct restores Time in the Shroud only on Bow and Dagger kills.
Recommended weapons
- Fell Marksman BowBowCommon, Uncommon, Rare, Epic, Legendary
- Power
- 82.8
- Legendary · Level 55
- Draw Speed
- 0.6 sec
- +20% Arrow Speed
- Magic Shroud Damage×2
- +10 Headseeker
- +30 Reaping
- +9% Damage against Scavenger
Ties for the most Power among bows that draw in 0.6 seconds, and quick shots keep you in the air with Bee Sting, which drains Stamina. Headseeker restores Stamina on Skillshots, which Skill Shot makes hit harder, and Reaping gives a Stamina Regeneration buff on kills.
- Fell Sentinel BowBowCommon, Uncommon, Rare, Epic, Legendary
- Power
- 82.8
- Legendary · Level 55
- Draw Speed
- 0.6 sec
- +20% Arrow Speed
- Piercing Damage×2
- +20% Critical Strike Damage
- +40 Reaping
- +6% Critical Strike Chance
The other bow with that Power and Draw Speed. Reaping gives a bigger Stamina Regeneration buff on kills, Critical Strike Chance makes crits more frequent, and Critical Strike Damage makes them hit harder.
Skill order
- 1Core+12 points (12 total)
- Mithridatist
- Calm Spirit
- Beast Master
- +3 attribute nodes
- 2Animal allies+7 points (19 total)
- 3Damage+10 points (29 total)
- Cull the HerdLevel 3
- Primal ForceLevel 3
- MarksmanLevel 3
- +1 attribute nodes
- 4Mobility+8 points (37 total)
- Skill Points
- 37
Opens with every node above already taken. Change it from there and share your own version.
Shroud Caster
- Trickster
- Wizard
- Staff
Shroud Meteor hits up to five enemies at once, but every Shroud spell eats into your Time in the Shroud. Fun in short bursts, risky on long Shroud trips.
 Shroud Meteor calls a meteor down on up to five enemies and
 Shroud Beam burns everything in a line, both boosted by Dark Arts at 10% per level. Every Shroud spell shortens your Time in the Shroud, so pair them with Inner Fires for an extra minute per level and Shroud Mitigation, whose flame bursts give 9 seconds back to you and allies within 20 meters.
- Early game
- Weak
- Groups
- Strong
- Bosses
- OK
- Flying
- OK
- Solo
- OK
- Co-op
- OK
- Upkeep
- Moderate
Strengths
- Strong against packs: one meteor can hit five enemies.
 Eternal Shroud Meteor and
 Eternal Shroud Beam remove the charge cost.
- Shroud Mitigation gives Time in the Shroud back to the whole group, not just you.
Weaknesses
- Every Shroud spell shortens your Time in the Shroud, even the Eternal ones.
- Some enemies resist Shroud damage, and you need
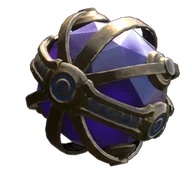 Gem of Cleansing to strip that resistance.
- Its damage skill only boosts Shroud damage, so there is little to fall back on.
Gear and items
Gem of Cleansing removes Shroud Damage Resistance on hit, and 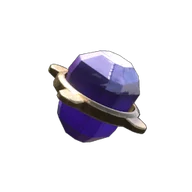 Gem of Hopeful Embers makes enemies drop orbs that refill your time when it runs low.
Recommended weapons
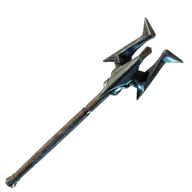 Blackened StaffStaffCommon, Uncommon, Rare, Epic, Legendary
- Power
- 59.8
- Legendary · Level 55
- Magic Shroud Damage×3
- +3% Mana Leech
- +10% All Magic Shroud Damage
Ties for the most Power a staff reaches, with three Magic Shroud Damage and All Magic Shroud Damage on top of Dark Arts.
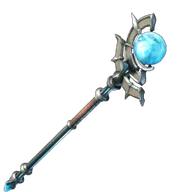 Oracle's EverblueStaffCommon, Uncommon, Rare, Epic, Legendary
- Power
- 55.2
- Legendary · Level 55
- Magic Shroud Damage×2
- +3% Mana Leech
- +7% Critical Strike Chance
- +10% All Magic Shroud Damage
Shroud Imbued adds heavy Shroud damage, with All Magic Shroud Damage and Critical Strike Chance. It is found only inside Shroud Lairs.
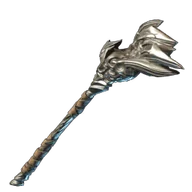 Shroud WeaverStaffRare, Legendary
- Power
- 55.2
- Legendary · Level 55
- Magic Shroud Damage×2
- +18% Critical Strike Damage
- +2 Mana Currents
- +10% All Magic Shroud Damage
Craft at AlchemistRare · Power 45.1
The Shroud staff the
Alchemist crafts, at Rare. Its Legendary version adds All Magic Shroud Damage.

Skill order
- 1Core+20 points (20 total)
- 2Staying power+10 points (30 total)
- Well Rested
- Inner FiresLevel 3
- Healer
- Water Aura
- Shroud MitigationLevel 3
- +1 attribute nodes
- 3Critical Strikes+12 points (42 total)
- Quick ChargeLevel 3
- Arsonist
- WizardLevel 3
- +2 attribute nodes
- 4Defense+7 points (49 total)
- Skill Points
- 49
Opens with every node above already taken. Change it from there and share your own version.
Combat tips that can change a build's tier
Ranger
Bows come as longbows and shortbows. Tell them apart by Draw Speed in the bow's stats: a shortbow shows a shorter time. Longbows hit harder and shortbows shoot more often. Since Shell Shock stuns enemies, a longbow holds up fine, but against groups and fast attackers such as the Drak'Dal a shortbow is safer.
Sneak Attack needs an unaware enemy, so it opens fights but will not finish a boss that has already seen you.
Mage
Ice spells such as
 Ice Bolt I slow enemies, and Shock spells such as
 Chain Lightning I fill the Stun Bar. When it is full the enemy is stunned, and a melee ally can land a Merciless Attack for +500% damage, so mages and warriors are stronger together.
Big enemies are stunned for less time, and
 Entangle I only slows them instead of rooting them in place. Expect longer fights against large bosses.
Totems are a mage's best tool. You can place 1 at a time by default, and Totem Mastery at its maximum level raises that to 4. Enemies go after the totems, so they cover you while they keep shooting.
Ice Totem I slows enemies and Shock Totem I fills their Stun Bar.In the endgame you have skill points to spare, so cover both ranges: a wand with Aerial Wand Attack up close and a staff at range. Blast and Cast ties them together: after a wand Critical Strike, your next Staff attack within 10 seconds gets 50% more base damage.
Life Burst heals 5 times your Intelligence per magic kill. Even with every Intelligence point from the skill tree and the Flame (11 from Intelligence nodes, 10 from raising the Flame Level and 5 from Exalted, 26 in total), that is only 130 Health. Late in the game your maximum Health is far higher and a single enemy attack takes a large share of it, so this heal will not keep you alive.
Any build
Any build can bring a decoy. Throw a
Skull Summoning Vessel I to summon a skull companion for a while, and enemies get something else to hit.Giant Slayer Hook and Grounding Hook cost more Stamina the higher the enemy's level. Against high-level bosses, save enough Stamina to dodge after you land.
How we rank
- These ranks are GameWith editorial calls for Version 1.0, not an official tier list.
- We rank each build on how it plays from the midgame to the end: clearing groups, killing bosses, handling flying enemies, staying alive solo and helping a group.
- Upkeep counts against a build. Heavy crafting pulls a rank down, though not out of S when the payoff is as large as Explosive Arrows.
- Point totals include every node on the way, attribute nodes too, so they match the Skill Tree Planner.
- Recommended weapons are compared as Legendary at the maximum level of 55 (a level 50 weapon with every enhancement unlocked). Melee builds list weapons with Health Leech first, and the Blizzard Staff compares only staves with All Magic Ice Damage. Within that, weapons are ranked by Power. Each damage enhancement adds 10% of base damage, so weapons with more of them reach more Power. Ties go to the enhancements and weapon effects the build uses, then to weapons you can craft.
- For bows, Draw Speed decides: builds that shoot often use bows that draw in 0.6 seconds, and the sniper build uses long bows that draw in 1 second for the most Power per arrow. Healer Support's staves are picked among those with the Healer enhancement. Upgrading costs Runes, and Legendary items need Legendary Runes.