This is the walkthrough chart for Chapter 1, “In Pursuit of the Aurora's Chosen,” of the Monster Hunter Outlanders story. It goes through each main quest step by step with screenshots and lists what each quest unlocks.
Chapter 1: In Pursuit of the Aurora's Chosen Walkthrough
The Storm-Swept Island
Choose a Control Mode
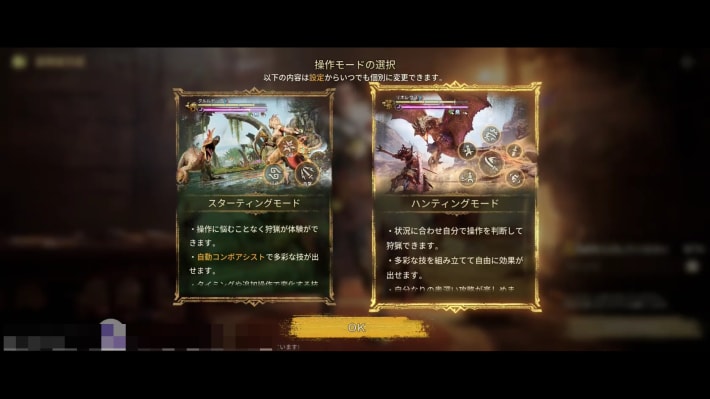
After you finish creating your character early on, you'll be asked to pick a control mode. Choose based on how used you are to action games and to playing on a phone.
ControlsFollow the Quest Marker
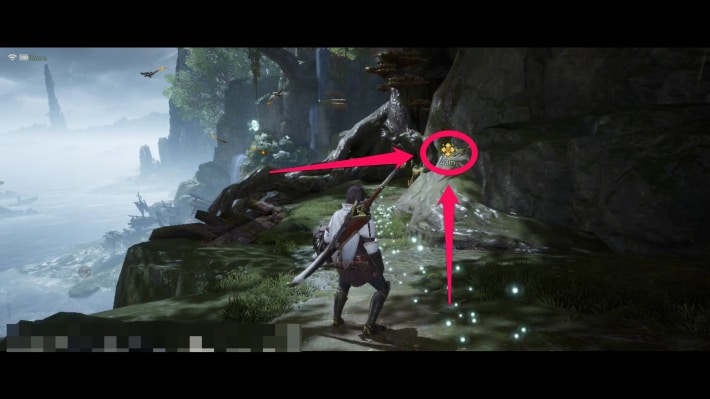
Follow the quest marker and the tutorials as instructed. The route is linear, and as long as you act as each tutorial explains, you can't fail.
 Point!
If the game runs slowly, go back to the server select screen and change your settings!
Fight Off the Rathian
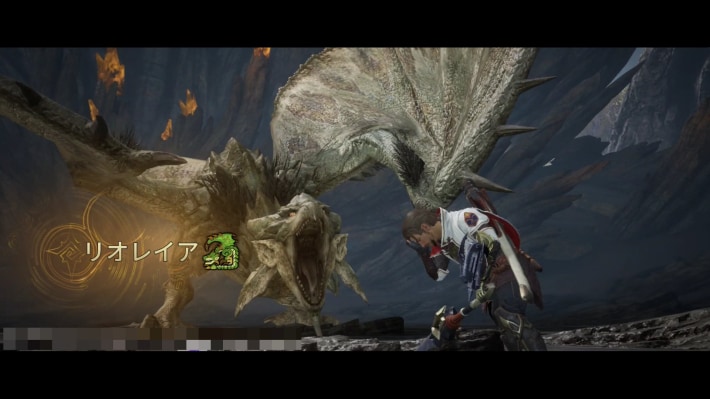
Fight off the Rathian that appears. You fight with a Long Sword here, but you can change your weapon later.
Learn the Long Sword Controls
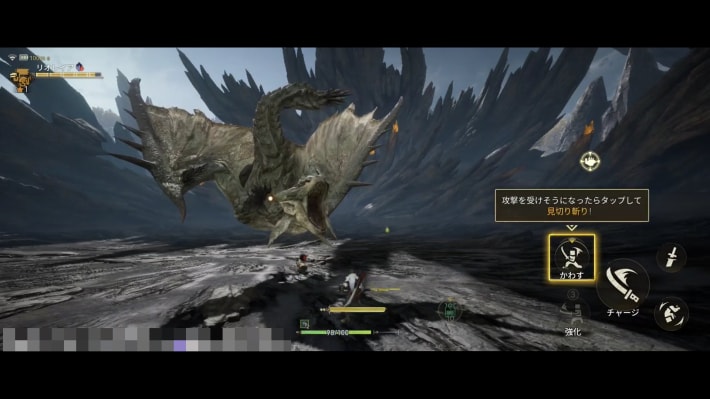
A Long Sword tutorial runs during the fight. Most prompts are timed to the Rathian's moves, so it's easy to tell what to do even if you're new to the controls.
Rekindling the Forge
Head to the Workshop
| Workshop location | What it looks like |
|---|---|
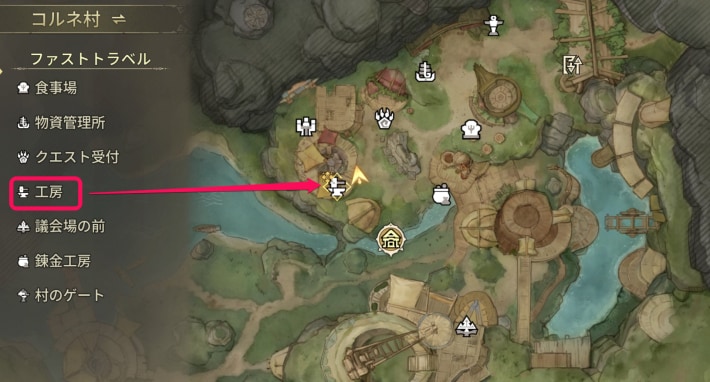 | 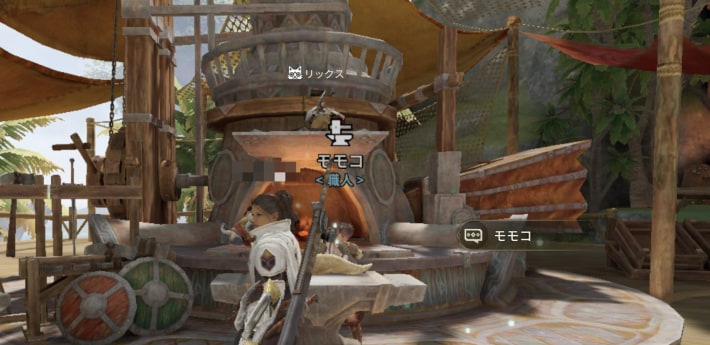 |
Head to the Workshop in the village. The story continues automatically when you arrive.
Choose Your Fated Adventurer's Weapon Type
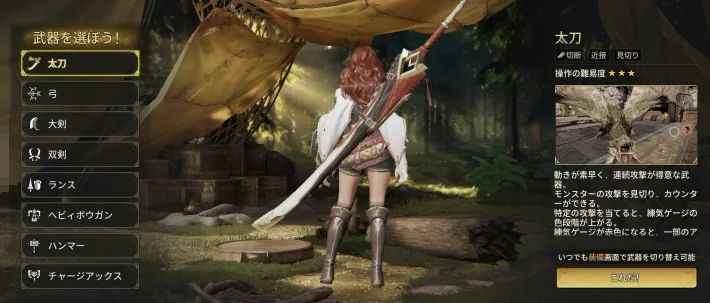
Choose the weapon type for your Fated Adventurer at the Workshop.
Point!If you're not sure which weapon to use, you can try out the controls at the training area!
Head to the Zip Line at the Destination
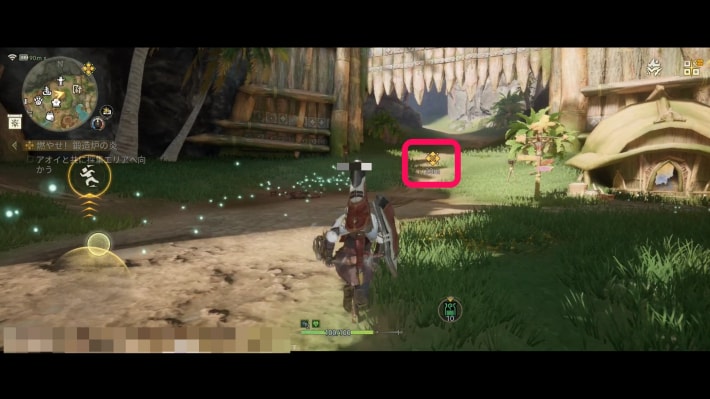 | 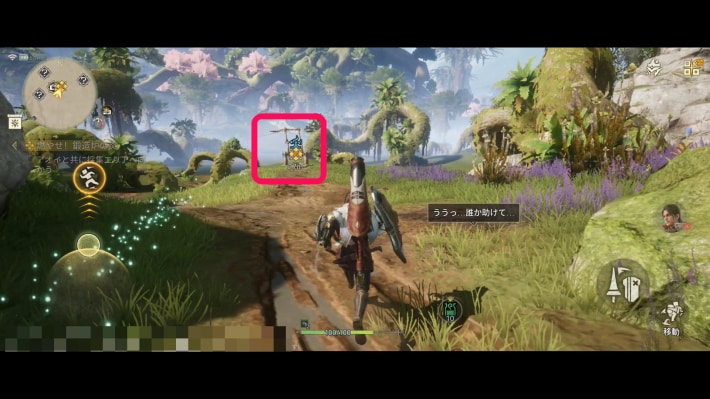 |
After choosing a weapon type, follow the quest marker out of the village. Then keep following the marker and use the Zip Line at the destination.
Point!Gather any ore and plants you see along the way. You'll need them later for crafting items and building!
Build a Zip Line and Head to the Destination
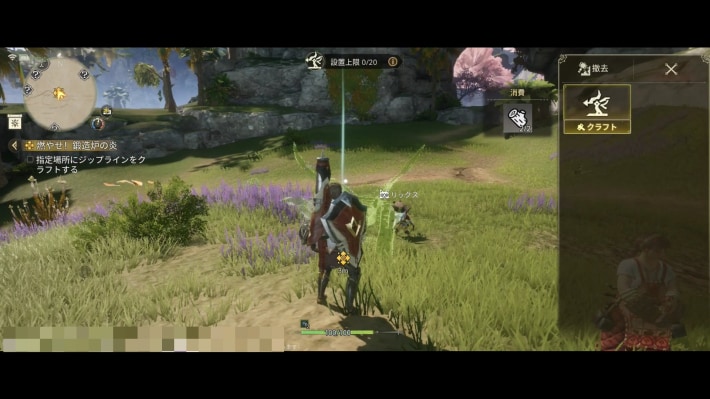
After riding the Zip Line down and moving on, the story continues and you can build Zip Lines yourself. A building tutorial starts; follow it to build a Zip Line and ride it.
Unwelcome Visitors in the Gathering Area
Head to the Gathering Area
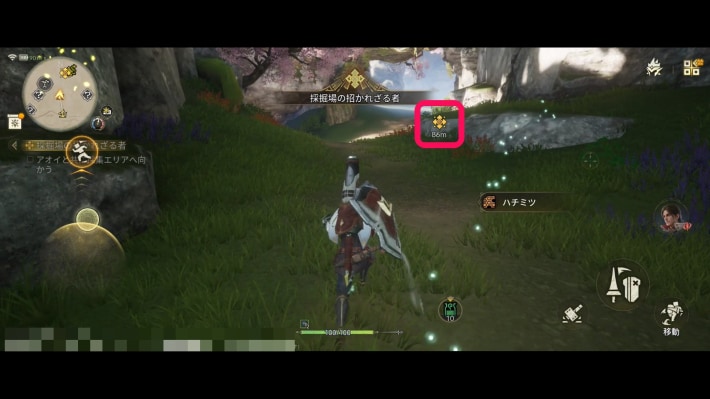
From where the Zip Line drops you off, follow the marker to the Gathering Area ahead. The story continues automatically when you get close.
Slay the Great Jagras
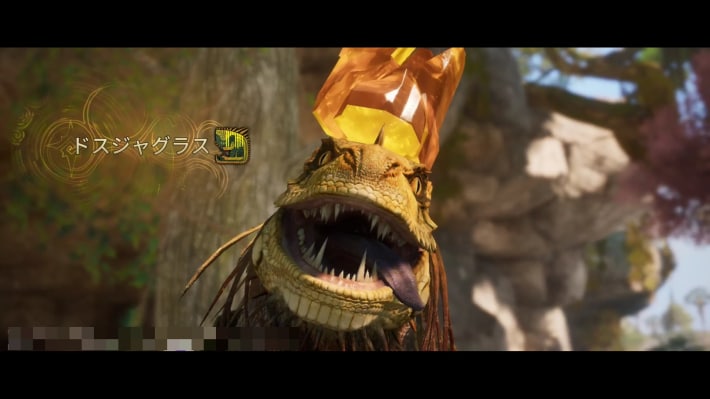
Slay the Great Jagras that appears. It flees partway through and fights an Anjanath over territory, so you'll need to chase it.
Point!A tutorial on using Ultimates runs during this fight!
Carve the Great Jagras
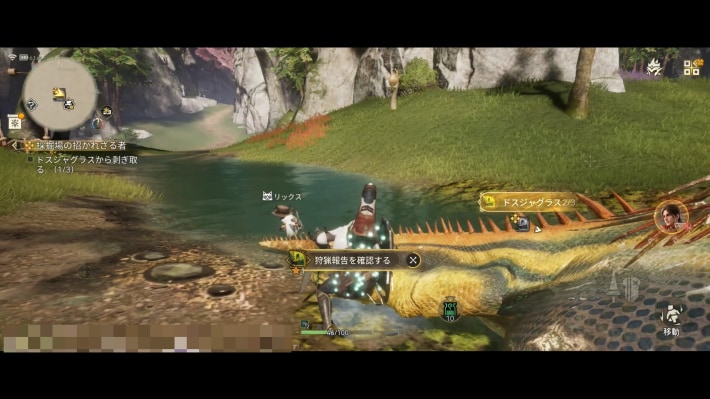
Carve materials from the Great Jagras you slew. A carving prompt appears when you approach a slain monster or a severed tail.
Check the Research Notes
| Where the research notes are |
|---|
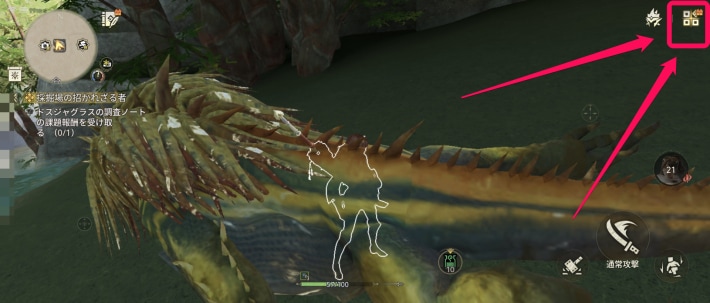 |
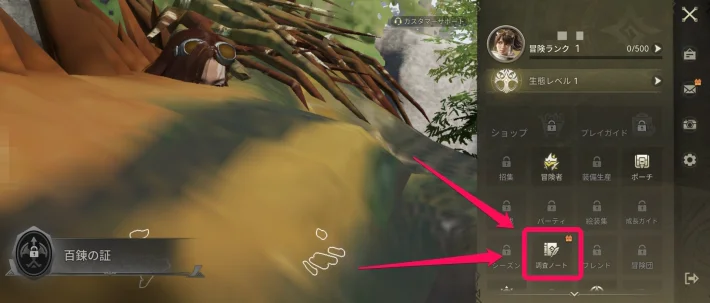 |
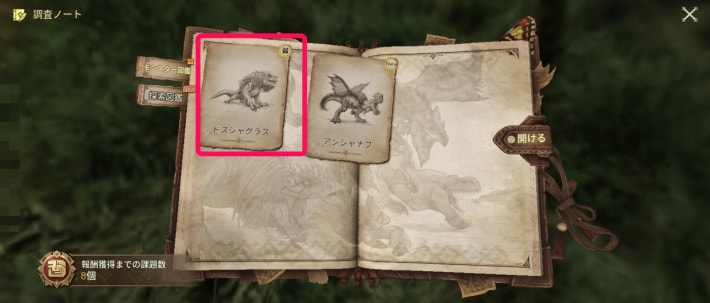 |
 |
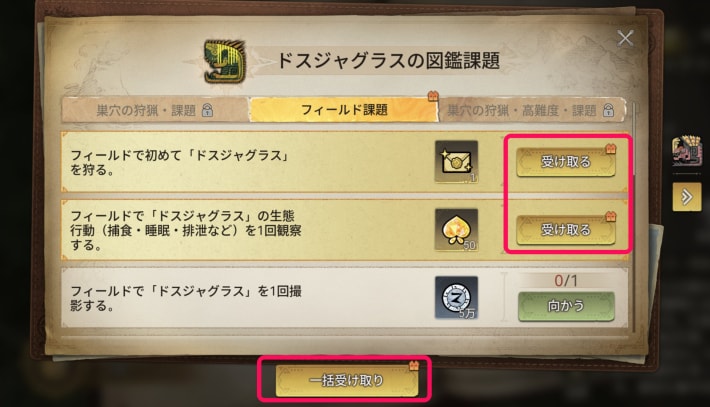 |
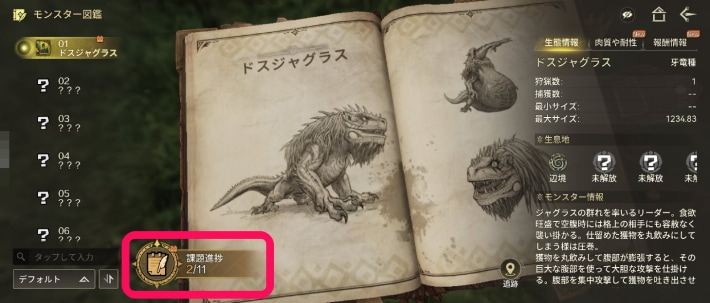
Open the Great Jagras entry in the research notes to view its info and claim the first-hunt reward.
Return to the Village by Wingdrake (Fast Travel)
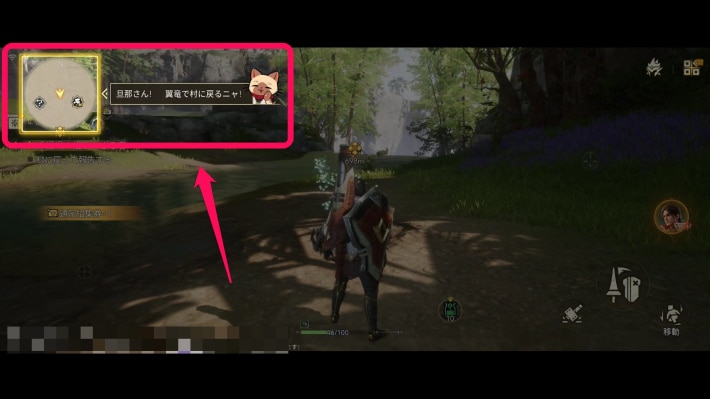
After the story moves on, a fast travel tutorial starts and takes you back to the village. The story then continues automatically and the quest is complete.
Interactive MapReady for Another Adventure!
Head to the Workshop
| Workshop location | What the Workshop looks like |
|---|---|
| |
The Workshop is in Kulune. Approach the Workshop smith and you'll be taken to the weapon crafting screen almost automatically.
Craft a Weapon
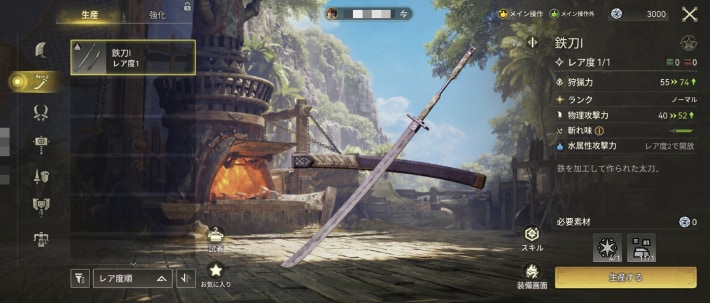
Craft any weapon you like. Afterward, return to the field screen to complete the quest.
Weapon CraftingAbout Element Specialization
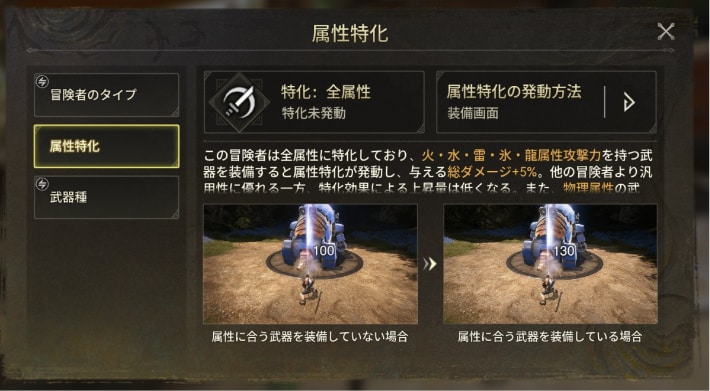
Element specialization is explained after you craft, but early on it doesn't make enough of a difference to affect your progress. As you get further, start matching the elements of your Fated Adventurer and your party.
Beginner GuideThe Missing Companion
Talk to the Quest Counter Attendant
| Where the attendant is | What the destination looks like |
|---|---|
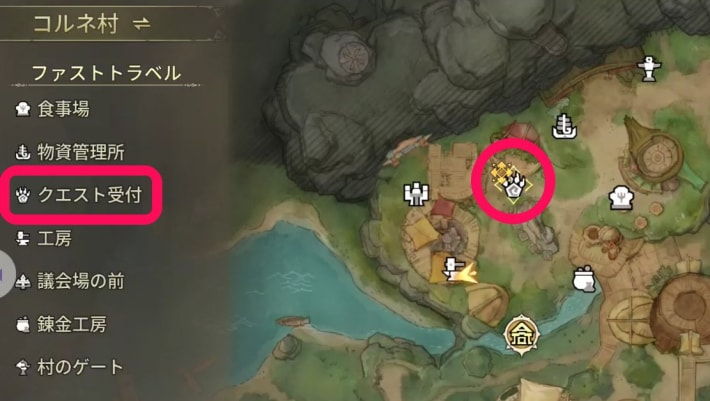 | 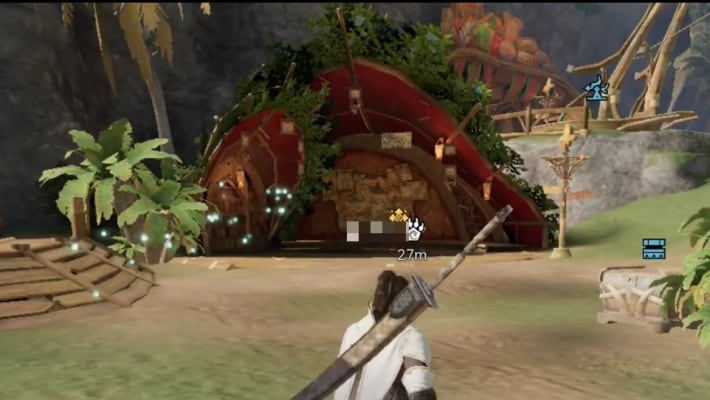 |
Go to the quest counter and talk to the attendant to move the story forward.
Fast Travel to the Outlands
| Field screen | Map screen |
|---|---|
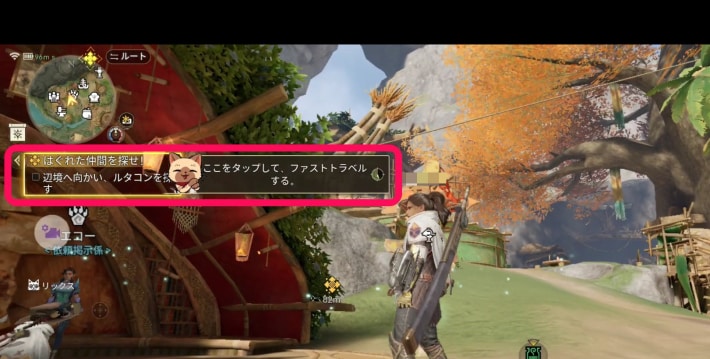 | 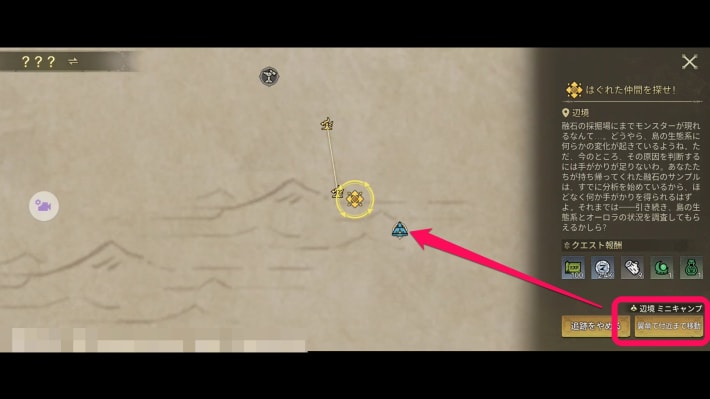 |
The quest objective is shown below the minimap at the top left of the field screen. Tap it to open the map, then use the fast travel button at the bottom right to travel near the objective.
Interactive MapFind the Rutaco
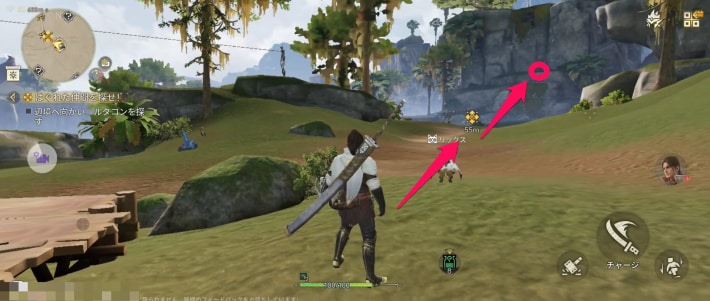
There's a rocky hill to the northwest of the fast travel point. The lost Rutaco is sitting at the top of the cliff; talk to it to move the quest forward.
Build a Wind Platform and Head to the Camp
| How to build it | How to use the Wind Platform |
|---|---|
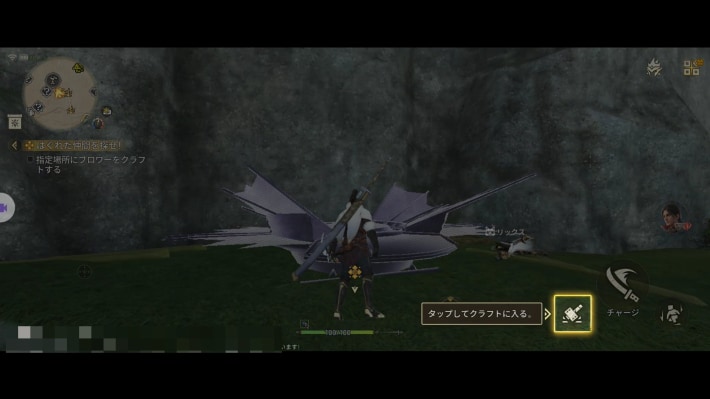 | 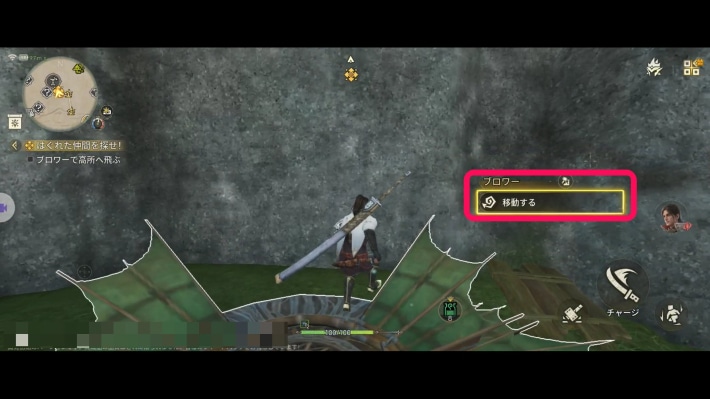 |
As the Rutaco instructs, build a Wind Platform at the marked spot right next to you. Then step onto it to ride the updraft up.
Talk to the Rutaco
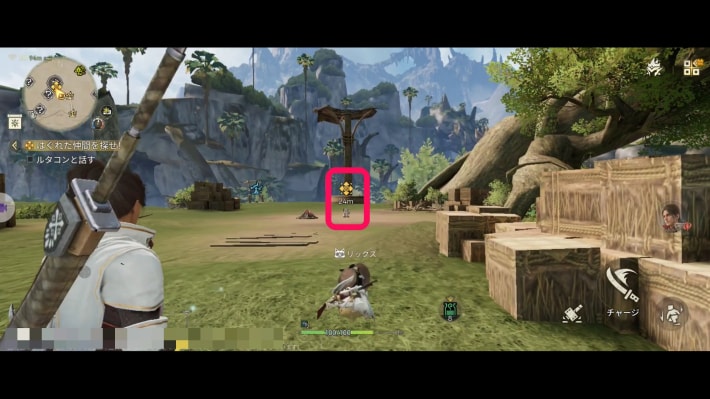
After using the Wind Platform, talk to the Rutaco by the campfire to continue the quest.
Repair the Watchtower
| What the Watchtower looks like | Leveling it up |
|---|---|
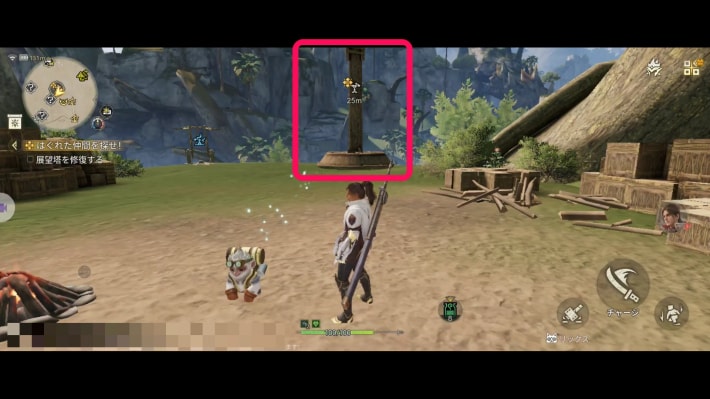 | 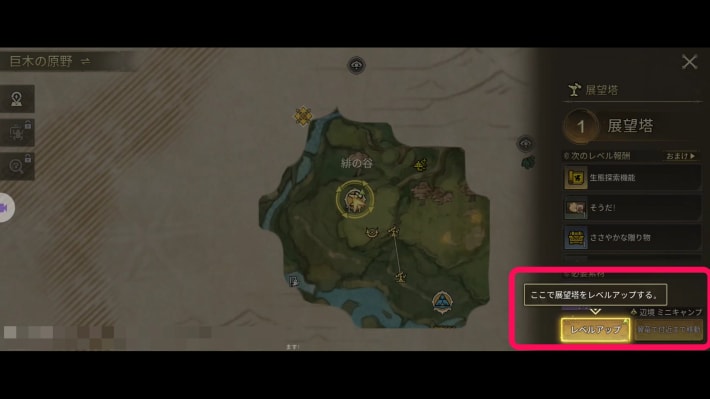 |
As the Rutaco instructs, repair the Watchtower and level it up. Repairing it switches to the map screen automatically, where you can raise its level.
There for the Radiantite
Head to Where the Disturbance Began
| Field screen | Map screen |
|---|---|
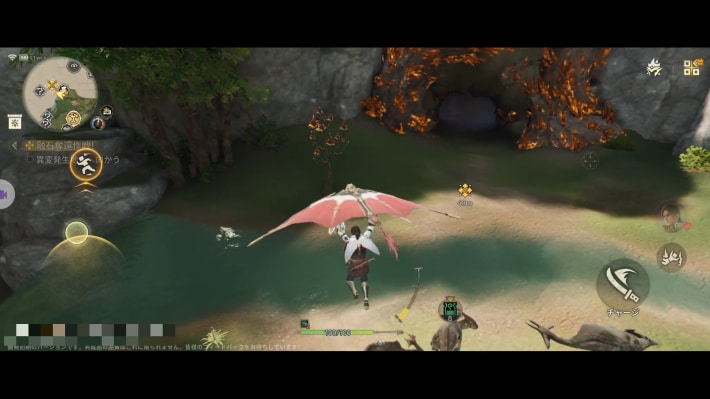 | 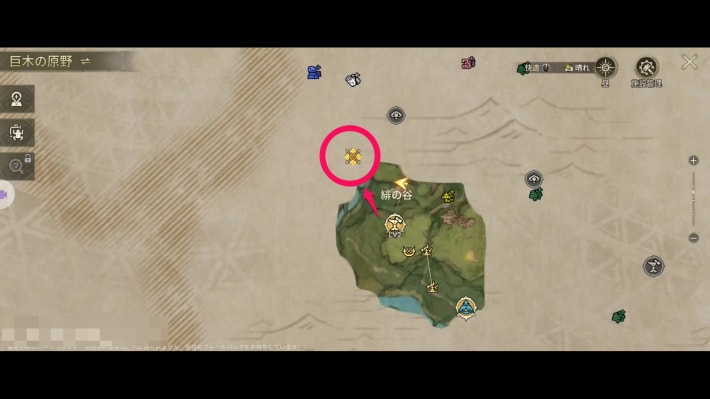 |
Head to where the disturbance began. You can jump straight down from the Crimson Vale Watchtower to get there. The story continues automatically when you reach it.
Slay the Kulu-Ya-Ku
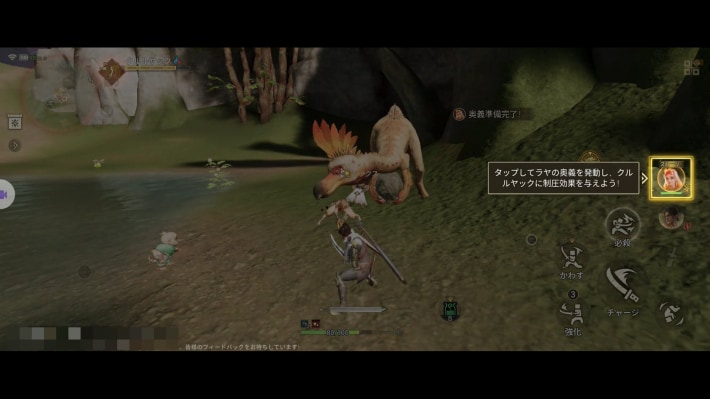
Slay the Kulu-Ya-Ku that appears. Raya joins the fight, and tutorials on Squadmate Skills and targeting individual parts with lock-on run along the way.
Co-op, Squadmate & UltimatesCarve It and Check the Research Notes
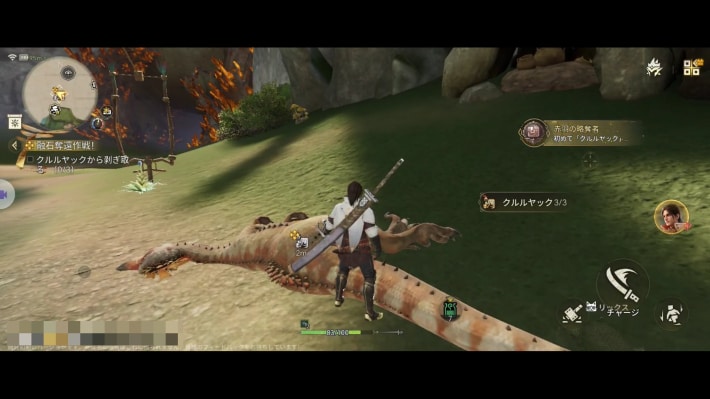 | 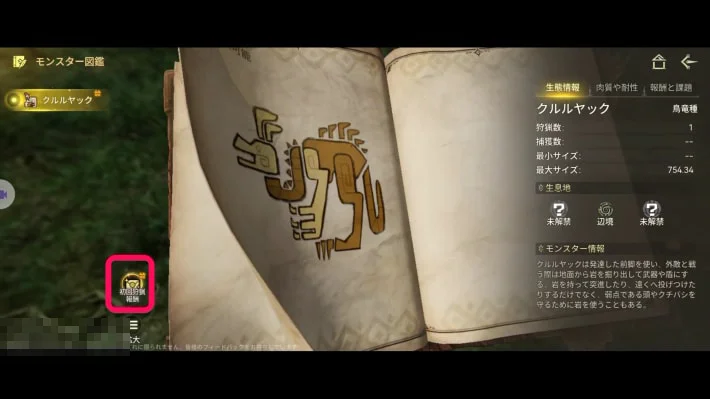 |
After slaying the Kulu-Ya-Ku, carve it, then open the monster field guide from the menu and claim the reward in the research notes.
Return to the Village and Craft Armor
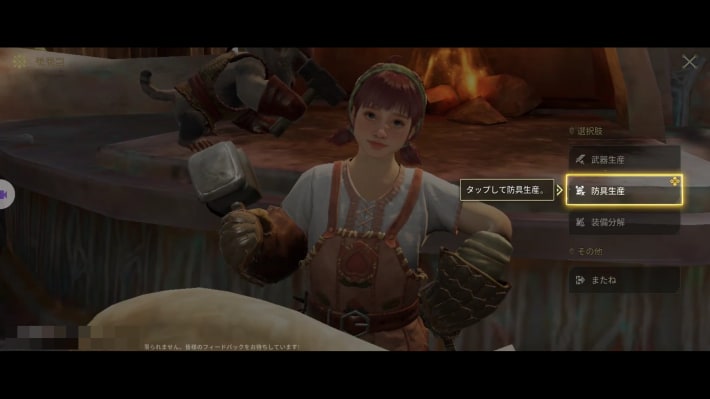 | 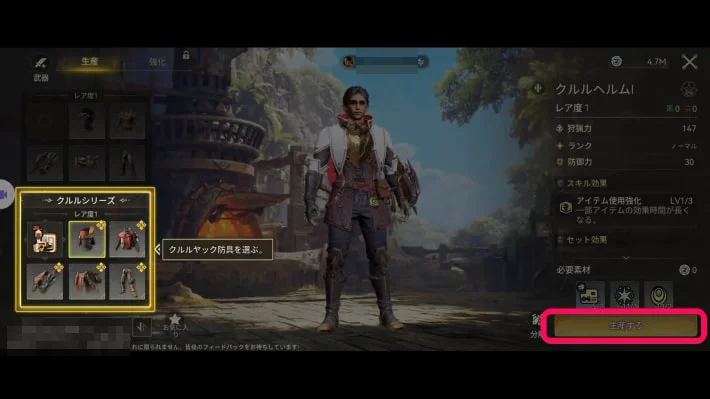 |
Go back to the village and visit the Workshop. Armor crafting is now available; craft a piece of Kulu-Ya-Ku armor and return to the field screen to complete the quest.
Weapon CraftingWhere Adventurers Gather
Recruit Raya
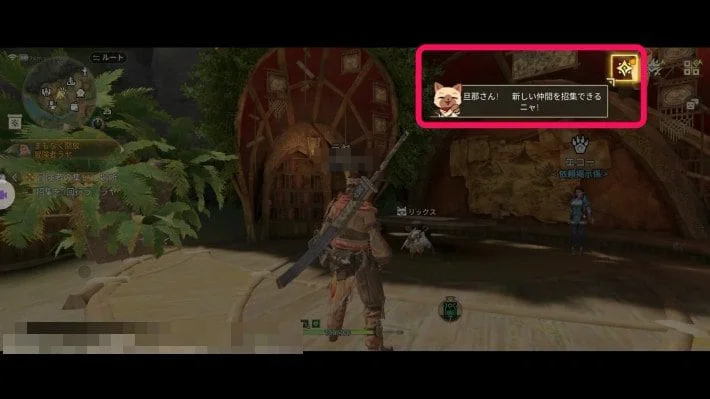 | 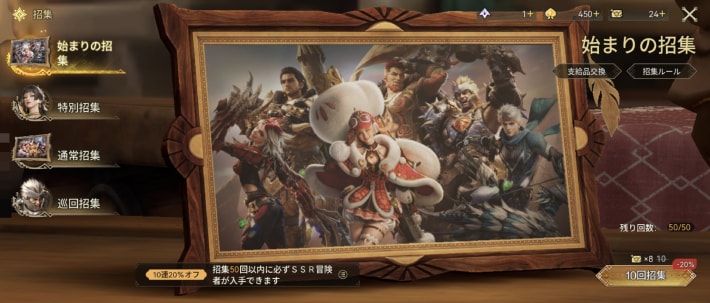 |
This is the Recruitment tutorial for getting Raya, who fought alongside you. You'll be taken to the Recruitment screen almost automatically; you'll do a recruitment pull, so just follow the tutorial.
Add Raya to Your Party
| Party lineup | Party screen |
|---|---|
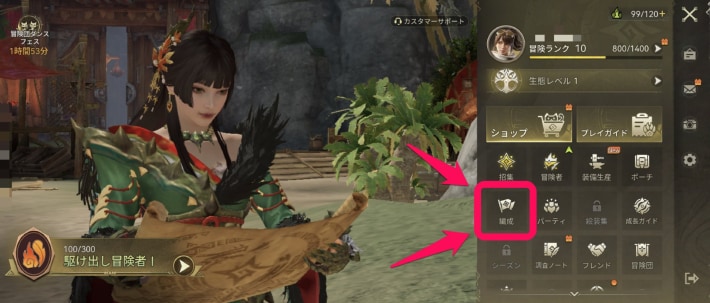 | 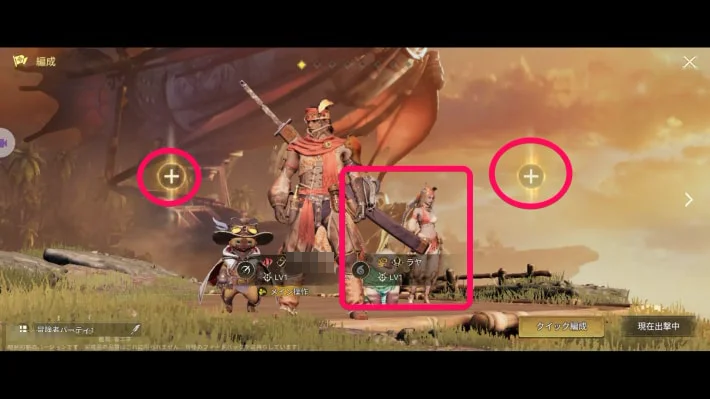 |
Once Raya has joined from the recruitment pull, open the party screen from the menu. Follow the tutorial to put Raya in an empty slot, then return to the field screen to complete the quest.
RayaGet Stronger, Adventurer
Talk to Icarus to Unlock Proof of Mastery
| Icarus | Map screen |
|---|---|
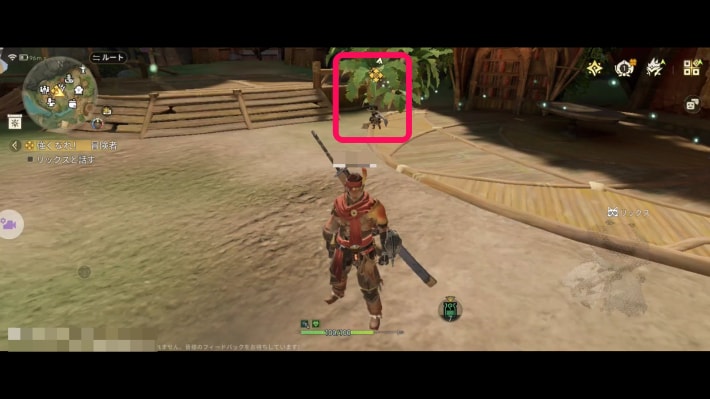 | 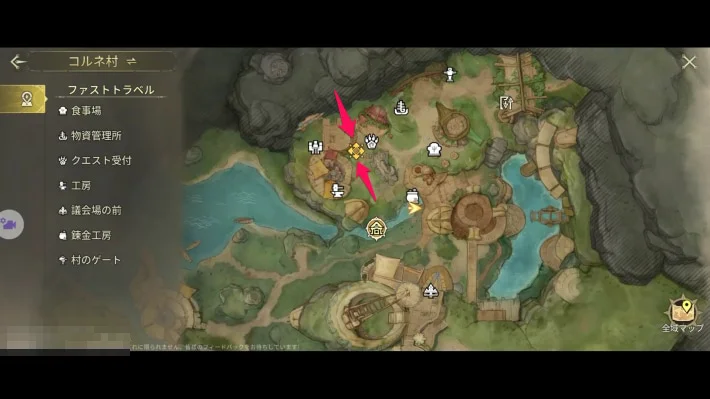 |
Go up to your Buddy Icarus and talk to him. The story moves on, and the Proof of Mastery tutorial starts almost automatically.
Reach Rookie Adventurer II
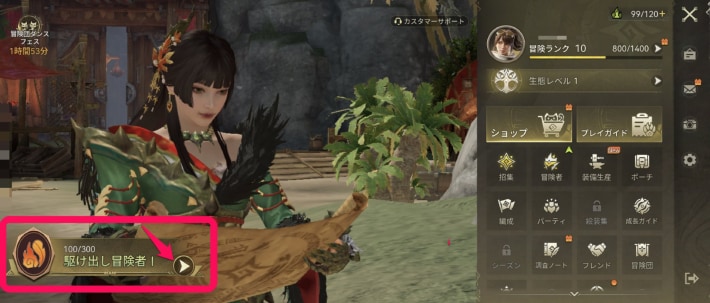 | 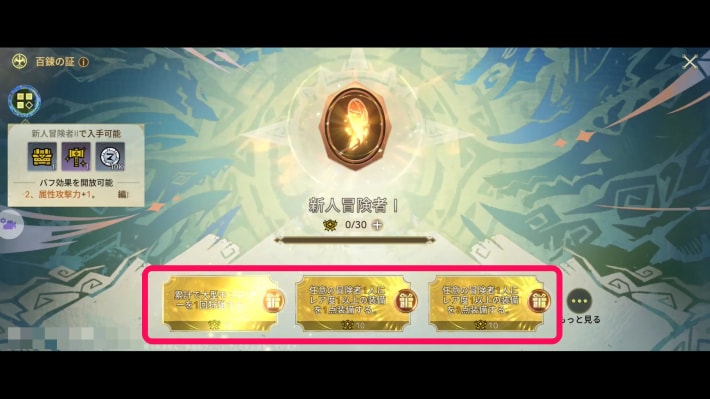 |
Follow the tutorial step by step and raise your Proof of Mastery to Rookie Adventurer II.
Level Up a Keepsake
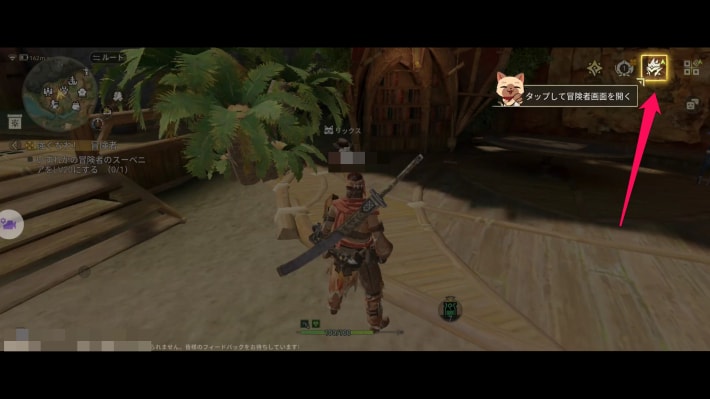 | 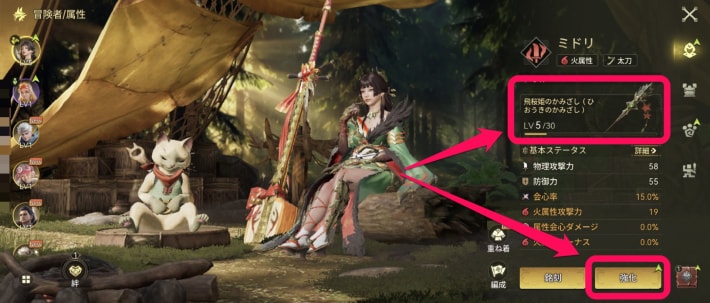 |
Return to the field screen and talk to Icarus again to start the tutorial on leveling up an adventurer's Keepsake. Follow it and level up the Keepsake.
Level Up GuideReach Rookie Adventurer III
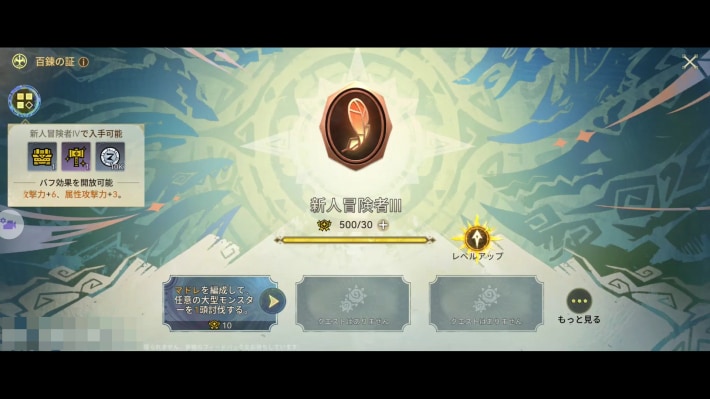
Go back to Proof of Mastery, raise it to Rookie Adventurer III, then return to the field screen to complete the quest.
Adventurers, Deploy!
Take the Quest
| Where to take the quest | Map screen |
|---|---|
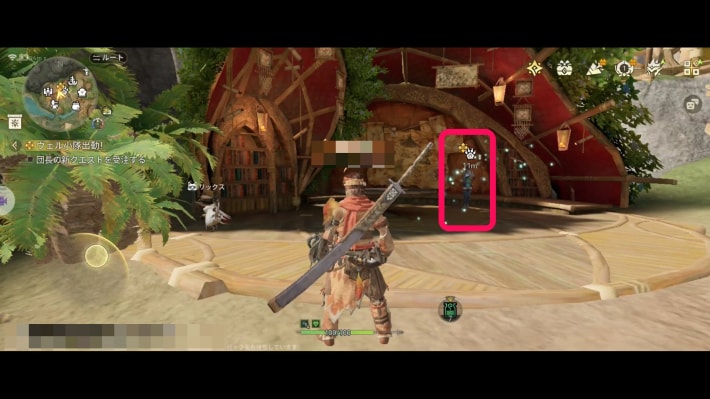 | 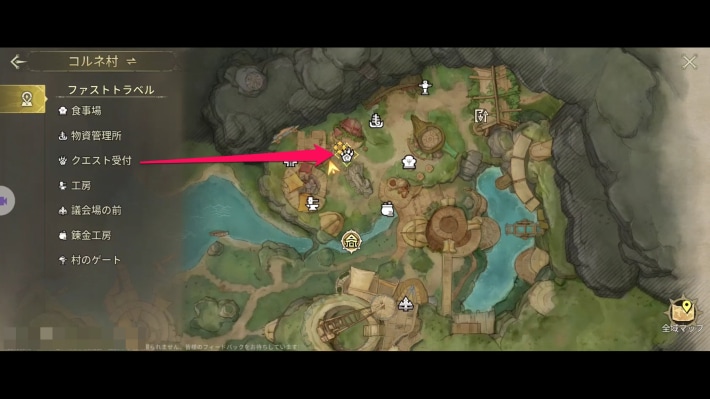 |
Talk to the quest counter attendant to move the story forward.
Talk to Holly
| Holly | Map screen |
|---|---|
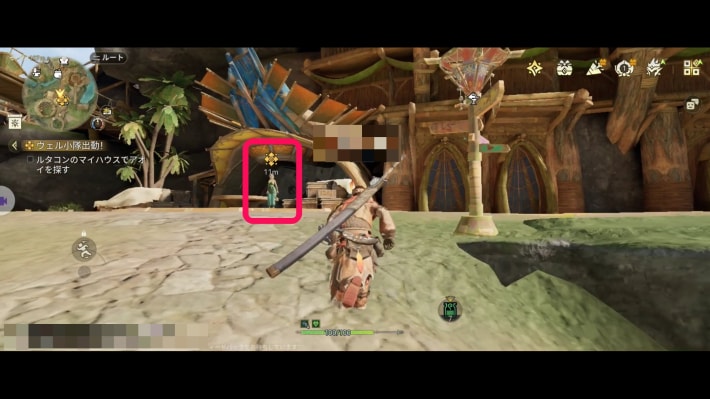 | 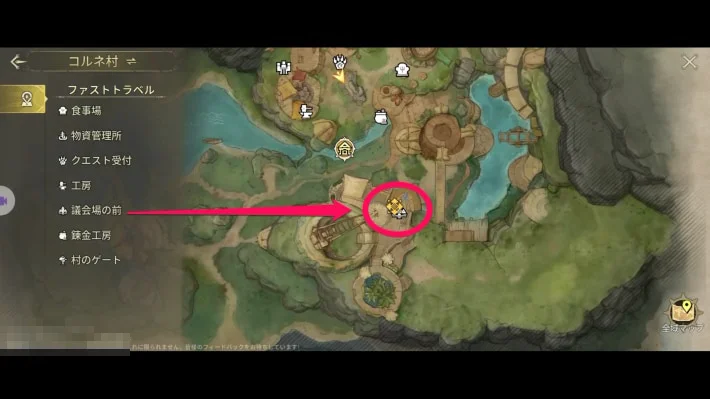 |
Go to the front of the council hall and talk to Holly to move the story forward.
Go to the Muddy Swamp
Buy an Antidote
| Buying from Ruck | Map screen |
|---|---|
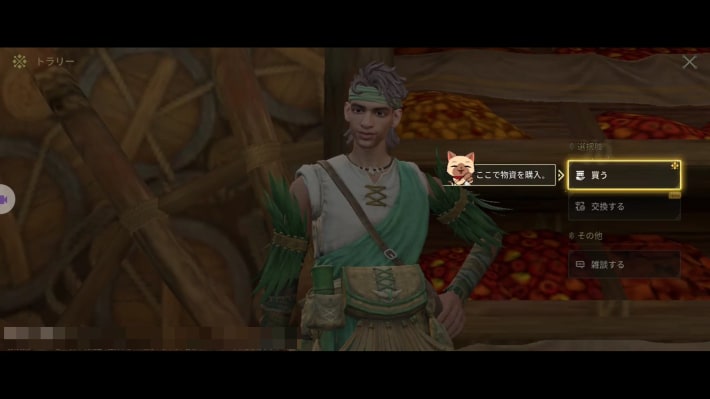 | 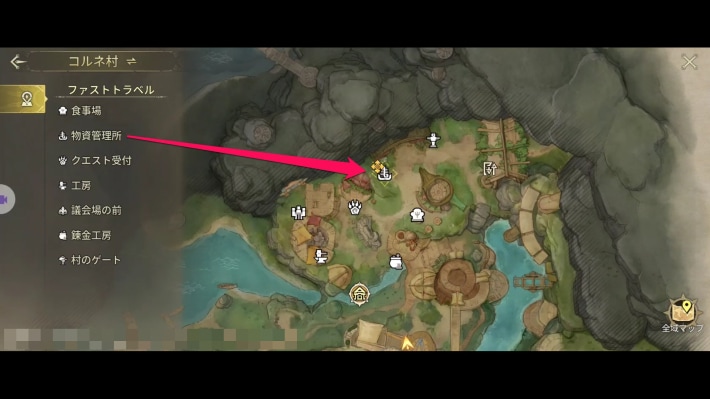 |
Go to the supply depot and talk to Ruck to start the shopping tutorial. Buy an Antidote, then return to the field screen.
Meet Up with Holly
| Holly | Map screen |
|---|---|
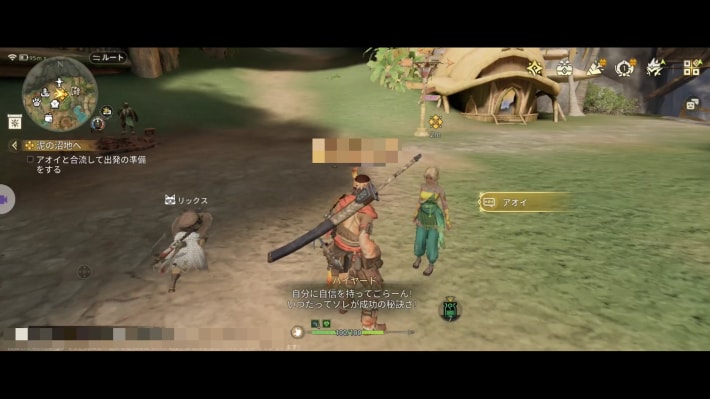 | 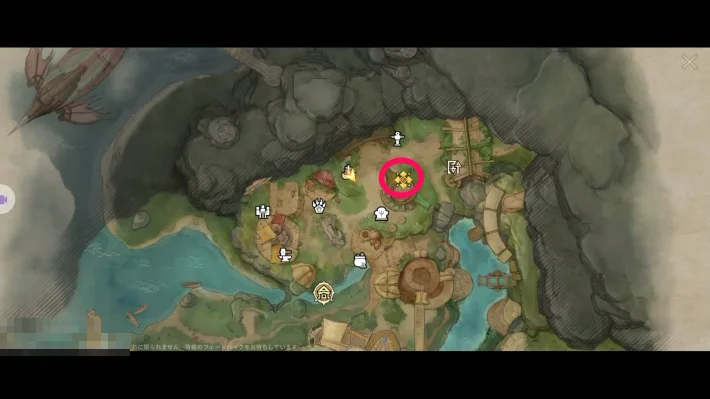 |
Holly is just east of the supply depot. Talking to her moves the story on and fast travels you to the destination automatically, so level up and sort out your gear beforehand.
Build a Zip Line
| Where to set it up | Map screen |
|---|---|
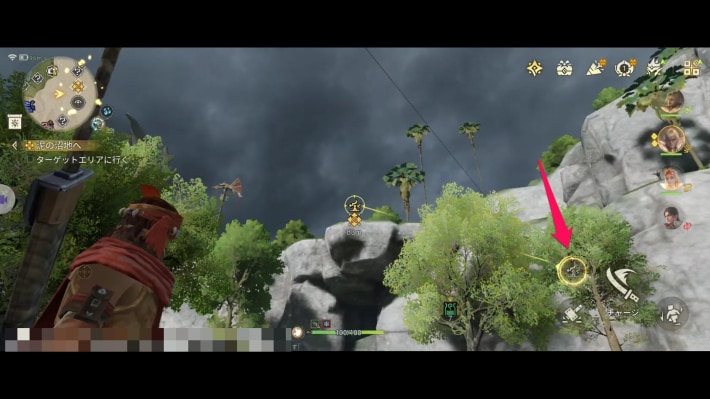 | 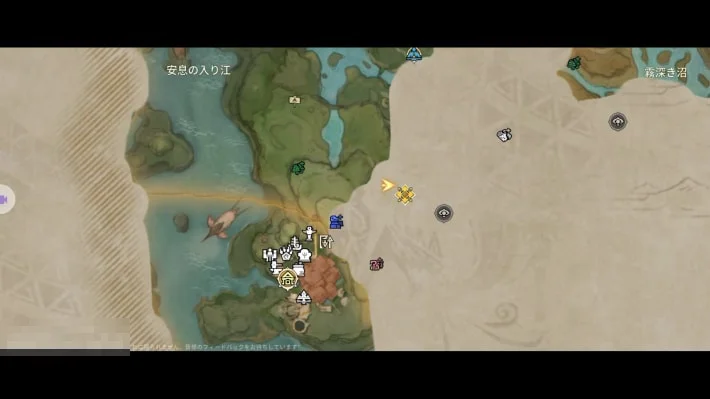 |
Build a Zip Line where the fast travel drops you off.
Ride the Zip Lines All the Way to the Destination
 |
 |
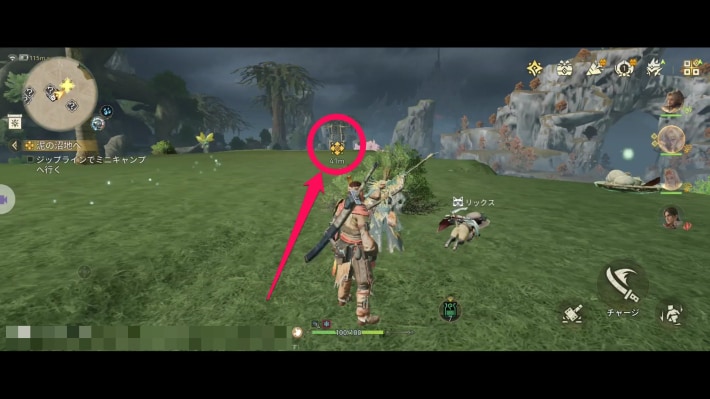 |
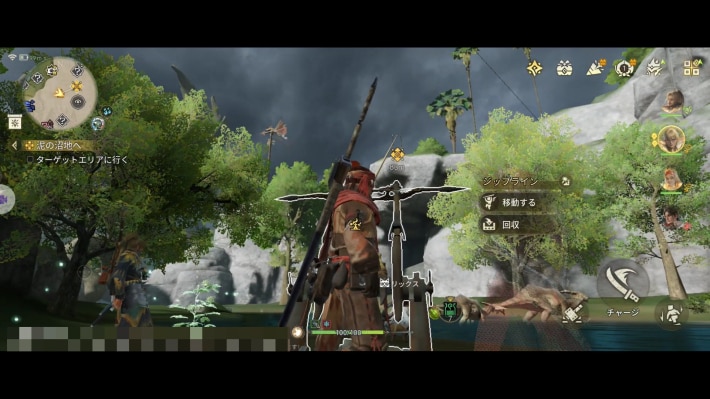
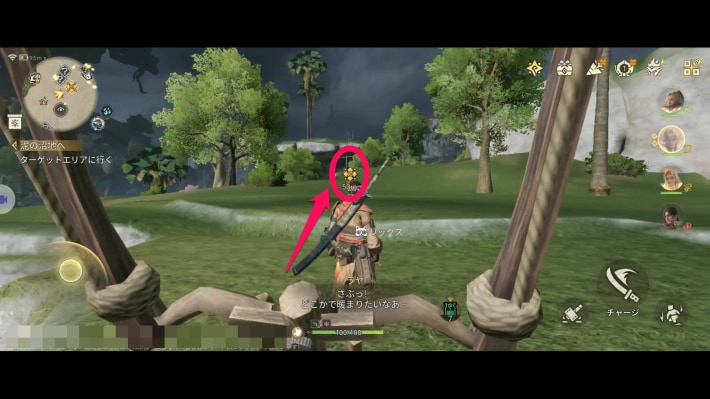
Ride the Zip Line once it's built. There's another Zip Line where you land, and another after that, so follow the quest marker and ride them in order.
Gather a Hot Pepper
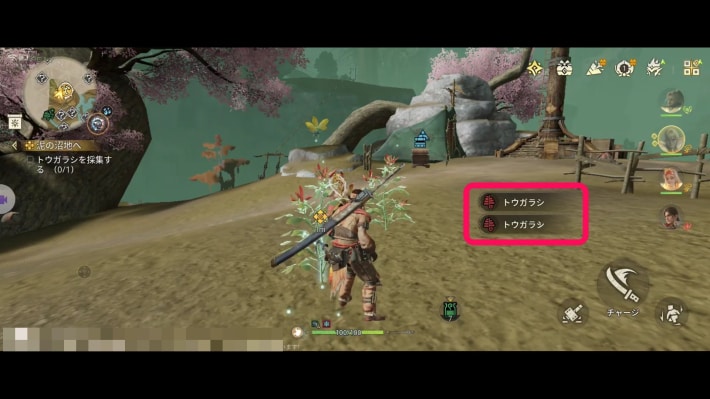
When you reach the swamp, a tutorial on crafting a Hot Drink starts. Gather the Hot Pepper just past where the last Zip Line drops you off.
Point!Repair the Watchtower nearby. It makes the rest of the quest easier!
Craft a Hot Drink
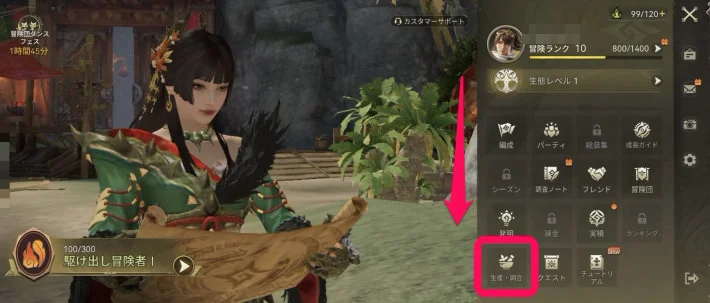 | 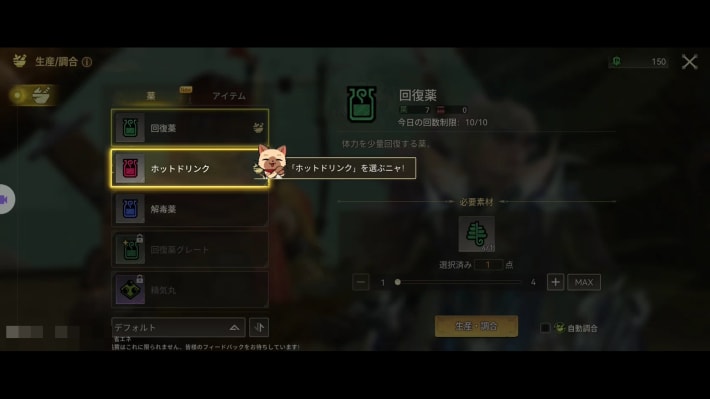 |
After gathering the Hot Pepper, open the menu to start the crafting tutorial. Follow the steps on screen to craft a Hot Drink.
Use the Hot Drink
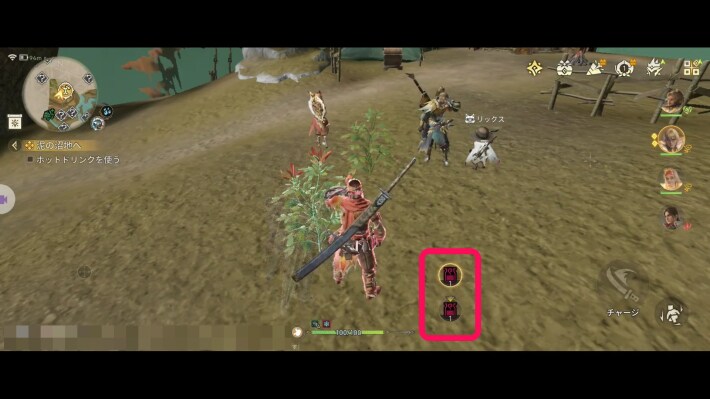
The Hot Drink you crafted is equipped automatically when you return to the field screen. Use it to complete the quest.
Repair the Watchtower
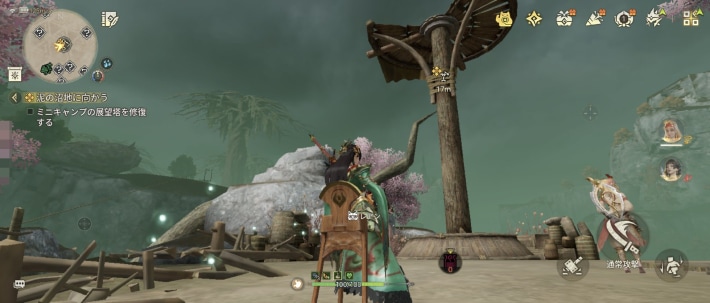
There's a Watchtower next to where you gathered the Hot Pepper; repair it to complete the quest. If you've already repaired it, the quest counts as complete automatically.
Shadow of Venom
Head to the Destination in the Swamp
| Destination | Map screen |
|---|---|
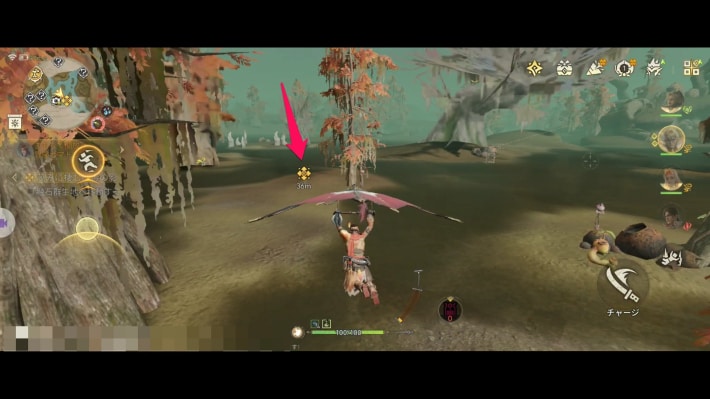 | 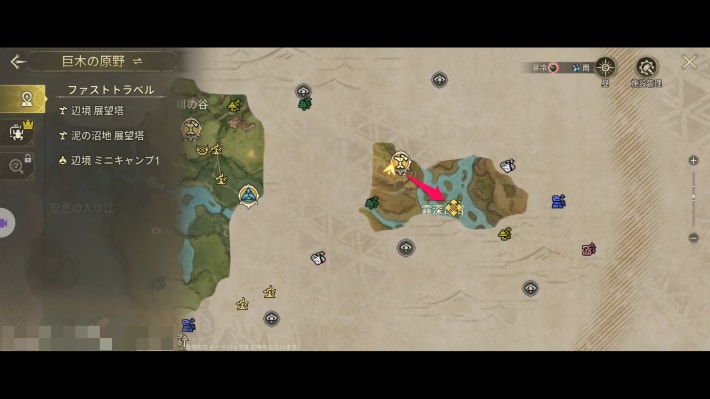 |
After crafting the Hot Drink, head to the swamp to the southeast, using the glider or other means. The story continues automatically when you arrive.
Slay the Pukei-Pukei
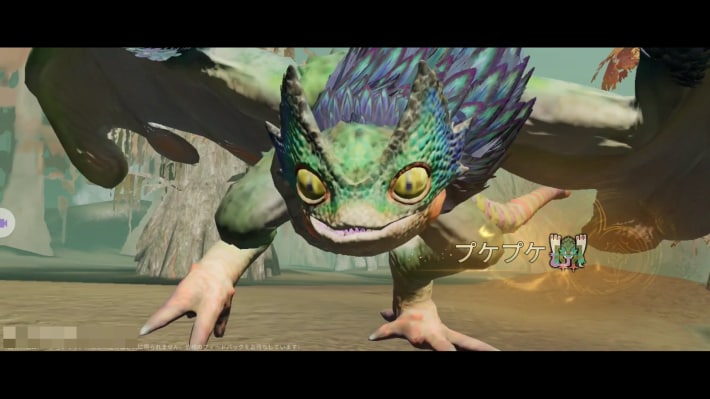
Slay the Pukei-Pukei that appears. It uses poison attacks, so use the Antidote you bought when needed.
Carve It and Claim the First-Hunt Reward
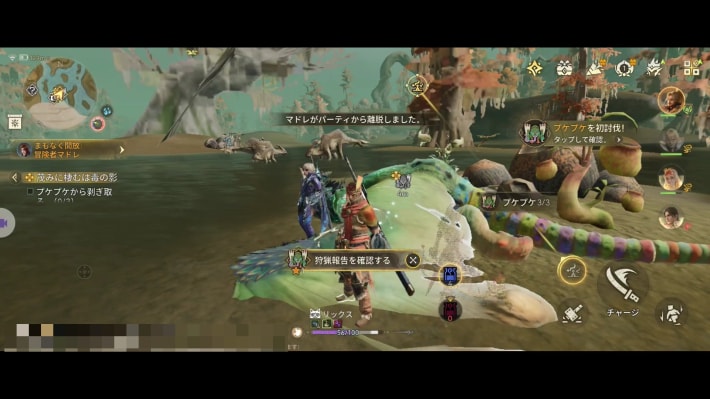
After slaying the Pukei-Pukei, carve it and claim the first-hunt reward in the research notes.
Learn Quick Forge
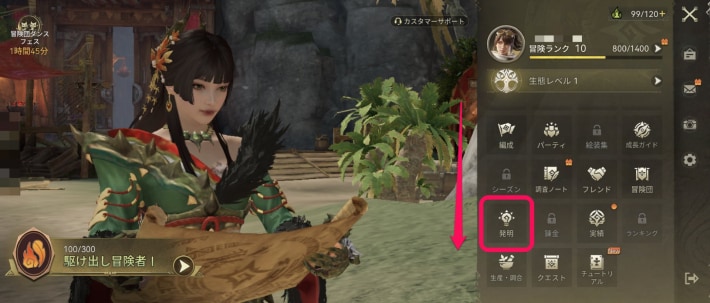 | 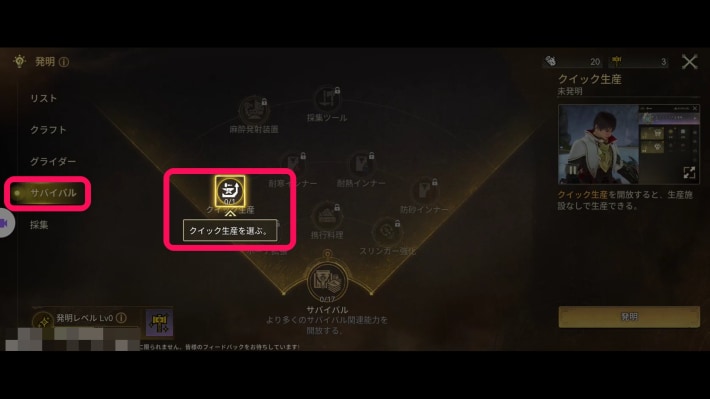 |
Return to the field screen and the Quick Forge tutorial starts. Follow the steps and learn Quick Forge from Research in the menu.
Craft Pukei-Pukei Gear with Quick Forge
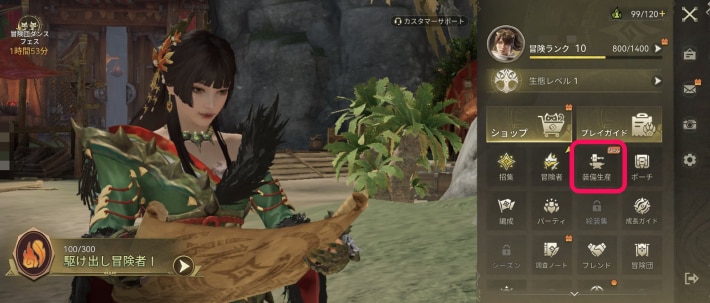 | 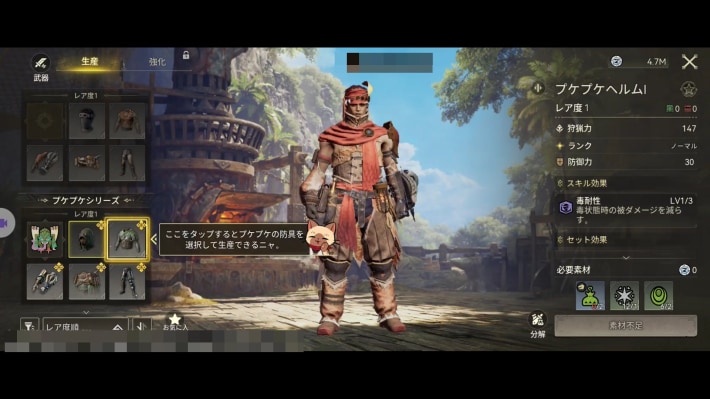 |
After learning Quick Forge, open the menu again and the Quick Forge tutorial continues. Follow it and craft one piece of Pukei-Pukei gear.
Claim Madelyn's Reward
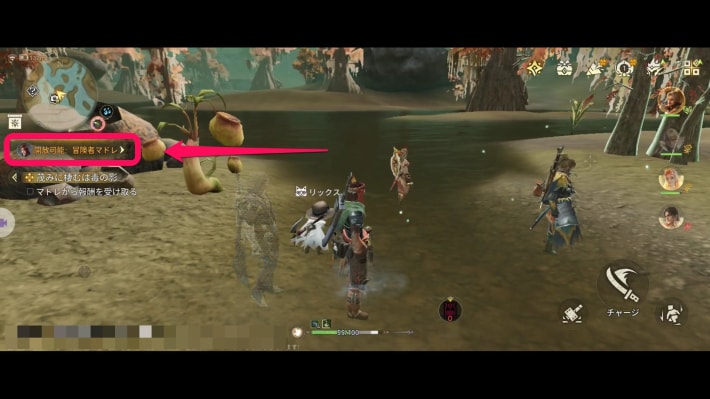 | 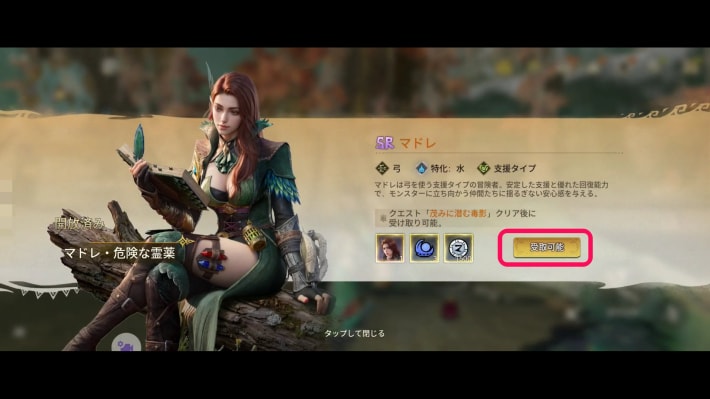 |
Return to the field screen and tap the entry below the minimap at the top left to open the reward screen. Claim the reward and the SR adventurer Madelyn joins you, completing the quest.
MadelynField a Party of Three Adventurers
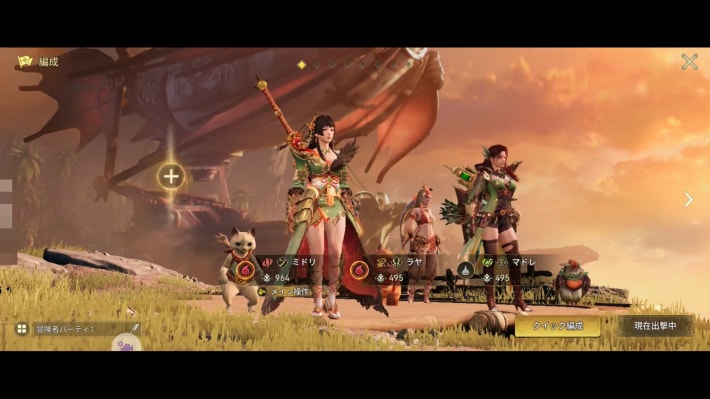
Add Madelyn, who just joined, to your party to make it three adventurers. If you already have three in your party, the quest counts as complete automatically.
Get Stronger, Adventurer
Raise Your Proof of Mastery
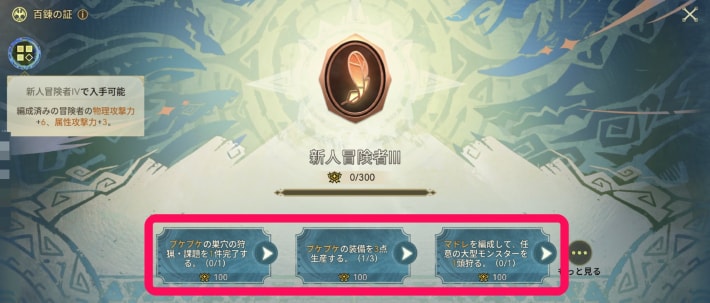
Open the menu and raise your Proof of Mastery to Rookie Adventurer IV. If you don't have enough Mastery Points to raise it, clear quests that award them.
Point!There aren't many of these quests early on, so you'll often need to clear every one on offer!
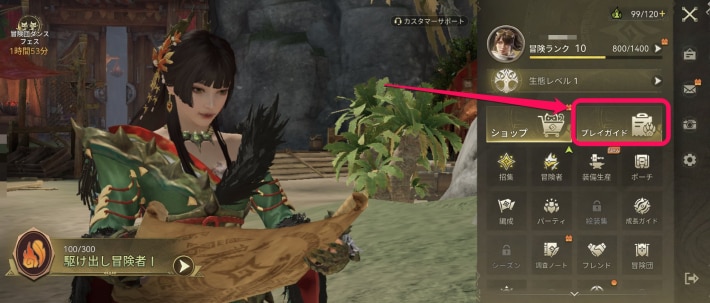
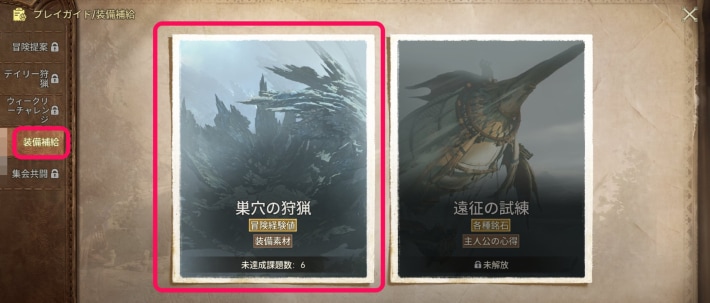
The Pukei-Pukei Quest Is in Free Hunt
| Where Free Hunt is |
|---|
 |
 |
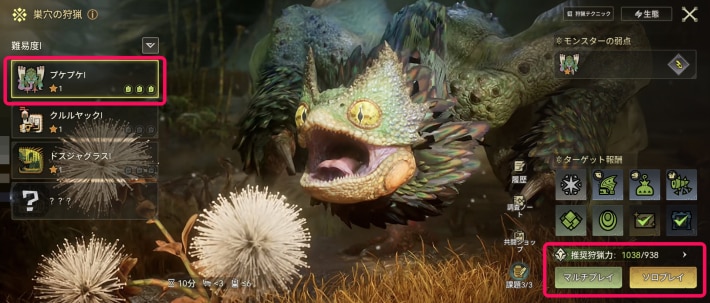 |
The Pukei-Pukei Free Hunt you need for Proof of Mastery is under Equipment Supply in Game Modes, which unlocks at this point.
Quest ListHunt Request
Talk to the Quest Counter Attendant
| Quest counter attendant | Map screen |
|---|---|
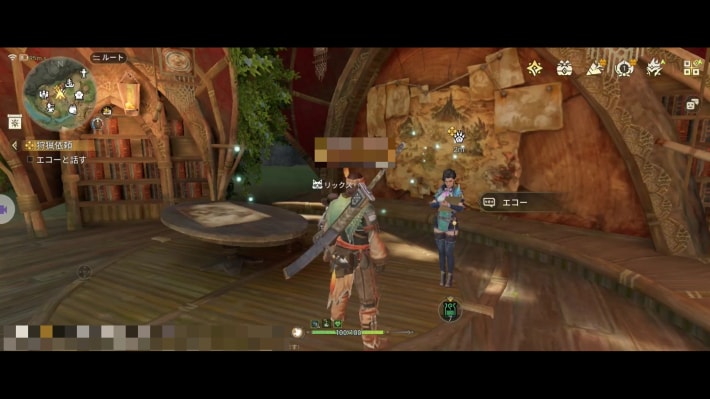 | 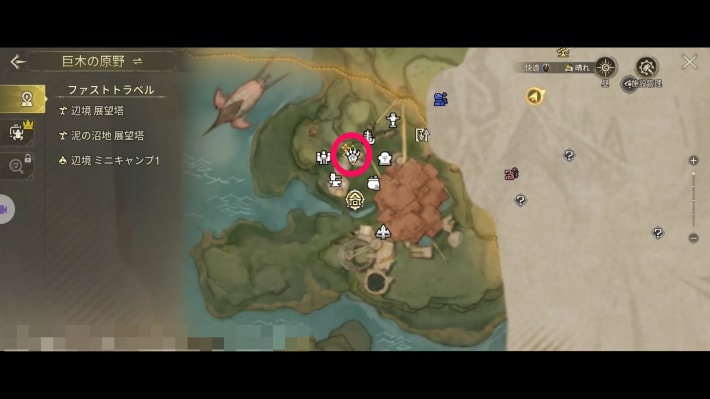 |
Talk to the attendant at the village quest counter. The story moves on and you can now take Hunt Requests.
Go on a Hunt Request
| Game Modes | Hunt Request |
|---|---|
| 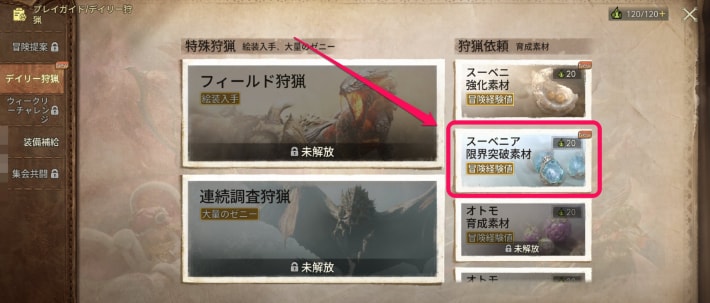 |
Hunt Requests are in the daily hunting section of Game Modes. Note that you can't take on a Hunt Request without Energy.
Energy (Stamina)Ascend One of Your Adventurers
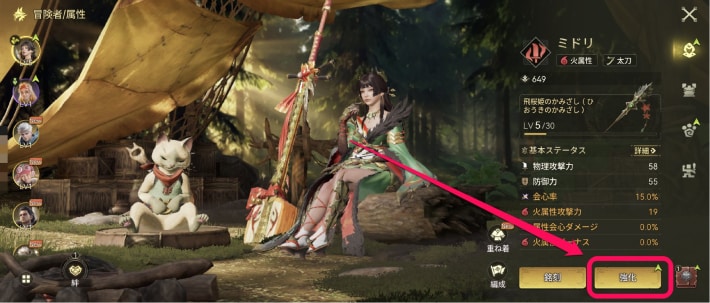 | 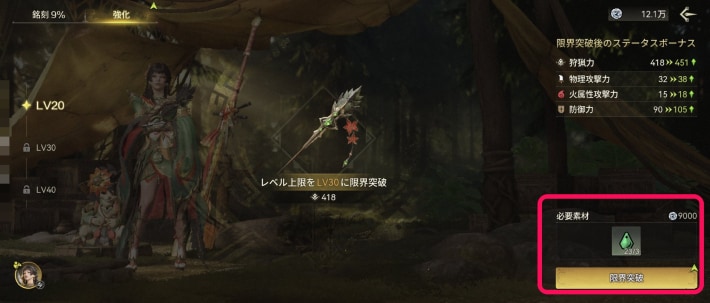 |
Use the materials from the Hunt Request to ascend one adventurer's Keepsake. Return to the field after ascending to complete the quest.
To the Radiantite Site!
Talk to Madelyn
| Madelyn | Map screen |
|---|---|
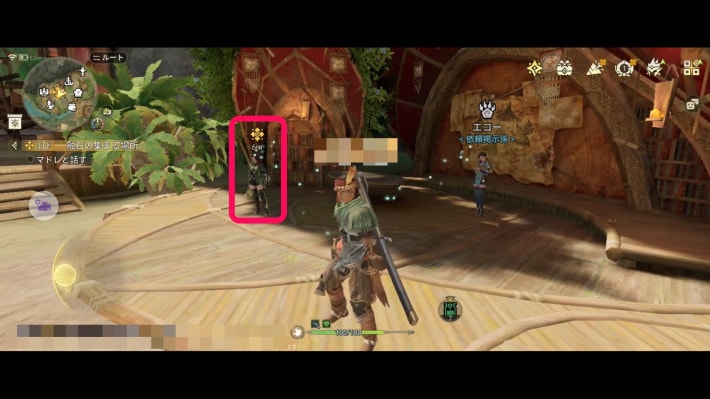 | 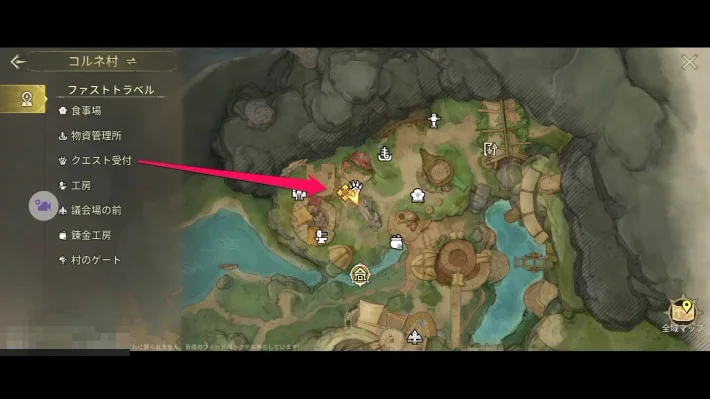 |
Talk to Madelyn, who's next to the quest counter, to move the story forward.
Build a Zip Line at the Swamp Watchtower
| What it looks like | Map screen |
|---|---|
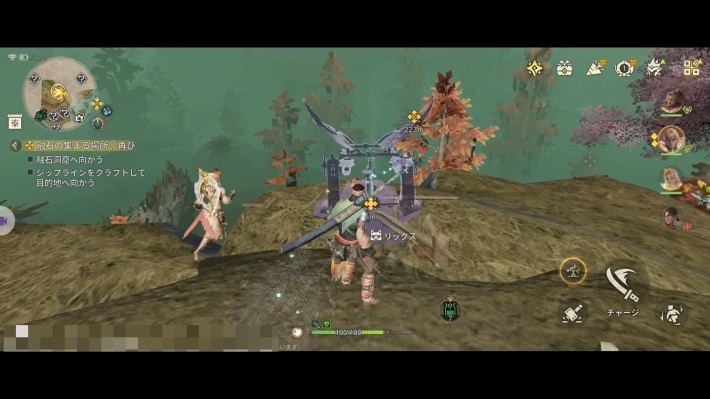 | 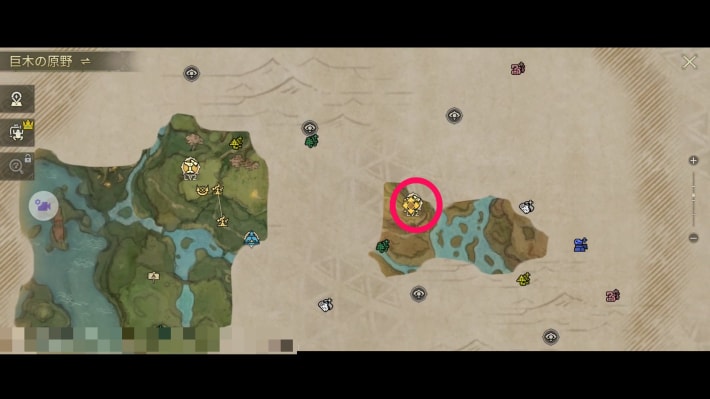 |
Go to the swamp Watchtower, build a Zip Line at the spot nearby, and head for the cave to the east. If you've already built it, just head to the destination.
Head to the Cave
| Destination | Map screen |
|---|---|
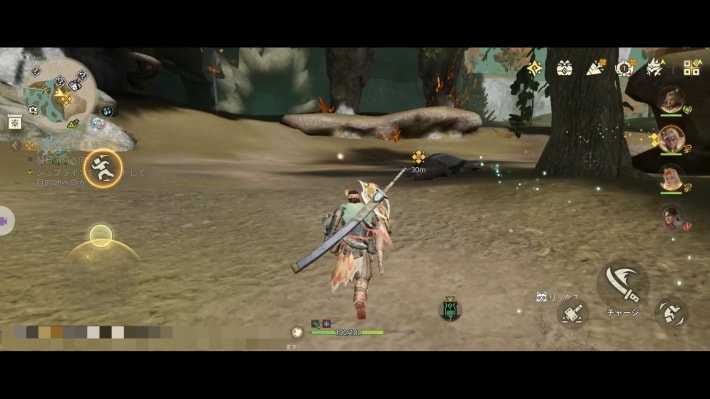 | 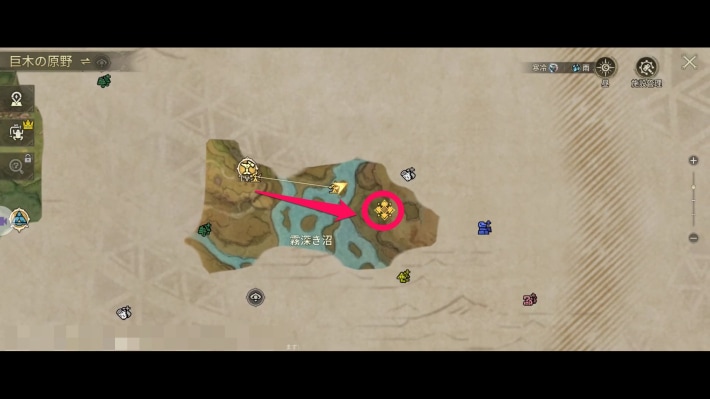 |
Follow the quest marker to the cave. The story continues once you get close enough.
Slay the Great Girros
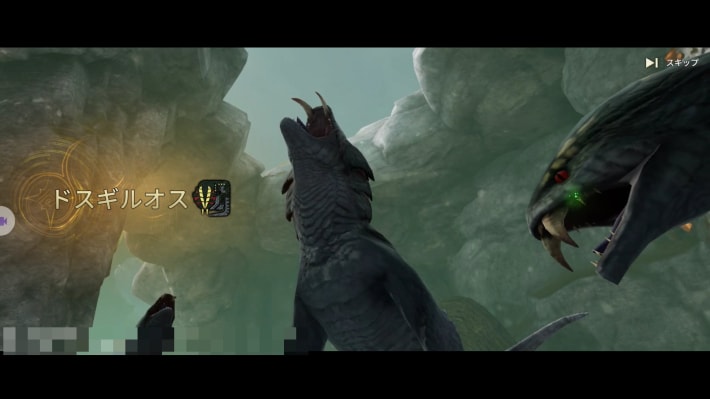
Slay the Great Girros that appears. Afterward, carve it.
Point!It uses paralyzing attacks, but your party is strong enough from the story so far, so it's not a problem!
Investigate the Tracks Nearby
| Objective | Map screen |
|---|---|
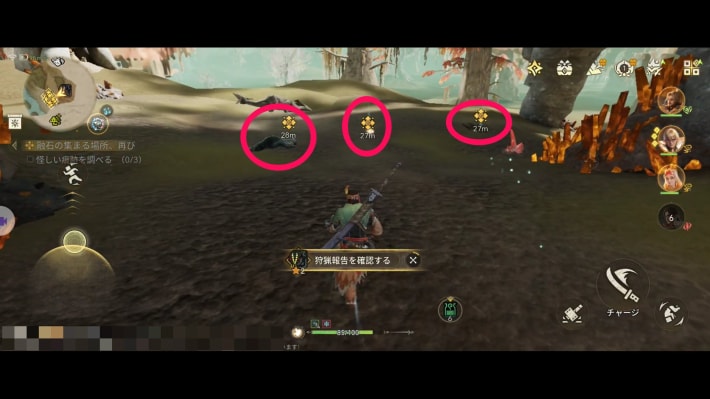 | 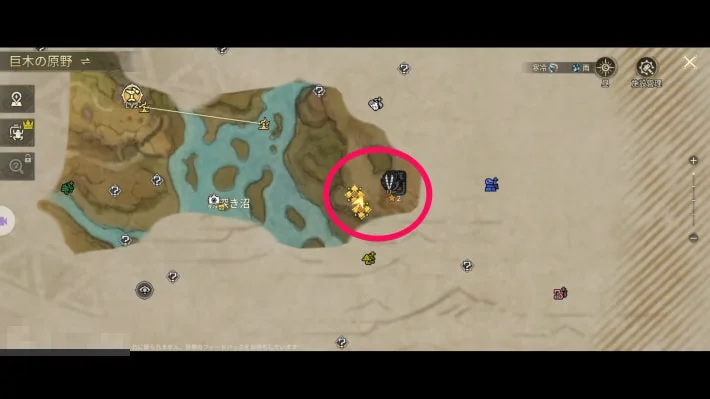 |
After carving, three tracks appear near the cave entrance. Investigate each one to move the story forward and complete the quest.
Night of Resolve
Head to the Village
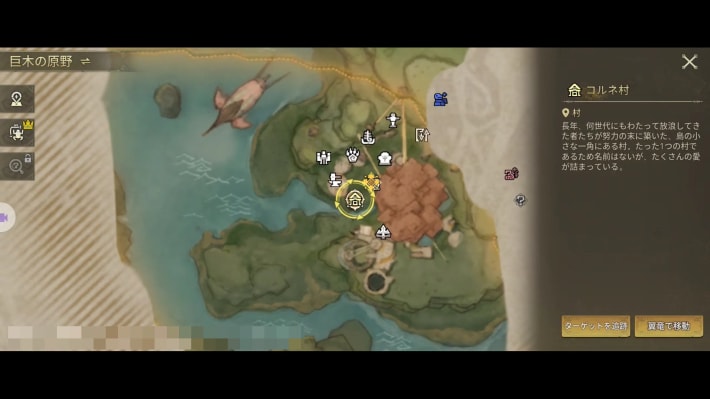
Fast travel back to Kulune. The story continues the moment you arrive.
Head to the Village Square
| Destination | Map screen |
|---|---|
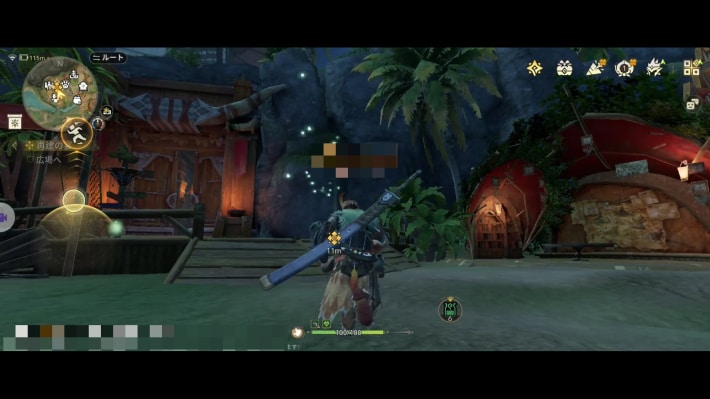 | 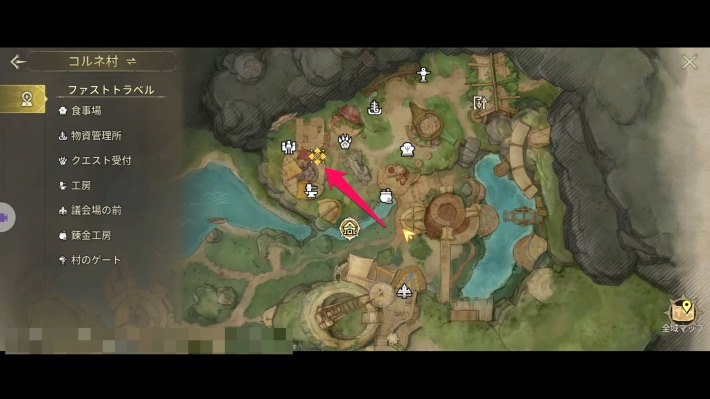 |
Once the story has moved on a bit, you head to the village square. The story resumes when you get there.
Get Stronger, Adventurer
Raise Your Proof of Mastery
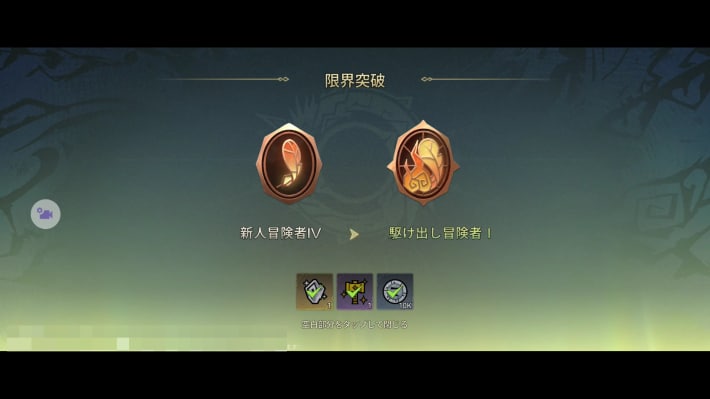
As before, open Proof of Mastery from the menu and raise it from Rookie Adventurer IV to Fledgling Adventurer I. Return to the field screen to finish Chapter 1.
Where to Find Request Quests
| Where to check requests | Request details |
|---|---|
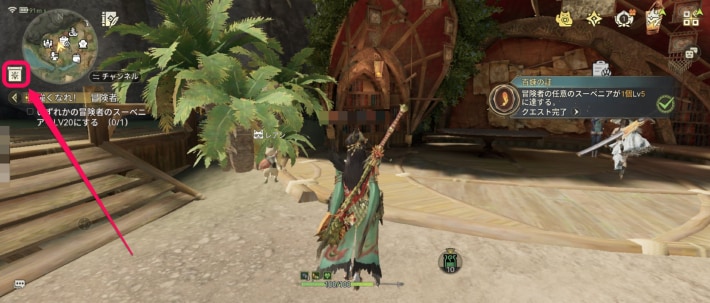 | 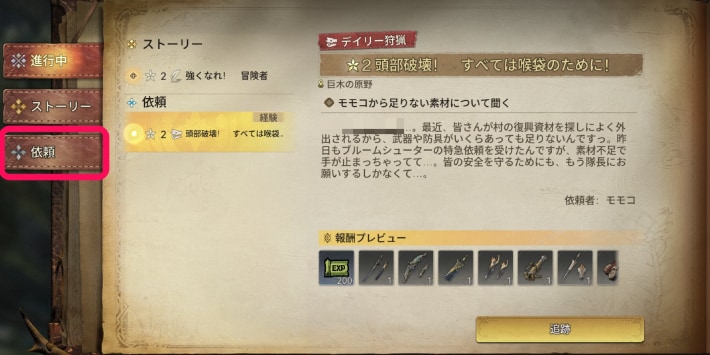 |
To rank up your Proof of Mastery, you need to clear one Request Quest. Check Request Quests from the quest tab below the minimap at the top left of the screen.
Chapter 1: In Pursuit of the Aurora's Chosen Unlocks
| Quest | Unlocks |
|---|---|
| Rekindling the Forge |
|
| Unwelcome Visitors in the Gathering Area |
|
| Ready for Another Adventure! |
|
| The Missing Companion |
|
| There for the Radiantite |
|
| Where Adventurers Gather |
|
| Get Stronger, Adventurer |
|
| Go to the Muddy Swamp |
|
| Shadow of Venom |
|
| Get Stronger, Adventurer |
|
| Hunt Request |
|
Story Walkthrough by Chapter
Story Walkthrough
The screenshots are from the Japanese version of the game.