This is the walkthrough chart for Chapter 2, “Blazing Pursuit,” of the Monster Hunter Outlanders story. It goes through each main quest step by step with screenshots and lists what each quest unlocks.
Chapter 2: Blazing Pursuit Walkthrough
Slingers and Suppers
Talk to the Quest Counter Attendant
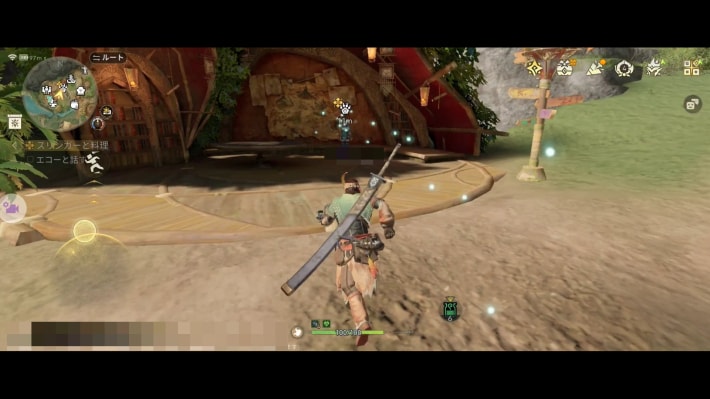
Walk up to the attendant at the quest counter. The story starts automatically once you get close enough.
Head to the Observation Point Near the Specialty Resource Cluster
| What it looks like | Map screen |
|---|---|
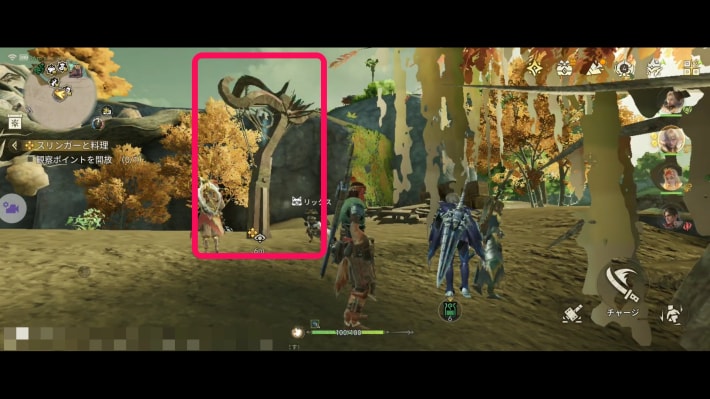 | 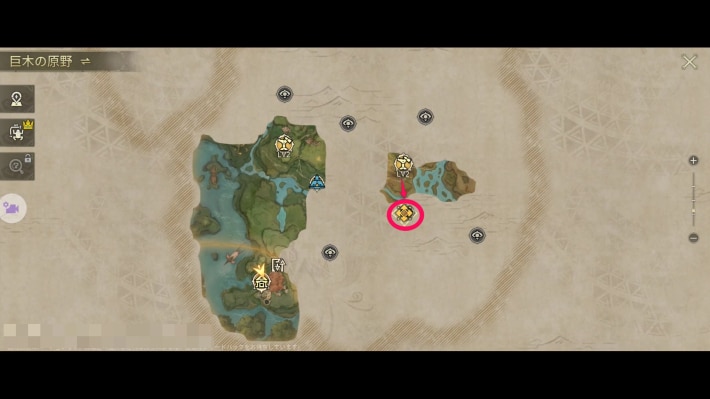 |
As the attendant suggests, first go to the Muddy Swamp Watchtower, then head to the observation point to the south. Activating the observation point clears the fog on the map.
Set Up a Camp at the Observation Point
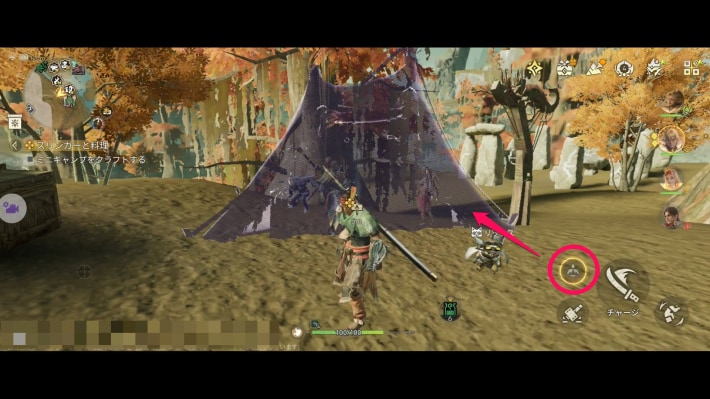
After you activate the observation point, you can build a Camp right next to it. Camps also work as fast travel points, so build one whenever you see the chance.
CampHead to the Resource Cluster
| Resource cluster | Map screen |
|---|---|
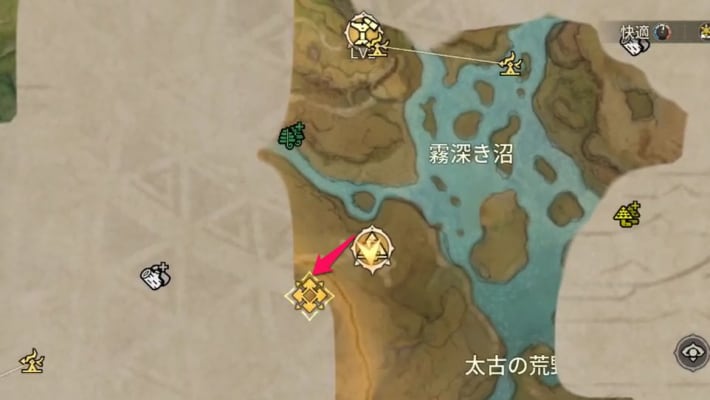 | 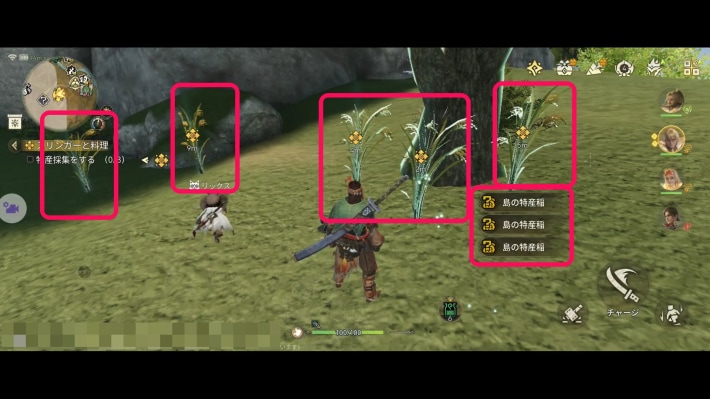 |
Go to the specialty resource cluster and gather three specialty resources.
Meld Research Points
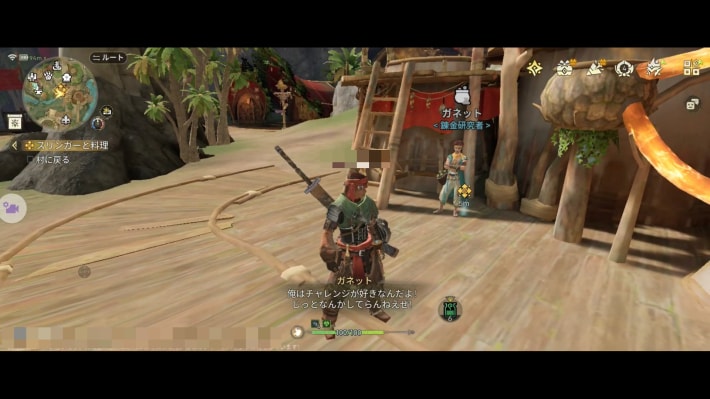 | 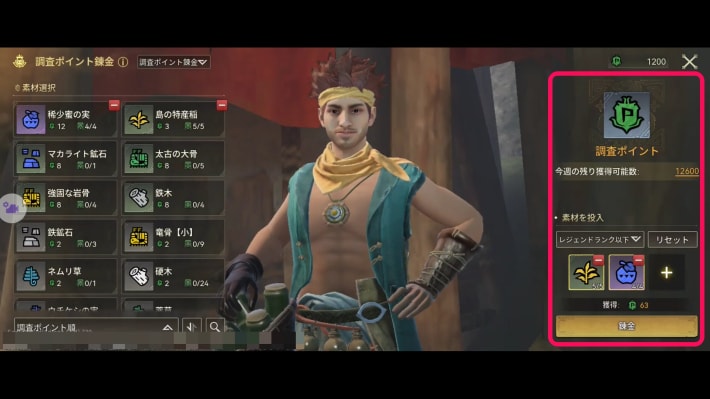 |
Go back to Kulune and Meld Research Points with Garnett, the Meld researcher. Talk to Garnett and the Meld tutorial starts automatically.
Talk to the Workshop Smith
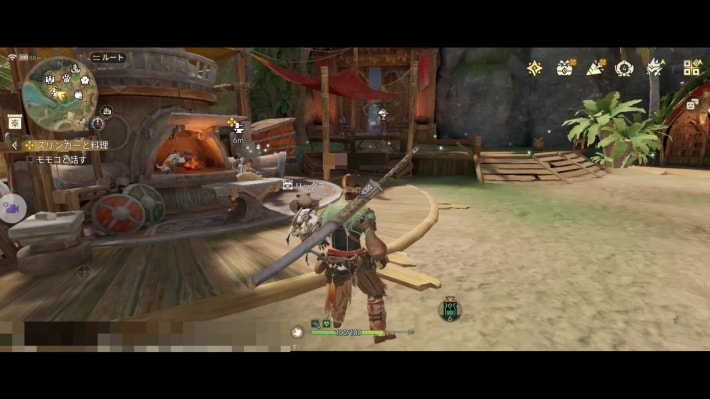
Talk to the Workshop smith and ask about the slinger, and you can unlock Enhanced Slinger in Research. It lets you trigger large field traps such as falling rocks.
Head to Meowffin's Bistro
| Meowffin's Bistro | Map screen |
|---|---|
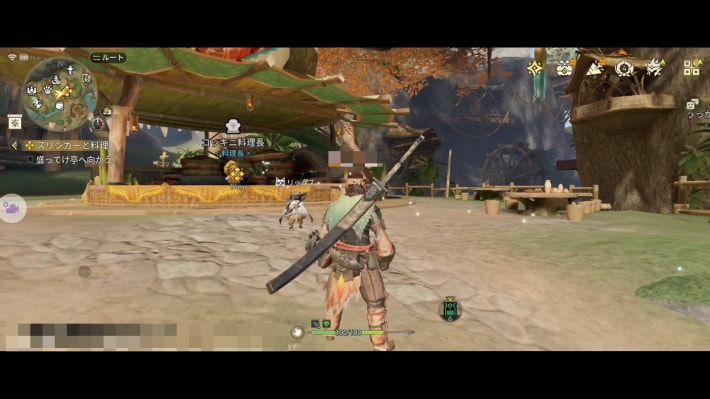 | 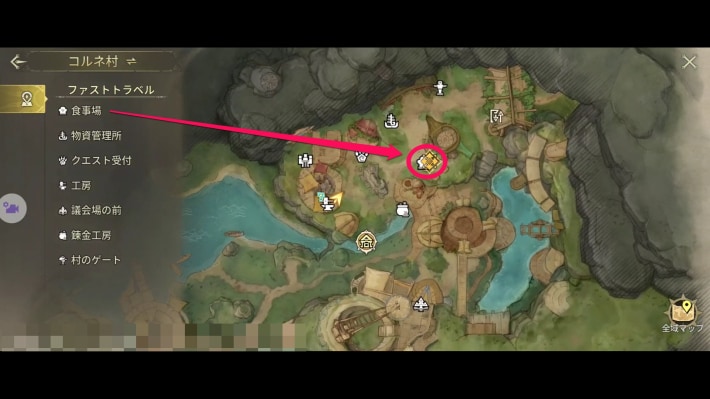 |
Go to the chef in Kulune.
Order a Meal
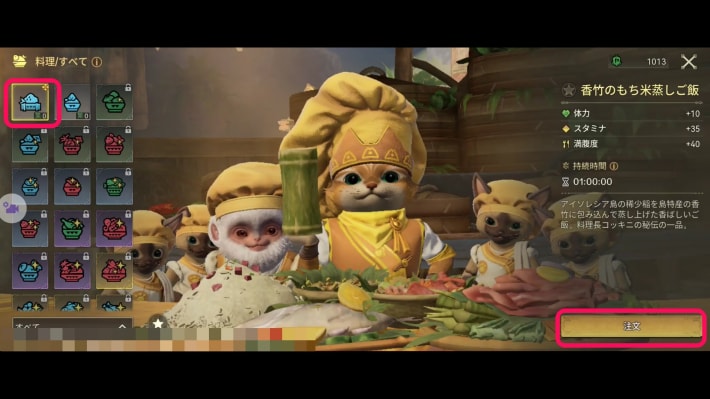
Order a meal at Meowffin's Bistro. Talking to the chef moves the story on automatically and starts the meal ordering tutorial.
Trial of the Searing Sands
Talk to Holly
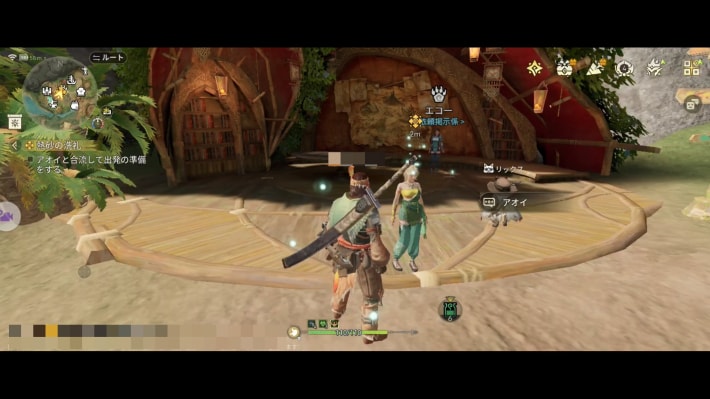
Talk to Holly to move the story forward.
Head to the Desert Entrance
| Entrance | Map screen |
|---|---|
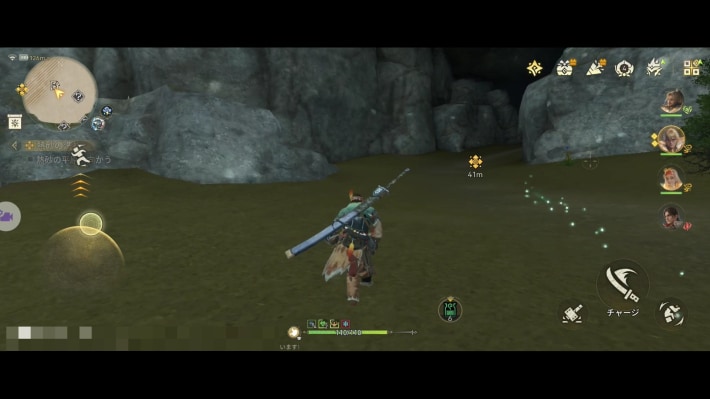 | 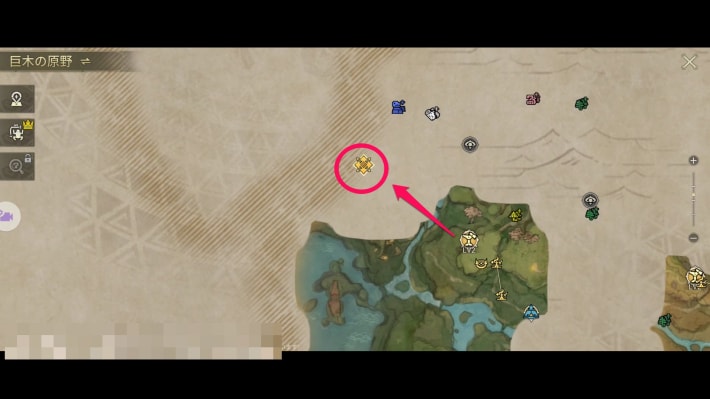 |
Head to the entrance to the desert. The entrance is a cave northwest of the nearby Watchtower.
Move On Through the Desert
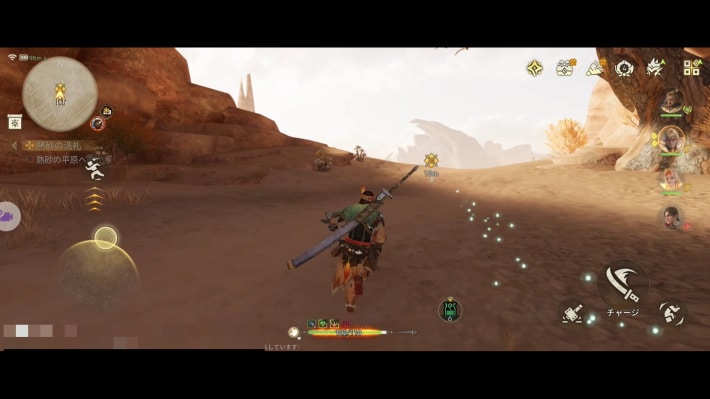
Once you're in the desert, follow the quest marker. The story continues after you've gone a certain distance.
Craft and Use a Cool Drink
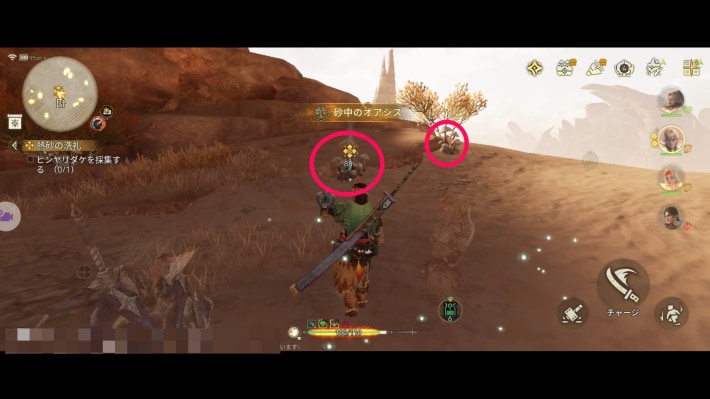 | 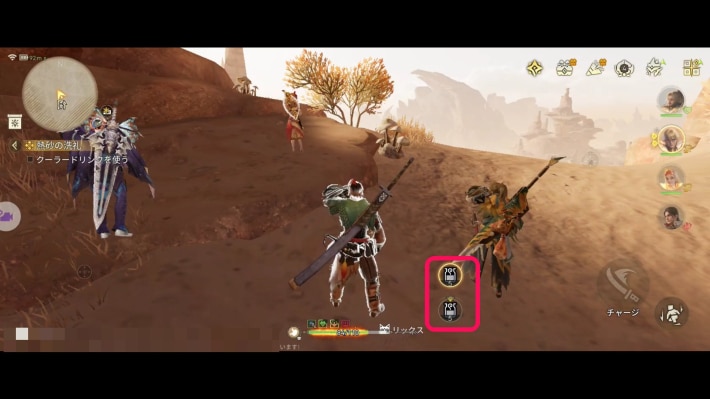 |
The desert is scorching hot, so you need to craft and use a Cool Drink. Follow the quest marker to gather a Chillshroom, then use the Cool Drink.
Slide Your Way Across the Desert
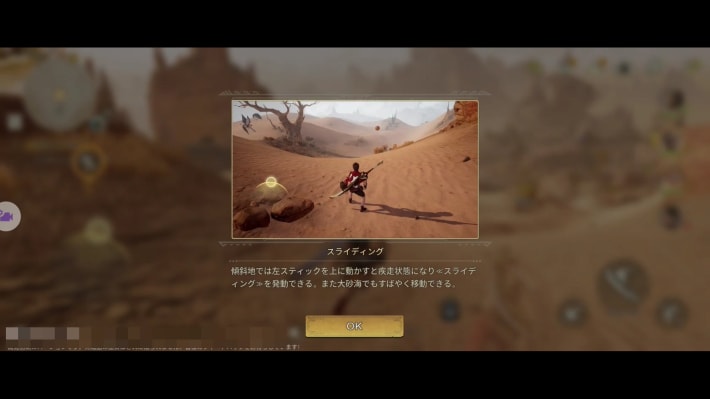
As you follow the quest marker across the desert, a sliding tutorial appears. Follow it as you head to the destination.
Head to the Watchtower in the Sands
| What it looks like | Map screen |
|---|---|
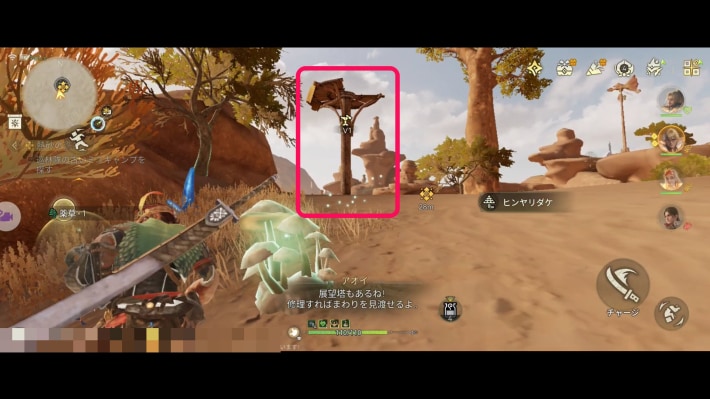 | 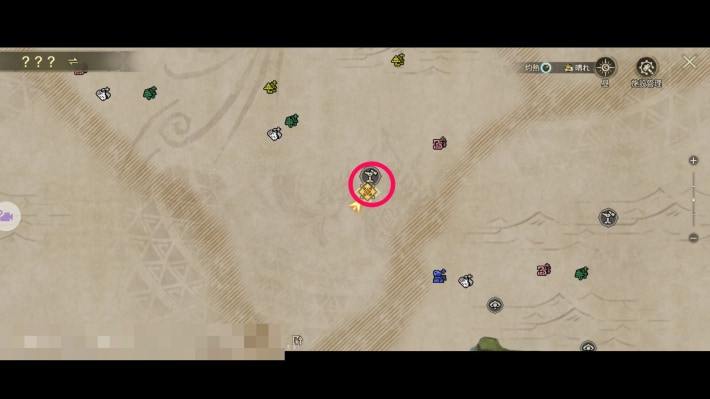 |
Head to the desert Watchtower.
Repair the Watchtower
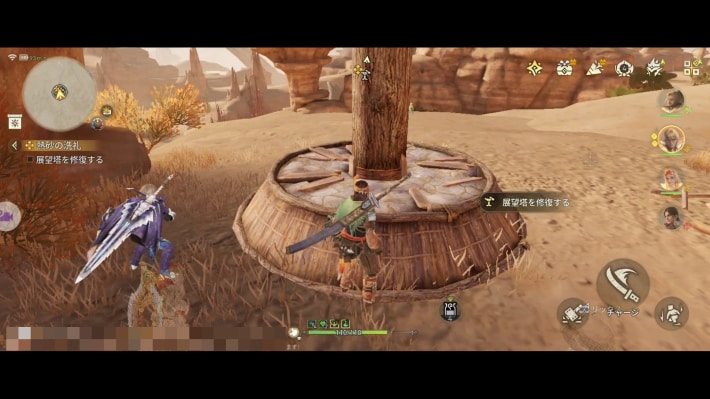
Go up to the Watchtower and repair it. Repairing it moves the story forward and completes the quest.
Overlord of the Mud
Head to the Waterfall
| Waterfall location | Map screen |
|---|---|
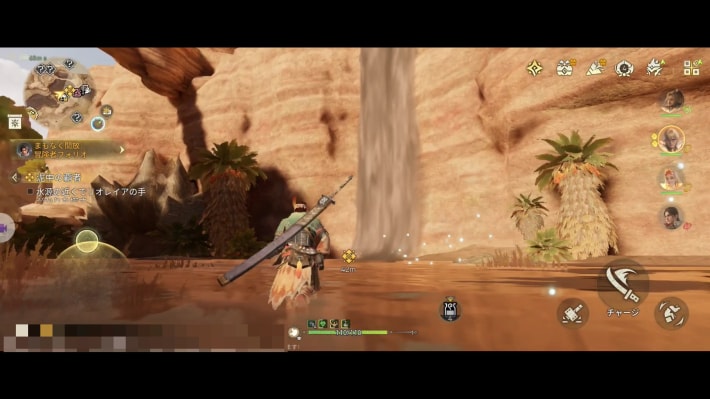 | 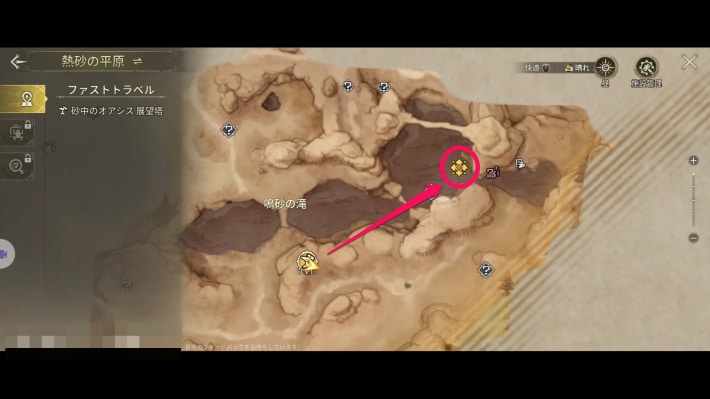 |
Follow the river north of the desert Watchtower eastward and head for the waterfall to the northeast.
Slay the Jyuratodus
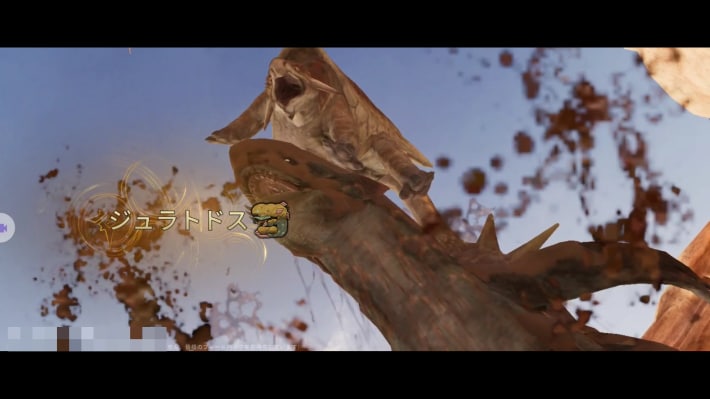
Slay the Jyuratodus. Afterward, carve it.
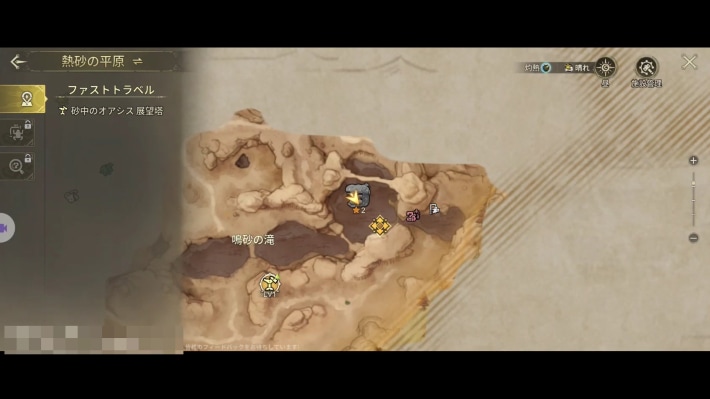
Investigate the Tracks Nearby
| Where the tracks are | ||
|---|---|---|
 | ||
| What the tracks look like | ||
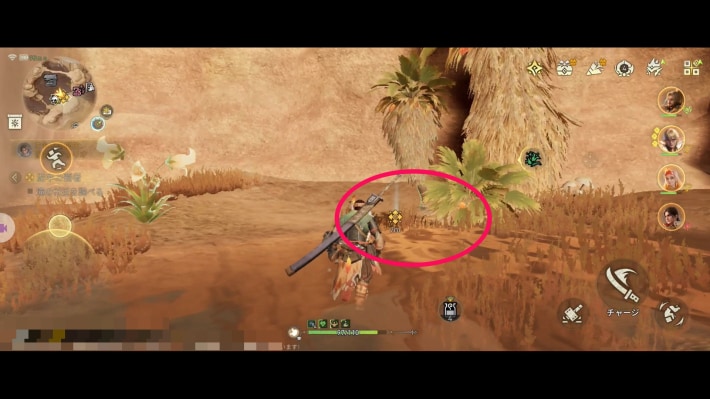 | 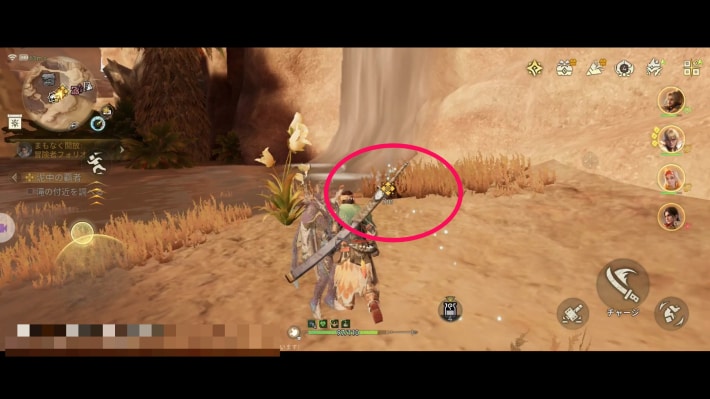 | 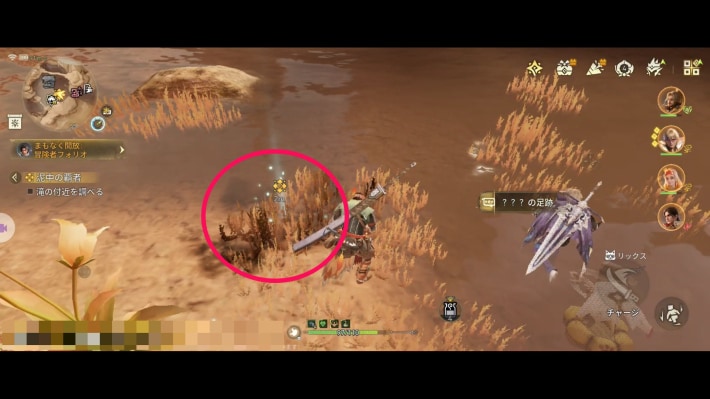 |
After carving the Jyuratodus, tracks appear beside the waterfall. Investigating them reveals three in a row; check the last one to complete the quest.
Weakness Beneath the Mud Armor
Look Up the Jyuratodus's Weakness
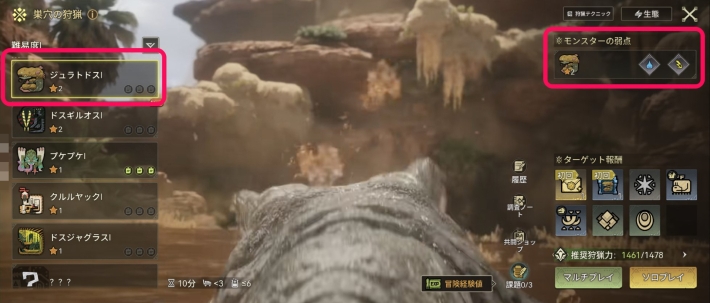
To find the Jyuratodus's weakness, go to Free Hunt. Each monster's hunt shows its weak element.
Quest ListCraft a Water Weapon
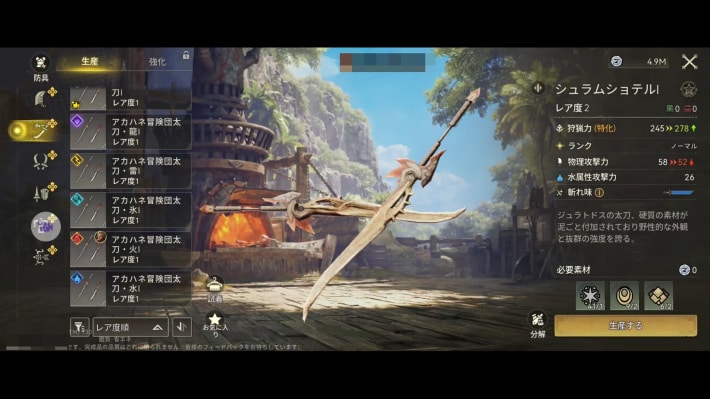 | 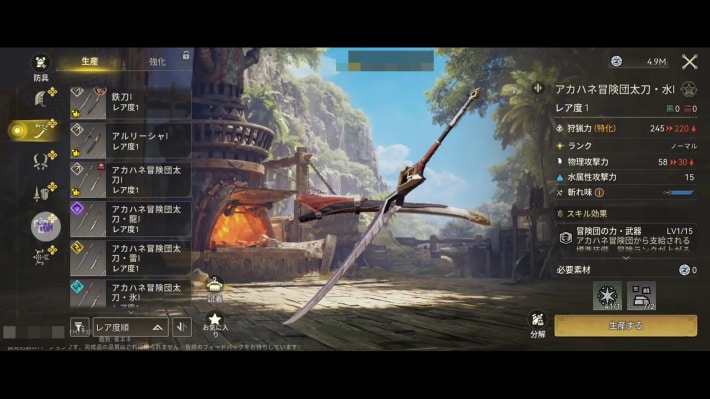 |
Craft a water element weapon at the Workshop or with field crafting from the menu. Options include the Jyuratodus weapons from the monster you slew and the guild's elemental weapons.
Take On the Jyuratodus Again in Free Hunt
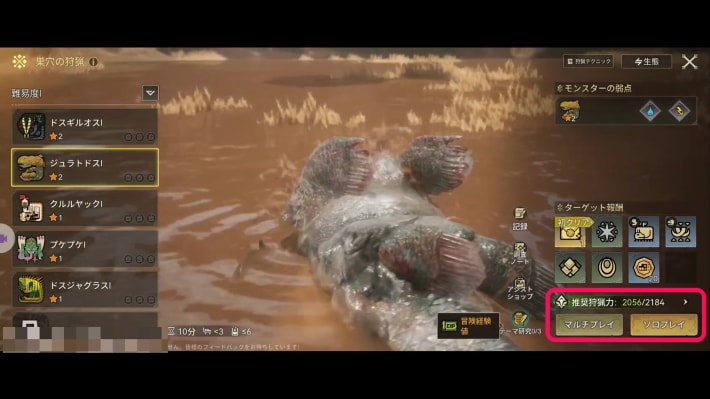 | 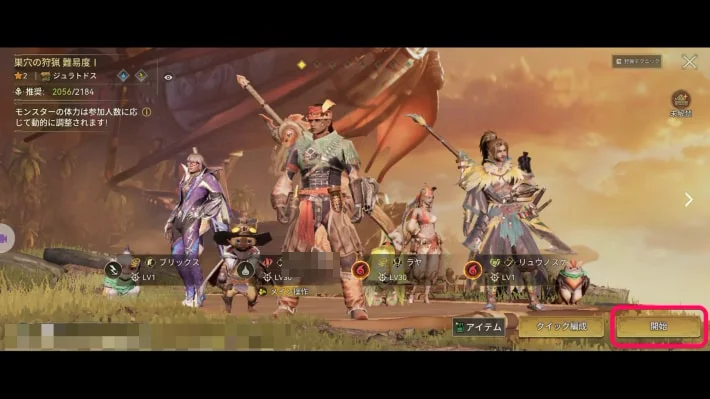 |
Go back to Free Hunt and challenge the Jyuratodus. Set up your party and hunt the Jyuratodus to complete the quest.
Get Stronger, Adventurer
Raise Your Proof of Mastery
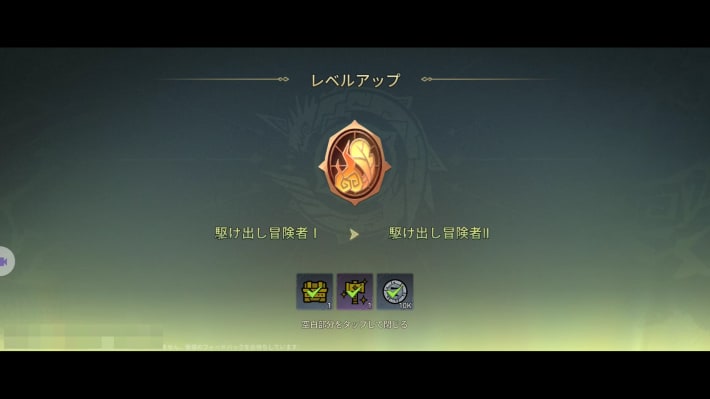
Raise your Proof of Mastery to Fledgling Adventurer II from the menu.
Adventurers, Assemble!
Recruit Ouyang Varen
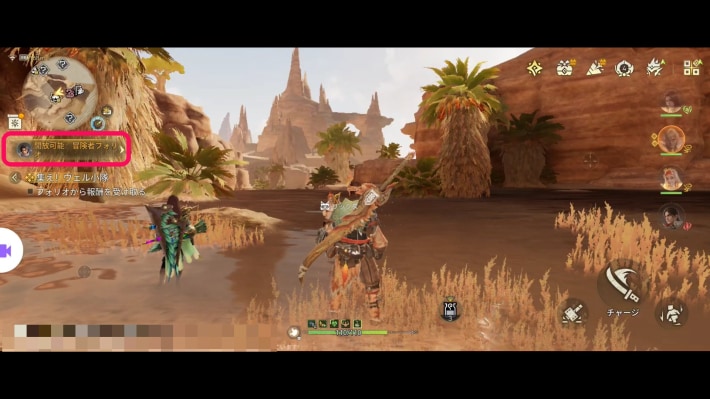 | 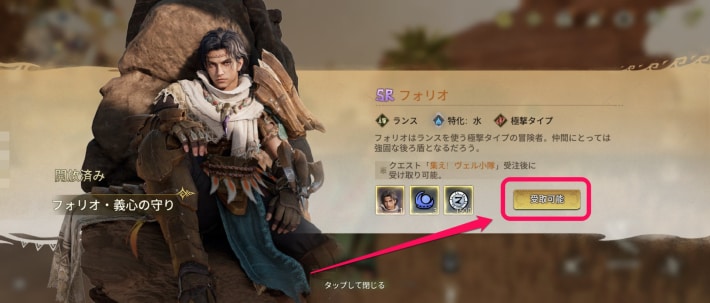 |
Have the adventurer Ouyang Varen join you.
Field a Party of Four
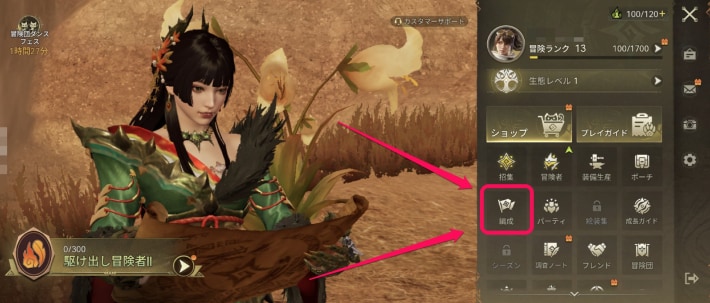 | 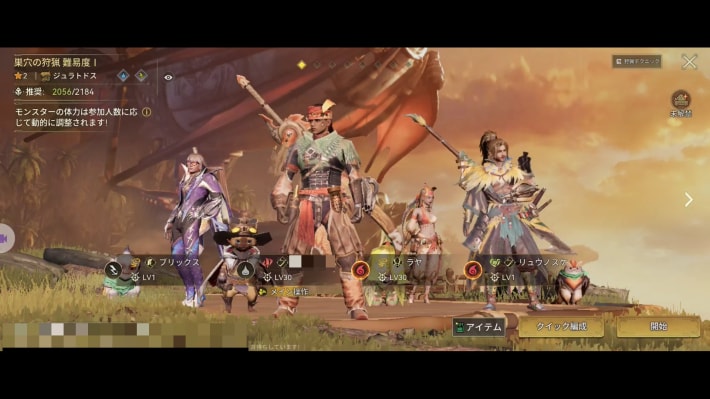 |
Put four adventurers in your party. If you've already done so, the quest completes automatically.
Trial Expedition
Return to Kulune and Talk to the Attendant
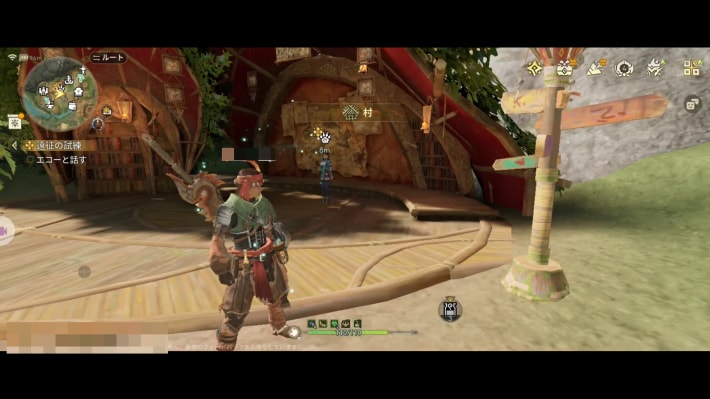
Go back to the quest counter in Kulune and talk to the attendant to move the story forward.
Head to Trial Expedition
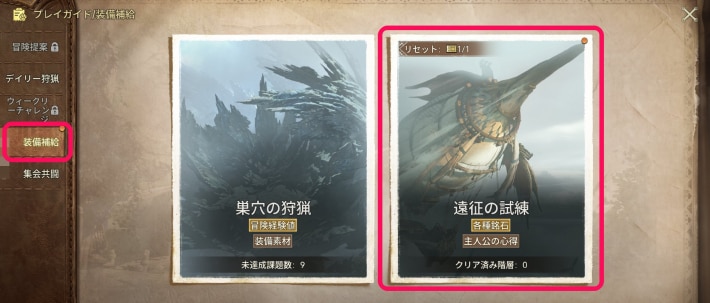
Go to Trial Expedition from Game Modes, or by talking to the quest counter attendant.
Do One Trial Expedition
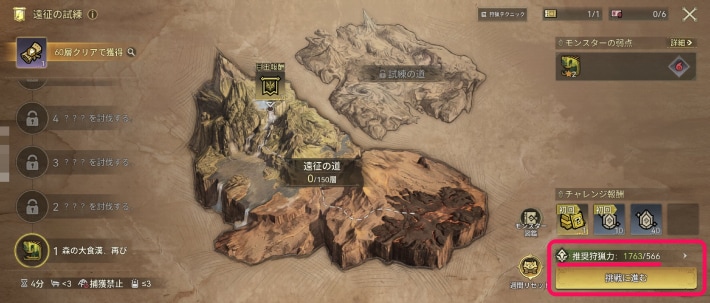
Do one Trial Expedition to complete the quest. If your power is well above the recommended power, you can skip the battle.
Lapua Soars the Skies
Return to the Desert Camp
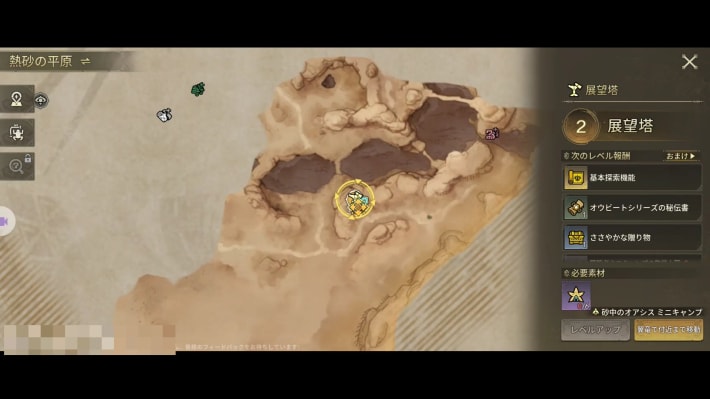
Go back to the desert and fast travel to the Desert Oasis Watchtower. The story continues automatically after you arrive.
Build a Catapult Near the Camp
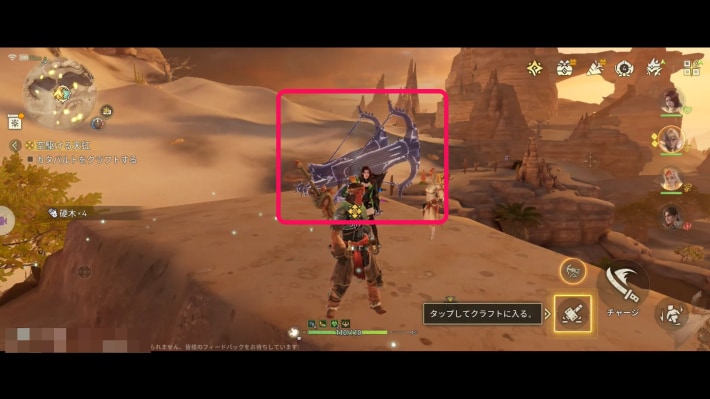 | 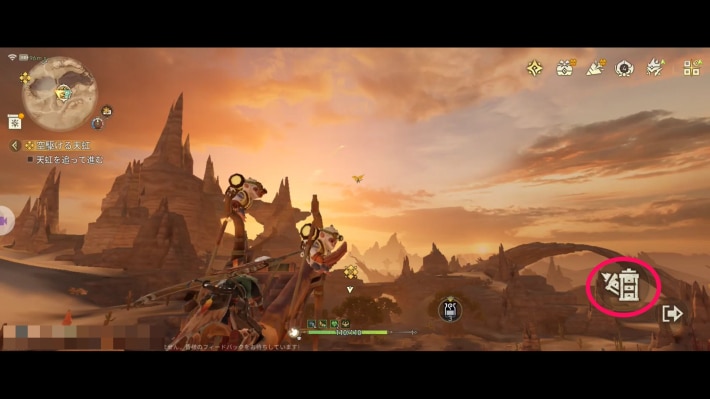 |
Build a Catapult on the high ground right next to the Watchtower. Go up to it and use the launch command to fling your adventurer toward the spot you aim at.
Head to the Destination
| Destination | Map screen |
|---|---|
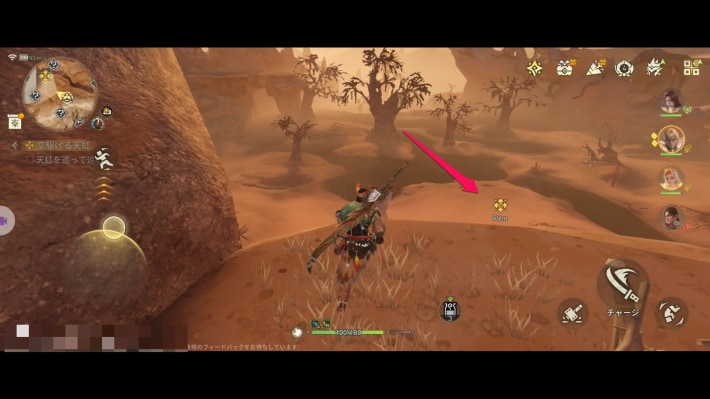 | 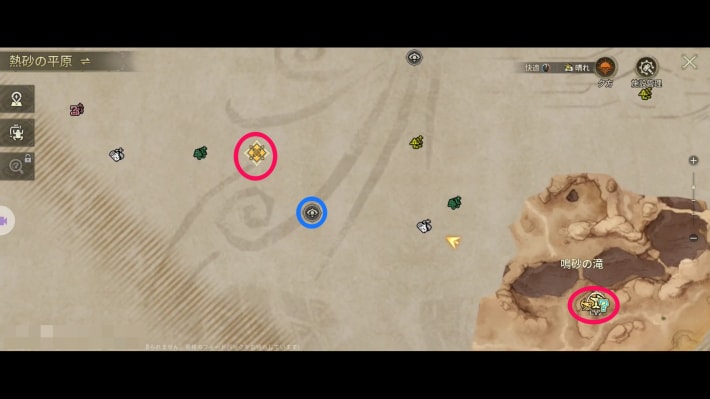 |
Head to the destination. There's an observation point on the way, so activate it and build a Camp there.
Slay the Barroth
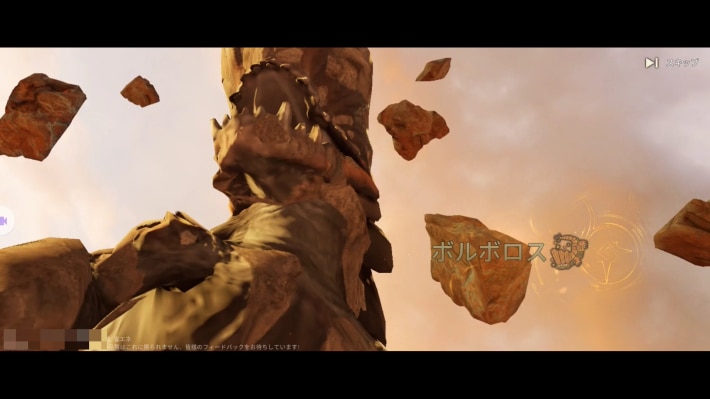
Slay the Barroth that appears. Afterward, carve it to move the story forward and complete the quest.
Enter the Arena
Return to Kulune and Talk to the Attendant
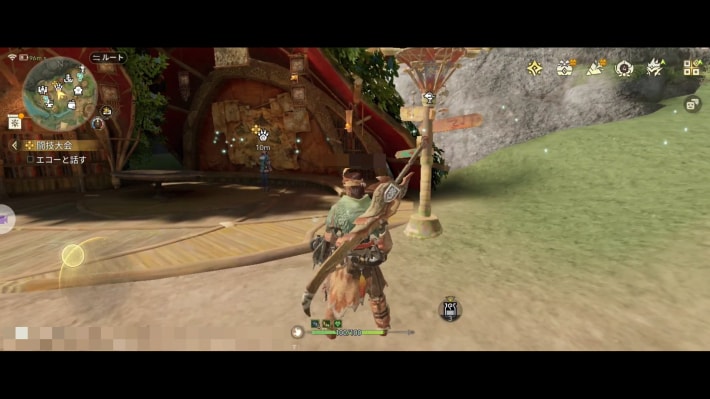
Go back to the quest counter in Kulune and talk to the attendant to move the story forward.
Take On the Arena
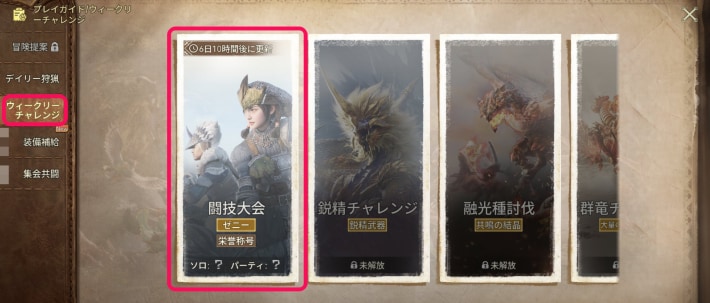 | 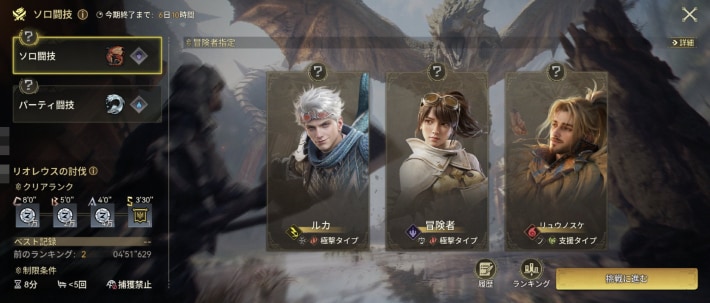 |
Take on the Arena in the weekly challenges in Game Modes once. Return to the field screen afterward to complete the quest. The tutorial takes you to the solo Arena automatically.
Departure Preparations
Talk to the Workshop Smith
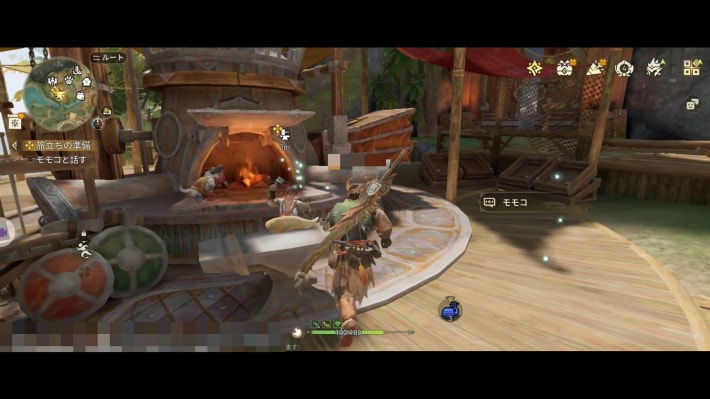 | 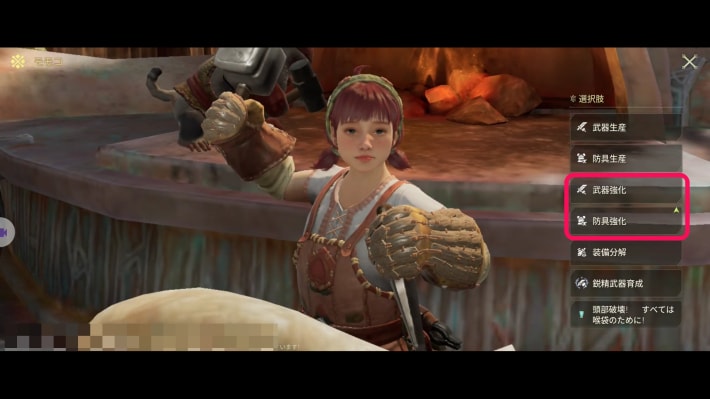 |
Talk to the Workshop smith in Kulune. A new gear upgrade option has been added, so follow the tutorial to upgrade.
Upgrade Your Gear
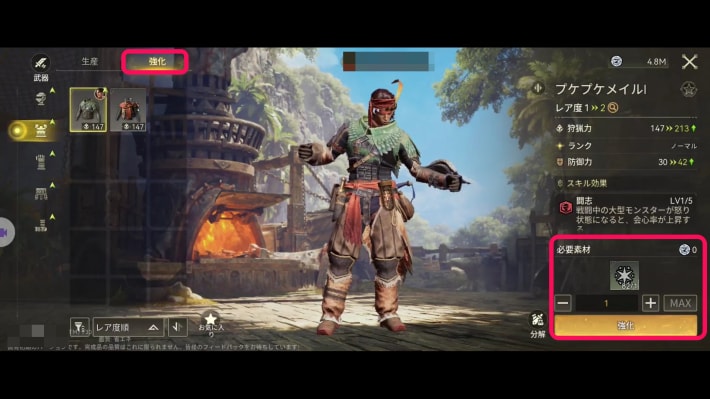 | 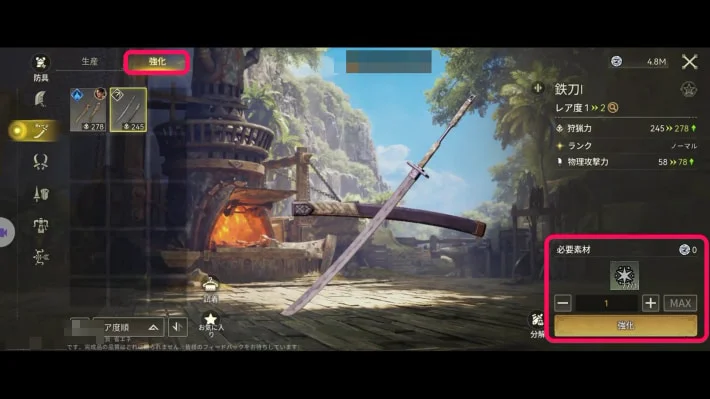 |
Upgrade a piece of gear to complete the quest. From now on, you can upgrade weapons and armor to higher rarities once you meet the requirements.
 Point!
Once you return to the field screen after upgrading, the next quest starts right away!
Daily Training
Complete One Adventure Request
| Field screen | Adventure Request |
|---|---|
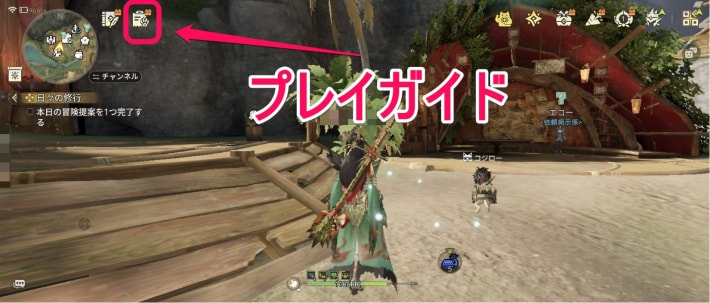 | 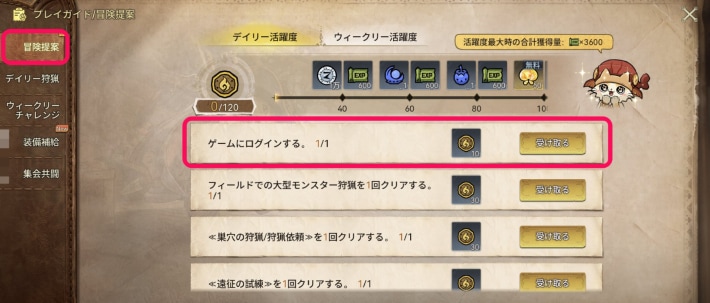 |
Adventure Requests are now unlocked; follow the tutorial and complete one daily request to complete the quest. After that, you can check them from Game Modes.
Get Stronger, Adventurer (Proof of Mastery)
Raise Your Proof of Mastery
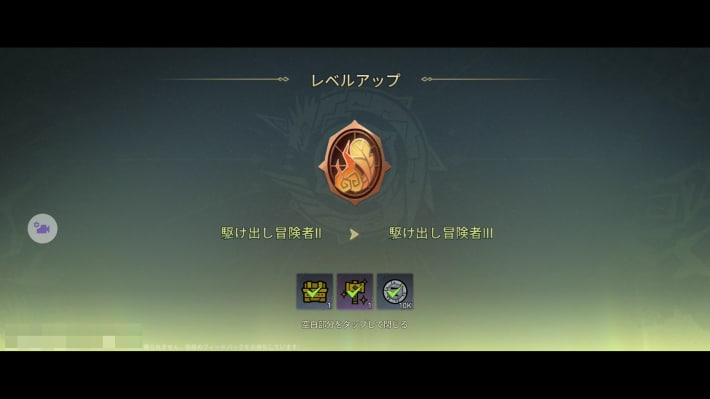
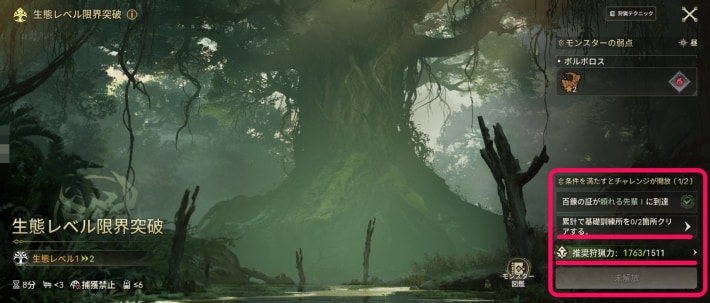
Raise your Proof of Mastery to Reliable Senior I from the menu. A quest to raise your Ecological Rank appears at this point, so check how to ascend it.
Ascend Your Ecological Rank
| Ascending your Ecological Rank | |
|---|---|
 | |
 | |
 | |
| Training Ground location | |
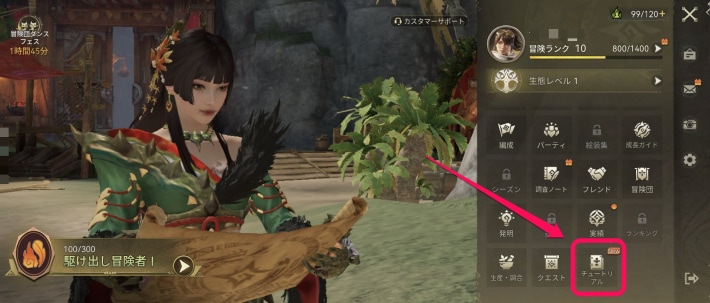 | 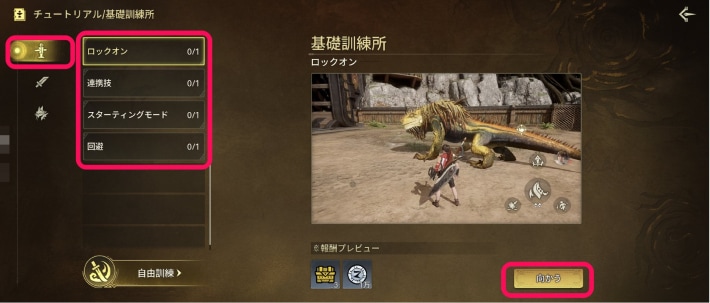 |
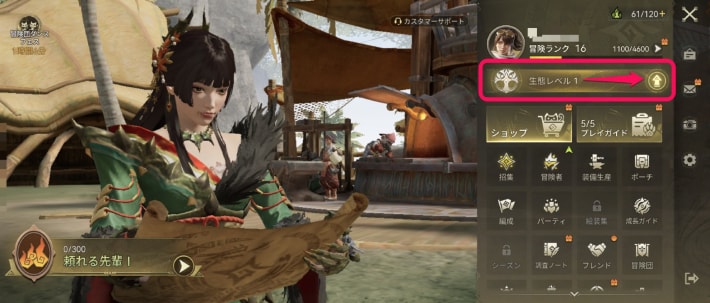
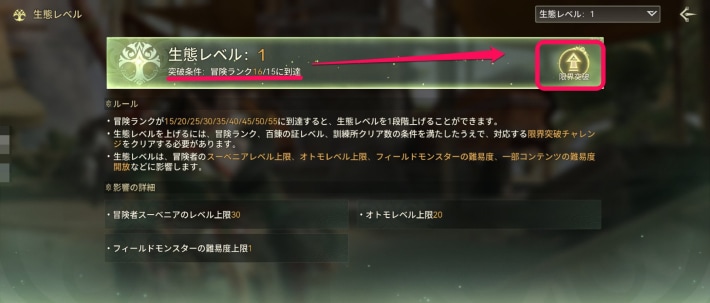
To raise your Proof of Mastery, you need to clear a quest that ascends your Ecological Rank. Note that to ascend, you also have to complete the basic training at the Training Ground.
How to Raise Adventurer RankGet Stronger, Adventurer (Adventurer Rank)
Raise Your Adventurer Rank
| Menu screen | How to raise it |
|---|---|
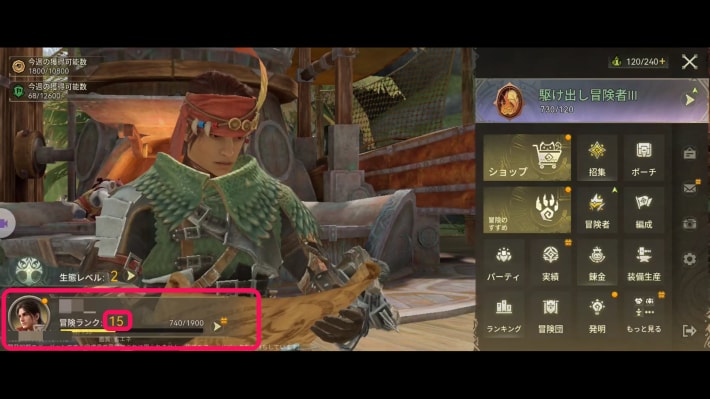 | 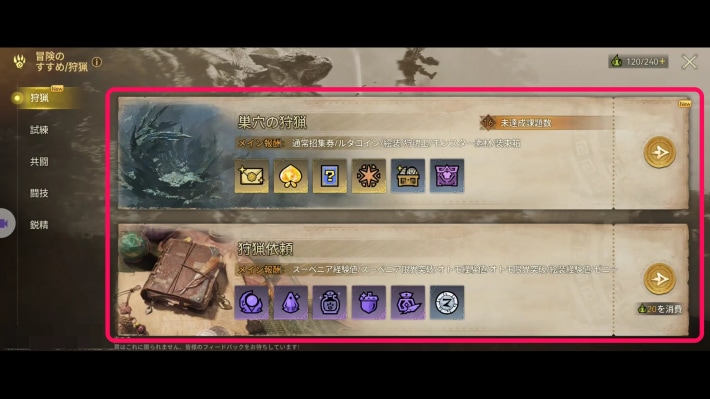 |
Open the menu and raise the Adventurer Rank shown at the bottom left to 17. If you meet the requirement, the quest completes and you move on to the next chapter; if not, raise your Adventurer Rank with daily requests and Free Hunt tasks.
How to Raise Adventurer RankWondrous Visages
Complete One Daily Investigation
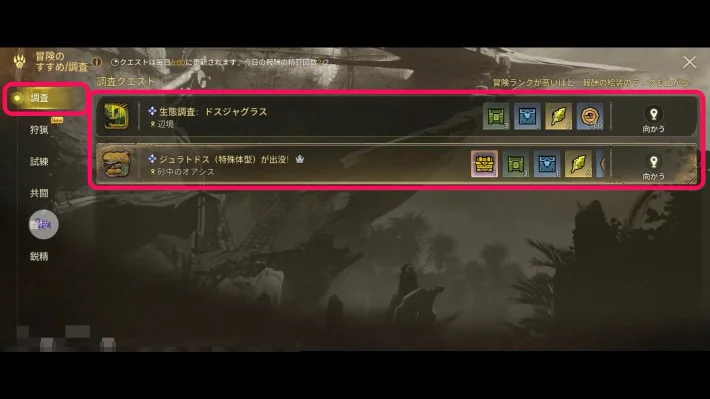 | 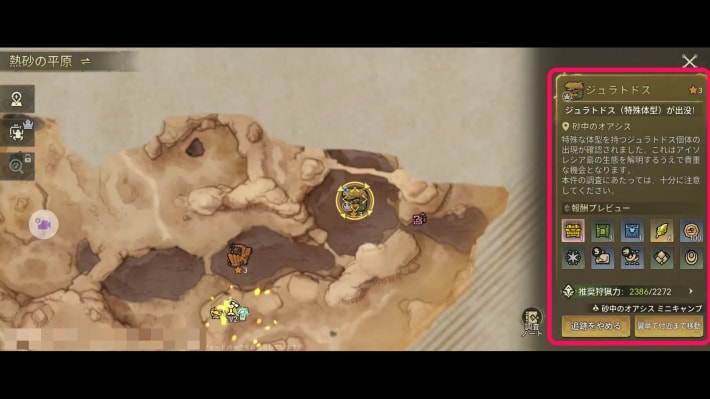 |
Complete one investigation request from Game Modes. Visages are rewards for investigation requests.
Visage GuideEquip One of Your New Visages
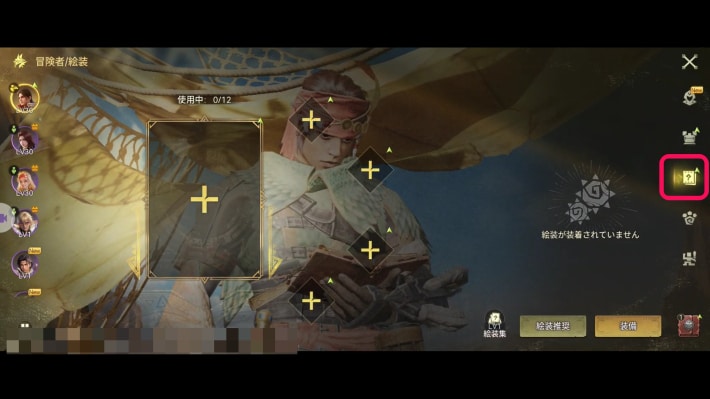
Equip the visage you got as a reward from the adventurer screen.
Upgrade the Visage
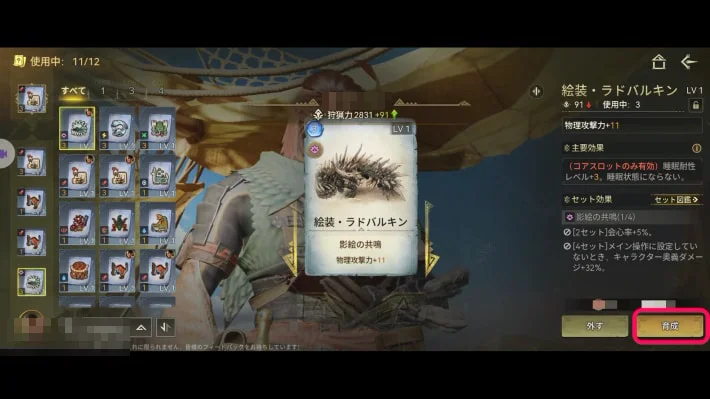 | 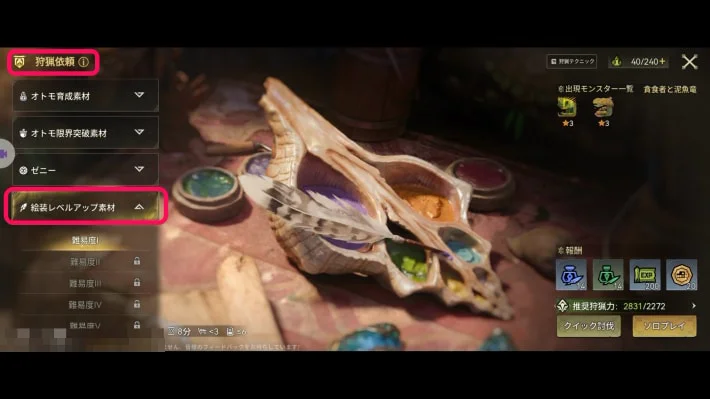 |
Upgrade the visage from the equipment screen. If you're short on materials, do the visage level-up material request that unlocks at the bottom of Hunt Request.
Visage GuideBlazing Scorch Marks
Meet Up with Holly in the Searing Plains
| Where Holly is | Map screen |
|---|---|
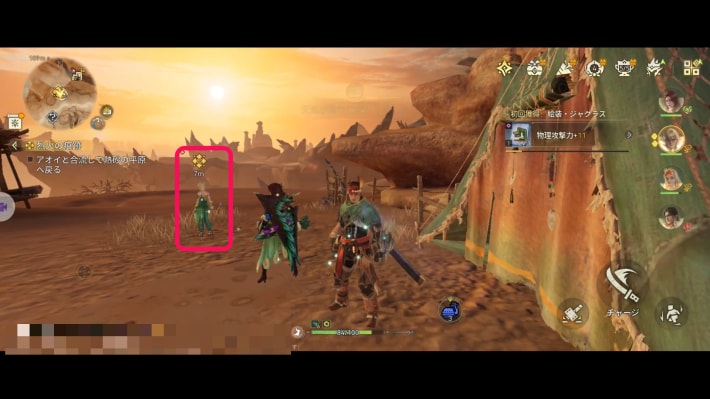 | 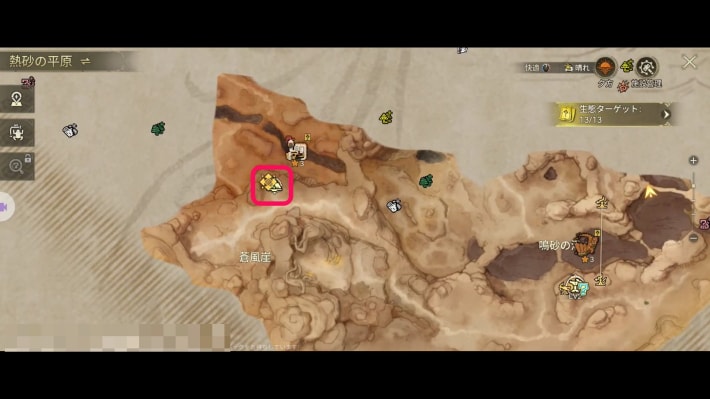 |
Go to the Searing Plains and talk to Holly at the Desert Oasis Camp.
Head to the Area with Scorch Marks
| Destination | Map screen |
|---|---|
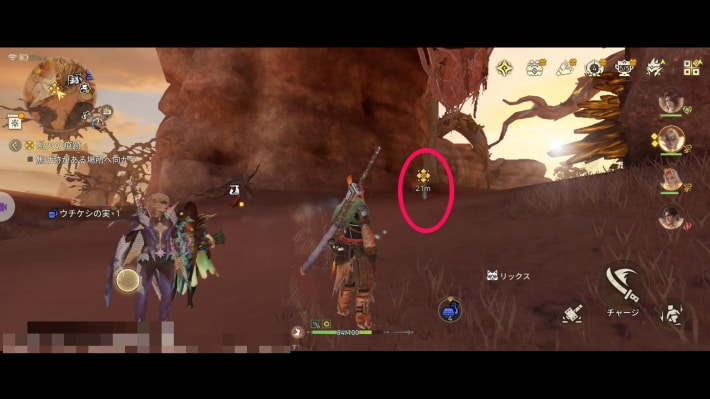 | 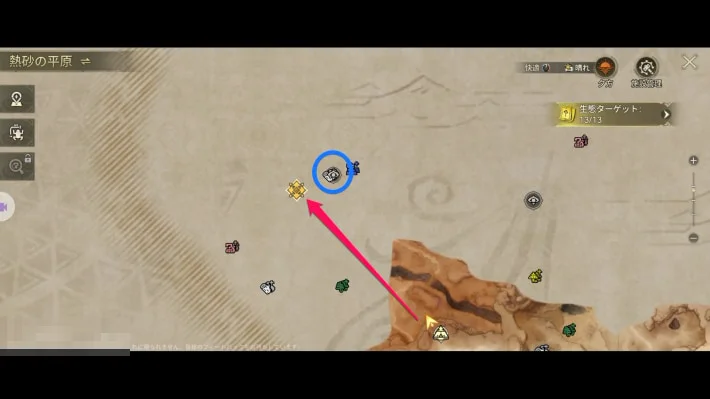 |
After meeting Holly, head to the area with scorch marks to the northwest. Building a Catapult near the Camp and using it makes the trip easier. Activate the observation point on the way, too.
Slay the Anjanath
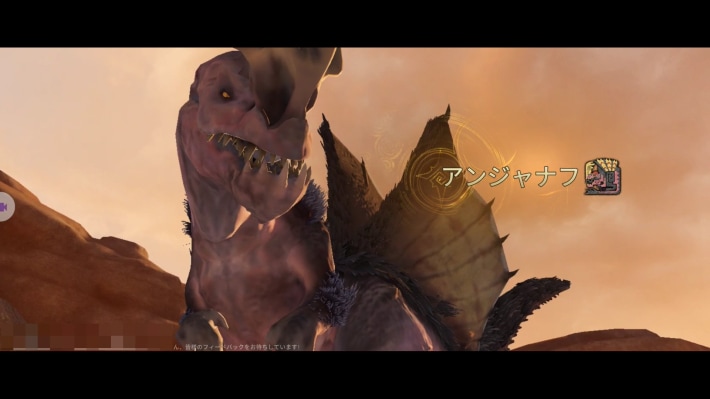
Slay the Anjanath that appears. Note that you need to carve it afterward.
Investigate the Tracks Near the Lair
| Tracks | Map screen |
|---|---|
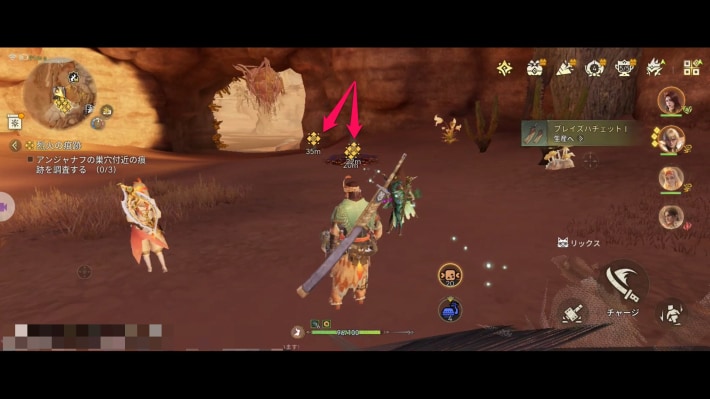 | 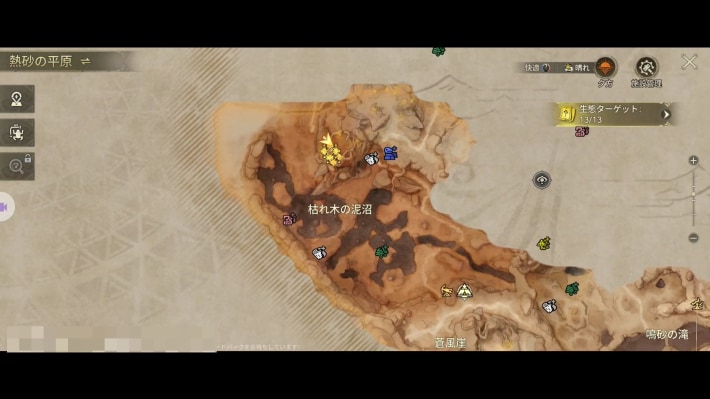 |
Three tracks appear south of the area where the Anjanath showed up. Investigate all three to complete the quest.
Intertwined Thoughts
Head to the Nearby Observation Point
| Destination | Map screen |
|---|---|
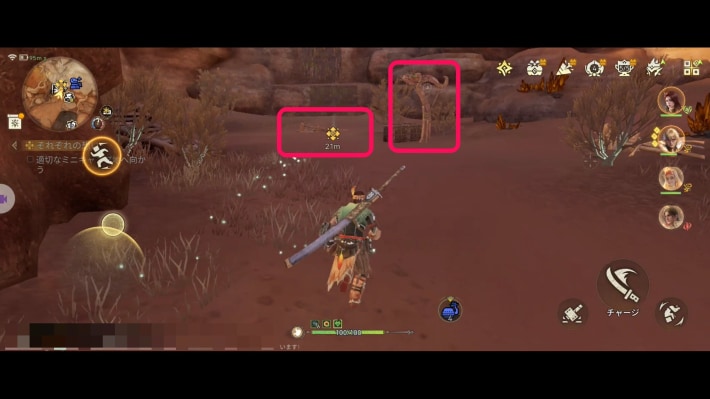 | 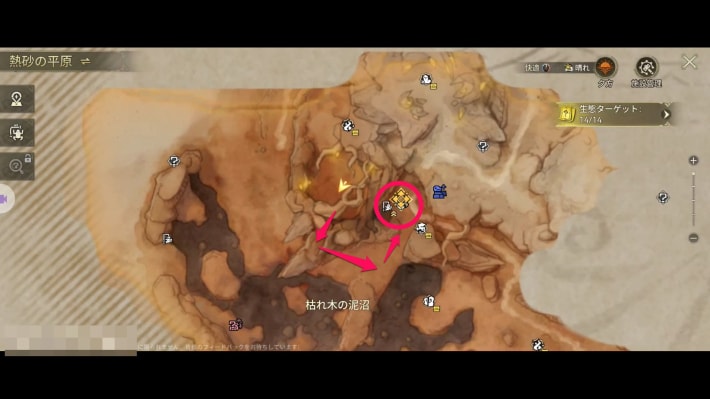 |
Head to the nearby observation point. Crossing straight east is difficult, so go around from the south.
Build a Camp at the Observation Point
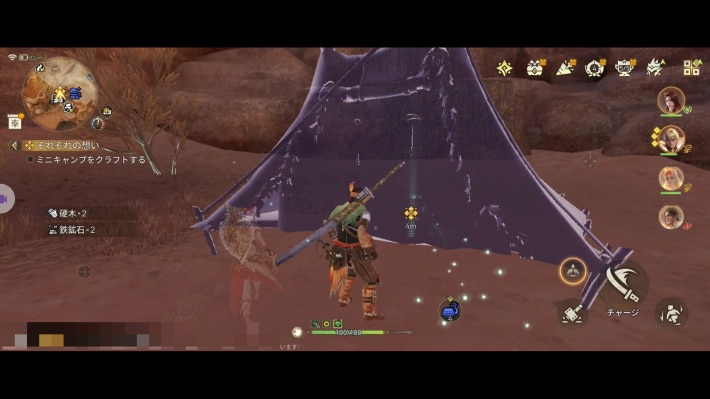
Activate the observation point and build a Camp. The story continues after it's built, completing the quest.
The Sun over the Golden Expanse
Talk to Holly
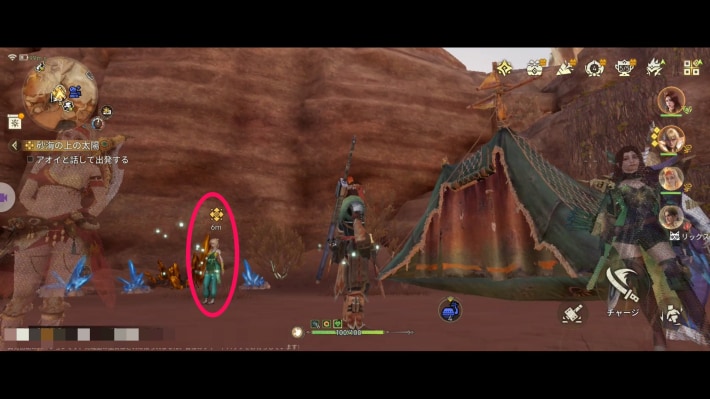
Talk to Holly at the Camp.
Follow the Tracks
| Destination | Map screen |
|---|---|
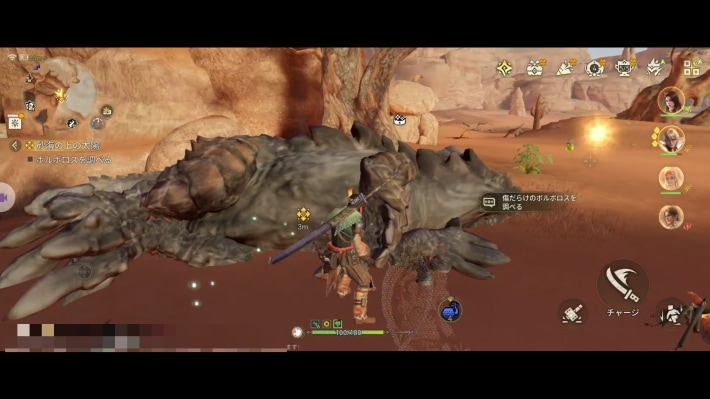 | 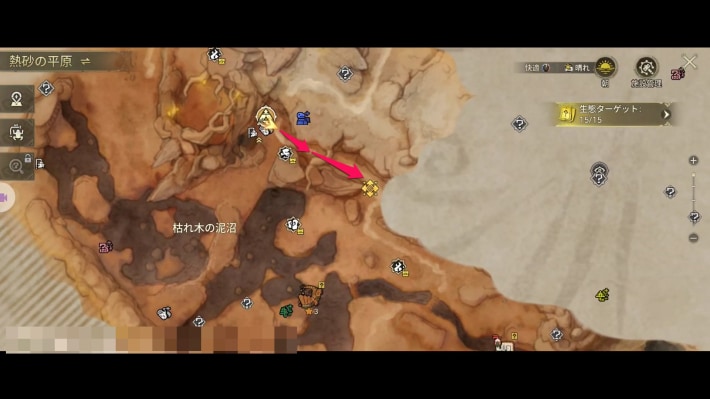 |
Follow the monster's tracks. A Barroth lies collapsed at the destination; investigate it and the next objective appears.
Head Toward the Light
| Destination | Map screen |
|---|---|
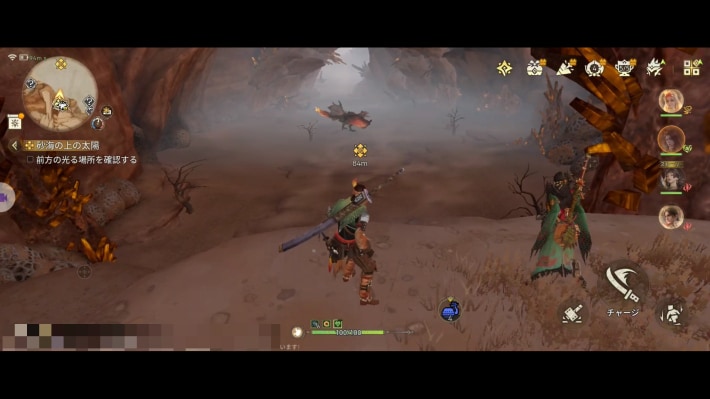 | 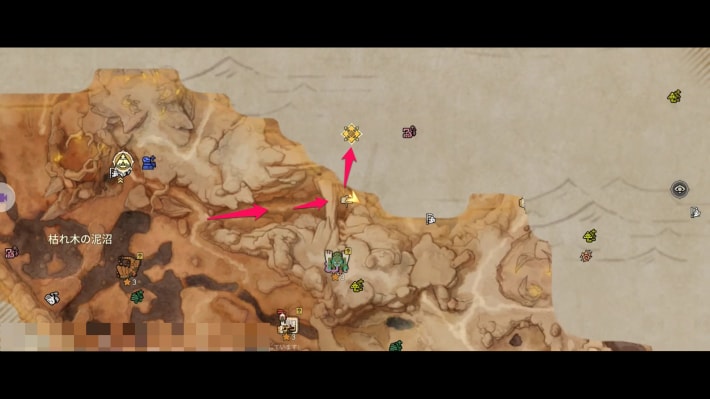 |
Keep following the quest marker. There's an observation point on the way, so activate it and set up a Camp.
Slay the ???
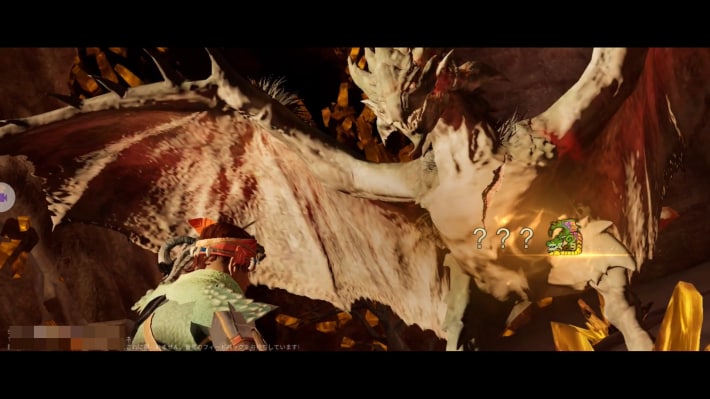
Slay the ??? that appears at the destination. Afterward, carve it and the story continues automatically.
Support from the Workshop
Talk to the Workshop Smith in Kulune
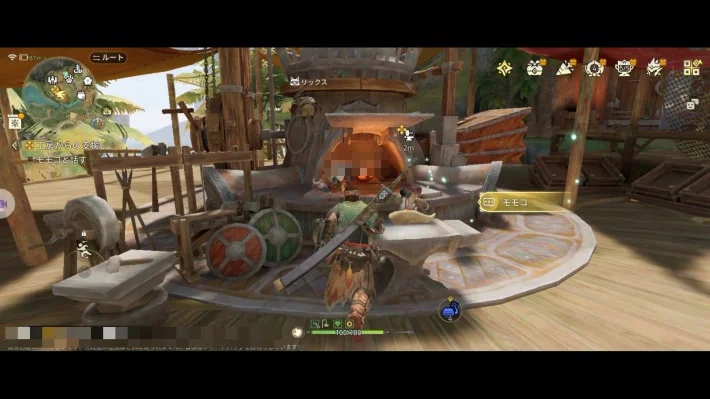
Talk to the smith at the Workshop in Kulune.
Set Up a Wood Gatherer
| Where to set it up | Map screen |
|---|---|
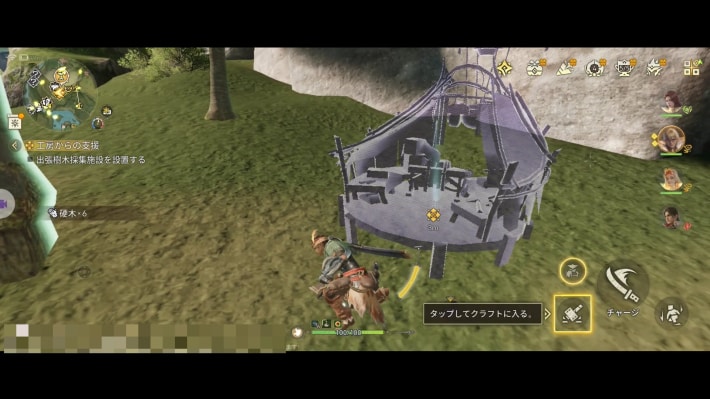 | 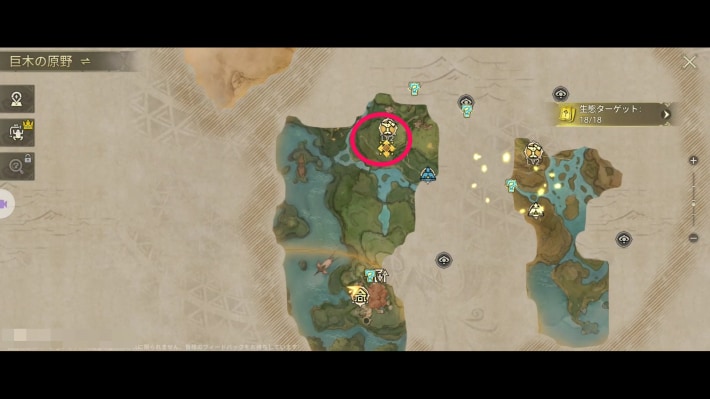 |
Head south from the Outlands Watchtower and set up a Wood Gatherer.
Wood GathererSet Up a Plant Gatherer
| Where to set it up | Map screen |
|---|---|
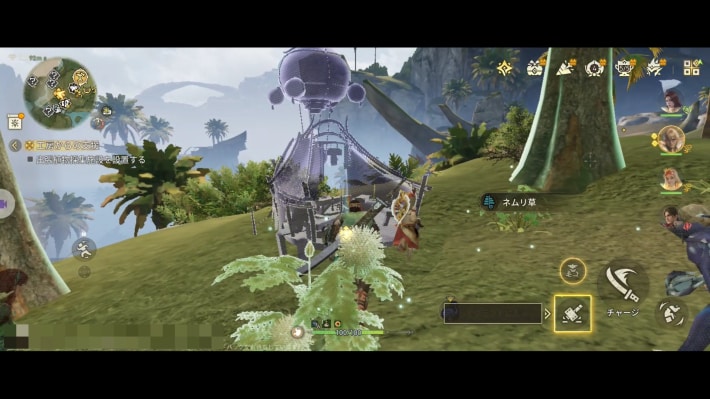 | 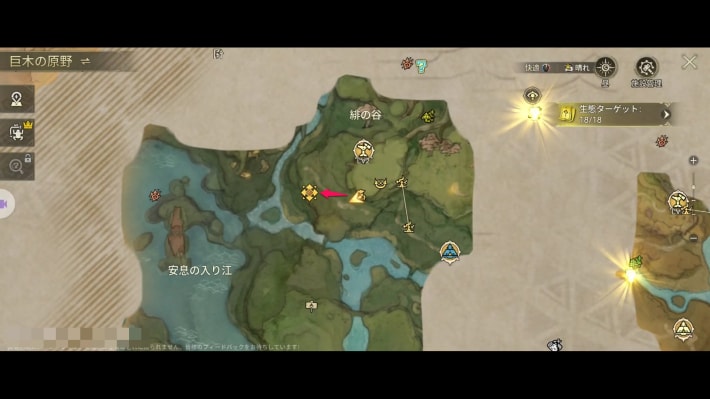 |
Head west from the Wood Gatherer and set up a Plant Gatherer.
Plant GathererSet Up an Ore Gatherer
| Where to set it up | Map screen |
|---|---|
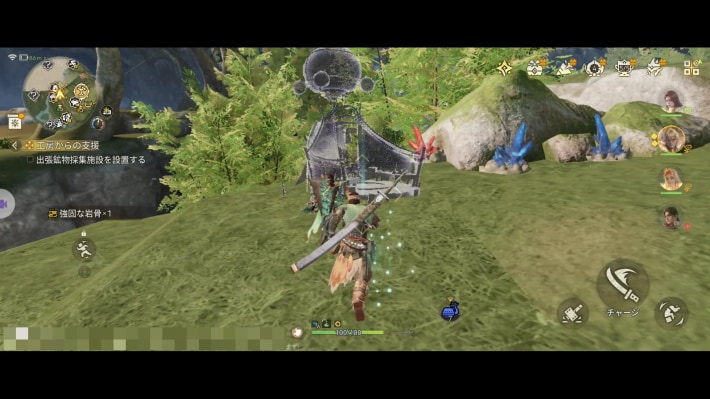 | 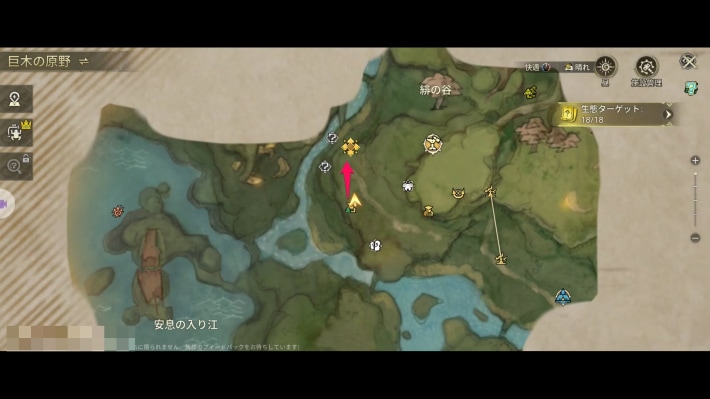 |
Head north from the Plant Gatherer and set up an Ore Gatherer.
Ore GathererCollect What the Gatherers Have Gathered
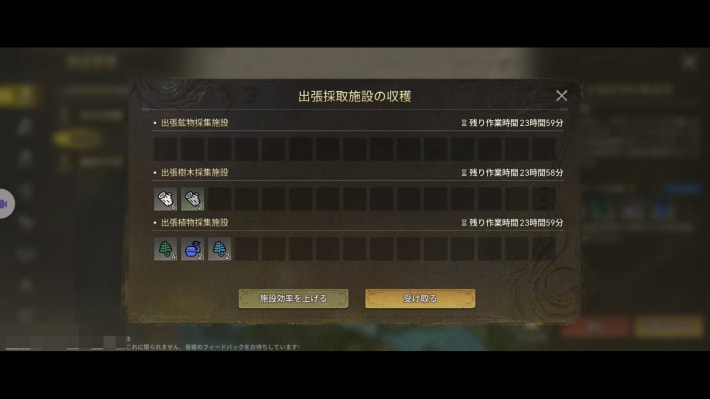
After setting up the last gatherer, follow the tutorial and collect the harvest from the map screen.
Path of Adventure
Raise Your Proof of Mastery
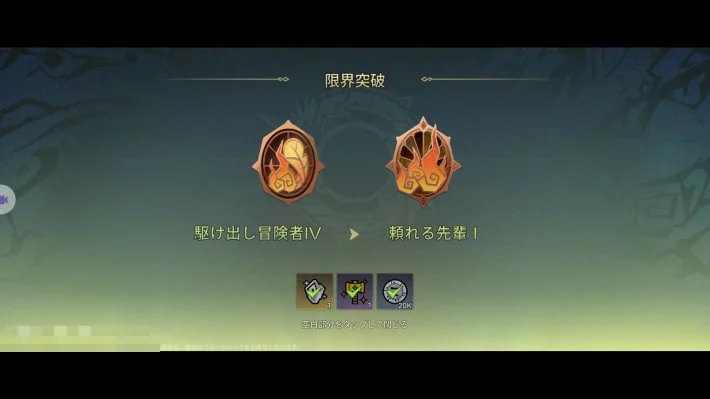
Raise your Proof of Mastery to Reliable Senior I to complete the quest.
Chapter 2: Blazing Pursuit Unlocks
| Quest | Unlocks |
|---|---|
| Slingers and Suppers |
|
| Trial Expedition |
|
| Enter the Arena |
|
| Departure Preparations |
|
| Daily Training |
|
| Wondrous Visages |
|
| Support from the Workshop |
|
Story Walkthrough by Chapter
Story Walkthrough
The screenshots are from the Japanese version of the game.