A walkthrough of the Monster Hunter Outlanders story (main quests). It goes through the quests from Chapter 1 to Chapter 5 step by step with screenshots, and, for Chapters 1 to 4, lists what each chapter unlocks and which monsters you hunt.
Story Chapters and Unlocks
Unlocks by Chapter
| Chapter | Unlocks |
|---|---|
 Chapter 1 |
|
 Chapter 2 |
|
 Chapter 3 |
|
 Chapter 4 |
|
Monsters by Chapter
| Chapter | Required rank and monsters |
|---|---|
| Chapter 1 | None
|
| Chapter 2 | Fledgling Adventurer I
|
| Chapter 3 | Reliable Senior I
|
| Chapter 4 | Reliable Senior III
|
Chapter 1 Walkthrough
Chapter 1 WalkthroughThe Storm-Swept Island
Choose a Control Mode
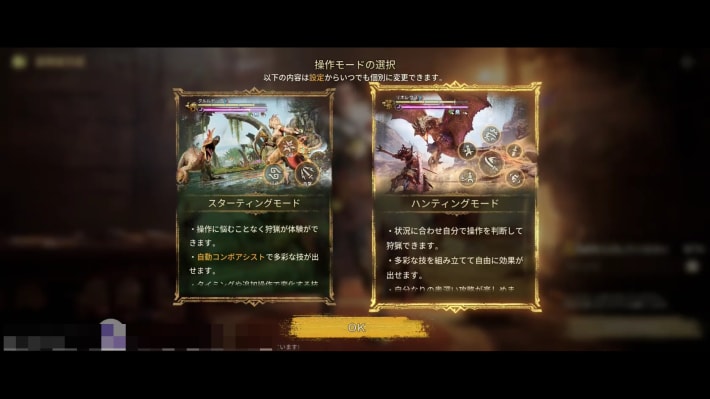
After you finish creating your character early on, you'll be asked to pick a control mode. Choose based on how used you are to action games and to playing on a phone.
ControlsFollow the Quest Marker
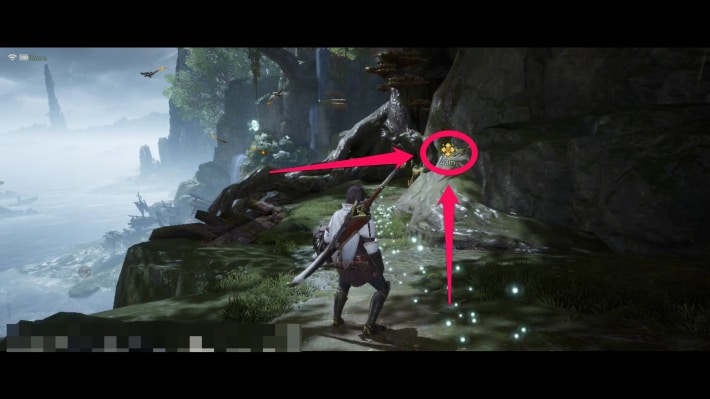
Follow the quest marker and the tutorials as instructed. The route is linear, and as long as you act as each tutorial explains, you can't fail.
 Point!
If the game runs slowly, go back to the server select screen and change your settings!
Fight Off the Rathian
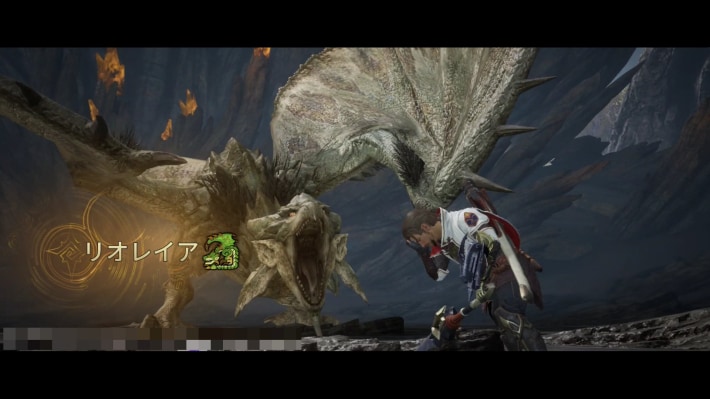
Fight off the Rathian that appears. You fight with a Long Sword here, but you can change your weapon later.
Learn the Long Sword Controls
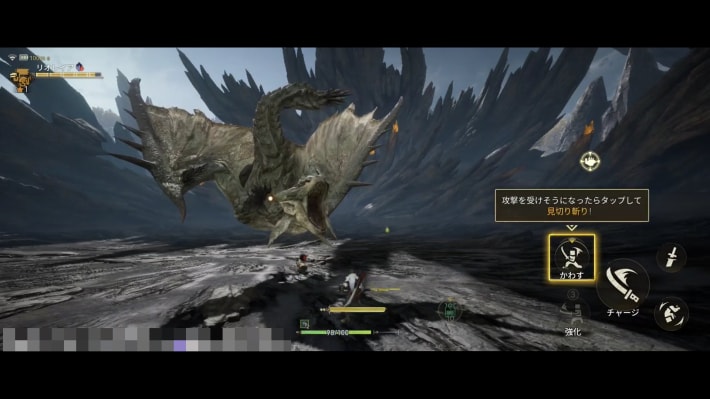
A Long Sword tutorial runs during the fight. Most prompts are timed to the Rathian's moves, so it's easy to tell what to do even if you're new to the controls.
Rekindling the Forge
Head to the Workshop
| Workshop location | What it looks like |
|---|---|
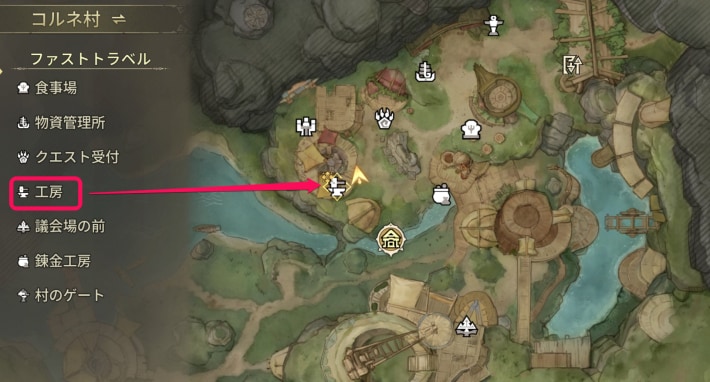 | 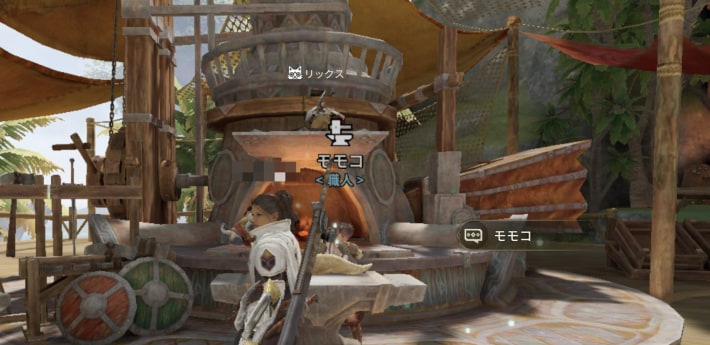 |
Head to the Workshop in the village. The story continues automatically when you arrive.
Choose Your Fated Adventurer's Weapon Type
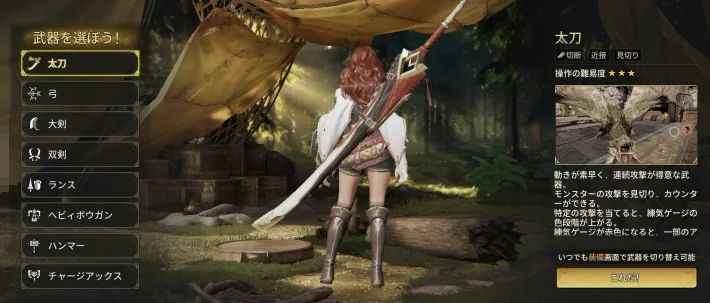
Choose the weapon type for your Fated Adventurer at the Workshop.
Point!If you're not sure which weapon to use, you can try out the controls at the training area!
Head to the Zip Line at the Destination
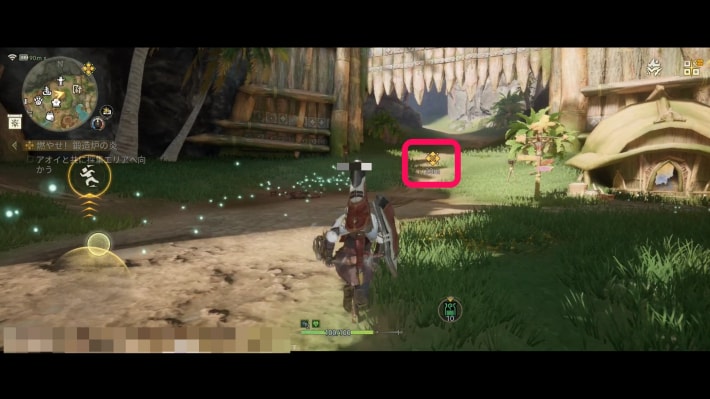 | 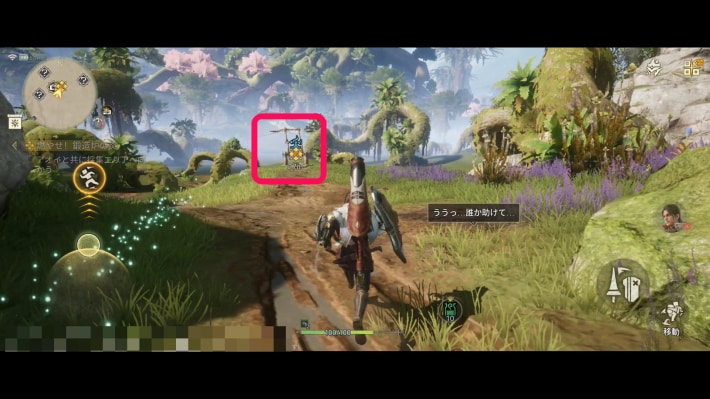 |
After choosing a weapon type, follow the quest marker out of the village. Then keep following the marker and use the Zip Line at the destination.
Point!Gather any ore and plants you see along the way. You'll need them later for crafting items and building!
Build a Zip Line and Head to the Destination
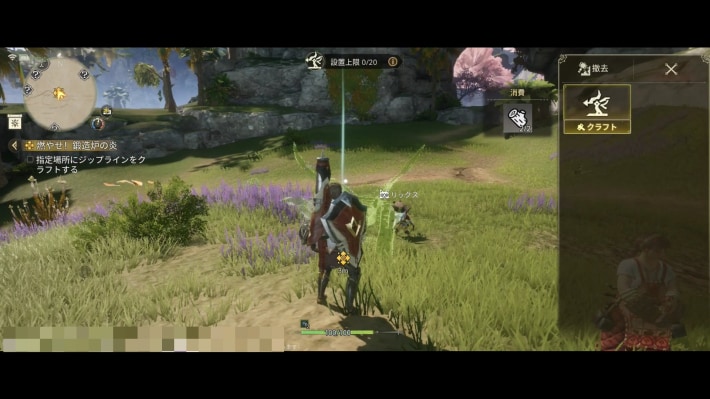
After riding the Zip Line down and moving on, the story continues and you can build Zip Lines yourself. A building tutorial starts; follow it to build a Zip Line and ride it.
Unwelcome Visitors in the Gathering Area
Head to the Gathering Area
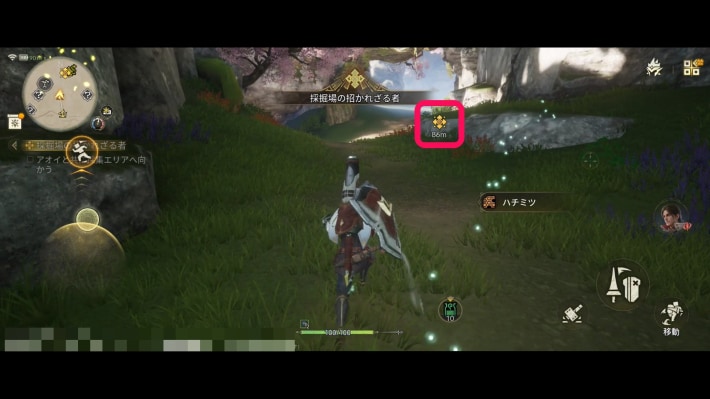
From where the Zip Line drops you off, follow the marker to the Gathering Area ahead. The story continues automatically when you get close.
Slay the Great Jagras

Slay the Great Jagras that appears. It flees partway through and fights an Anjanath over territory, so you'll need to chase it.
Point!A tutorial on using Ultimates runs during this fight!
Carve the Great Jagras
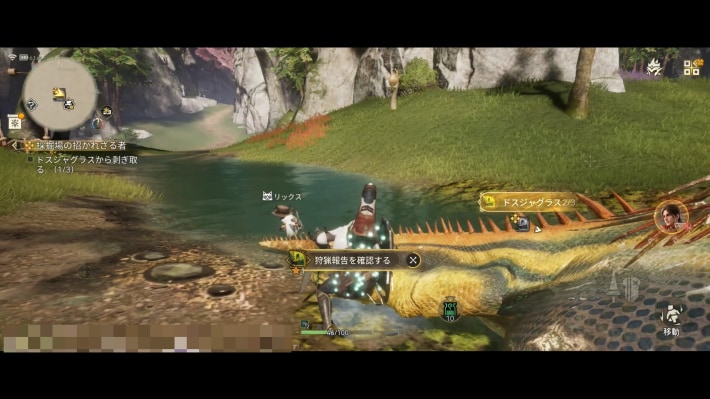
Carve materials from the Great Jagras you slew. A carving prompt appears when you approach a slain monster or a severed tail.
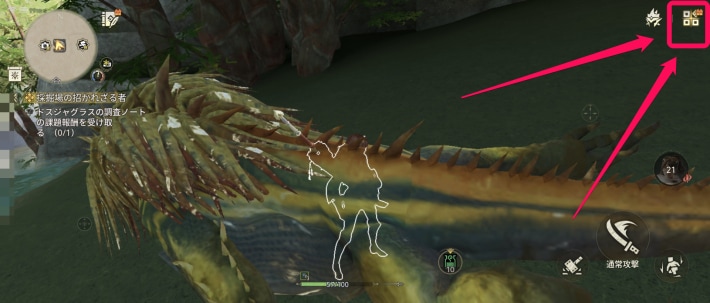
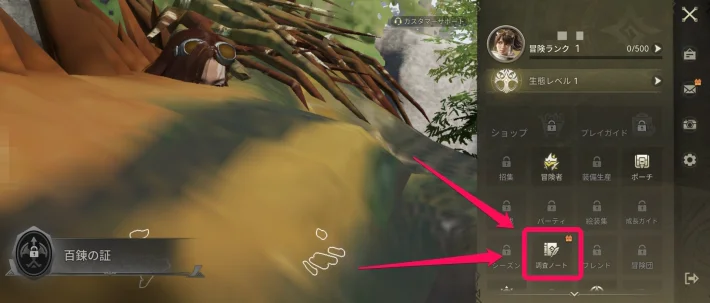
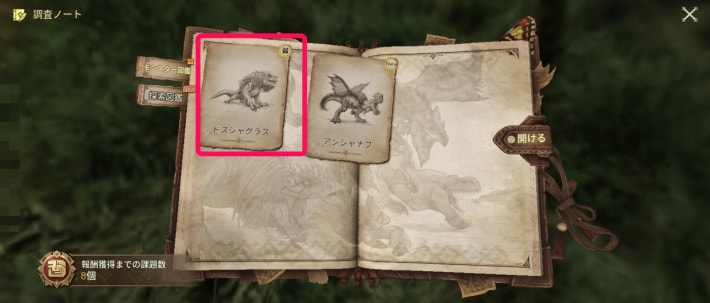
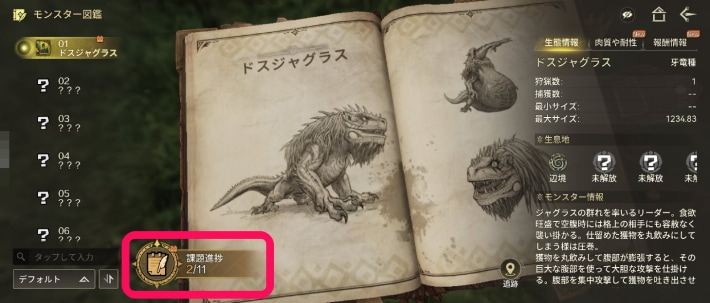
Check the Research Notes
| Where the research notes are |
|---|
 |
 |
 |
 |
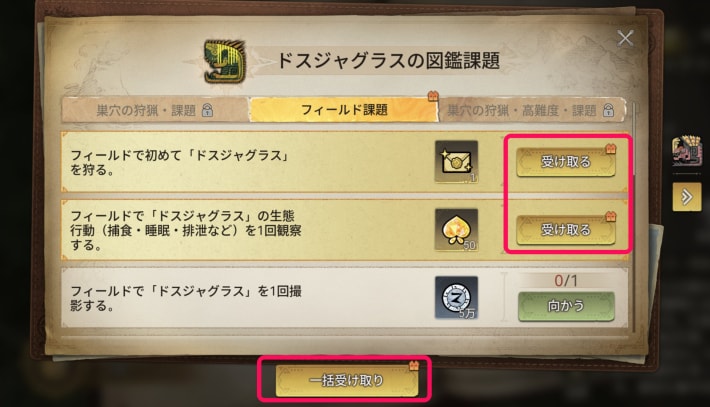 |
Open the Great Jagras entry in the research notes to view its info and claim the first-hunt reward.
Return to the Village by Wingdrake (Fast Travel)
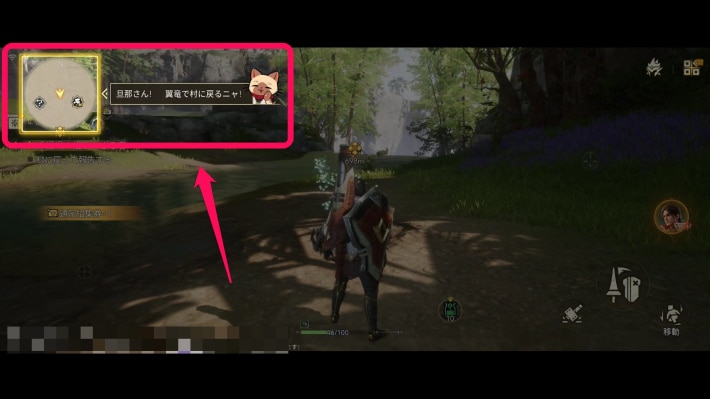
After the story moves on, a fast travel tutorial starts and takes you back to the village. The story then continues automatically and the quest is complete.
Interactive MapReady for Another Adventure!
Head to the Workshop
| Workshop location | What the Workshop looks like |
|---|---|
| |
The Workshop is in Kulune. Approach the Workshop smith and you'll be taken to the weapon crafting screen almost automatically.
Craft a Weapon
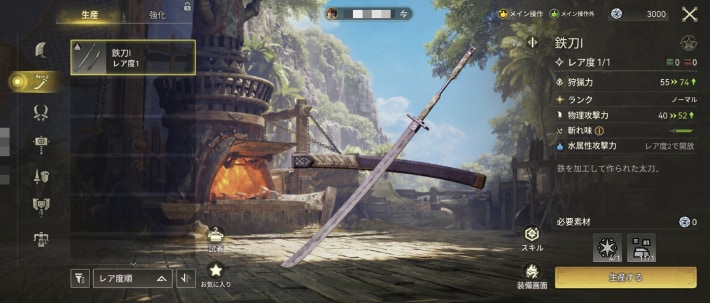
Craft any weapon you like. Afterward, return to the field screen to complete the quest.
Weapon CraftingAbout Element Specialization
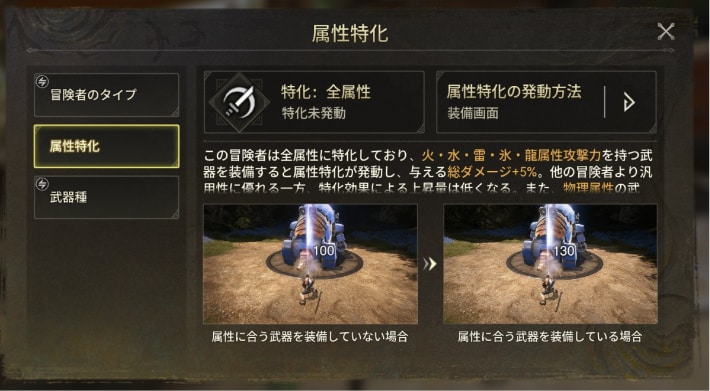
Element specialization is explained after you craft, but early on it doesn't make enough of a difference to affect your progress. As you get further, start matching the elements of your Fated Adventurer and your party.
Beginner GuideThe Missing Companion
Talk to the Quest Counter Attendant
| Where the attendant is | What the destination looks like |
|---|---|
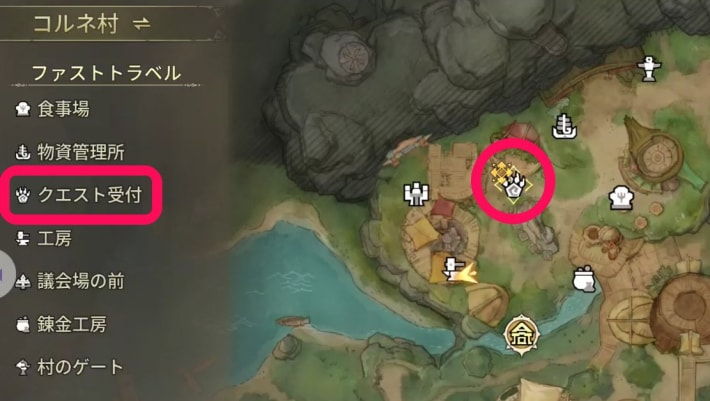 | 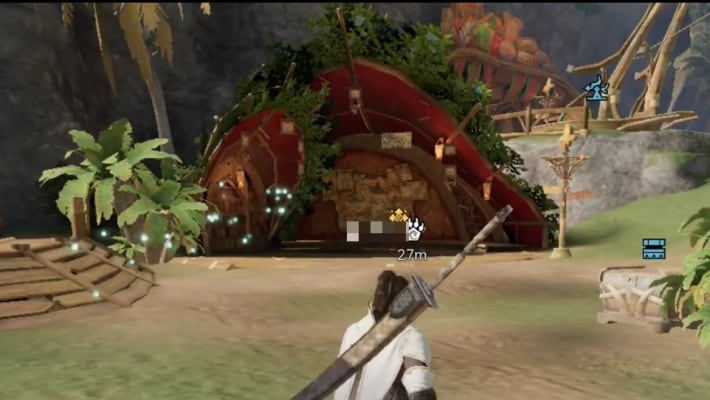 |
Go to the quest counter and talk to the attendant to move the story forward.
Fast Travel to the Outlands
| Field screen | Map screen |
|---|---|
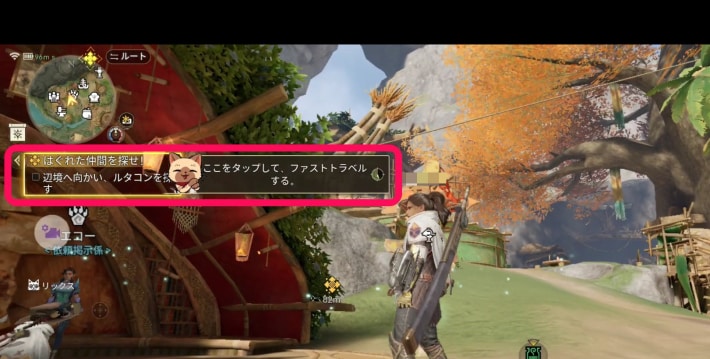 | 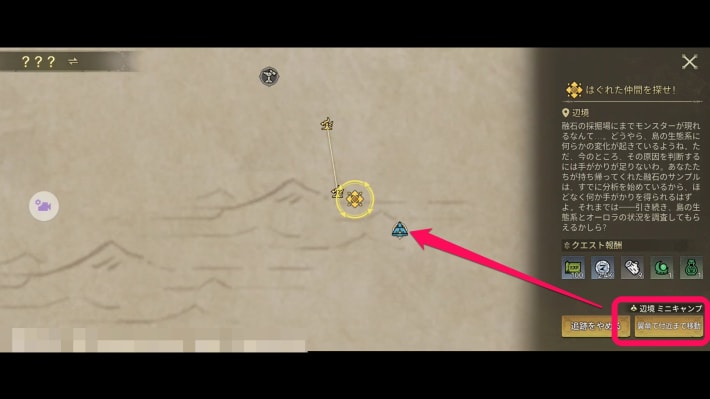 |
The quest objective is shown below the minimap at the top left of the field screen. Tap it to open the map, then use the fast travel button at the bottom right to travel near the objective.
Interactive MapFind the Rutaco
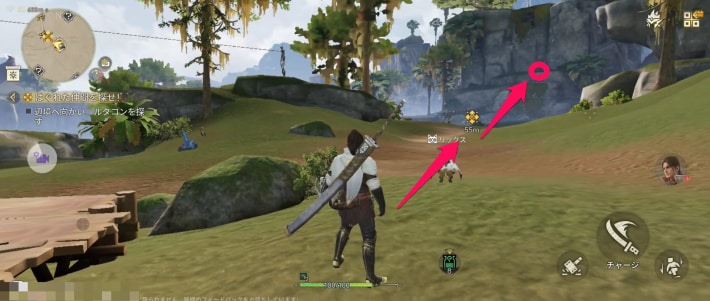
There's a rocky hill to the northwest of the fast travel point. The lost Rutaco is sitting at the top of the cliff; talk to it to move the quest forward.
Build a Wind Platform and Head to the Camp
| How to build it | How to use the Wind Platform |
|---|---|
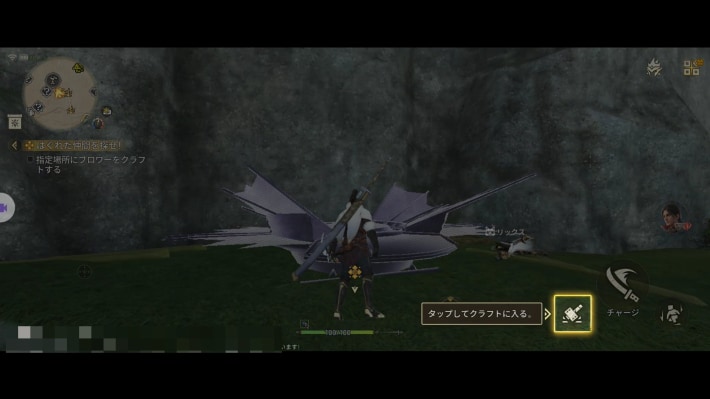 | 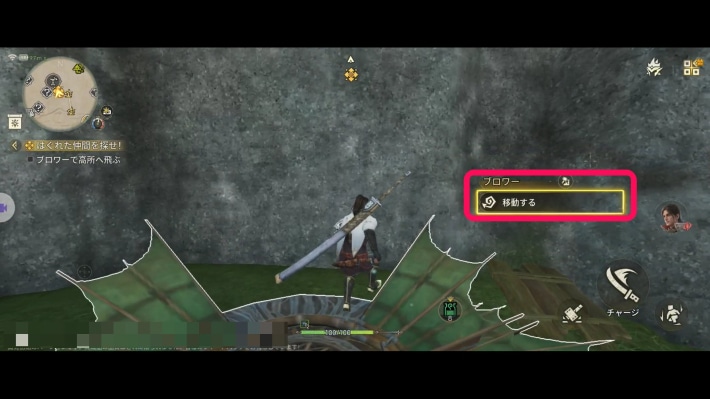 |
As the Rutaco instructs, build a Wind Platform at the marked spot right next to you. Then step onto it to ride the updraft up.
Talk to the Rutaco
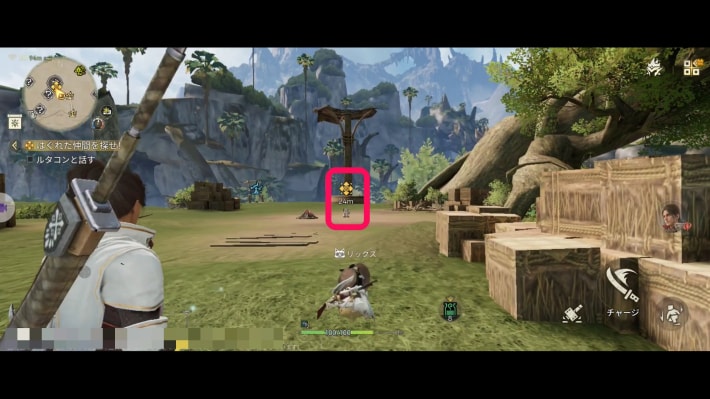
After using the Wind Platform, talk to the Rutaco by the campfire to continue the quest.
Repair the Watchtower
| What the Watchtower looks like | Leveling it up |
|---|---|
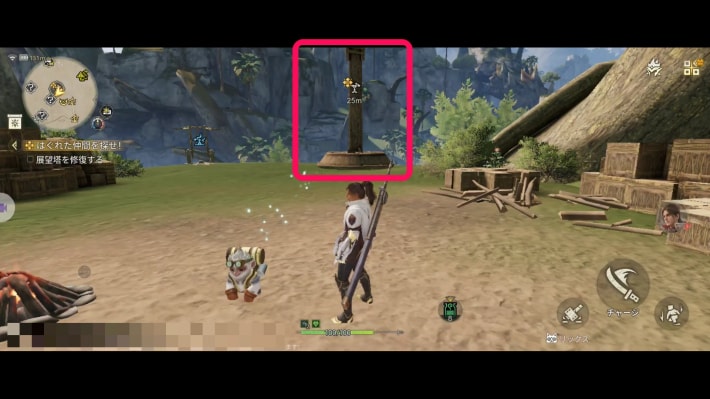 | 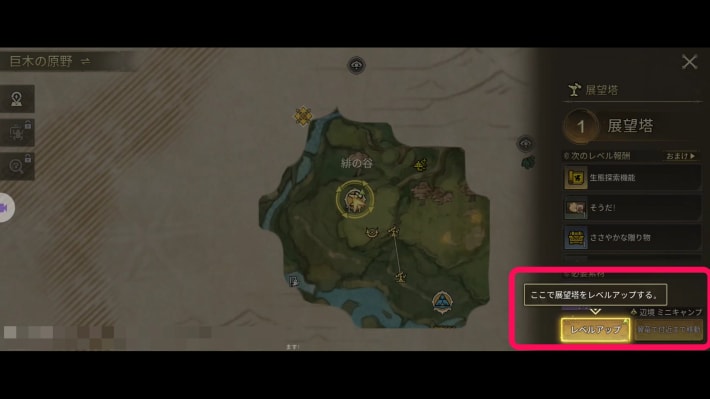 |
As the Rutaco instructs, repair the Watchtower and level it up. Repairing it switches to the map screen automatically, where you can raise its level.
There for the Radiantite
Head to Where the Disturbance Began
| Field screen | Map screen |
|---|---|
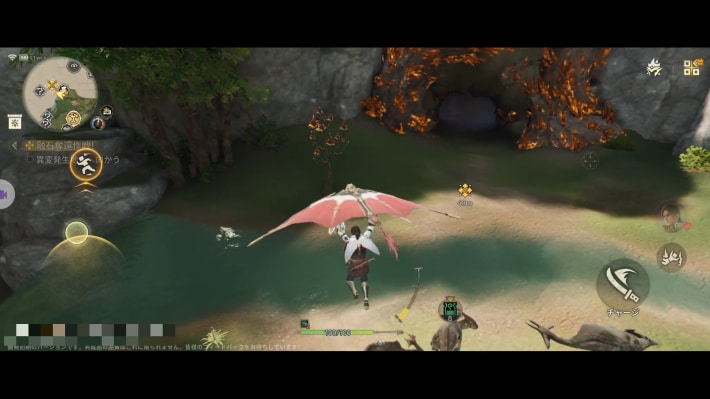 | 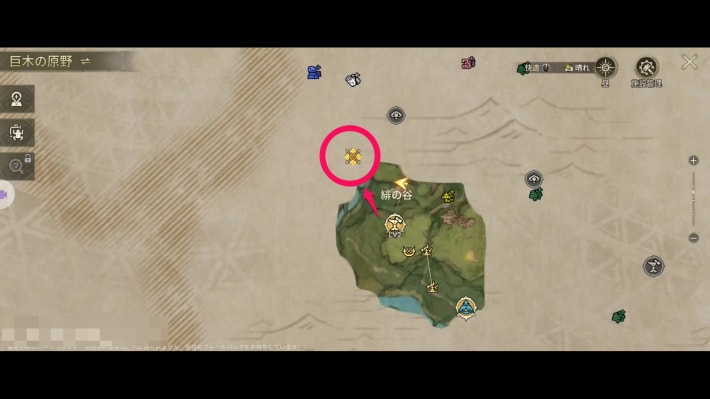 |
Head to where the disturbance began. You can jump straight down from the Crimson Vale Watchtower to get there. The story continues automatically when you reach it.
Slay the Kulu-Ya-Ku
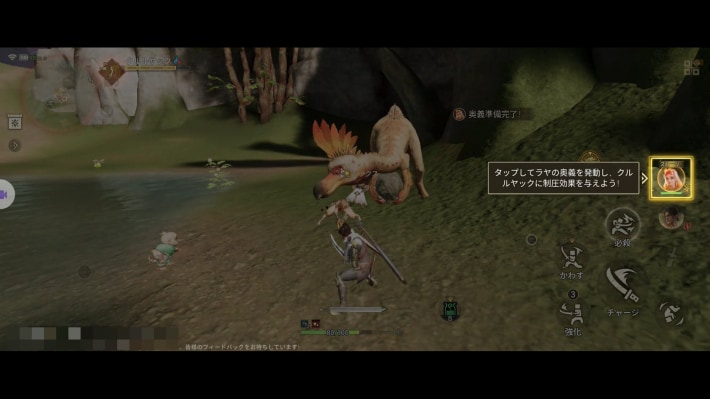
Slay the Kulu-Ya-Ku that appears. Raya joins the fight, and tutorials on Squadmate Skills and targeting individual parts with lock-on run along the way.
Co-op, Squadmate & UltimatesCarve It and Check the Research Notes
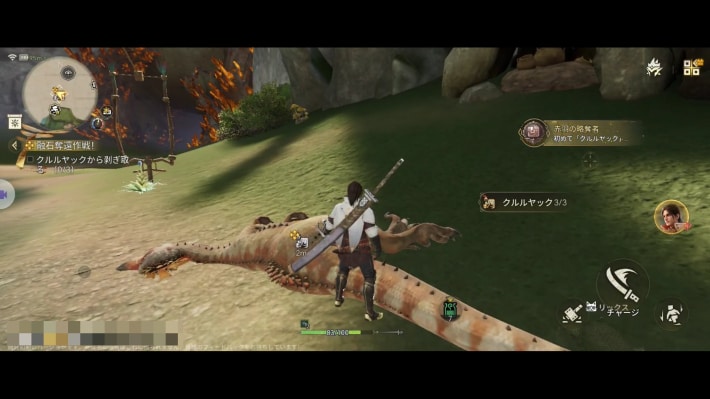 | 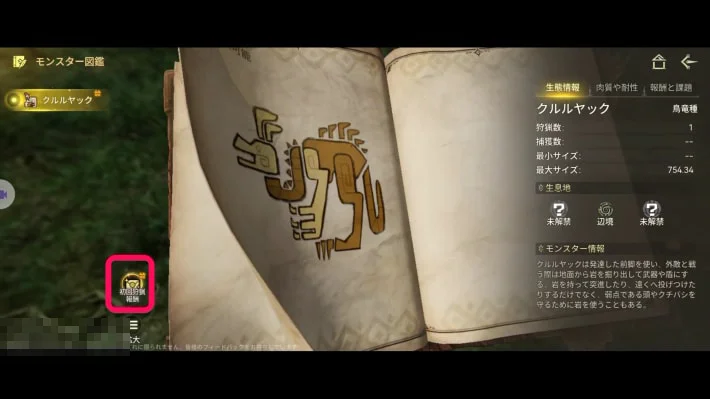 |
After slaying the Kulu-Ya-Ku, carve it, then open the monster field guide from the menu and claim the reward in the research notes.
Return to the Village and Craft Armor
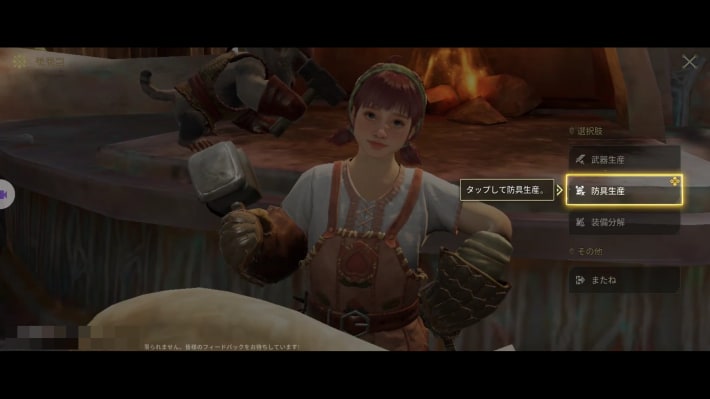 | 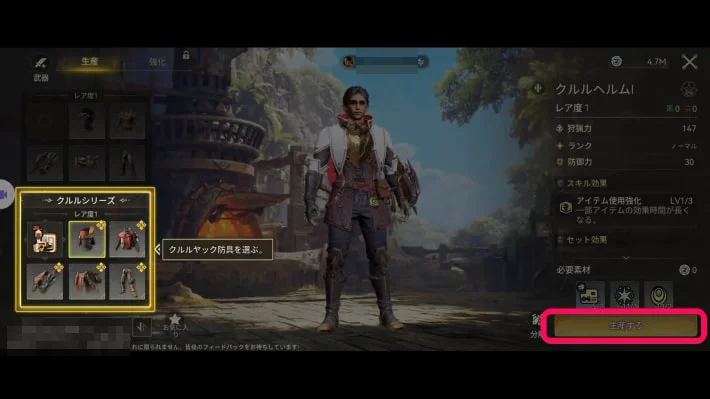 |
Go back to the village and visit the Workshop. Armor crafting is now available; craft a piece of Kulu-Ya-Ku armor and return to the field screen to complete the quest.
Weapon CraftingWhere Adventurers Gather
Recruit Raya
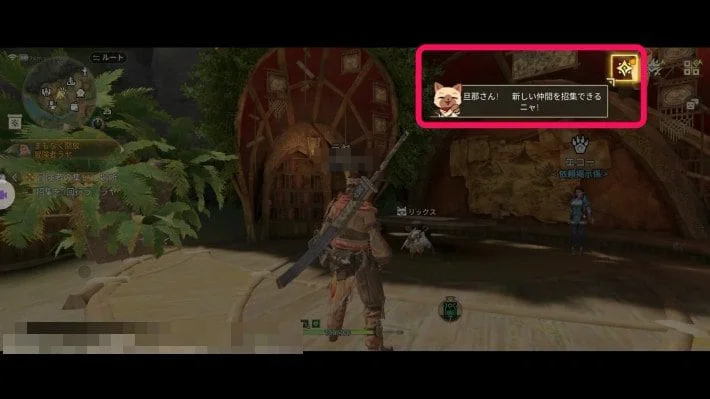 | 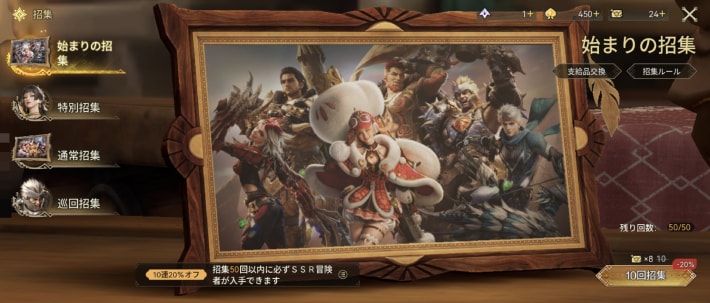 |
This is the Recruitment tutorial for getting Raya, who fought alongside you. You'll be taken to the Recruitment screen almost automatically; you'll do a recruitment pull, so just follow the tutorial.
Add Raya to Your Party
| Party lineup | Party screen |
|---|---|
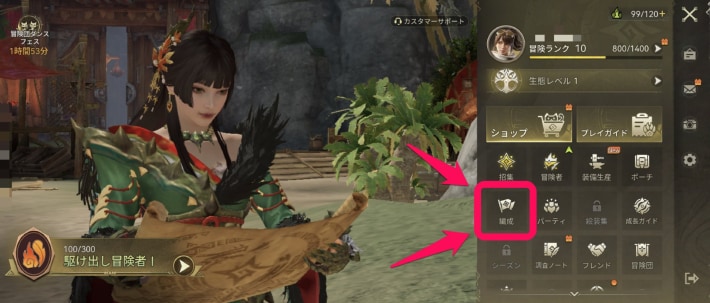 | 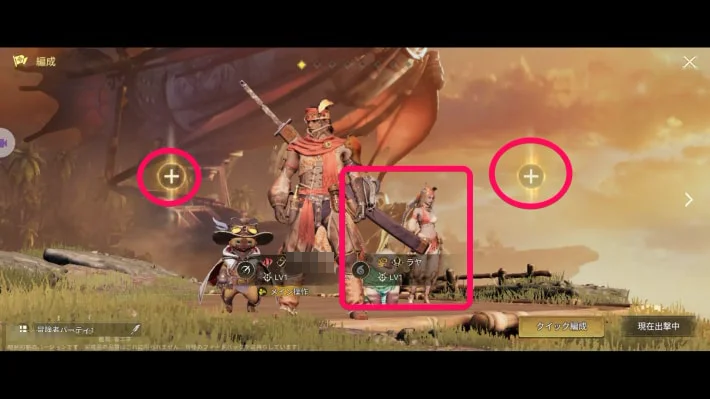 |
Once Raya has joined from the recruitment pull, open the party screen from the menu. Follow the tutorial to put Raya in an empty slot, then return to the field screen to complete the quest.
RayaGet Stronger, Adventurer
Talk to Icarus to Unlock Proof of Mastery
| Icarus | Map screen |
|---|---|
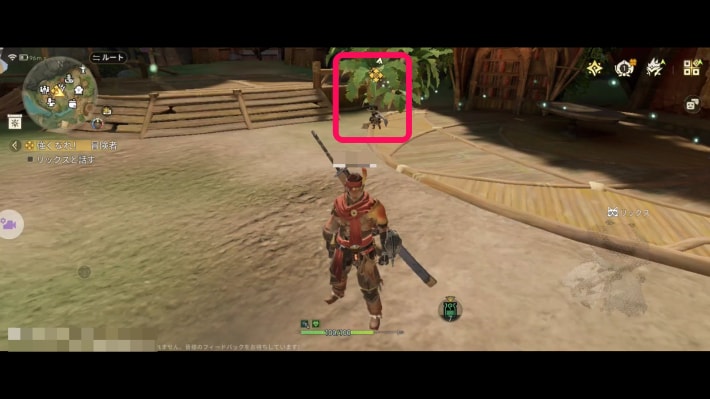 | 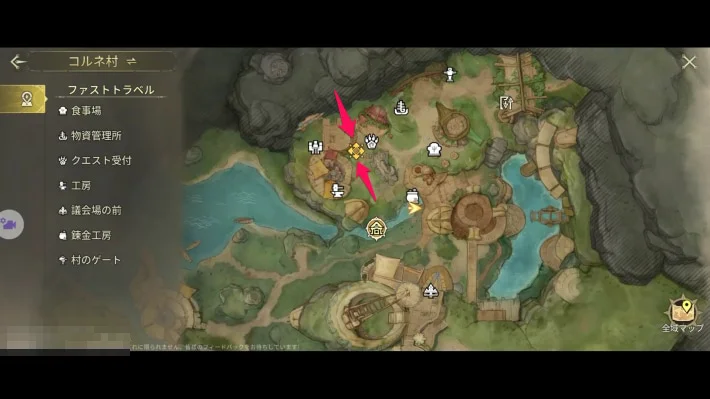 |
Go up to your Buddy Icarus and talk to him. The story moves on, and the Proof of Mastery tutorial starts almost automatically.
Reach Rookie Adventurer II
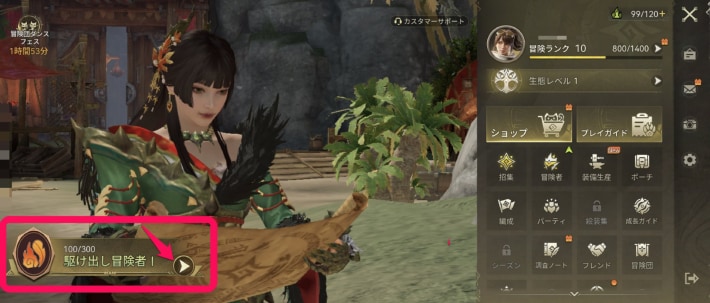 | 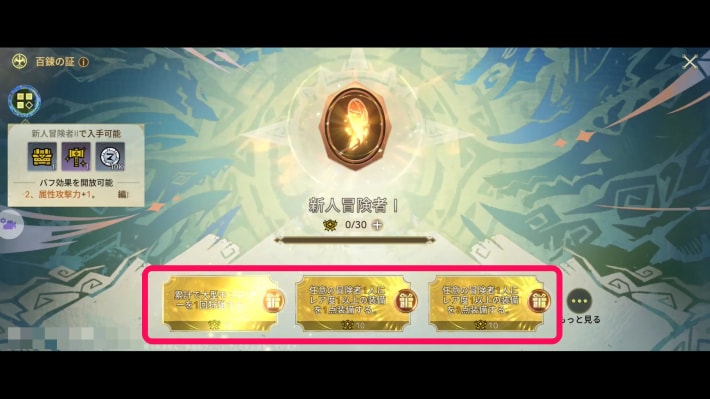 |
Follow the tutorial step by step and raise your Proof of Mastery to Rookie Adventurer II.
Level Up a Keepsake
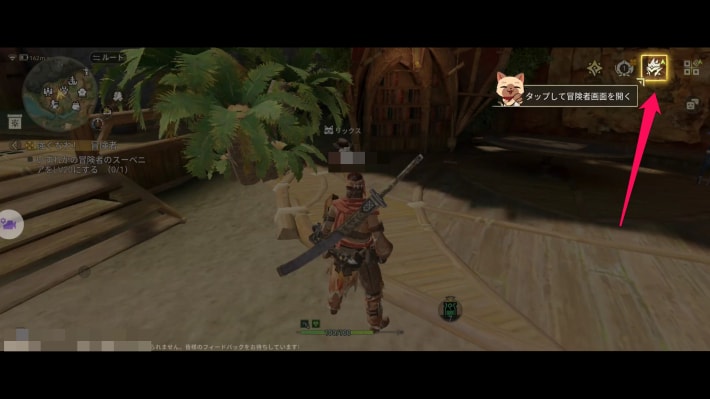 | 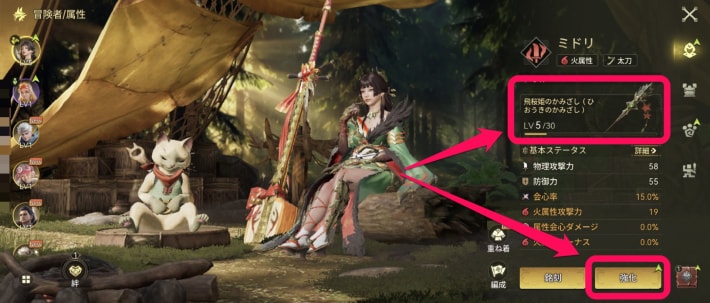 |
Return to the field screen and talk to Icarus again to start the tutorial on leveling up an adventurer's Keepsake. Follow it and level up the Keepsake.
Level Up GuideReach Rookie Adventurer III
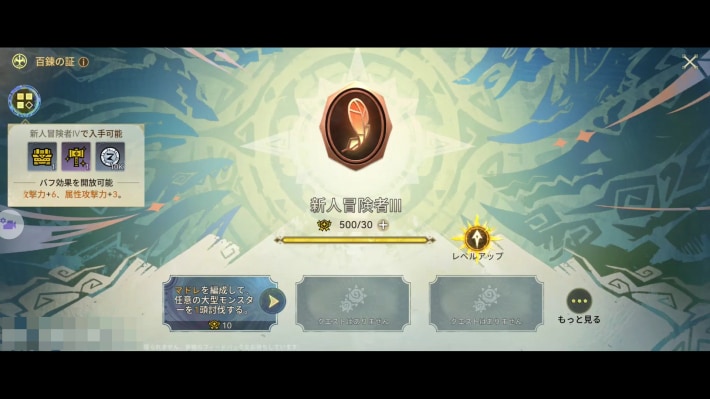
Go back to Proof of Mastery, raise it to Rookie Adventurer III, then return to the field screen to complete the quest.
Adventurers, Deploy!
Take the Quest
| Where to take the quest | Map screen |
|---|---|
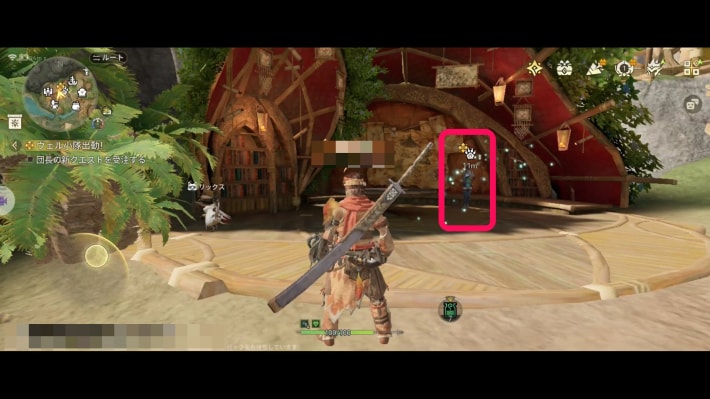 | 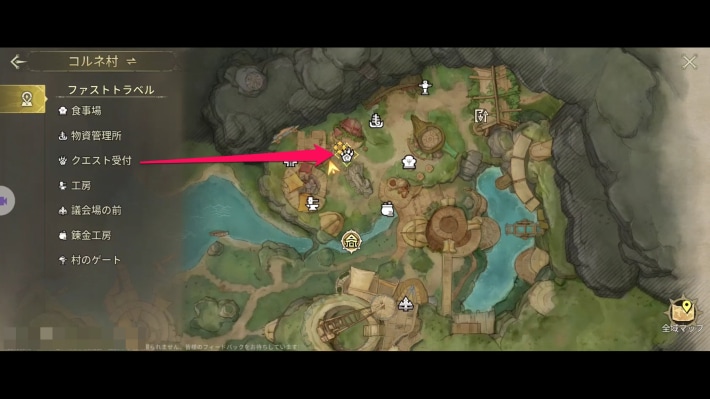 |
Talk to the quest counter attendant to move the story forward.
Talk to Holly
| Holly | Map screen |
|---|---|
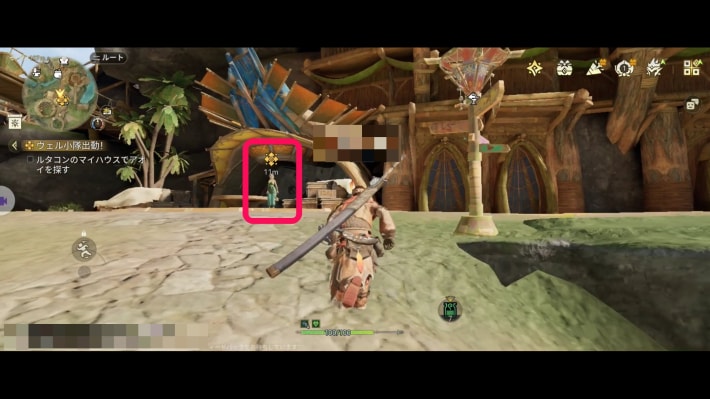 | 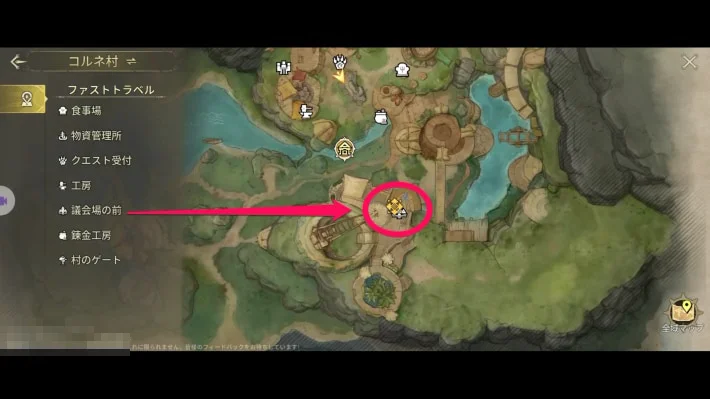 |
Go to the front of the council hall and talk to Holly to move the story forward.
Go to the Muddy Swamp
Buy an Antidote
| Buying from Ruck | Map screen |
|---|---|
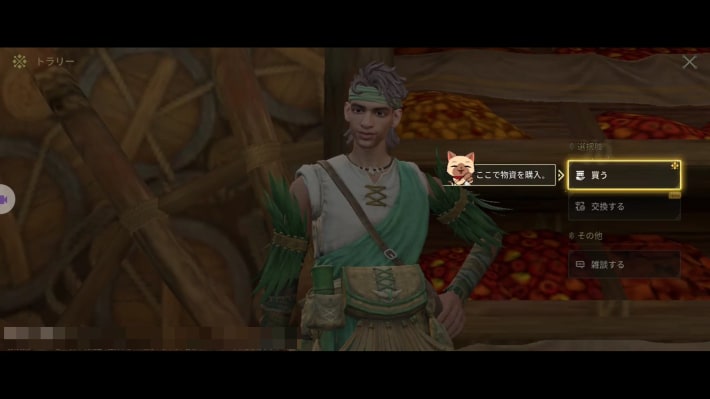 | 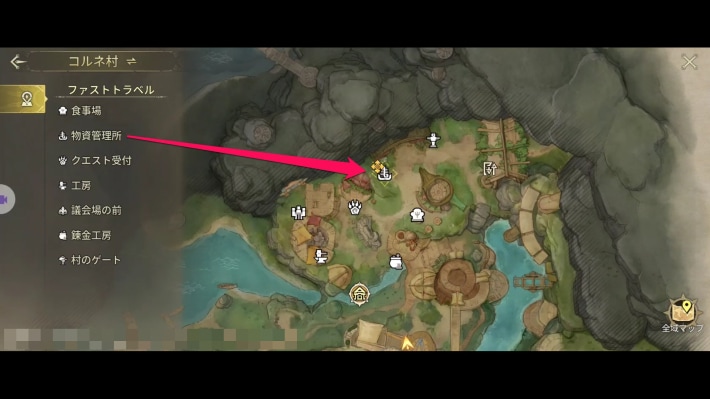 |
Go to the supply depot and talk to Ruck to start the shopping tutorial. Buy an Antidote, then return to the field screen.
Meet Up with Holly
| Holly | Map screen |
|---|---|
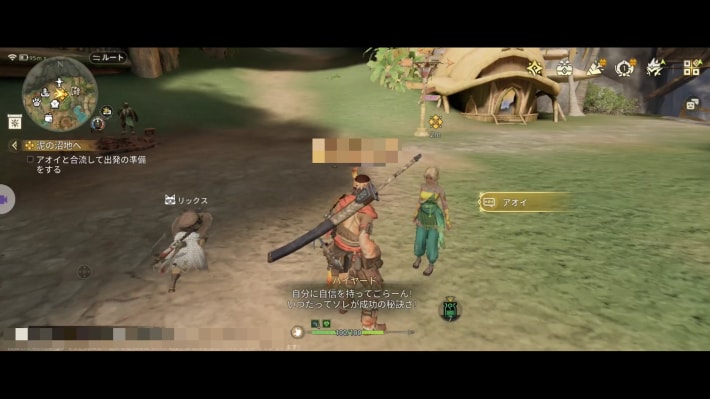 | 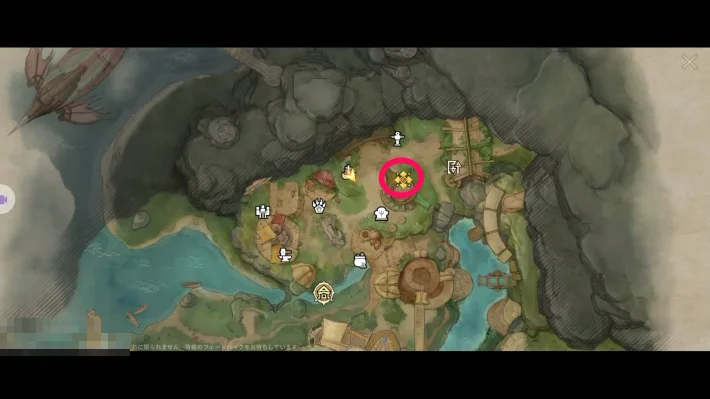 |
Holly is just east of the supply depot. Talking to her moves the story on and fast travels you to the destination automatically, so level up and sort out your gear beforehand.
Build a Zip Line
| Where to set it up | Map screen |
|---|---|
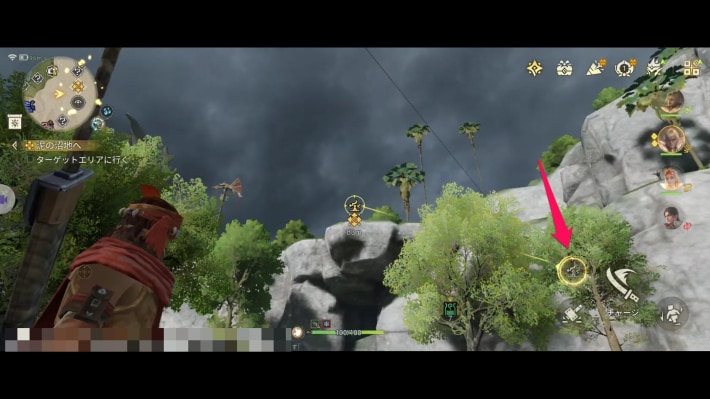 | 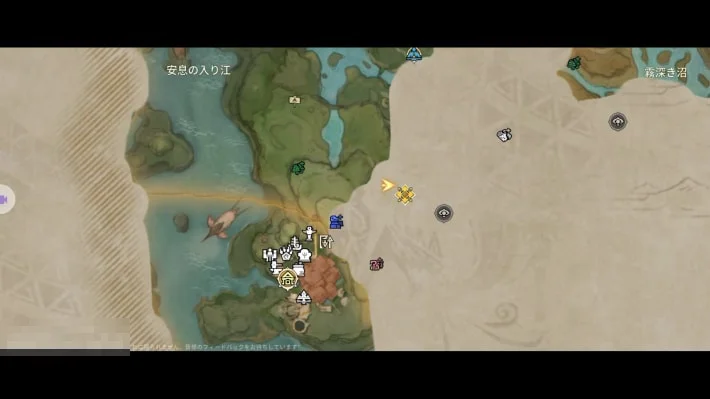 |
Build a Zip Line where the fast travel drops you off.
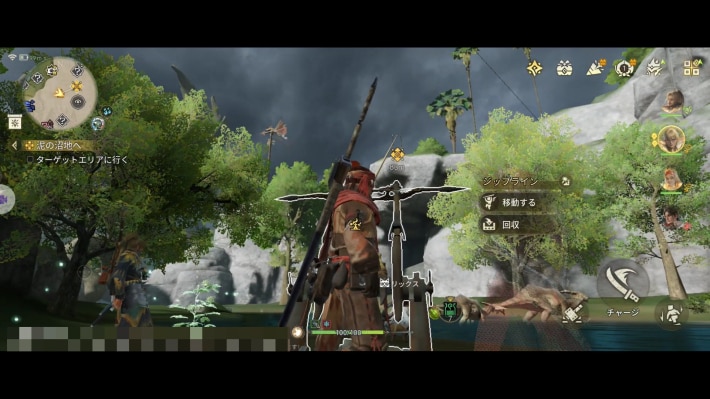
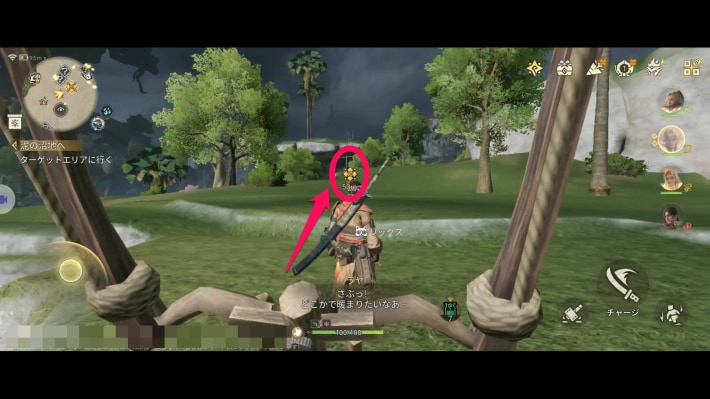
Ride the Zip Lines All the Way to the Destination
 |
 |
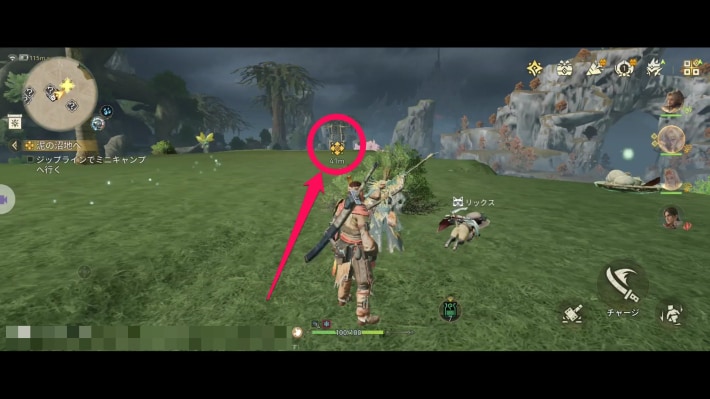 |
Ride the Zip Line once it's built. There's another Zip Line where you land, and another after that, so follow the quest marker and ride them in order.
Gather a Hot Pepper
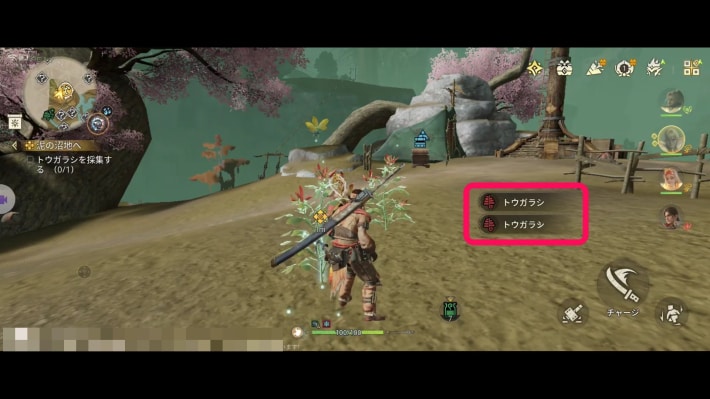
When you reach the swamp, a tutorial on crafting a Hot Drink starts. Gather the Hot Pepper just past where the last Zip Line drops you off.
Point!Repair the Watchtower nearby. It makes the rest of the quest easier!
Craft a Hot Drink
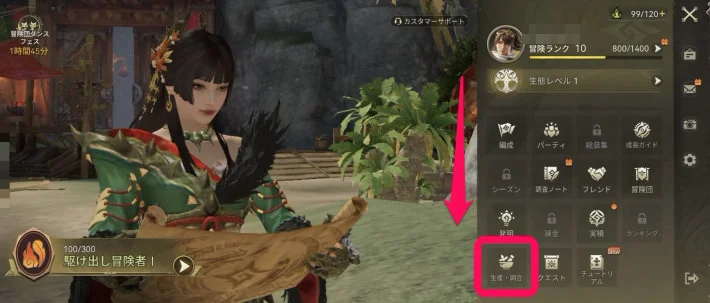 | 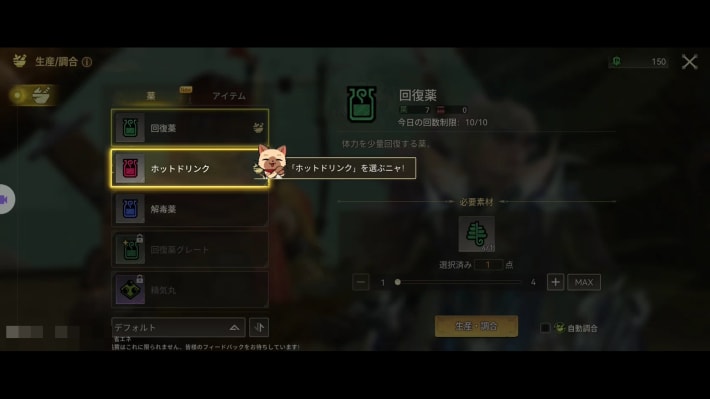 |
After gathering the Hot Pepper, open the menu to start the crafting tutorial. Follow the steps on screen to craft a Hot Drink.
Use the Hot Drink
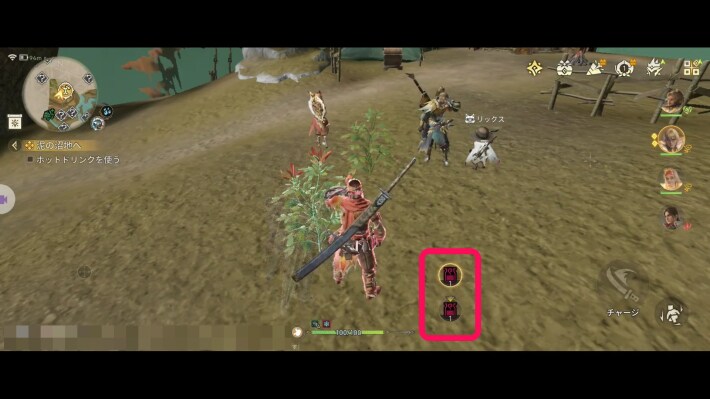
The Hot Drink you crafted is equipped automatically when you return to the field screen. Use it to complete the quest.
Repair the Watchtower
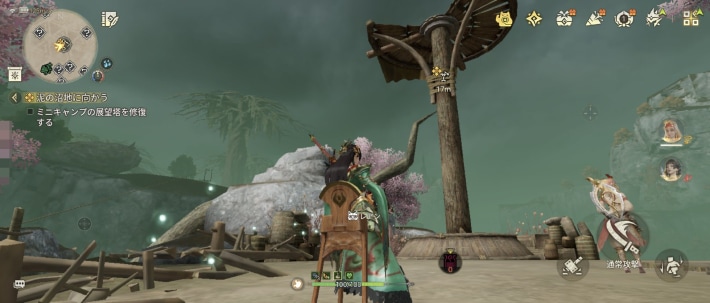
There's a Watchtower next to where you gathered the Hot Pepper; repair it to complete the quest. If you've already repaired it, the quest counts as complete automatically.
Shadow of Venom
Head to the Destination in the Swamp
| Destination | Map screen |
|---|---|
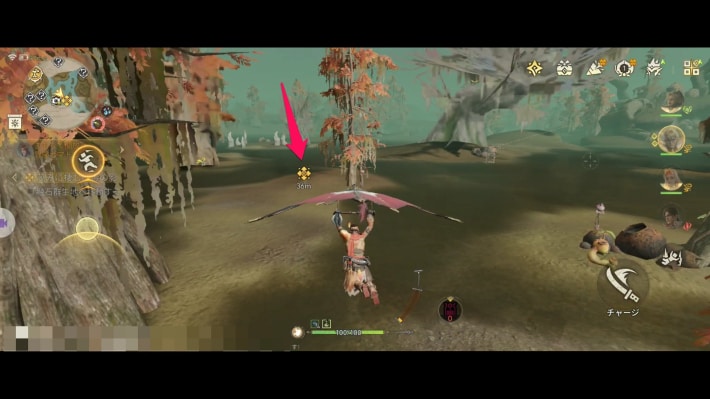 | 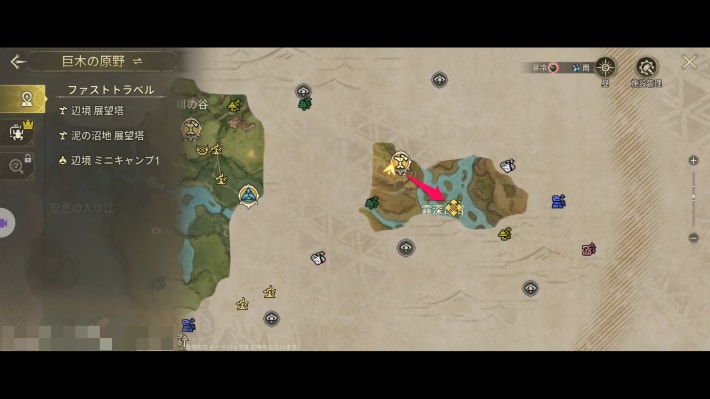 |
After crafting the Hot Drink, head to the swamp to the southeast, using the glider or other means. The story continues automatically when you arrive.
Slay the Pukei-Pukei
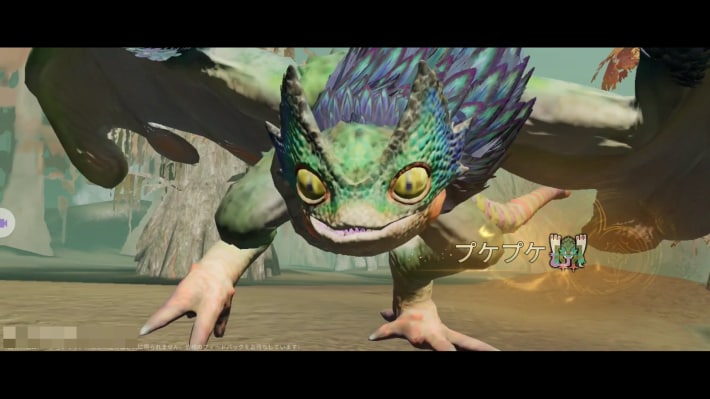
Slay the Pukei-Pukei that appears. It uses poison attacks, so use the Antidote you bought when needed.
Carve It and Claim the First-Hunt Reward
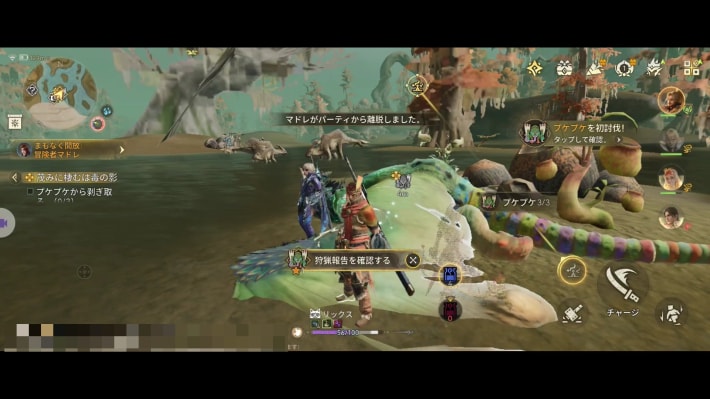
After slaying the Pukei-Pukei, carve it and claim the first-hunt reward in the research notes.
Learn Quick Forge
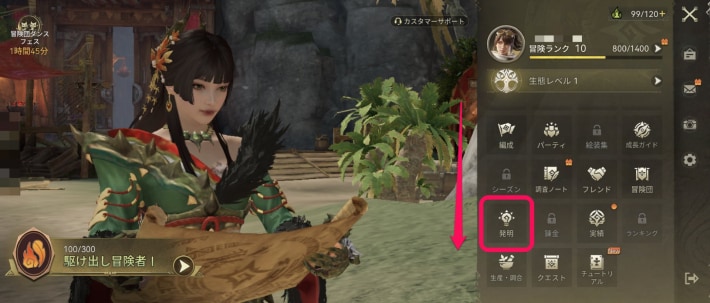 | 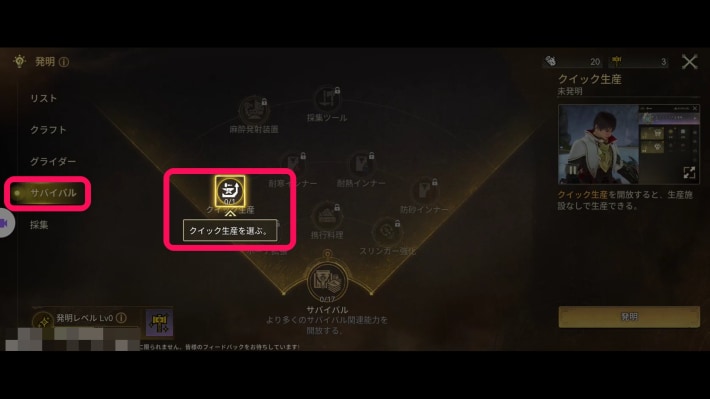 |
Return to the field screen and the Quick Forge tutorial starts. Follow the steps and learn Quick Forge from Research in the menu.
Craft Pukei-Pukei Gear with Quick Forge
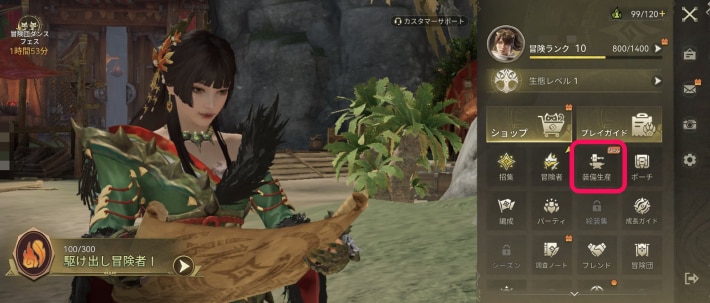 | 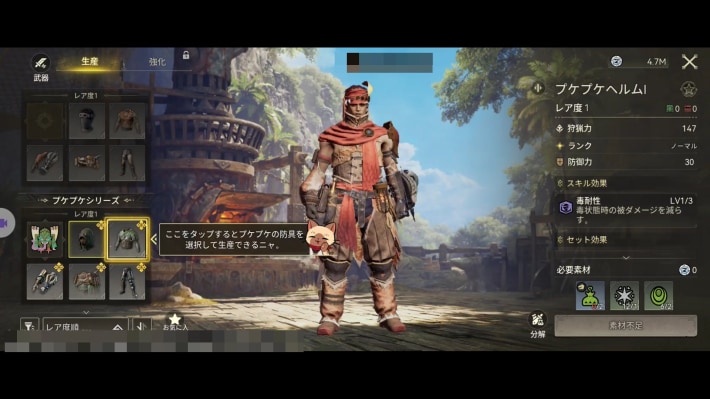 |
After learning Quick Forge, open the menu again and the Quick Forge tutorial continues. Follow it and craft one piece of Pukei-Pukei gear.
Claim Madelyn's Reward
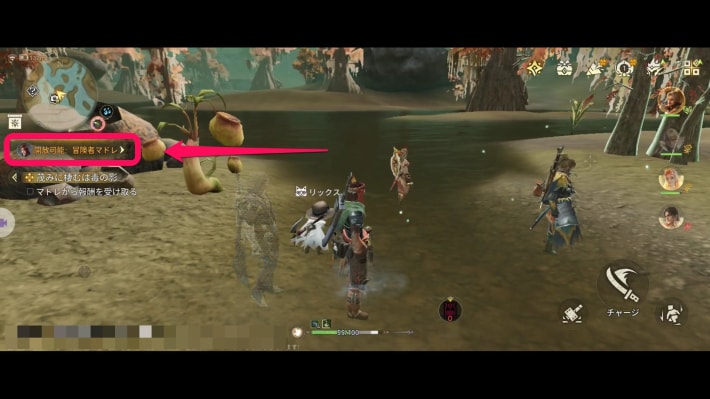 | 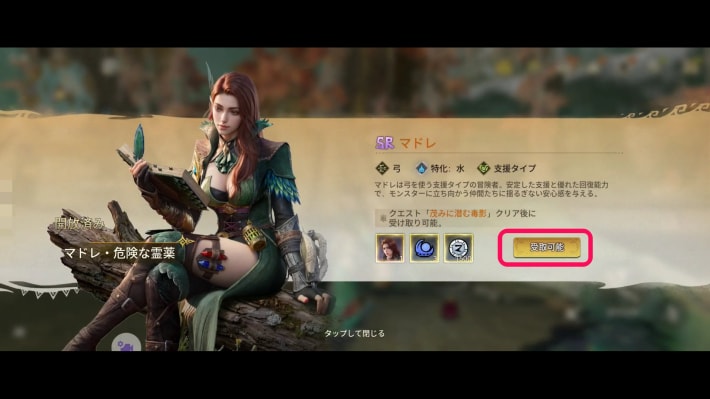 |
Return to the field screen and tap the entry below the minimap at the top left to open the reward screen. Claim the reward and the SR adventurer Madelyn joins you, completing the quest.
MadelynField a Party of Three Adventurers
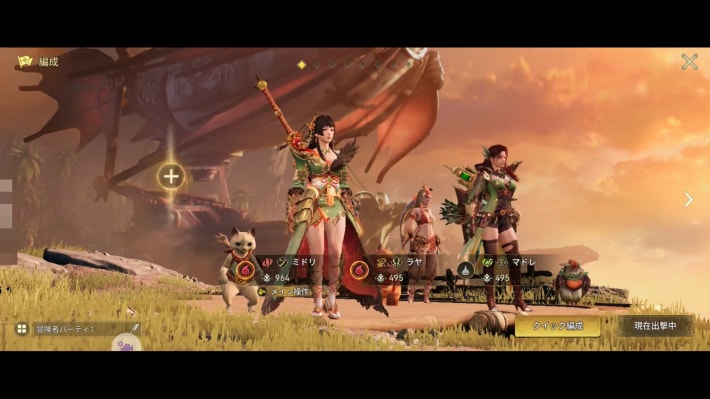
Add Madelyn, who just joined, to your party to make it three adventurers. If you already have three in your party, the quest counts as complete automatically.
Get Stronger, Adventurer
Raise Your Proof of Mastery
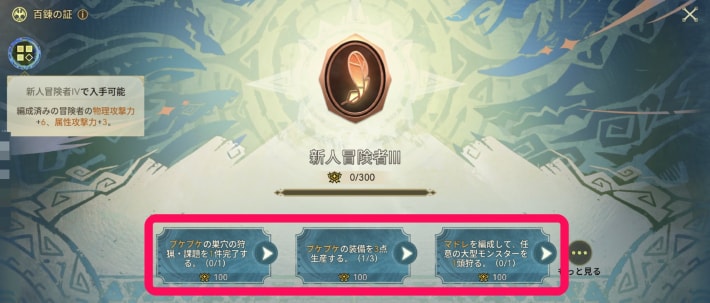
Open the menu and raise your Proof of Mastery to Rookie Adventurer IV. If you don't have enough Mastery Points to raise it, clear quests that award them.
Point!There aren't many of these quests early on, so you'll often need to clear every one on offer!
The Pukei-Pukei Quest Is in Free Hunt
| Where Free Hunt is |
|---|
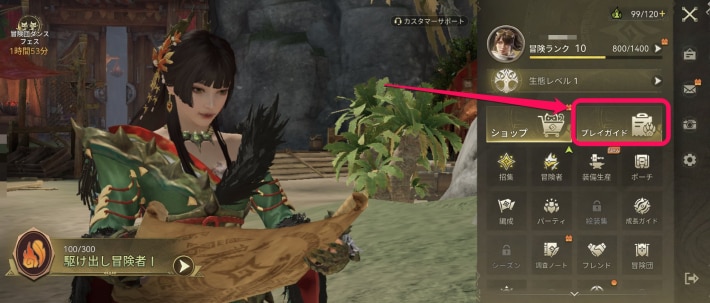 |
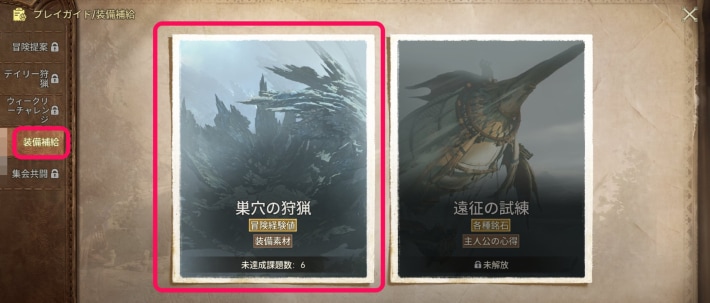 |
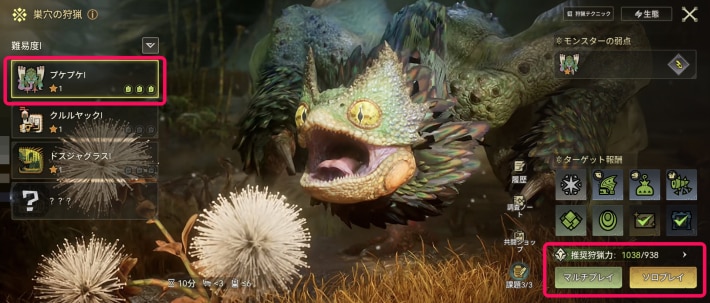 |
The Pukei-Pukei Free Hunt you need for Proof of Mastery is under Equipment Supply in Game Modes, which unlocks at this point.
Quest ListHunt Request
Talk to the Quest Counter Attendant
| Quest counter attendant | Map screen |
|---|---|
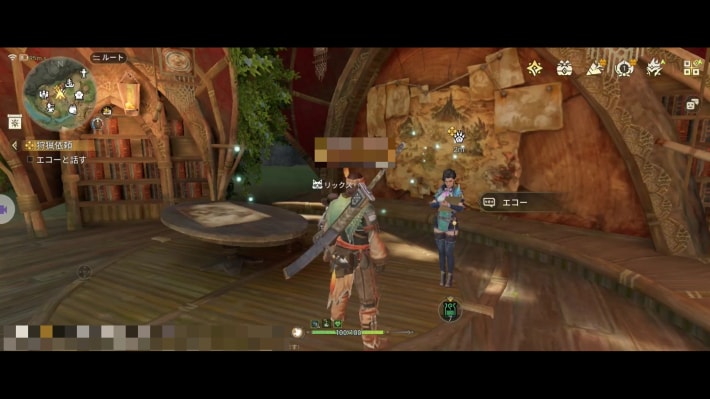 | 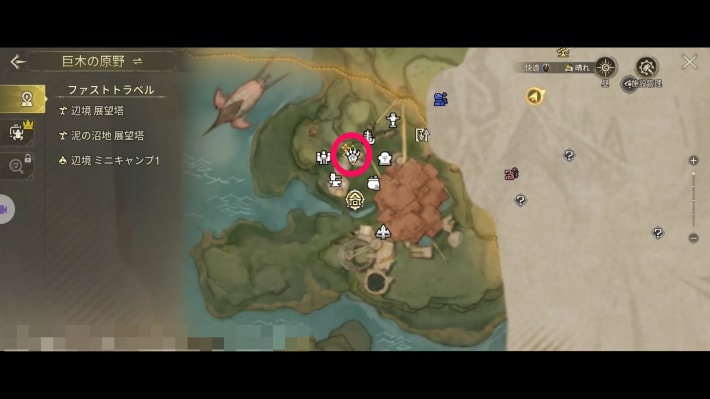 |
Talk to the attendant at the village quest counter. The story moves on and you can now take Hunt Requests.
Go on a Hunt Request
| Game Modes | Hunt Request |
|---|---|
| 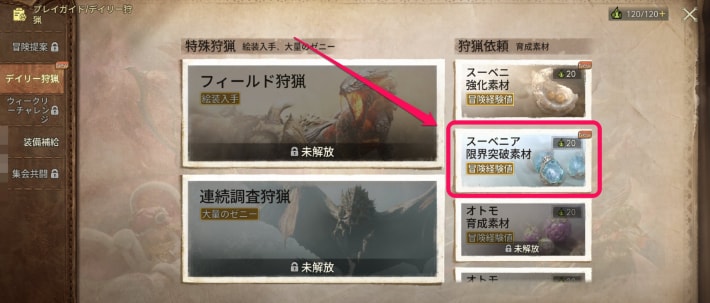 |
Hunt Requests are in the daily hunting section of Game Modes. Note that you can't take on a Hunt Request without Energy.
Energy (Stamina)Ascend One of Your Adventurers
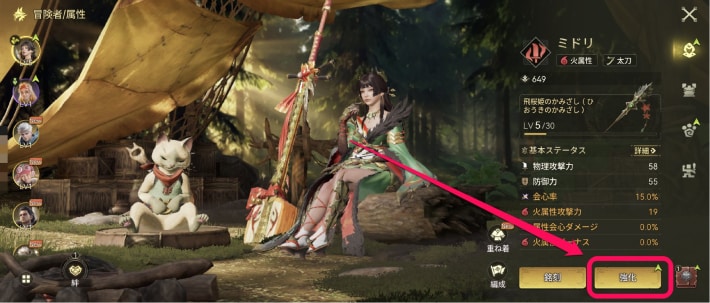 | 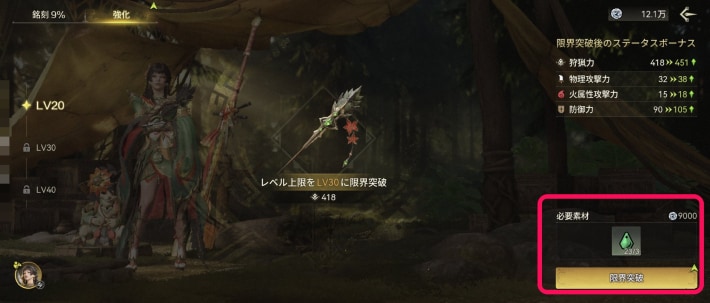 |
Use the materials from the Hunt Request to ascend one adventurer's Keepsake. Return to the field after ascending to complete the quest.
To the Radiantite Site!
Talk to Madelyn
| Madelyn | Map screen |
|---|---|
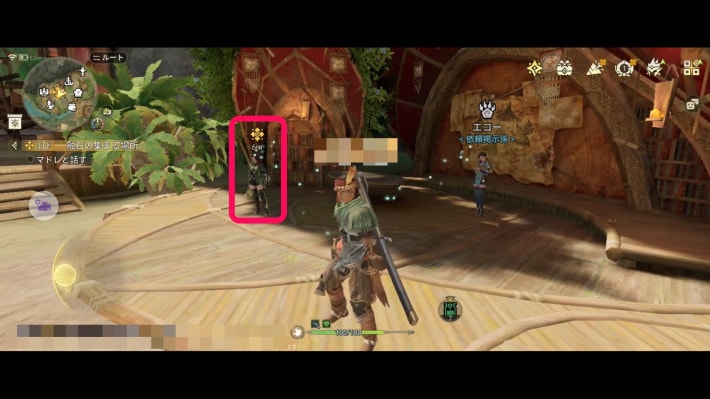 | 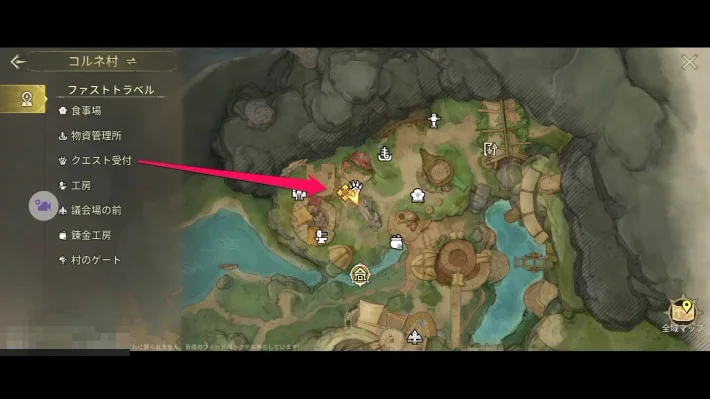 |
Talk to Madelyn, who's next to the quest counter, to move the story forward.
Build a Zip Line at the Swamp Watchtower
| What it looks like | Map screen |
|---|---|
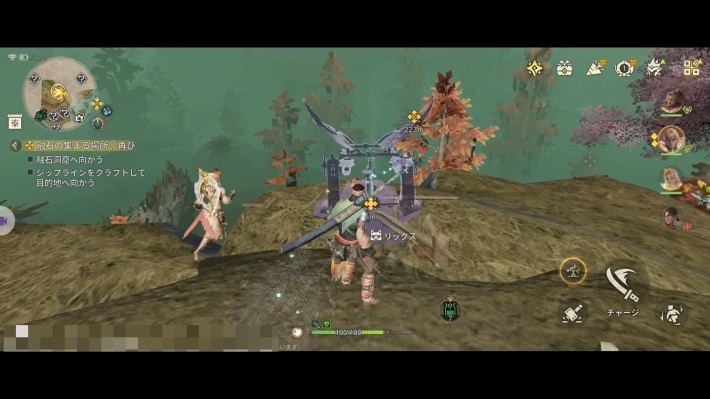 | 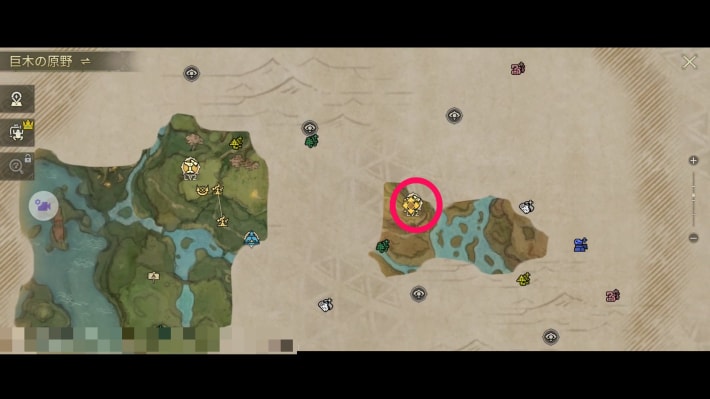 |
Go to the swamp Watchtower, build a Zip Line at the spot nearby, and head for the cave to the east. If you've already built it, just head to the destination.
Head to the Cave
| Destination | Map screen |
|---|---|
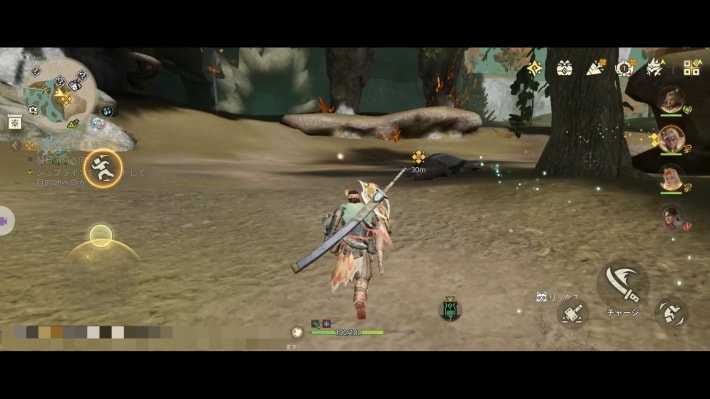 | 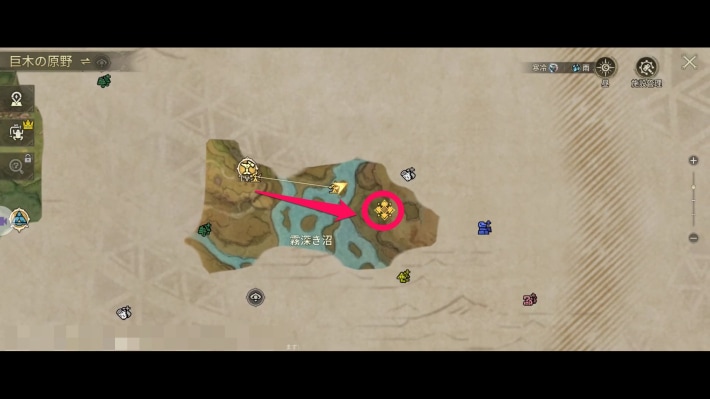 |
Follow the quest marker to the cave. The story continues once you get close enough.
Slay the Great Girros
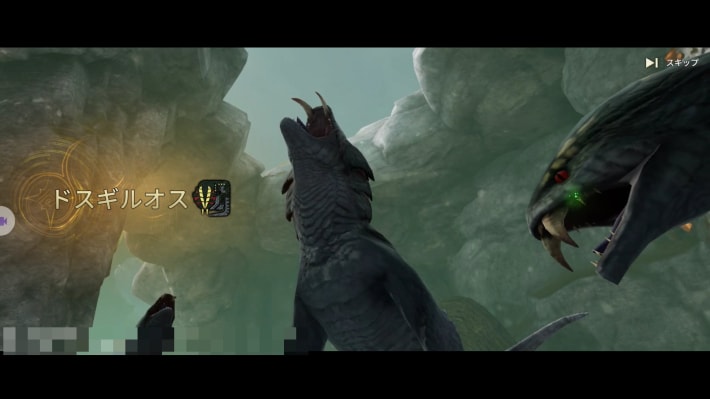
Slay the Great Girros that appears. Afterward, carve it.
Point!It uses paralyzing attacks, but your party is strong enough from the story so far, so it's not a problem!
Investigate the Tracks Nearby
| Objective | Map screen |
|---|---|
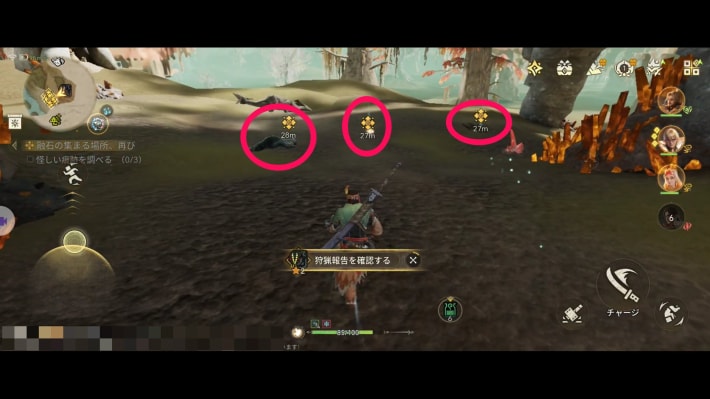 | 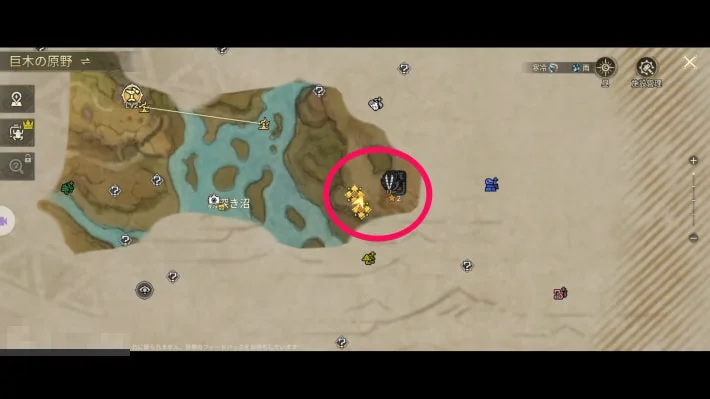 |
After carving, three tracks appear near the cave entrance. Investigate each one to move the story forward and complete the quest.
Night of Resolve
Head to the Village
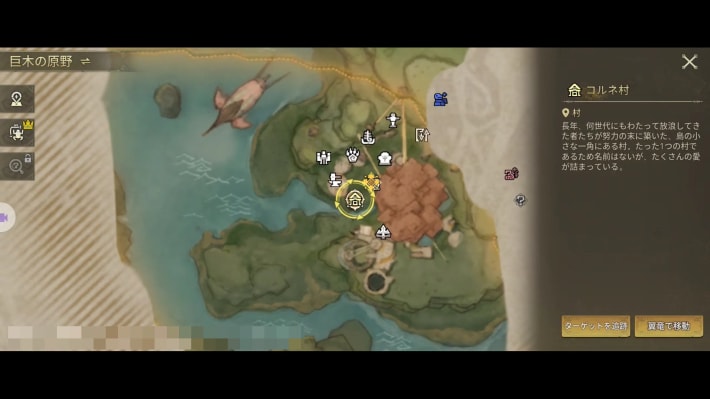
Fast travel back to Kulune. The story continues the moment you arrive.
Head to the Village Square
| Destination | Map screen |
|---|---|
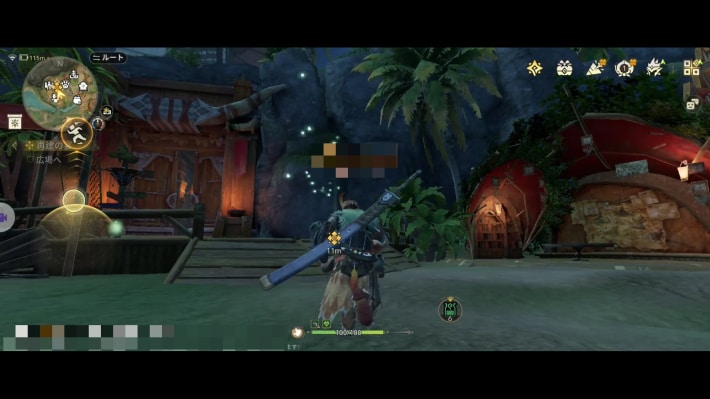 | 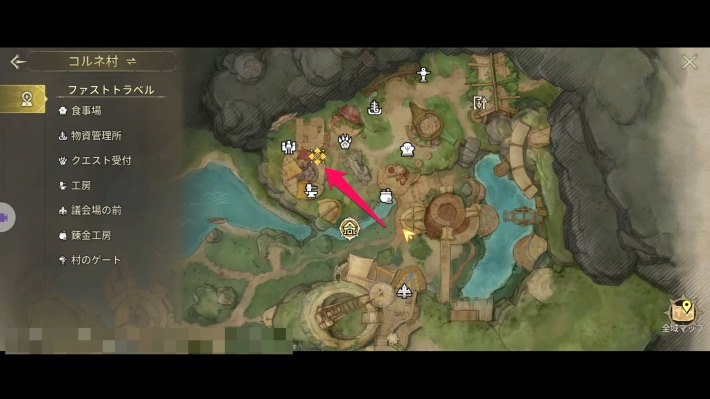 |
Once the story has moved on a bit, you head to the village square. The story resumes when you get there.
Get Stronger, Adventurer
Raise Your Proof of Mastery
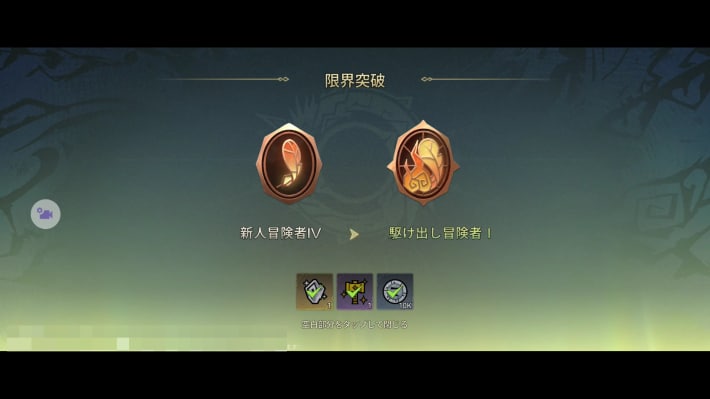
As before, open Proof of Mastery from the menu and raise it from Rookie Adventurer IV to Fledgling Adventurer I. Return to the field screen to finish Chapter 1.
Where to Find Request Quests
| Where to check requests | Request details |
|---|---|
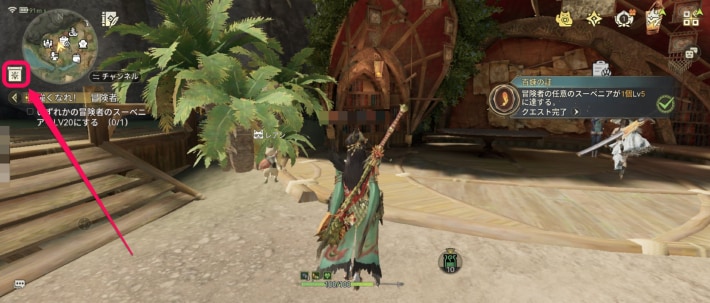 | 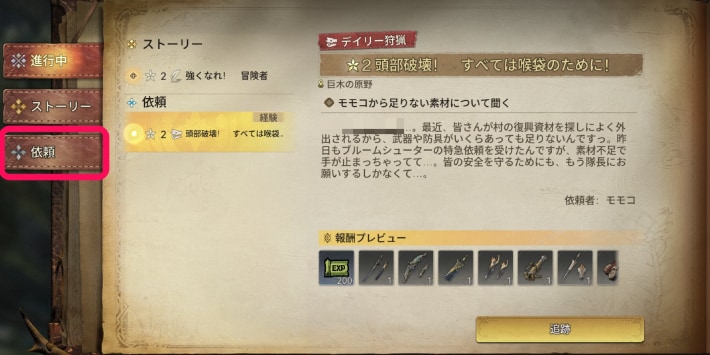 |
To rank up your Proof of Mastery, you need to clear one Request Quest. Check Request Quests from the quest tab below the minimap at the top left of the screen.
Chapter 2 Walkthrough
Chapter 2 WalkthroughSlingers and Suppers
Talk to the Quest Counter Attendant
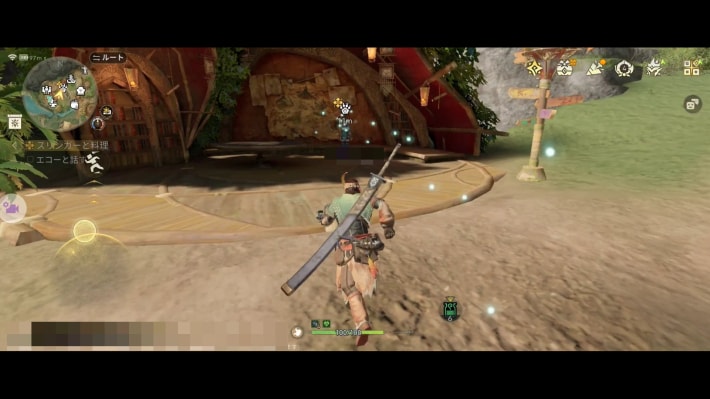
Walk up to the attendant at the quest counter. The story starts automatically once you get close enough.
Head to the Observation Point Near the Specialty Resource Cluster
| What it looks like | Map screen |
|---|---|
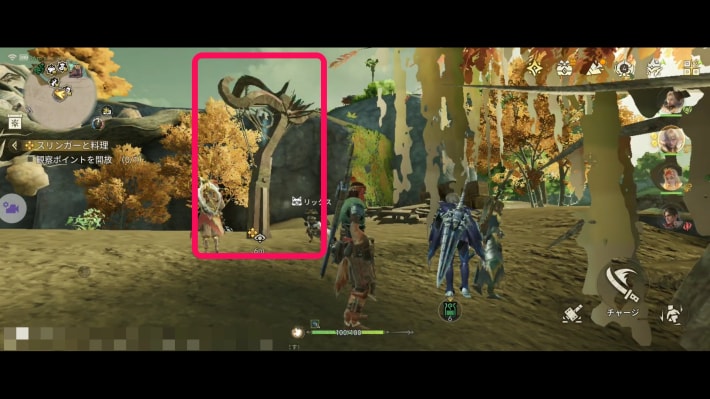 | 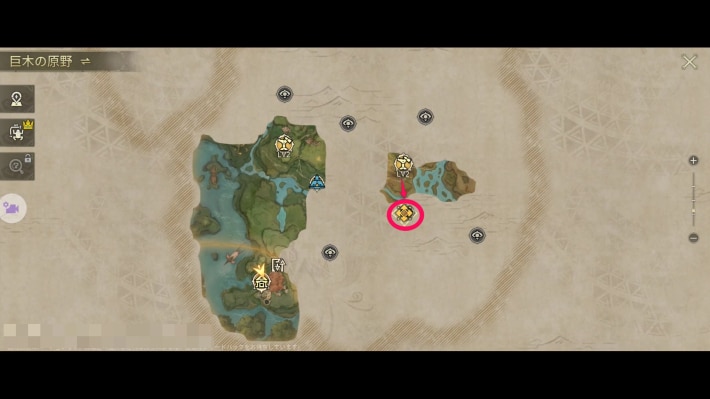 |
As the attendant suggests, first go to the Muddy Swamp Watchtower, then head to the observation point to the south. Activating the observation point clears the fog on the map.
Set Up a Camp at the Observation Point
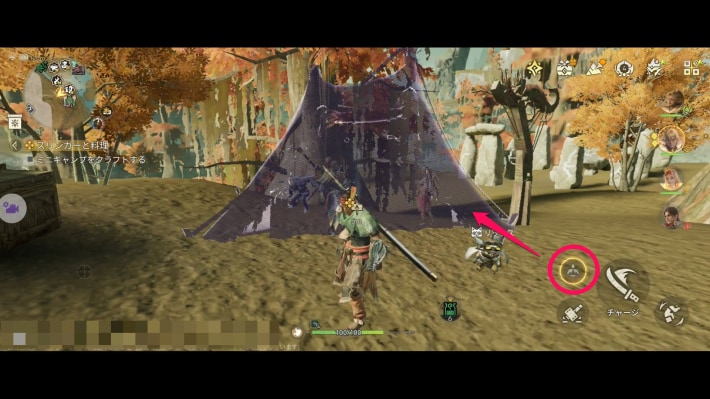
After you activate the observation point, you can build a Camp right next to it. Camps also work as fast travel points, so build one whenever you see the chance.
CampHead to the Resource Cluster
| Resource cluster | Map screen |
|---|---|
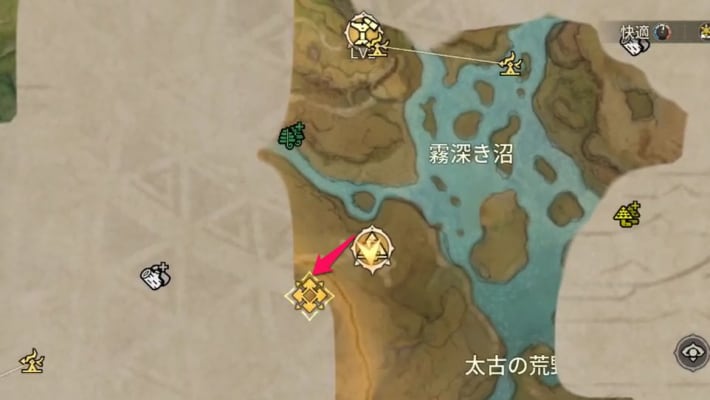 | 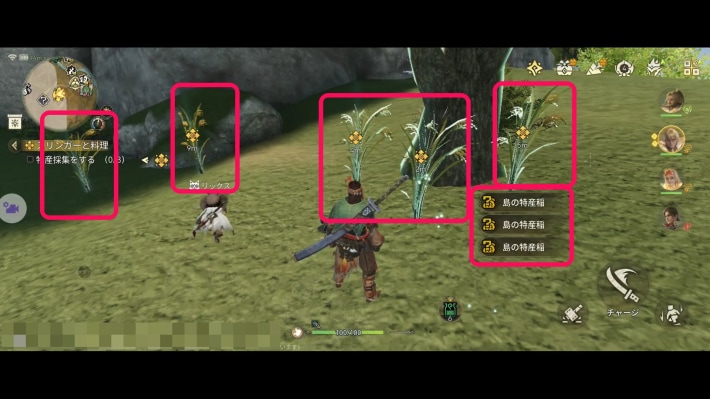 |
Go to the specialty resource cluster and gather three specialty resources.
Meld Research Points
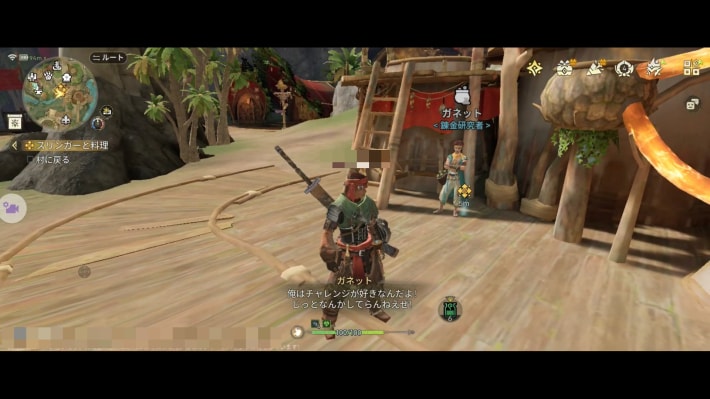 | 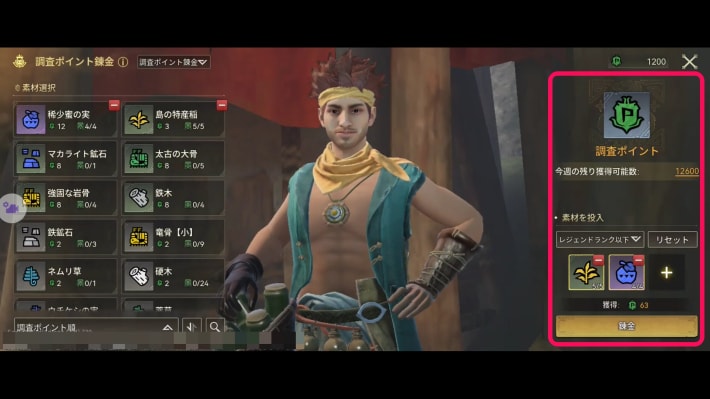 |
Go back to Kulune and Meld Research Points with Garnett, the Meld researcher. Talk to Garnett and the Meld tutorial starts automatically.
Talk to the Workshop Smith
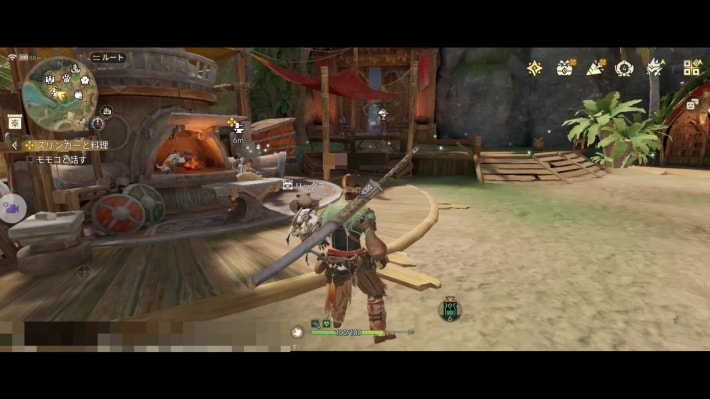
Talk to the Workshop smith and ask about the slinger, and you can unlock Enhanced Slinger in Research. It lets you trigger large field traps such as falling rocks.
Head to Meowffin's Bistro
| Meowffin's Bistro | Map screen |
|---|---|
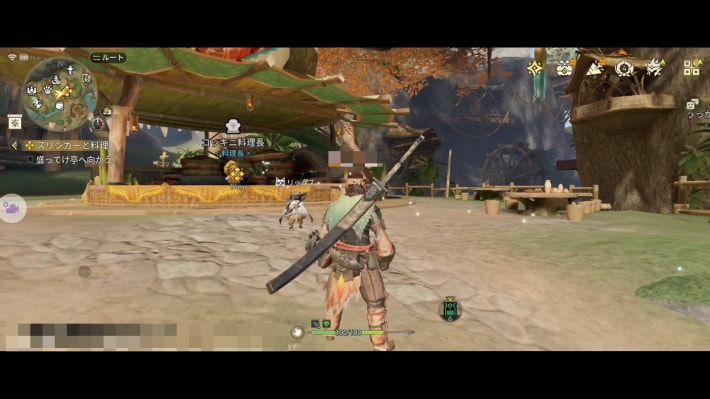 | 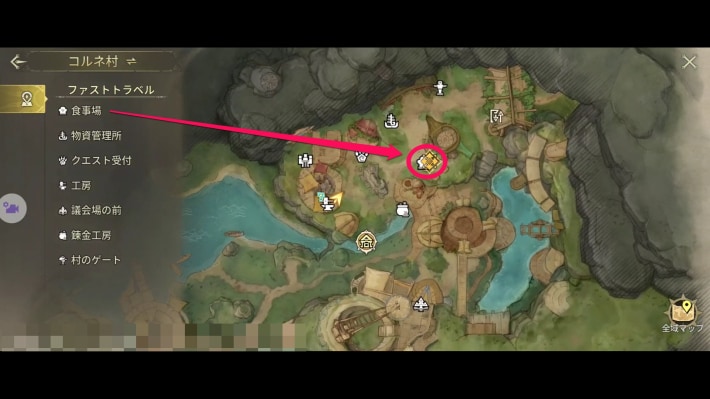 |
Go to the chef in Kulune.
Order a Meal
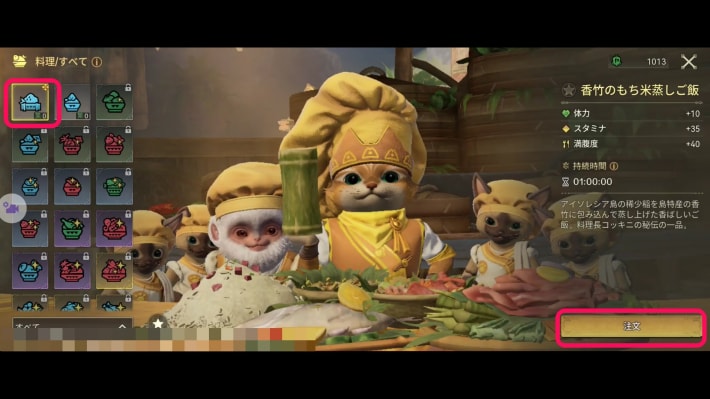
Order a meal at Meowffin's Bistro. Talking to the chef moves the story on automatically and starts the meal ordering tutorial.
Trial of the Searing Sands
Talk to Holly
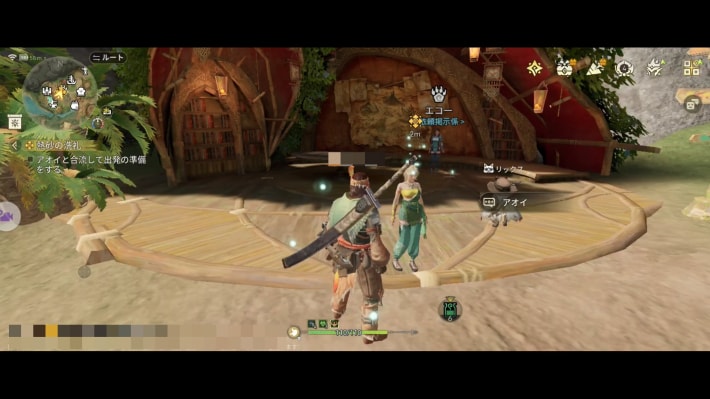
Talk to Holly to move the story forward.
Head to the Desert Entrance
| Entrance | Map screen |
|---|---|
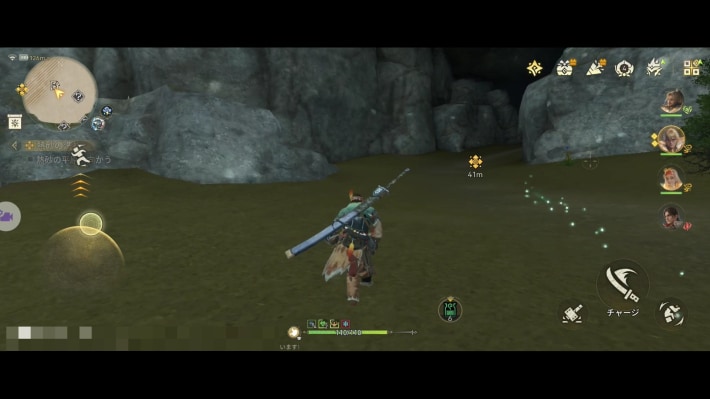 | 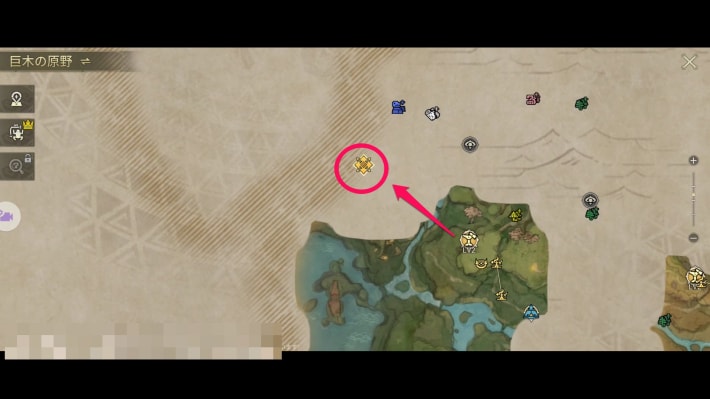 |
Head to the entrance to the desert. The entrance is a cave northwest of the nearby Watchtower.
Move On Through the Desert
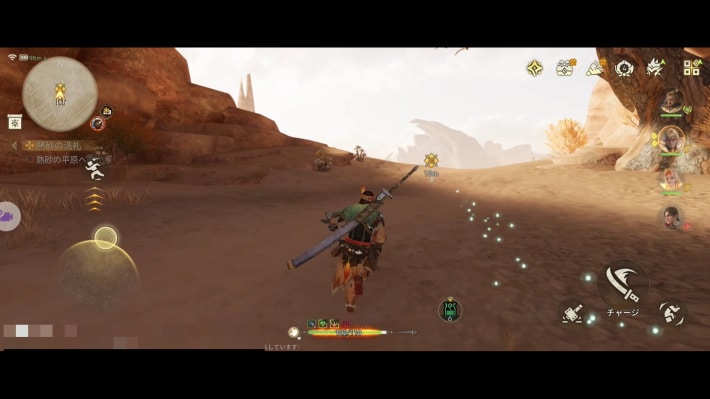
Once you're in the desert, follow the quest marker. The story continues after you've gone a certain distance.
Craft and Use a Cool Drink
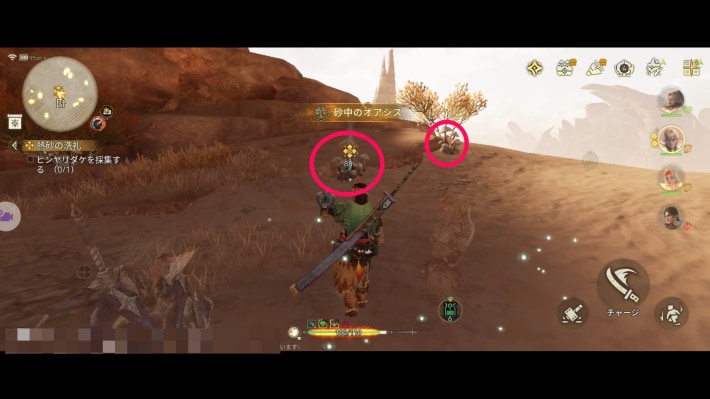 | 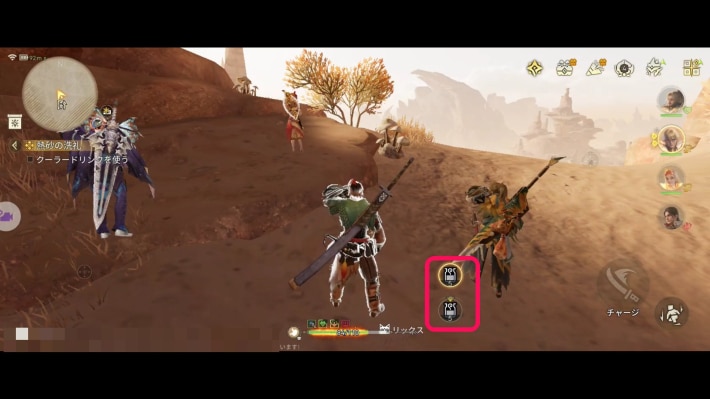 |
The desert is scorching hot, so you need to craft and use a Cool Drink. Follow the quest marker to gather a Chillshroom, then use the Cool Drink.
Slide Your Way Across the Desert
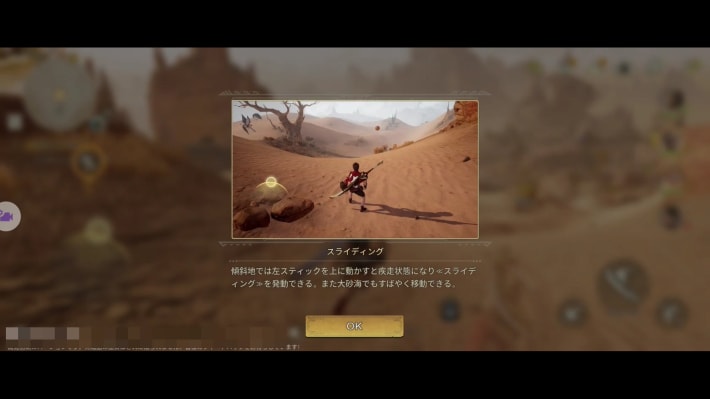
As you follow the quest marker across the desert, a sliding tutorial appears. Follow it as you head to the destination.
Head to the Watchtower in the Sands
| What it looks like | Map screen |
|---|---|
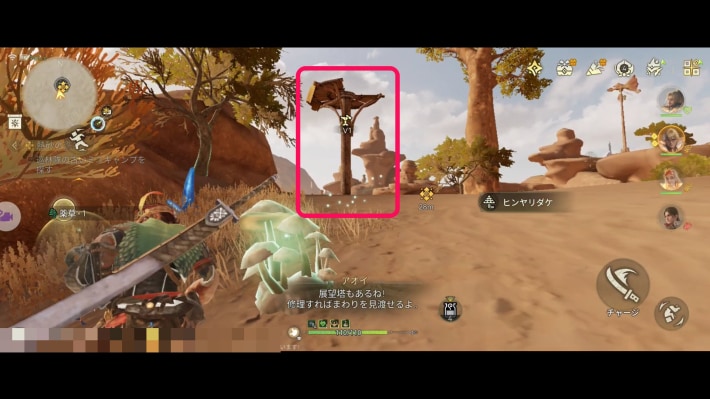 | 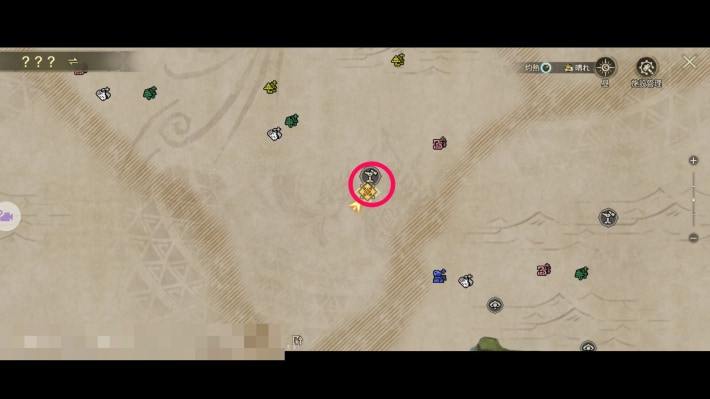 |
Head to the desert Watchtower.
Repair the Watchtower
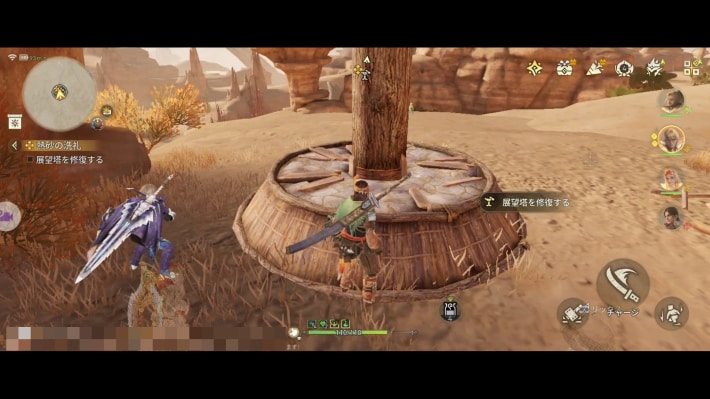
Go up to the Watchtower and repair it. Repairing it moves the story forward and completes the quest.
Overlord of the Mud
Head to the Waterfall
| Waterfall location | Map screen |
|---|---|
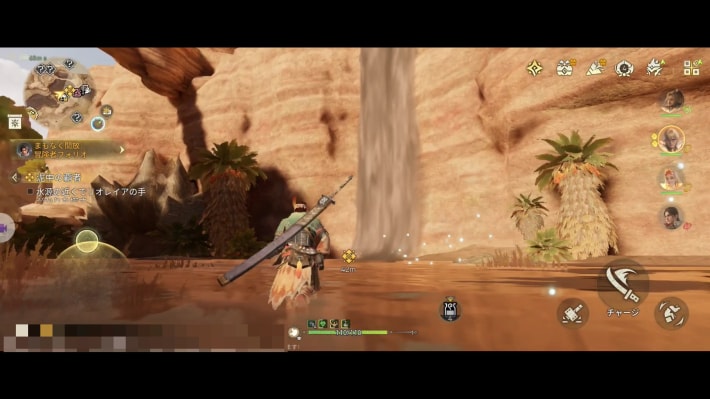 | 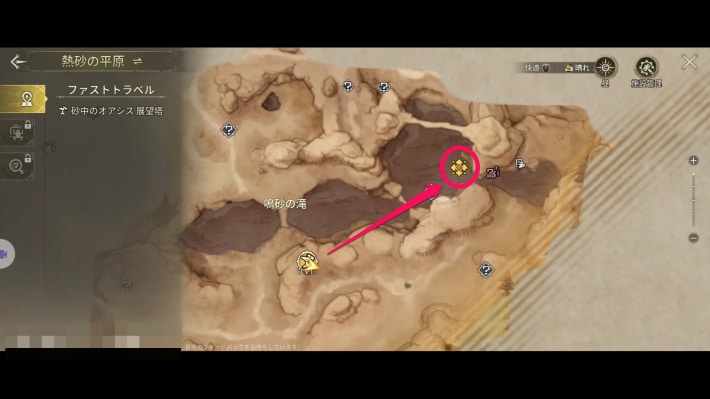 |
Follow the river north of the desert Watchtower eastward and head for the waterfall to the northeast.
Slay the Jyuratodus
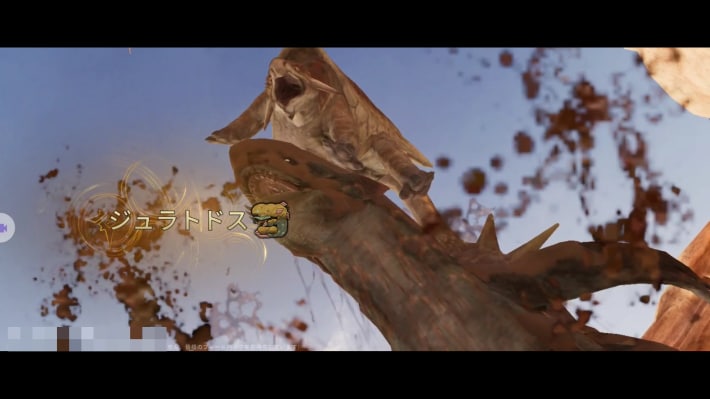
Slay the Jyuratodus. Afterward, carve it.
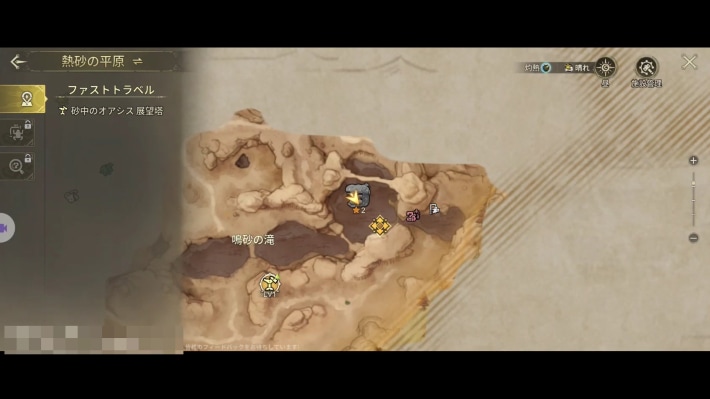
Investigate the Tracks Nearby
| Where the tracks are | ||
|---|---|---|
 | ||
| What the tracks look like | ||
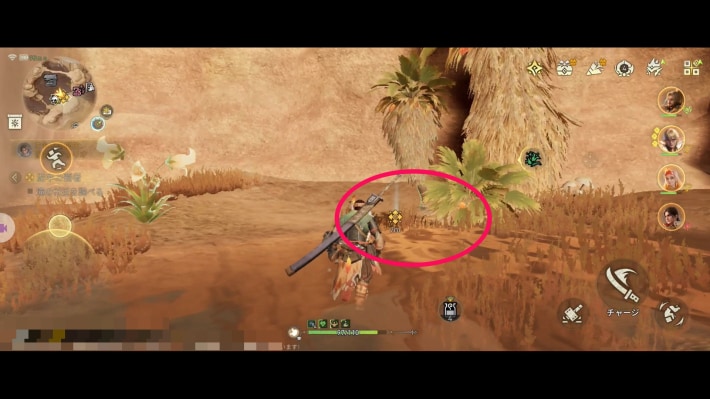 | 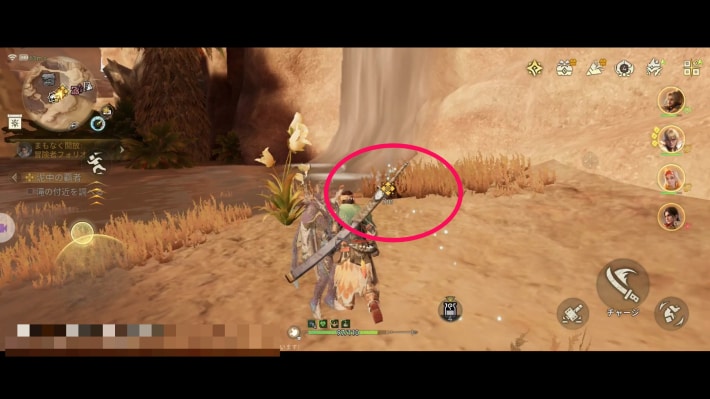 | 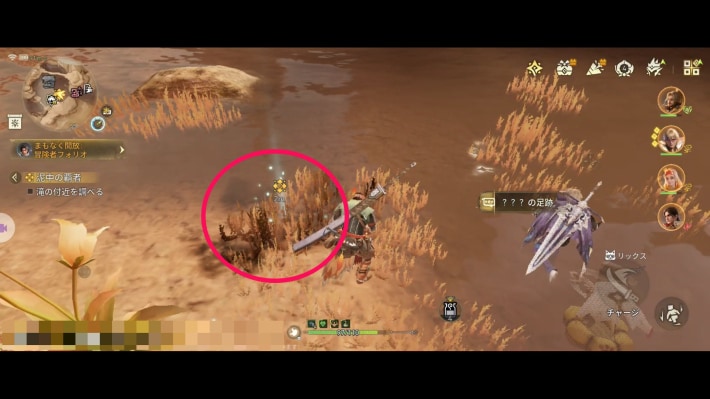 |
After carving the Jyuratodus, tracks appear beside the waterfall. Investigating them reveals three in a row; check the last one to complete the quest.
Weakness Beneath the Mud Armor
Look Up the Jyuratodus's Weakness
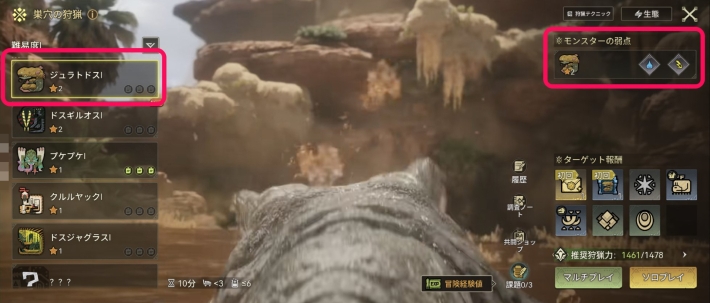
To find the Jyuratodus's weakness, go to Free Hunt. Each monster's hunt shows its weak element.
Quest ListCraft a Water Weapon
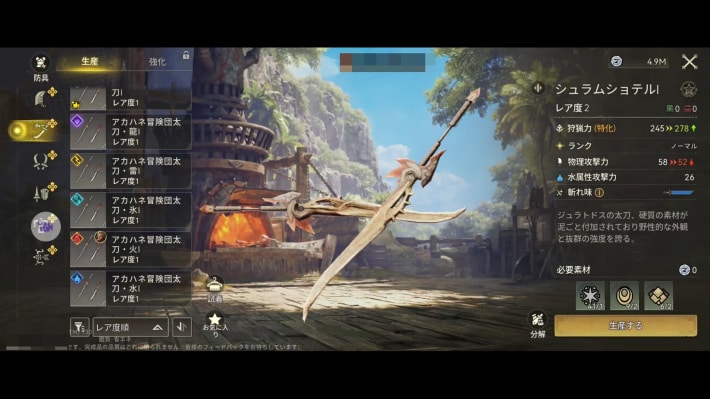 | 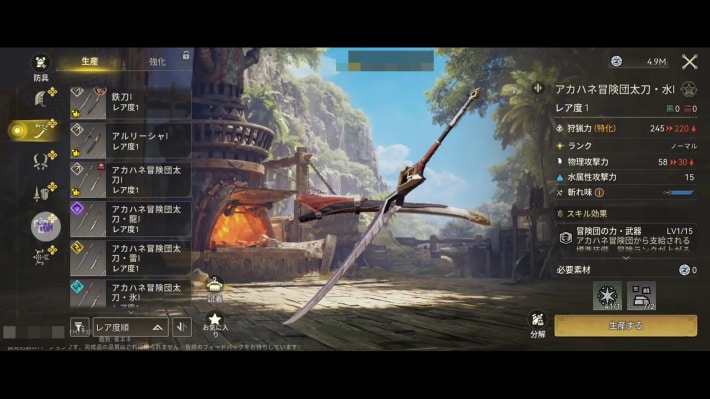 |
Craft a water element weapon at the Workshop or with field crafting from the menu. Options include the Jyuratodus weapons from the monster you slew and the guild's elemental weapons.
Take On the Jyuratodus Again in Free Hunt
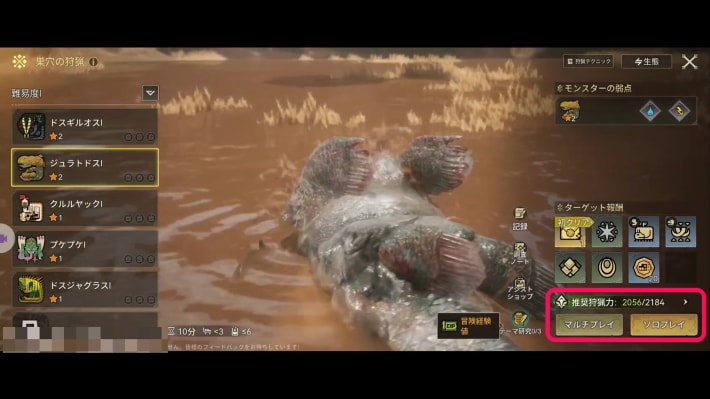 | 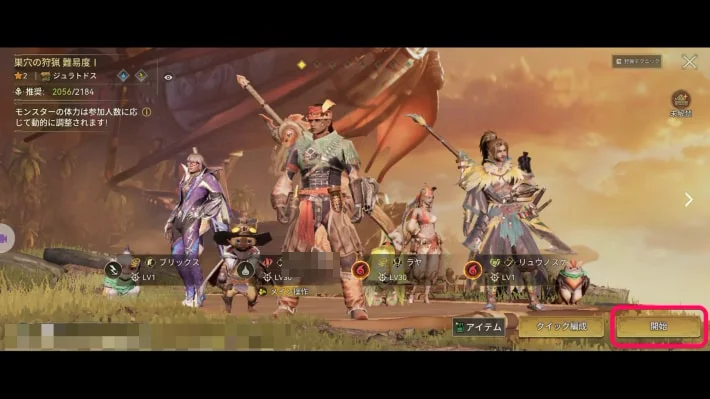 |
Go back to Free Hunt and challenge the Jyuratodus. Set up your party and hunt the Jyuratodus to complete the quest.
Get Stronger, Adventurer
Raise Your Proof of Mastery
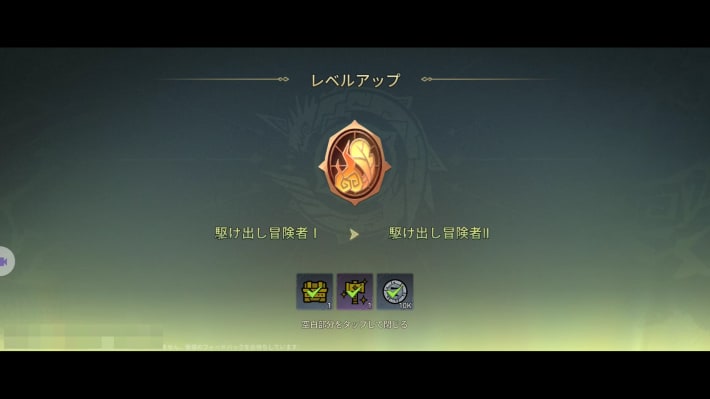
Raise your Proof of Mastery to Fledgling Adventurer II from the menu.
Adventurers, Assemble!
Recruit Ouyang Varen
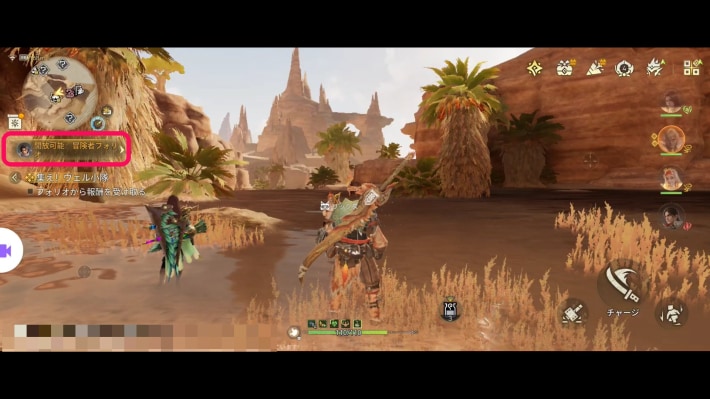 | 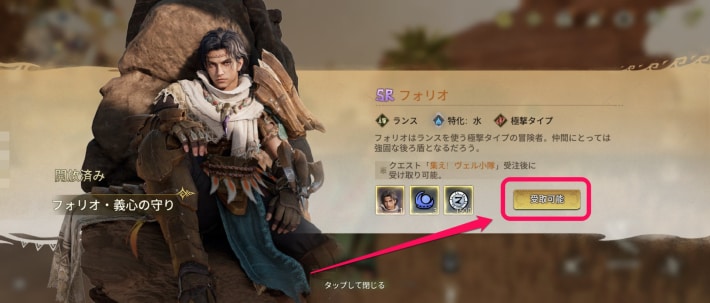 |
Have the adventurer Ouyang Varen join you.
Field a Party of Four
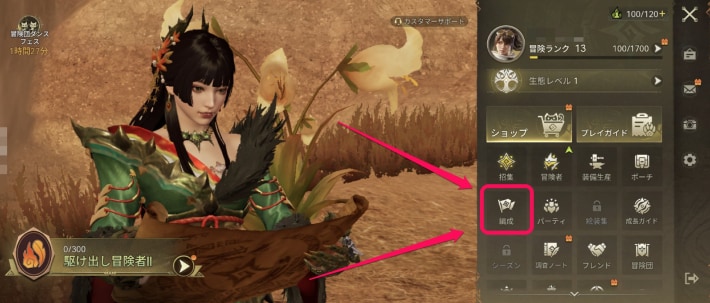 | 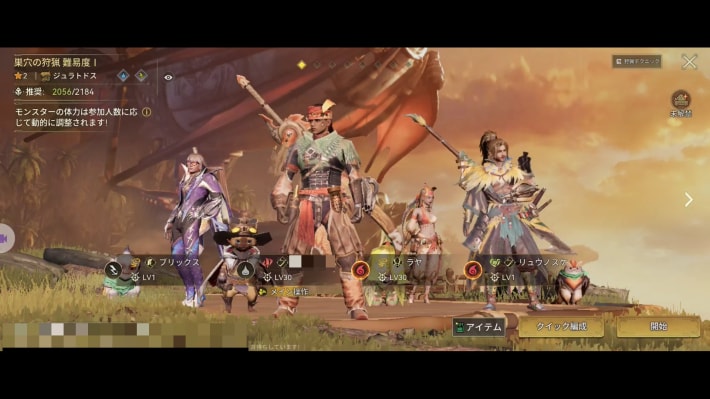 |
Put four adventurers in your party. If you've already done so, the quest completes automatically.
Trial Expedition
Return to Kulune and Talk to the Attendant
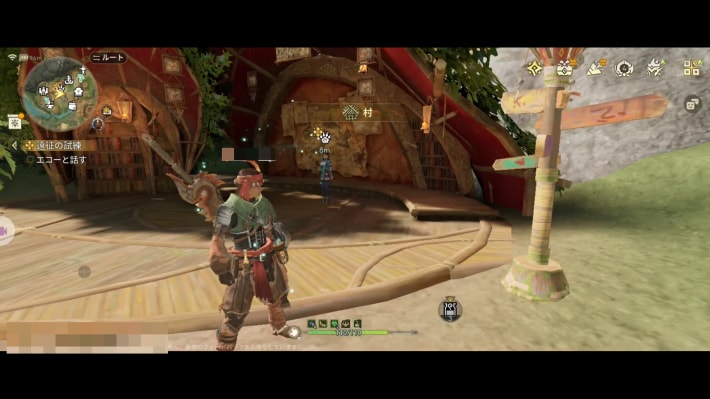
Go back to the quest counter in Kulune and talk to the attendant to move the story forward.
Head to Trial Expedition
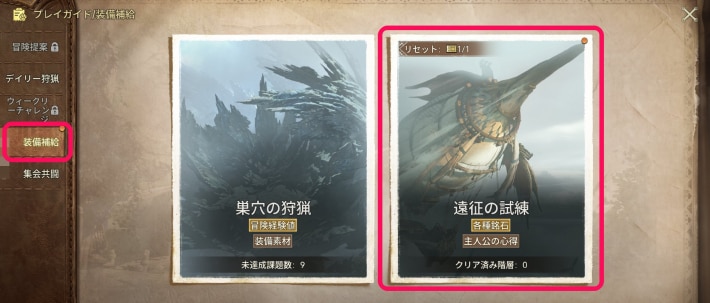
Go to Trial Expedition from Game Modes, or by talking to the quest counter attendant.
Do One Trial Expedition
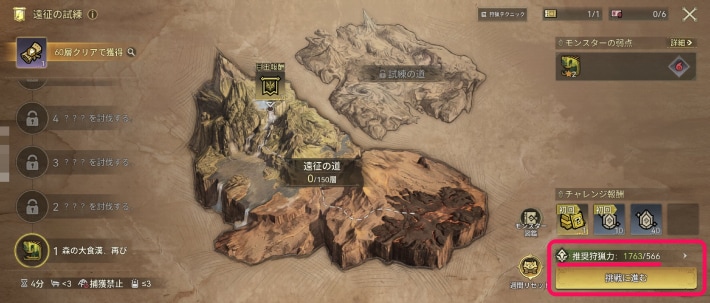
Do one Trial Expedition to complete the quest. If your power is well above the recommended power, you can skip the battle.
Lapua Soars the Skies
Return to the Desert Camp
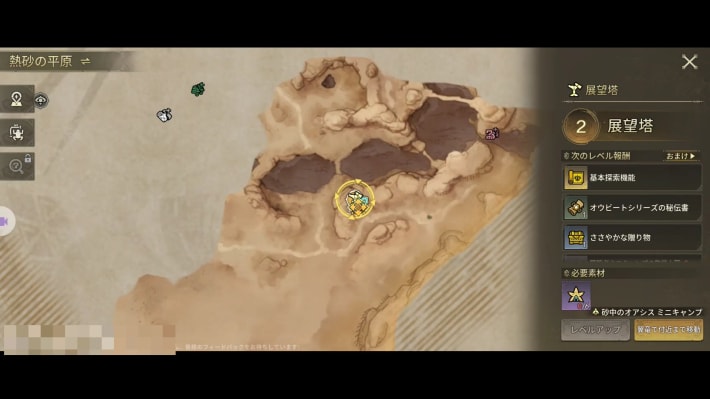
Go back to the desert and fast travel to the Desert Oasis Watchtower. The story continues automatically after you arrive.
Build a Catapult Near the Camp
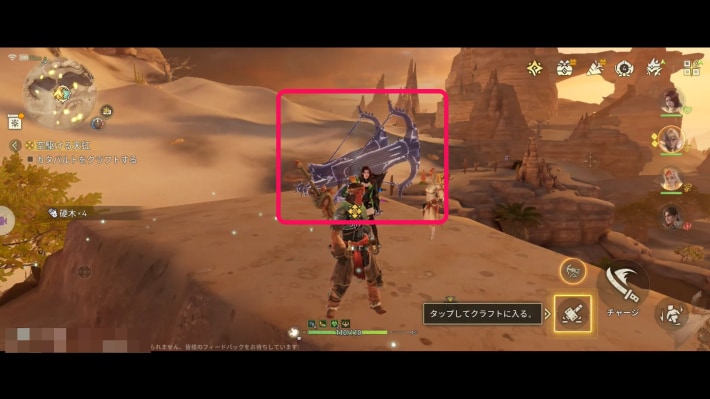 | 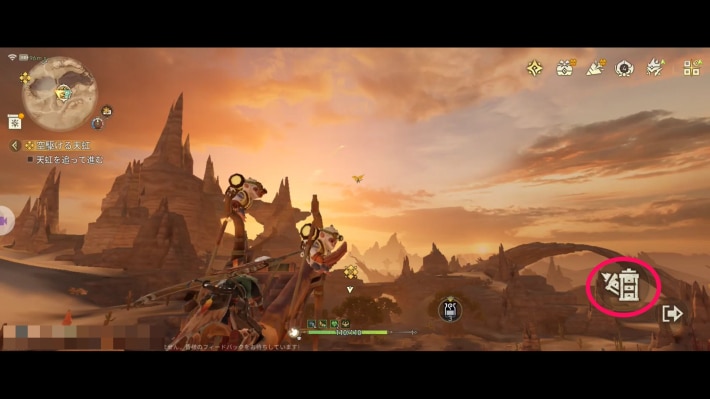 |
Build a Catapult on the high ground right next to the Watchtower. Go up to it and use the launch command to fling your adventurer toward the spot you aim at.
Head to the Destination
| Destination | Map screen |
|---|---|
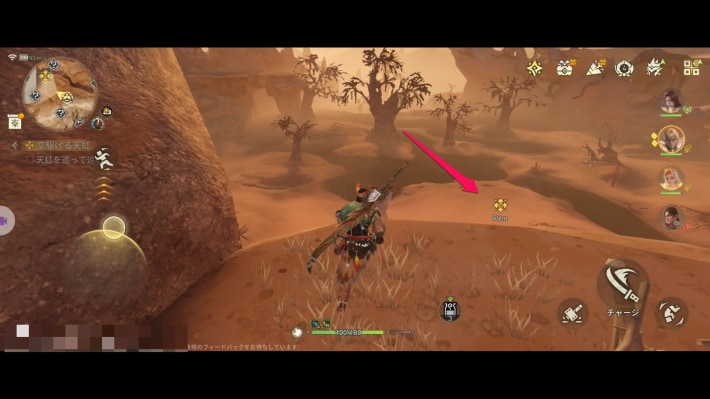 | 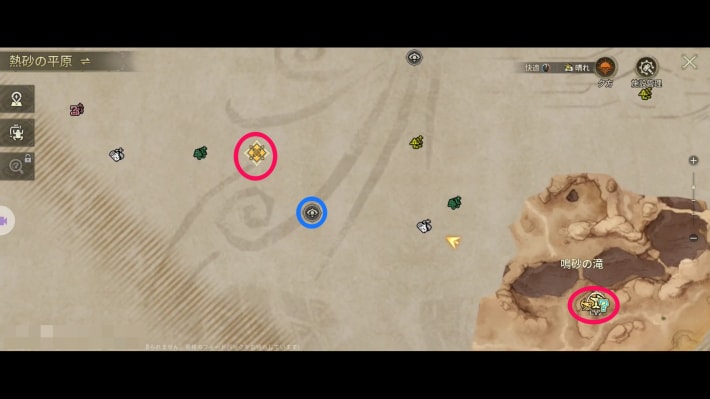 |
Head to the destination. There's an observation point on the way, so activate it and build a Camp there.
Slay the Barroth
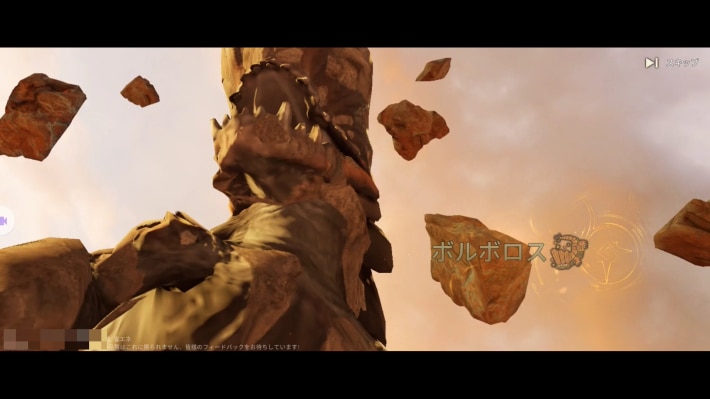
Slay the Barroth that appears. Afterward, carve it to move the story forward and complete the quest.
Enter the Arena
Return to Kulune and Talk to the Attendant
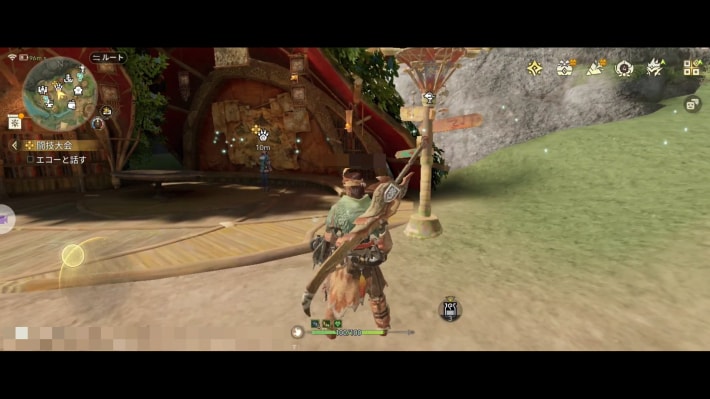
Go back to the quest counter in Kulune and talk to the attendant to move the story forward.
Take On the Arena
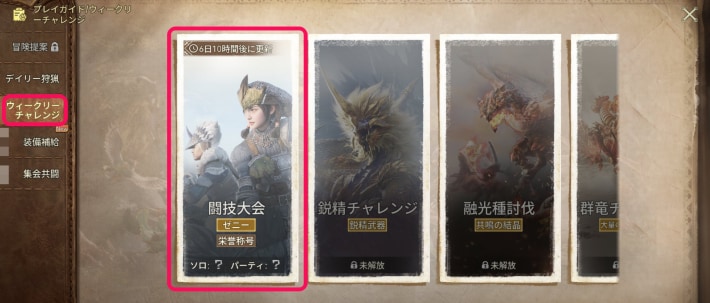 | 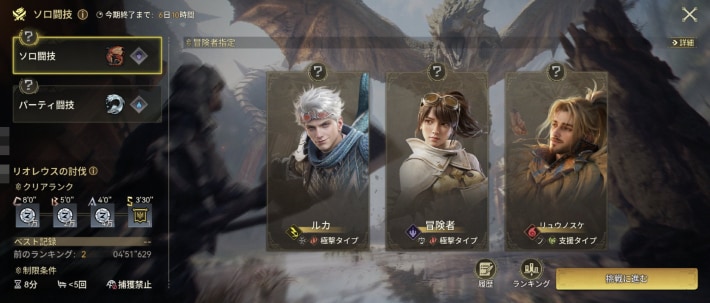 |
Take on the Arena in the weekly challenges in Game Modes once. Return to the field screen afterward to complete the quest. The tutorial takes you to the solo Arena automatically.
Departure Preparations
Talk to the Workshop Smith
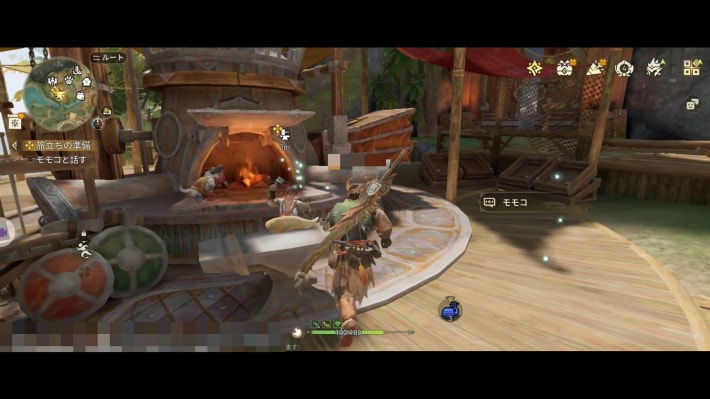 | 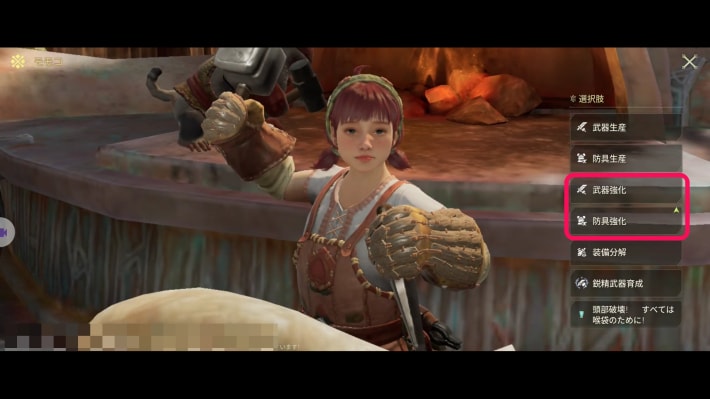 |
Talk to the Workshop smith in Kulune. A new gear upgrade option has been added, so follow the tutorial to upgrade.
Upgrade Your Gear
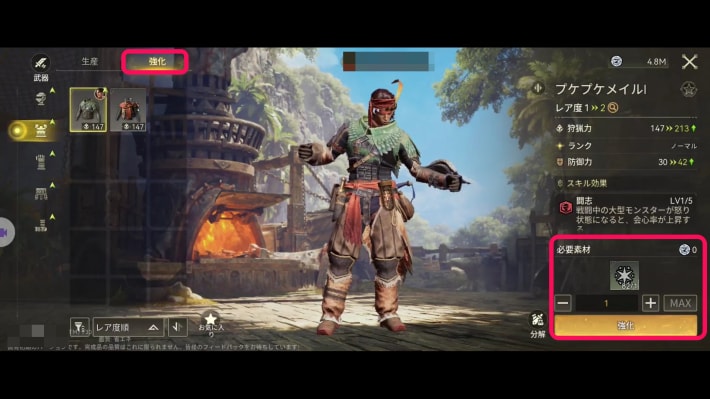 | 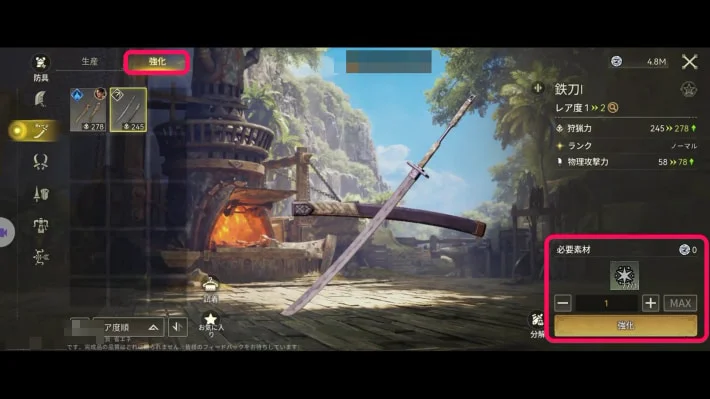 |
Upgrade a piece of gear to complete the quest. From now on, you can upgrade weapons and armor to higher rarities once you meet the requirements.
Point!Once you return to the field screen after upgrading, the next quest starts right away!
Daily Training
Complete One Adventure Request
| Field screen | Adventure Request |
|---|---|
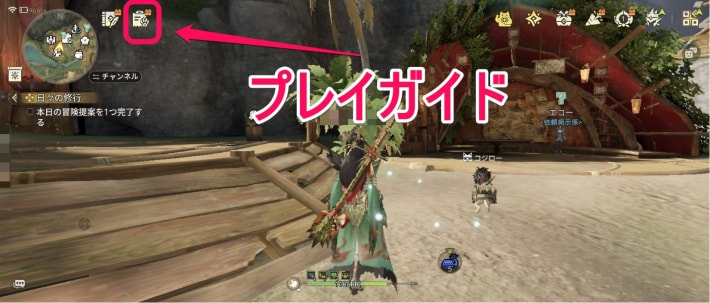 | 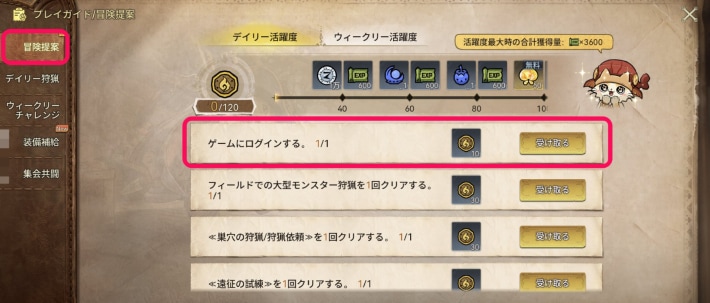 |
Adventure Requests are now unlocked; follow the tutorial and complete one daily request to complete the quest. After that, you can check them from Game Modes.
Get Stronger, Adventurer (Proof of Mastery)
Raise Your Proof of Mastery
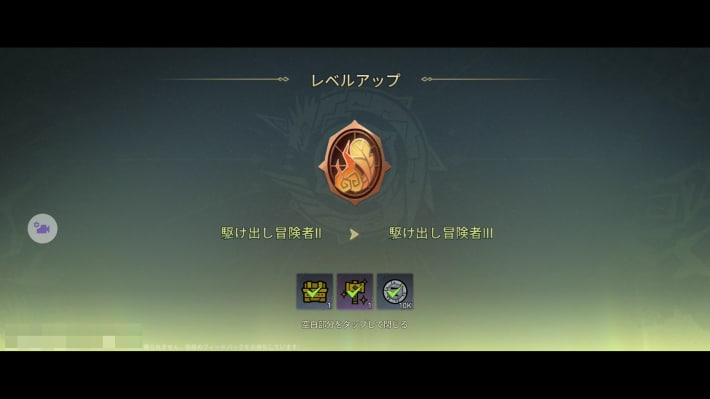
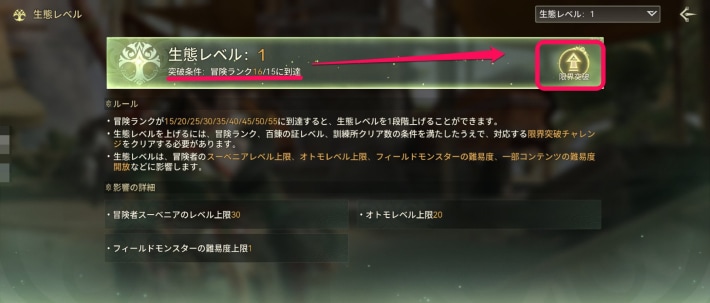
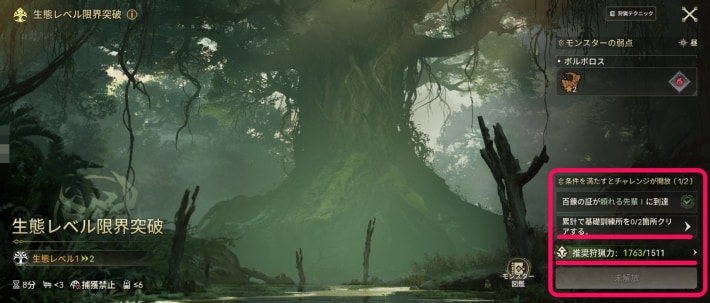
Raise your Proof of Mastery to Reliable Senior I from the menu. A quest to raise your Ecological Rank appears at this point, so check how to ascend it.
Ascend Your Ecological Rank
| Ascending your Ecological Rank | |
|---|---|
 | |
 | |
 | |
| Training Ground location | |
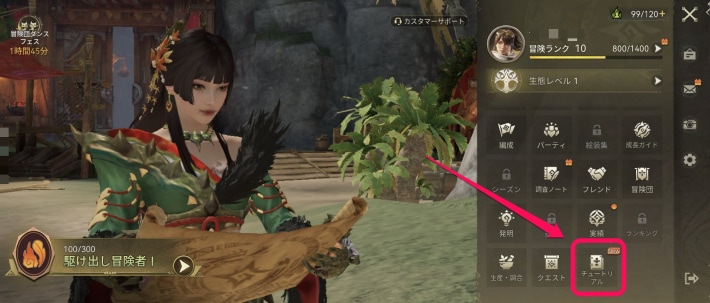 | 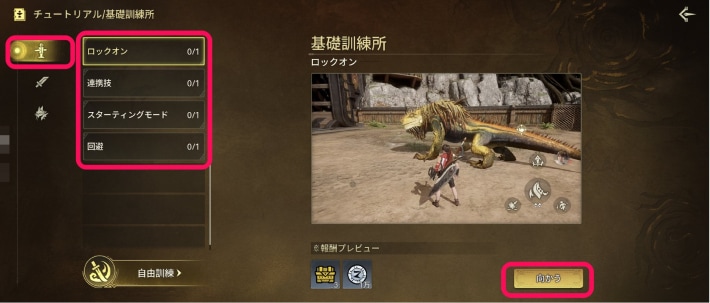 |
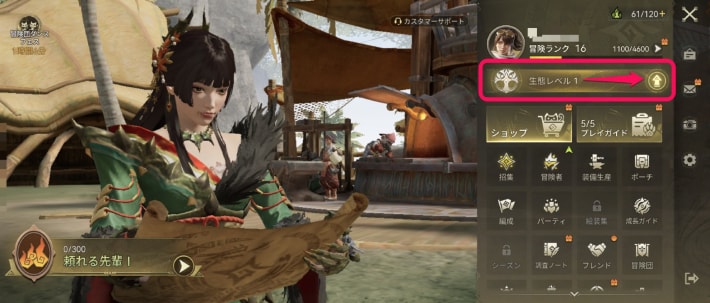
To raise your Proof of Mastery, you need to clear a quest that ascends your Ecological Rank. Note that to ascend, you also have to complete the basic training at the Training Ground.
How to Raise Adventurer RankGet Stronger, Adventurer (Adventurer Rank)
Raise Your Adventurer Rank
| Menu screen | How to raise it |
|---|---|
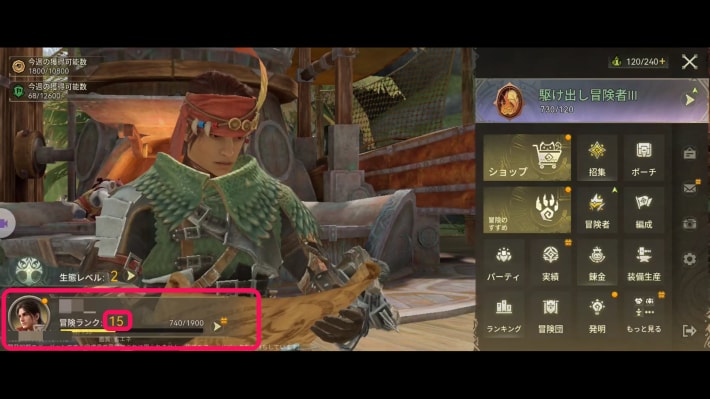 | 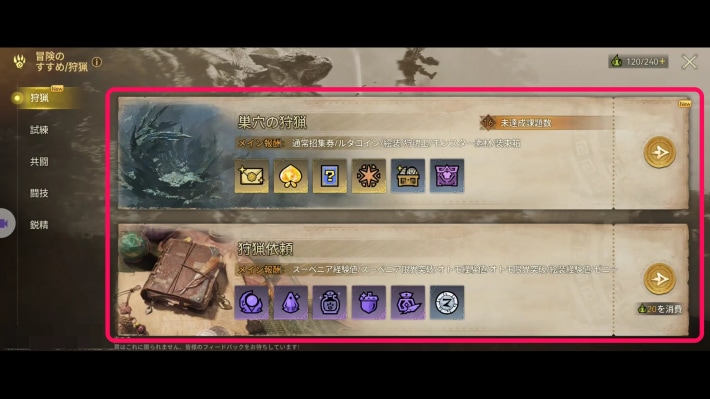 |
Open the menu and raise the Adventurer Rank shown at the bottom left to 17. If you meet the requirement, the quest completes and you move on to the next chapter; if not, raise your Adventurer Rank with daily requests and Free Hunt tasks.
How to Raise Adventurer RankWondrous Visages
Complete One Daily Investigation
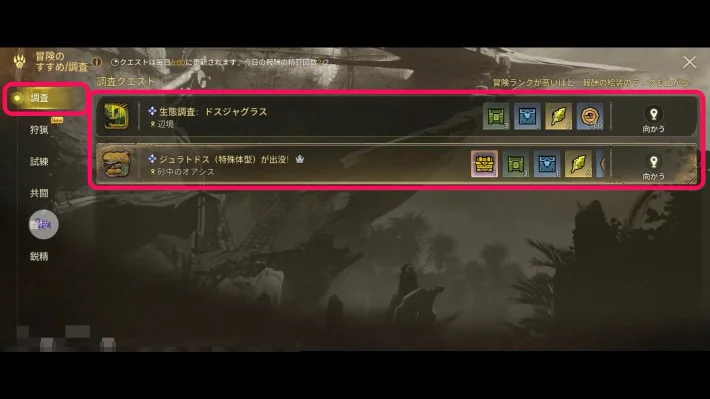 | 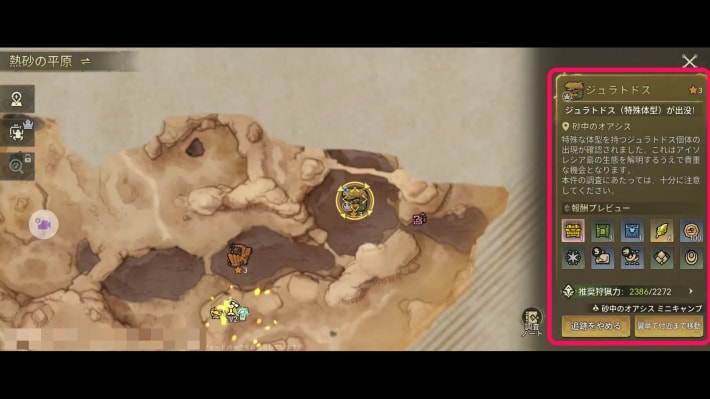 |
Complete one investigation request from Game Modes. Visages are rewards for investigation requests.
Visage GuideEquip One of Your New Visages
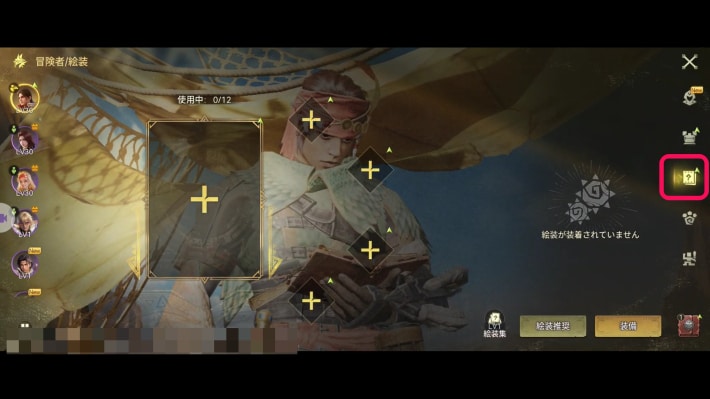
Equip the visage you got as a reward from the adventurer screen.
Upgrade the Visage
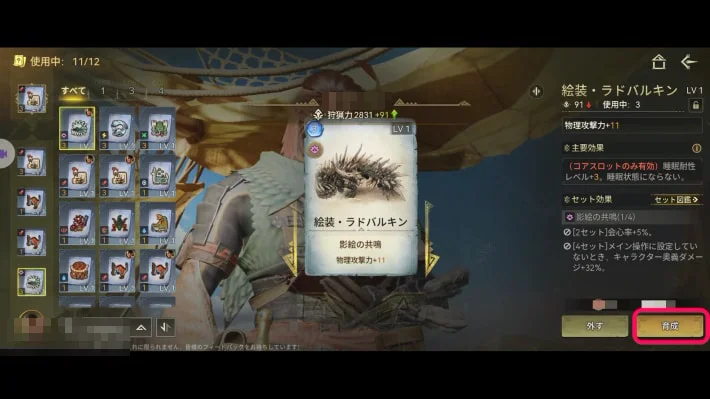 | 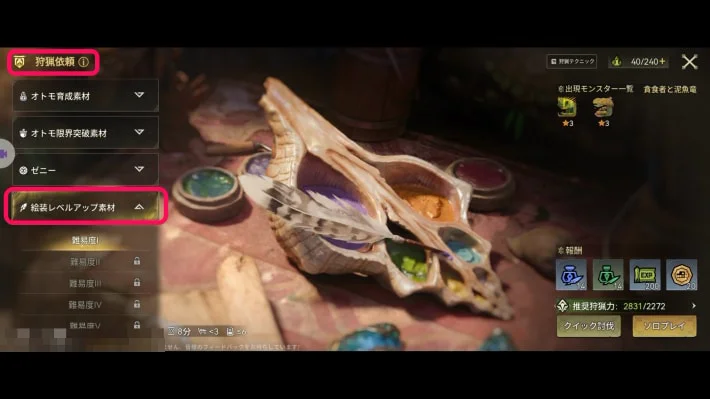 |
Upgrade the visage from the equipment screen. If you're short on materials, do the visage level-up material request that unlocks at the bottom of Hunt Request.
Visage GuideBlazing Scorch Marks
Meet Up with Holly in the Searing Plains
| Where Holly is | Map screen |
|---|---|
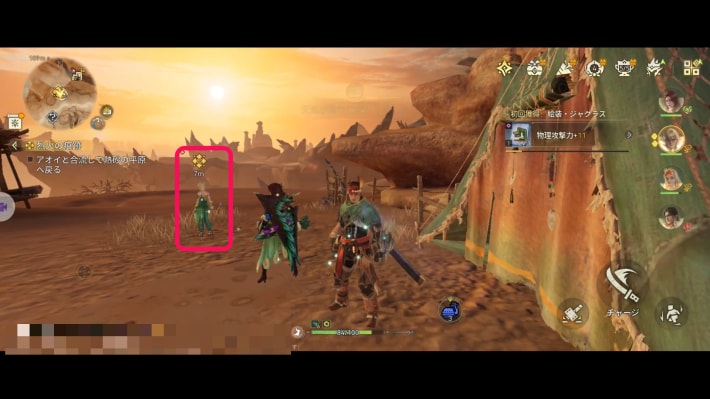 | 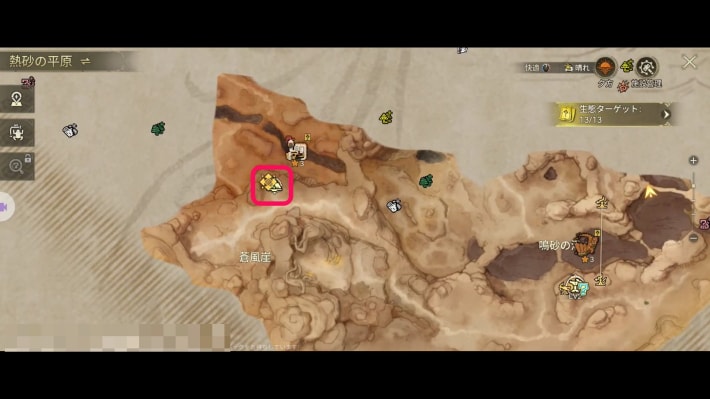 |
Go to the Searing Plains and talk to Holly at the Desert Oasis Camp.
Head to the Area with Scorch Marks
| Destination | Map screen |
|---|---|
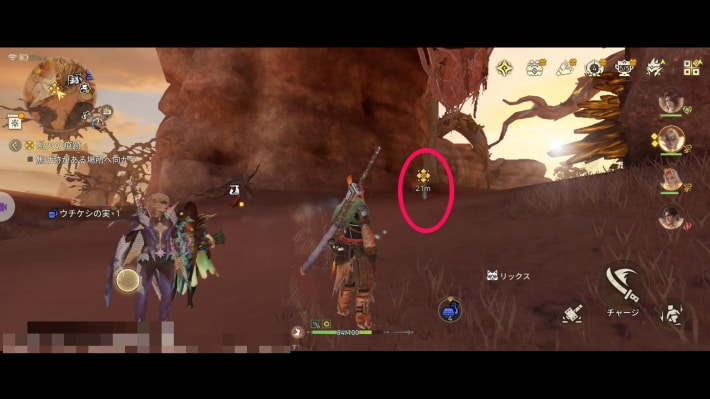 | 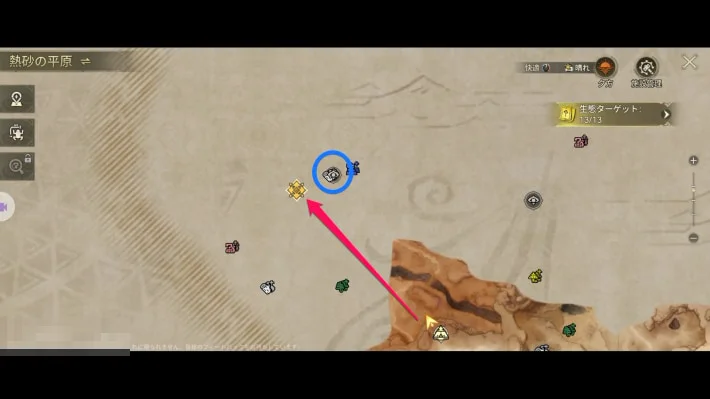 |
After meeting Holly, head to the area with scorch marks to the northwest. Building a Catapult near the Camp and using it makes the trip easier. Activate the observation point on the way, too.
Slay the Anjanath
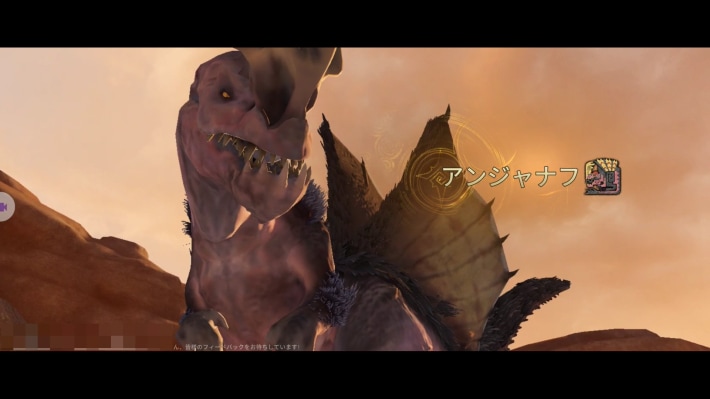
Slay the Anjanath that appears. Note that you need to carve it afterward.
Investigate the Tracks Near the Lair
| Tracks | Map screen |
|---|---|
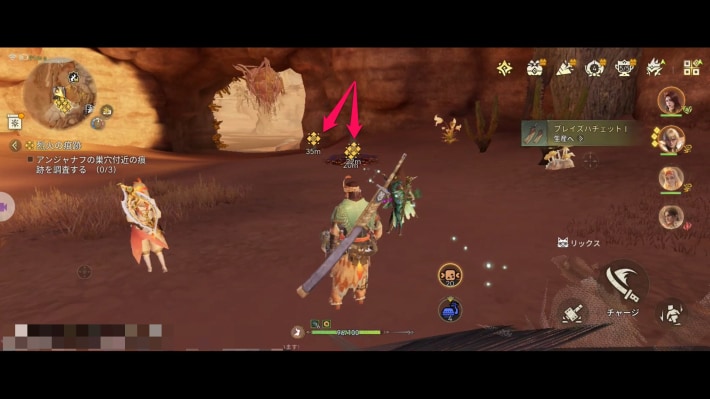 | 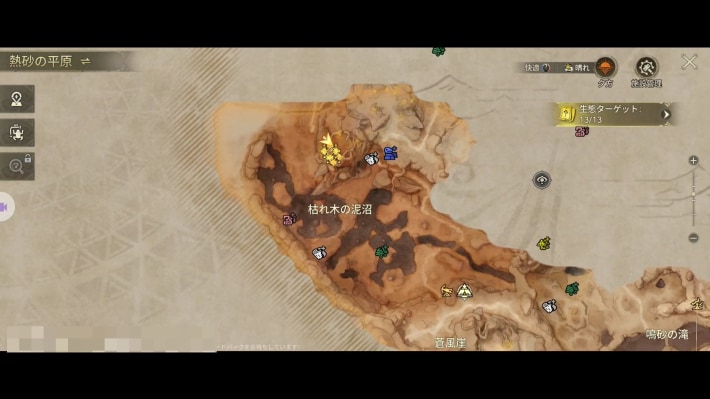 |
Three tracks appear south of the area where the Anjanath showed up. Investigate all three to complete the quest.
Intertwined Thoughts
Head to the Nearby Observation Point
| Destination | Map screen |
|---|---|
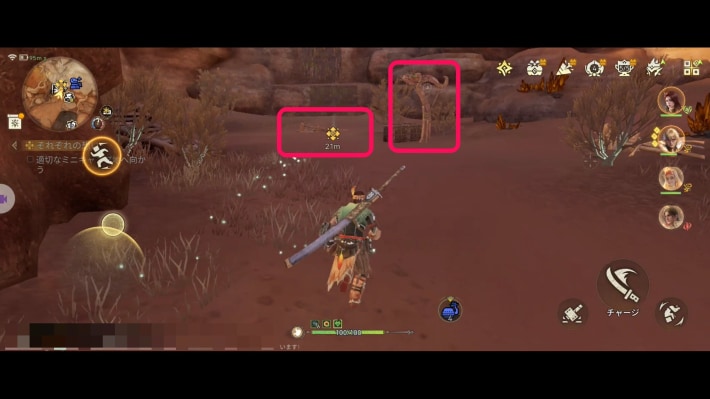 | 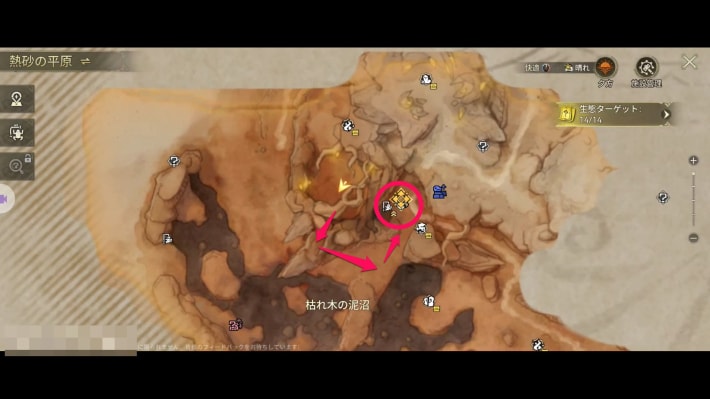 |
Head to the nearby observation point. Crossing straight east is difficult, so go around from the south.
Build a Camp at the Observation Point
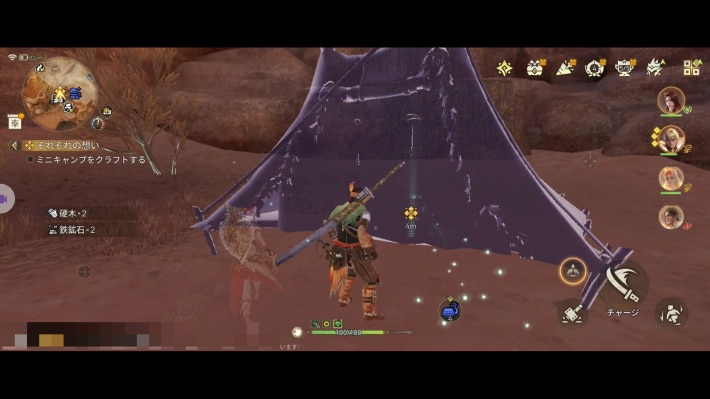
Activate the observation point and build a Camp. The story continues after it's built, completing the quest.
The Sun over the Golden Expanse
Talk to Holly
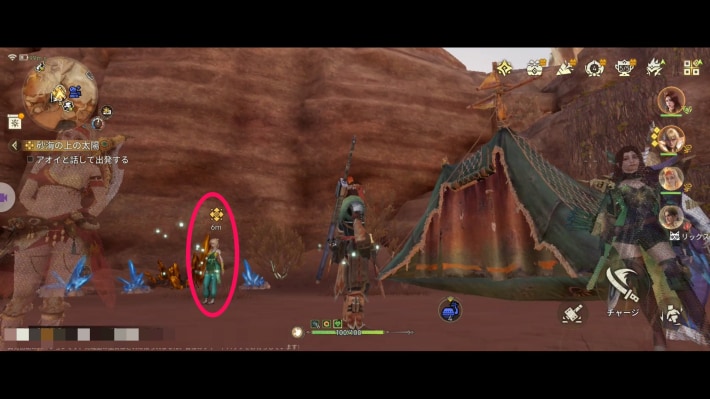
Talk to Holly at the Camp.
Follow the Tracks
| Destination | Map screen |
|---|---|
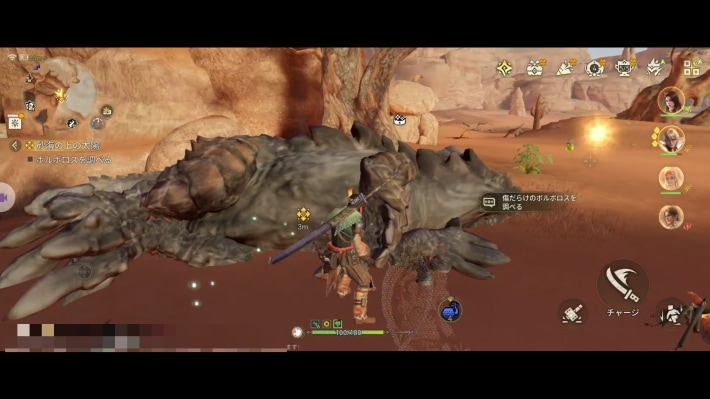 | 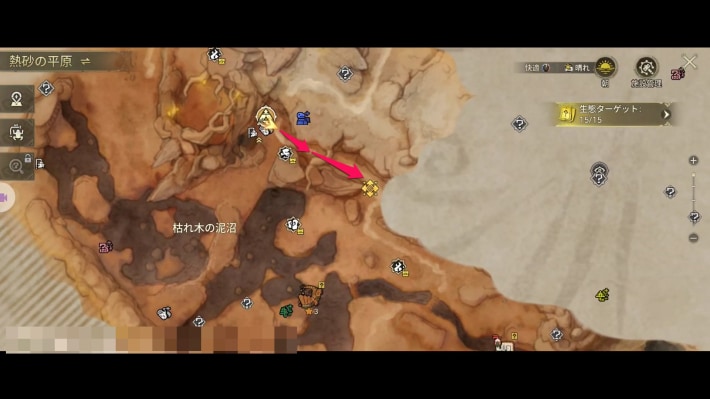 |
Follow the monster's tracks. A Barroth lies collapsed at the destination; investigate it and the next objective appears.
Head Toward the Light
| Destination | Map screen |
|---|---|
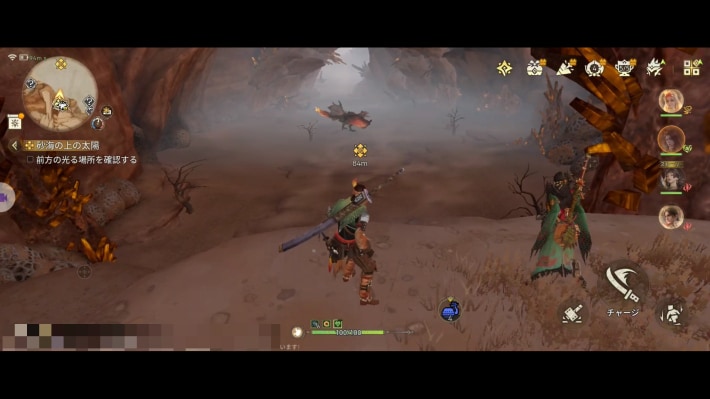 | 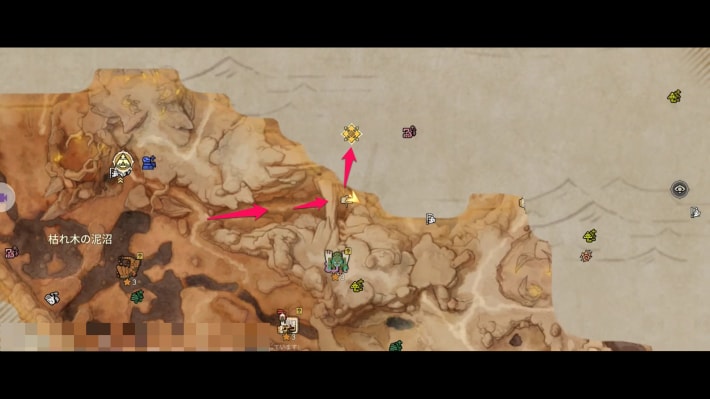 |
Keep following the quest marker. There's an observation point on the way, so activate it and set up a Camp.
Slay the ???
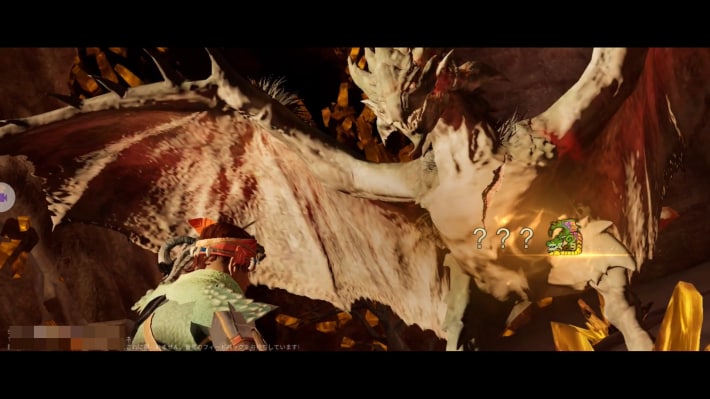
Slay the ??? that appears at the destination. Afterward, carve it and the story continues automatically.
Support from the Workshop
Talk to the Workshop Smith in Kulune
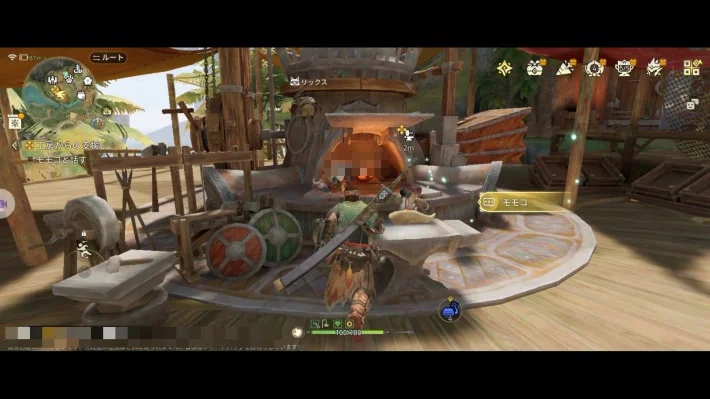
Talk to the smith at the Workshop in Kulune.
Set Up a Wood Gatherer
| Where to set it up | Map screen |
|---|---|
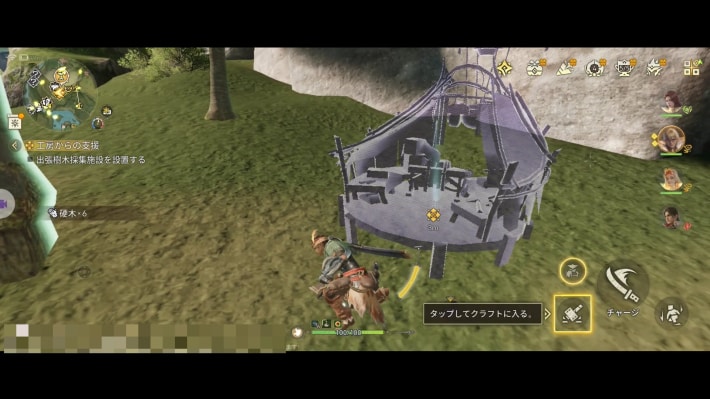 | 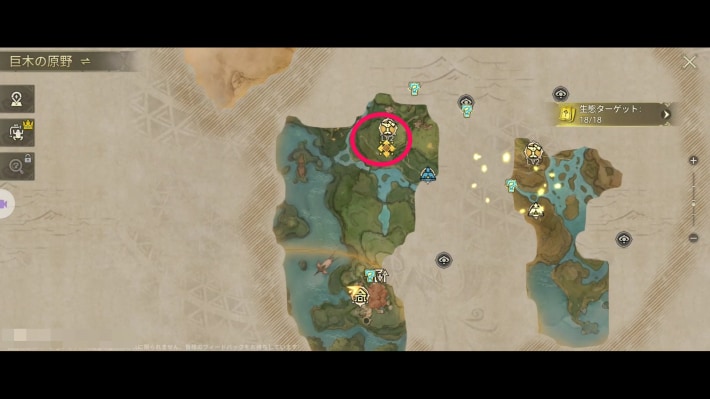 |
Head south from the Outlands Watchtower and set up a Wood Gatherer.
Wood GathererSet Up a Plant Gatherer
| Where to set it up | Map screen |
|---|---|
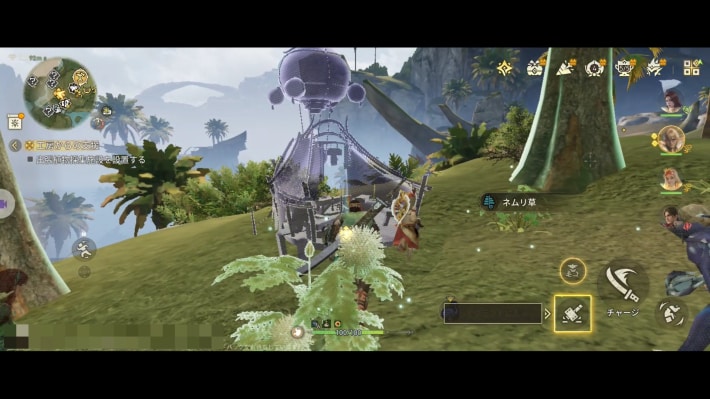 | 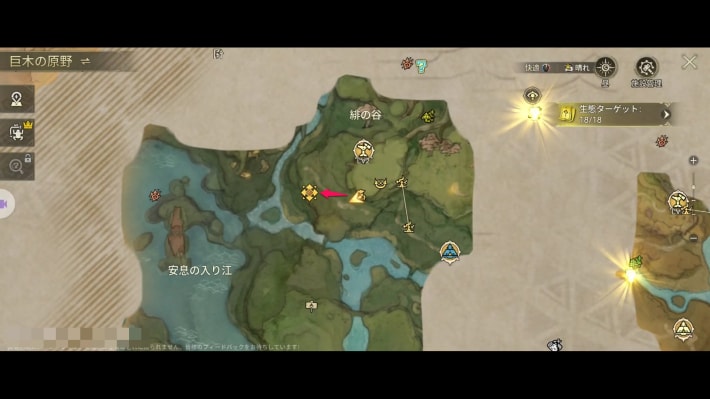 |
Head west from the Wood Gatherer and set up a Plant Gatherer.
Plant GathererSet Up an Ore Gatherer
| Where to set it up | Map screen |
|---|---|
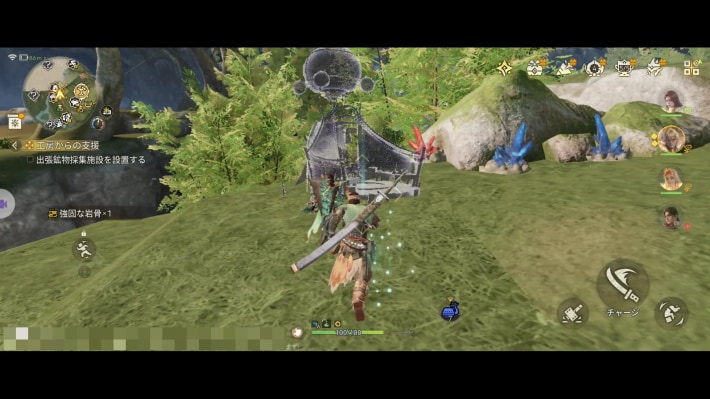 | 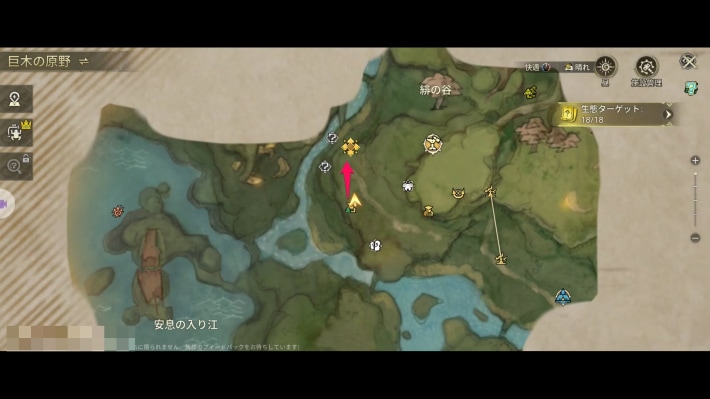 |
Head north from the Plant Gatherer and set up an Ore Gatherer.
Ore GathererCollect What the Gatherers Have Gathered
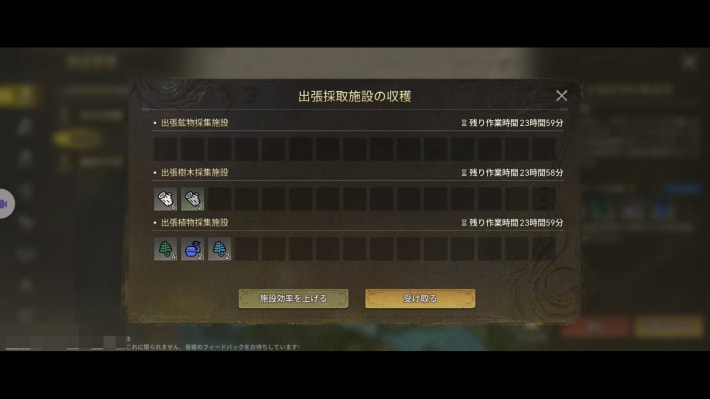
After setting up the last gatherer, follow the tutorial and collect the harvest from the map screen.
Path of Adventure
Raise Your Proof of Mastery
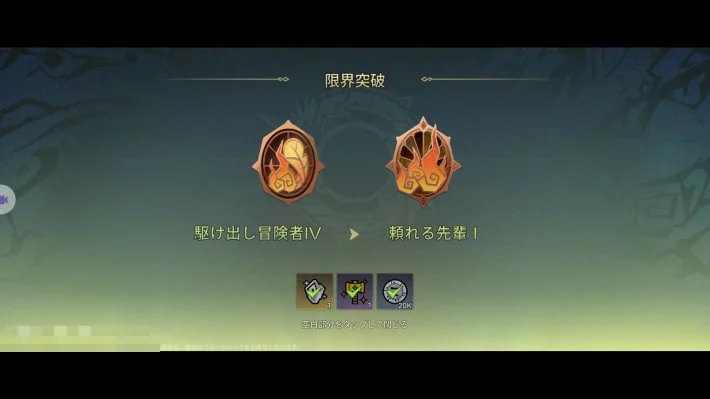
Raise your Proof of Mastery to Reliable Senior I to complete the quest.
Chapter 3 Walkthrough
Chapter 3 WalkthroughSinister Glow in the Dark
Talk to the Quest Counter Attendant
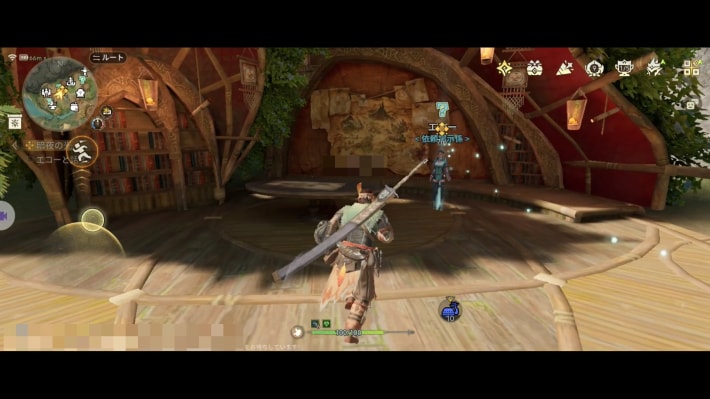
Talk to the attendant at the quest counter in Kulune. The story moves on as you approach and a fight begins, so prepare beforehand.
Point!Restock your Potions and upgrade your weapons and armor!
Slay the Radiant Great Jagras
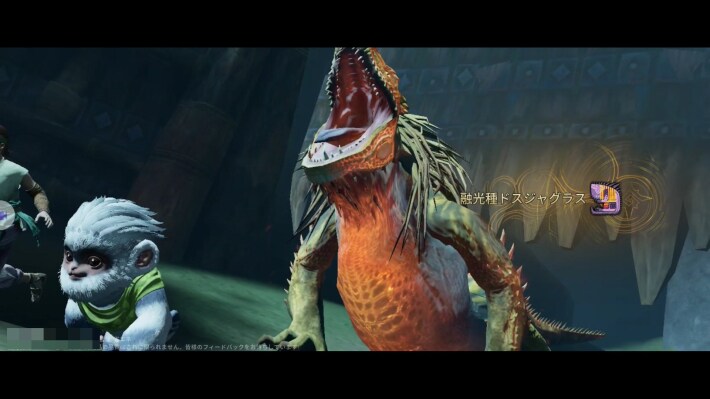
Slay the Radiant Great Jagras. Slaying it moves the story forward and completes the quest.
Opening in the Radiant Light
Check the Radiant Great Jagras's Weak Element
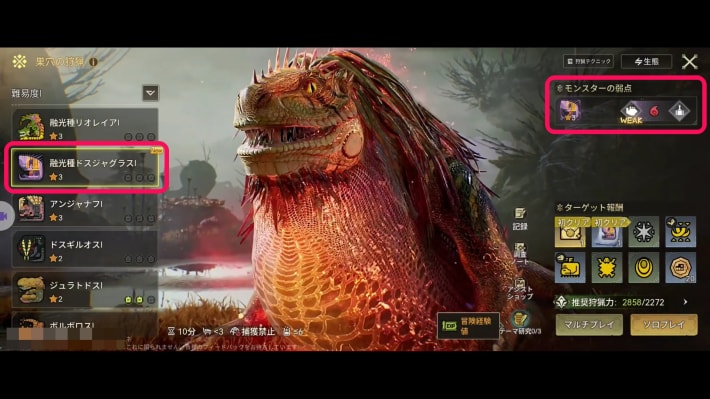
The Radiant Great Jagras has been added to Free Hunt, so check its weak element there.
Craft One Fire Weapon
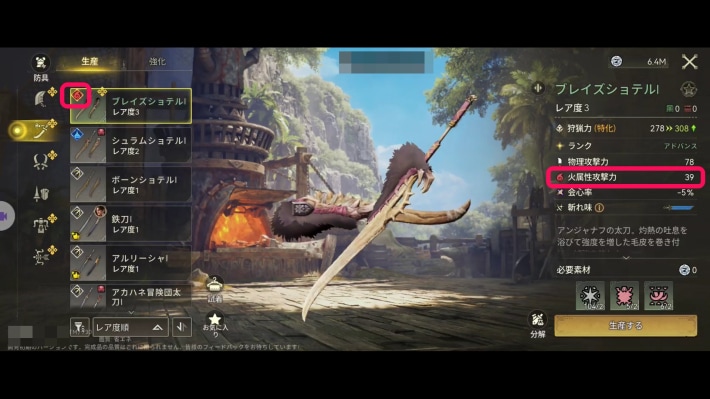
Craft one fire element weapon. You don't have to equip it, so if you're short on materials, Guild Crimson Crest gear will do.
Weapon ListCraft Two Pieces of Fire Damage Up Armor
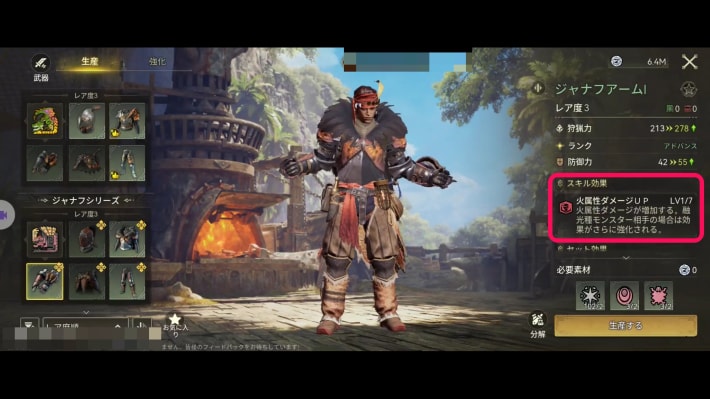
Craft two pieces of armor with the Fire Damage Up skill. If you're short on materials, hunt the monsters they come from to get them.
Armor ListTake On the Radiant Great Jagras in Free Hunt
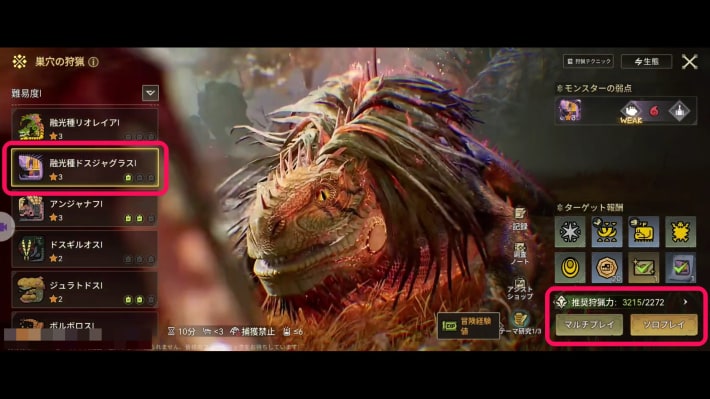
Go to Free Hunt and challenge the Radiant Great Jagras. The quest completes once the attempt ends.
Off to Mistwood
Enter Mistwood
| Destination | Map screen |
|---|---|
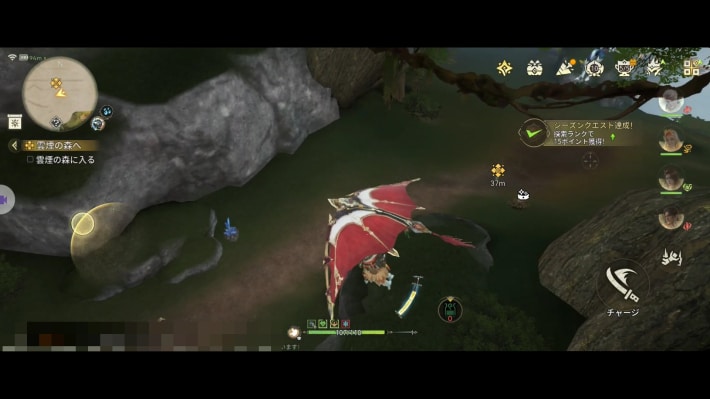 | 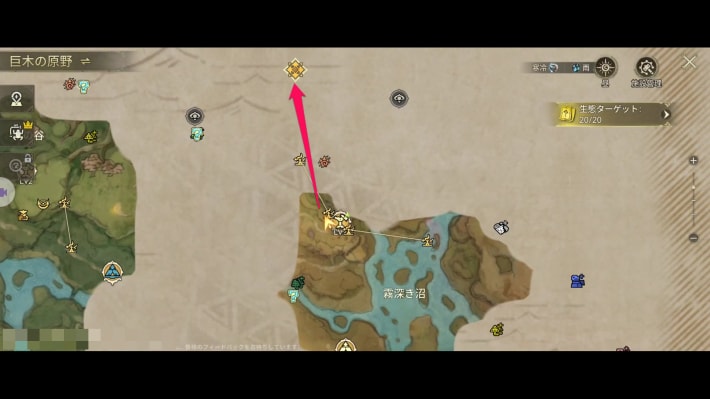 |
Head to the entrance to Mistwood. It's a long way, so build a Zip Line or Catapult near a fast travel point.
Head to the Northern Watchtower
| Destination | Map screen |
|---|---|
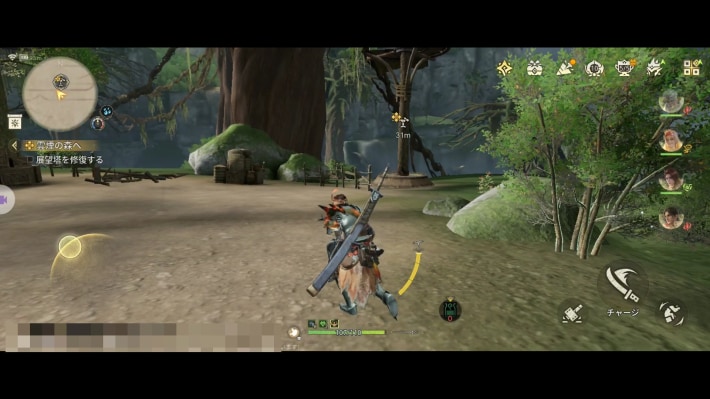 | 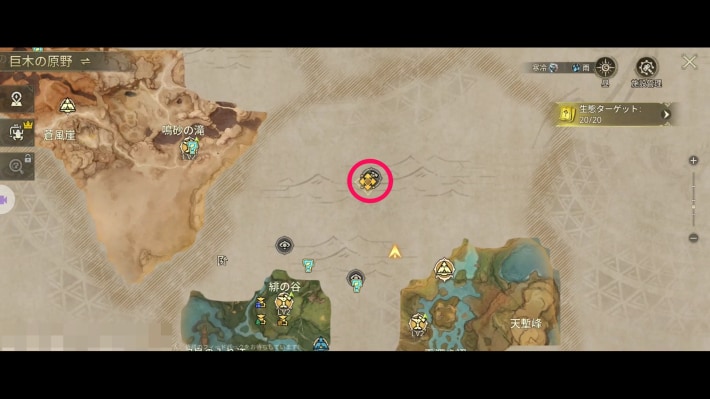 |
After reaching the entrance, head to the northern Watchtower in the Giantwood Locale.
Repair the Watchtower
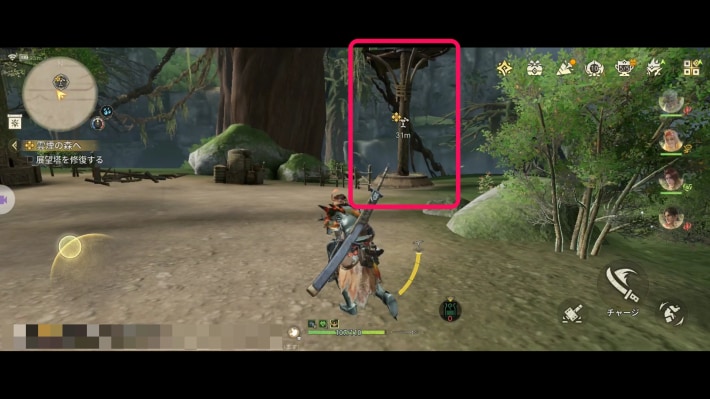
Repair the Watchtower. Afterward, a new quest marker appears.
Head Toward the Voice
| Destination | Map screen |
|---|---|
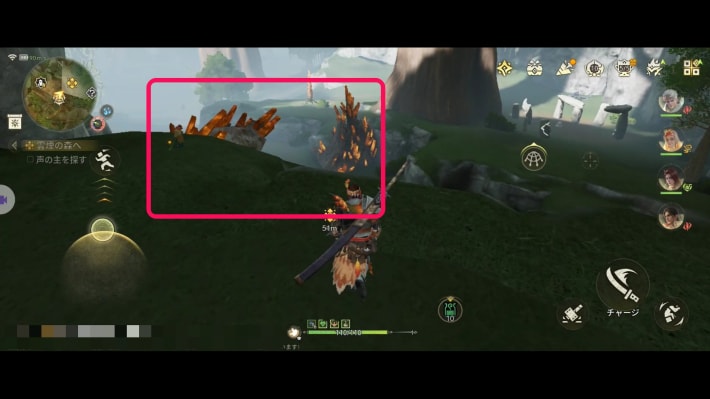 | 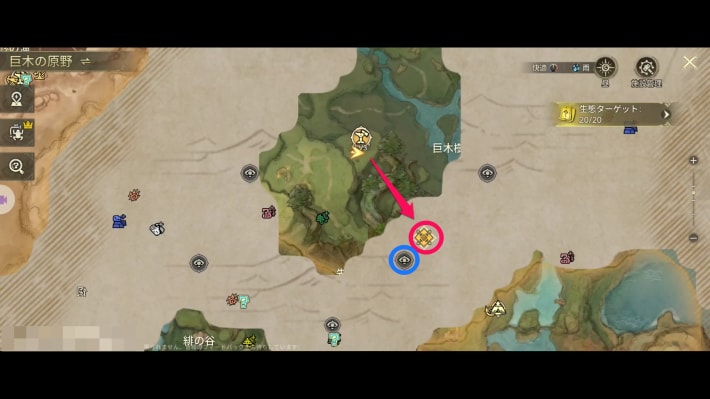 |
Head south-southeast of the Watchtower. It's a long way, so build a Catapult and use it. Setting up a Camp at the nearby observation point is also a good idea.
Slay the Radiant Pukei-Pukei
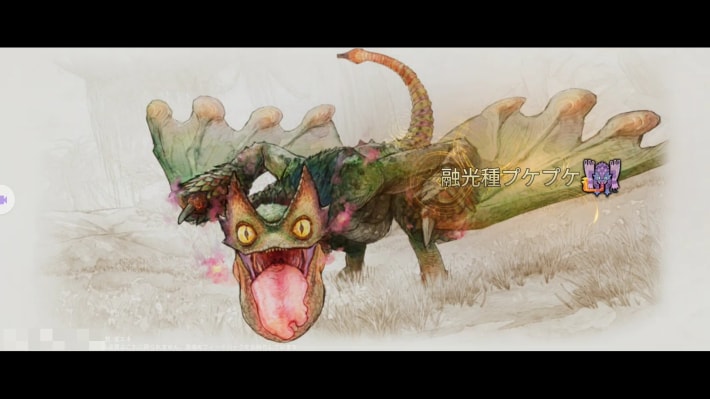
Slay the Radiant Pukei-Pukei that appears. Afterward, carve it to complete the quest.
Ruck's Survival Secrets
Return to the Northern Watchtower and Talk to Holly
| Holly | Map screen |
|---|---|
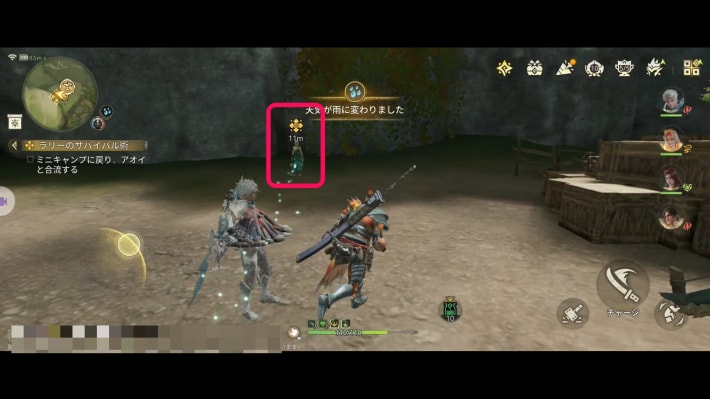 | 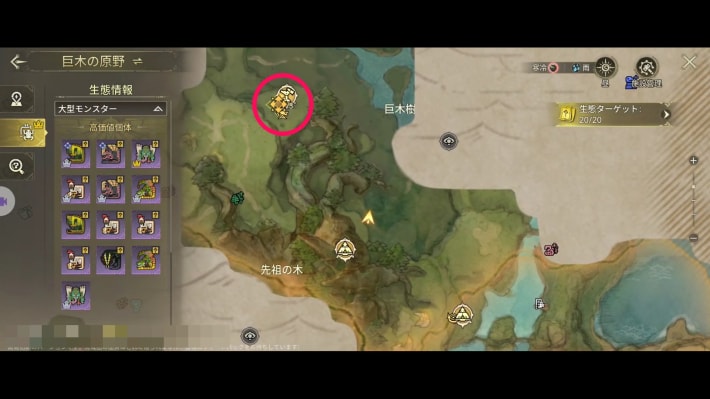 |
Fast travel back to the Mistwood Camp and talk to Holly. The quest completes once the story moves on.
Path of Adventure
Raise Your Proof of Mastery
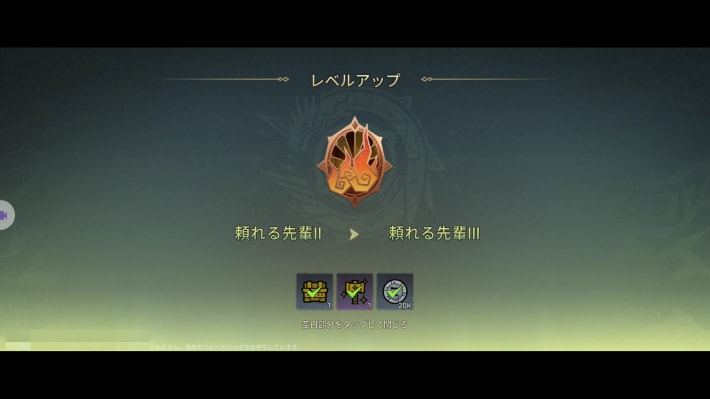
Raise your Proof of Mastery to Reliable Senior III.
The Rumbling Thunder
Unlock the Glider's Dash
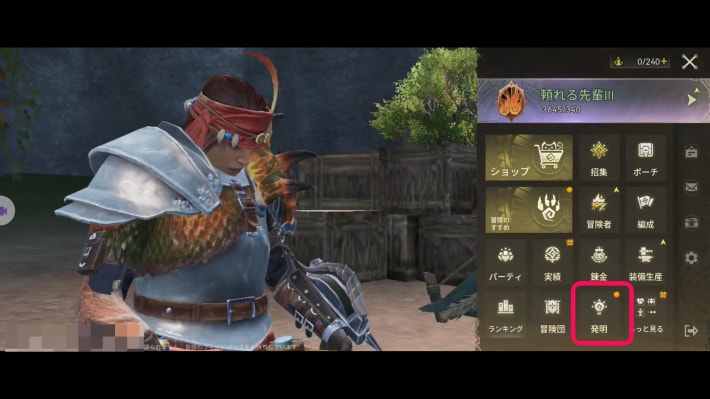 | 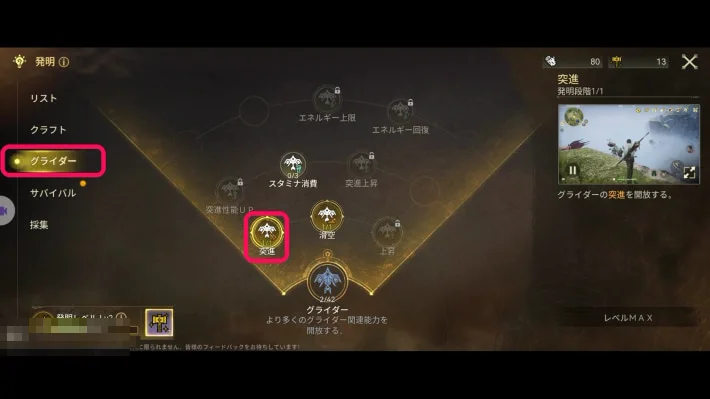 |
From Research, unlock the glider's Dash.
Research ListHead to the Area with Clues
| Destination | Map screen |
|---|---|
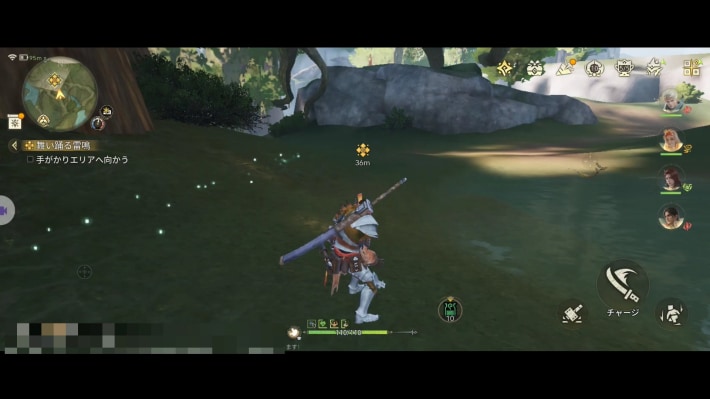 | 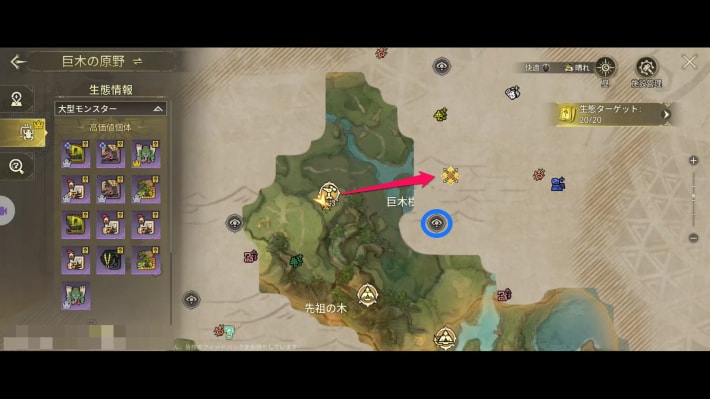 |
Head to the destination east of Mistwood. A fight starts when you arrive, so be ready. There's an observation point on the way, so activate it and set up a Camp.
Slay the Tobi-Kadachi
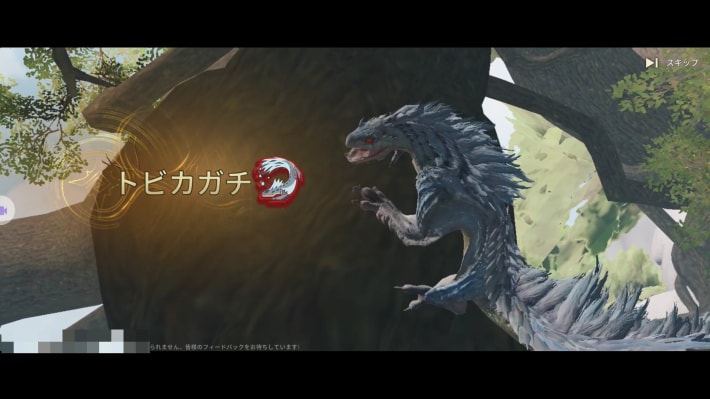
Slay the Tobi-Kadachi. Afterward, carve it.
Return to the Mistwood Camp
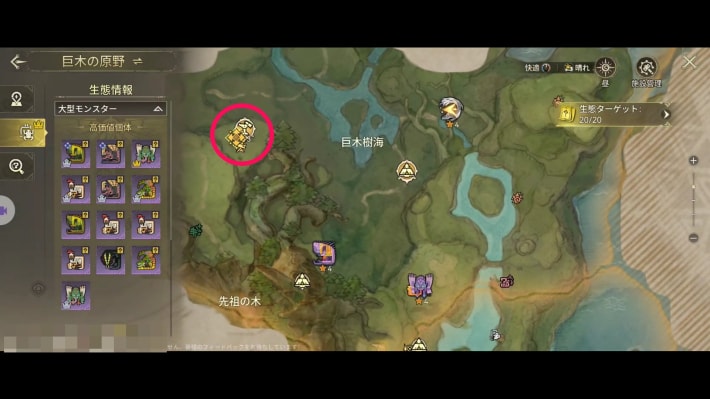
Return to the Mistwood Watchtower. The story continues as soon as you're back, completing the quest.
Unfinished Business
Head to the Destination
| Destination | Map screen |
|---|---|
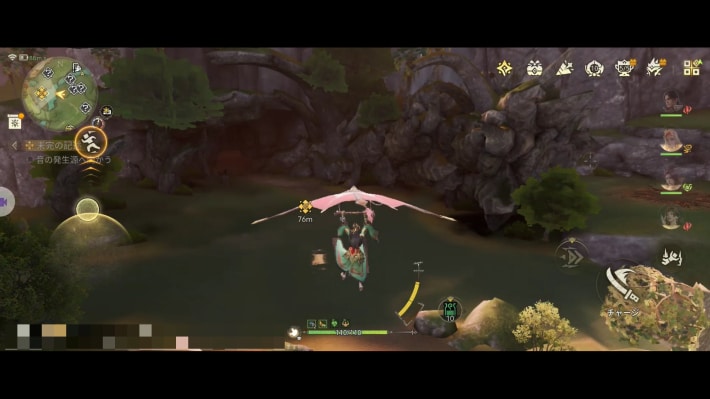 | 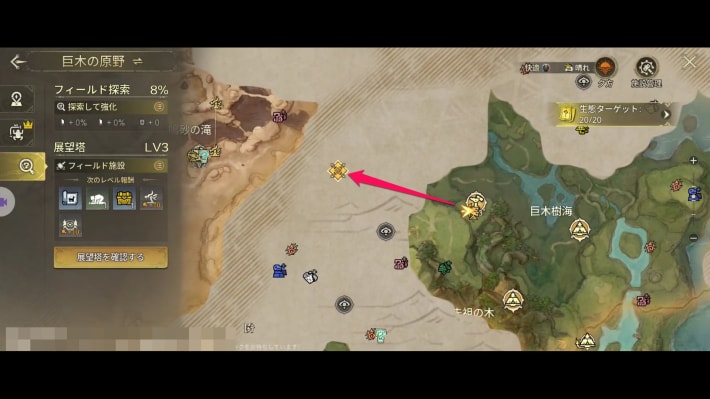 |
Head to the destination. It's a long way, so use a Catapult or similar.
Slay the Radiant Anjanath
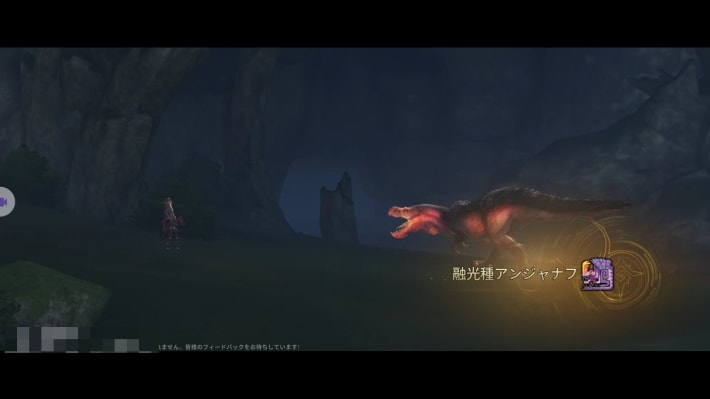
Slay the Radiant Anjanath. Afterward, carve it to move the story forward.
Head to the Cave
| Destination | Map screen |
|---|---|
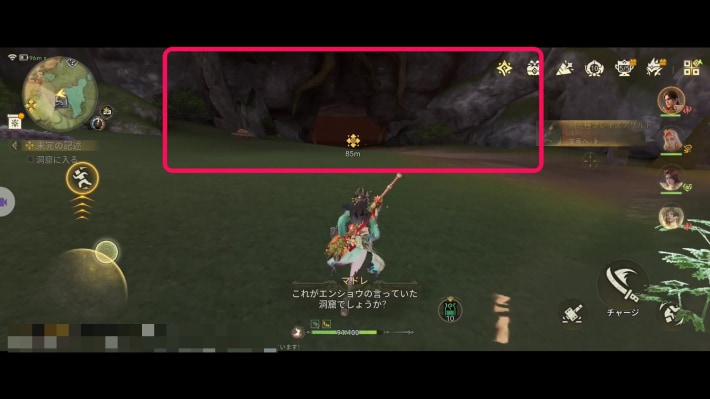 | 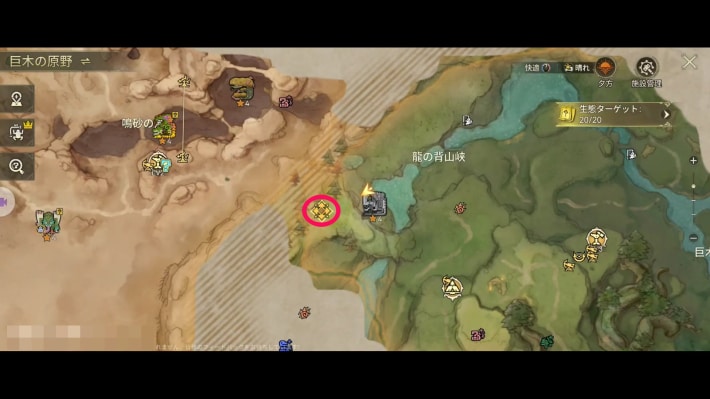 |
The destination cave is to the west of where the Radiant Anjanath appeared.
Explore the Cave
| Part 1 | Part 2 |
|---|---|
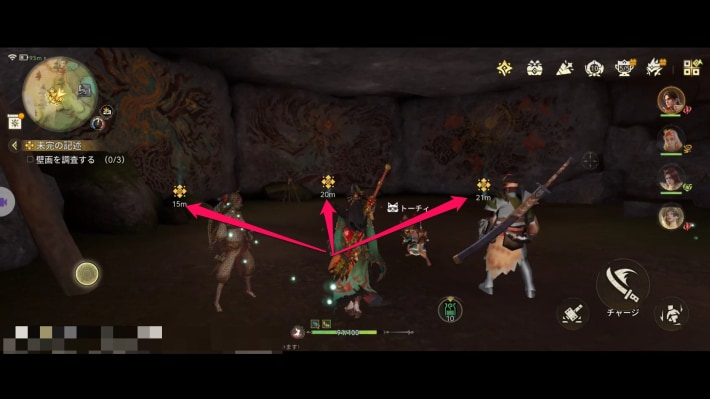 | 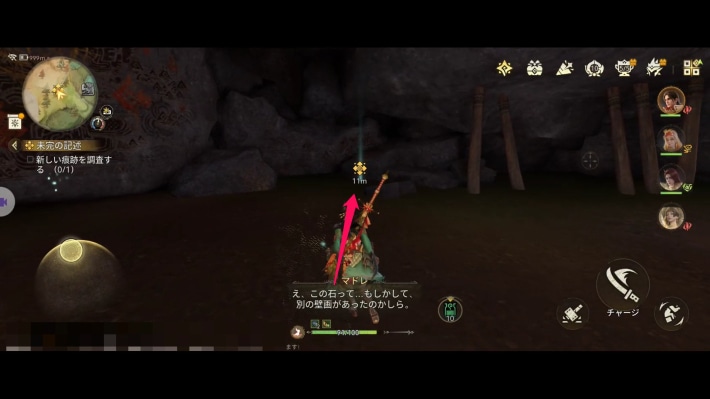 |
Investigate the three murals in the cave. A fourth point to investigate appears afterward.
Return to Kulune
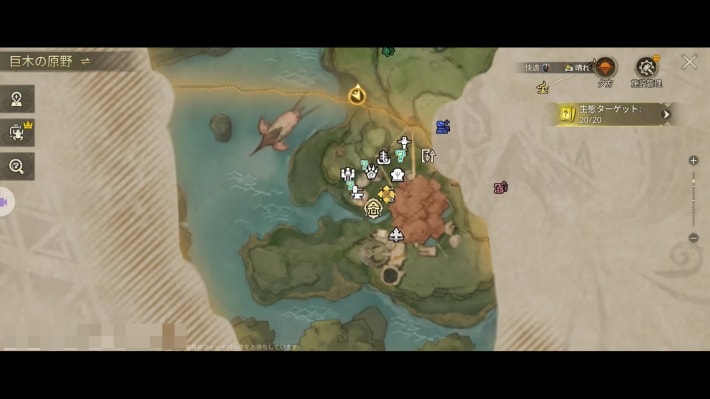
Return to Kulune and the story continues automatically.
The Power of a Full Visage Set
Check the Radiant Anjanath's Weakness
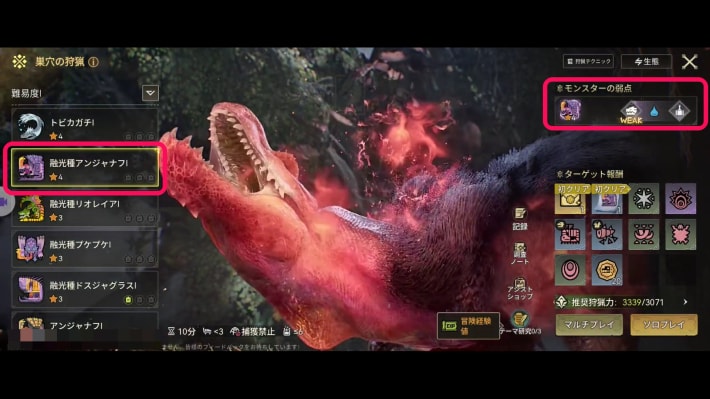
Check the weakness of the Radiant Anjanath, which has been added to Free Hunt.
Check the Water Visage Set
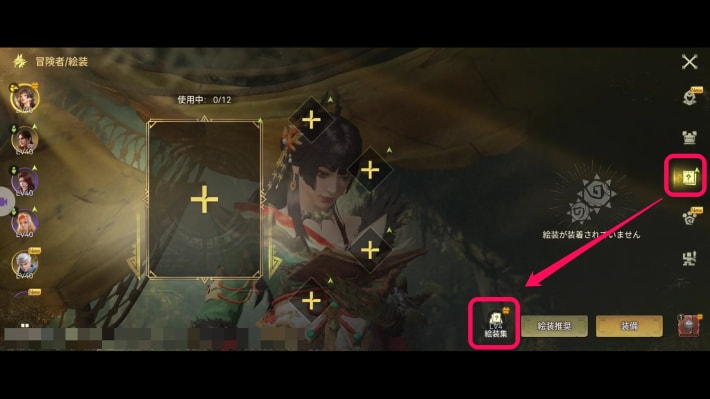 | 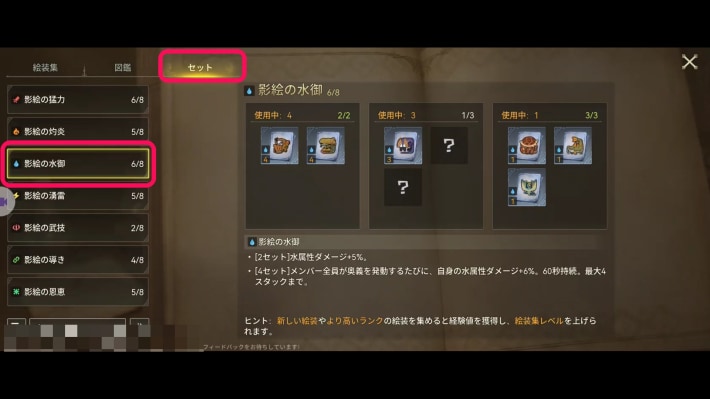 |
Check the water element set in the Visage Album. You can open the Visage Album from the adventurer screen.
Take On the Radiant Anjanath in Free Hunt
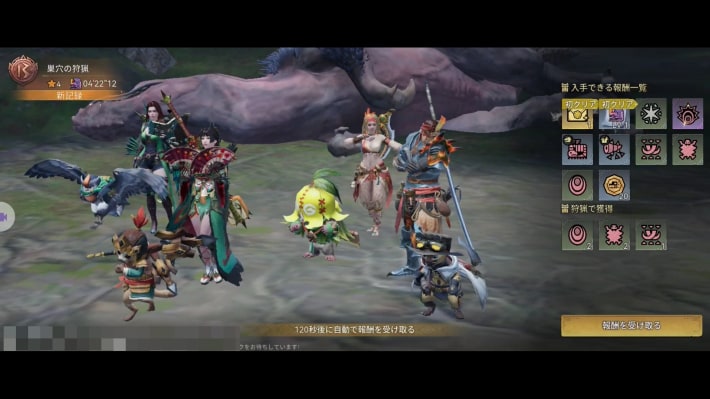
Challenge the Radiant Anjanath in Free Hunt.
Get Stronger, Adventurer
You need to raise your Adventurer Rank to the required level. If you meet the requirement, the quest completes and you move on to the next chapter; if not, raise your Adventurer Rank with daily requests and Free Hunt.
Chapter 4 Walkthrough
Chapter 4 WalkthroughDesert Path
Talk to the Quest Counter Attendant
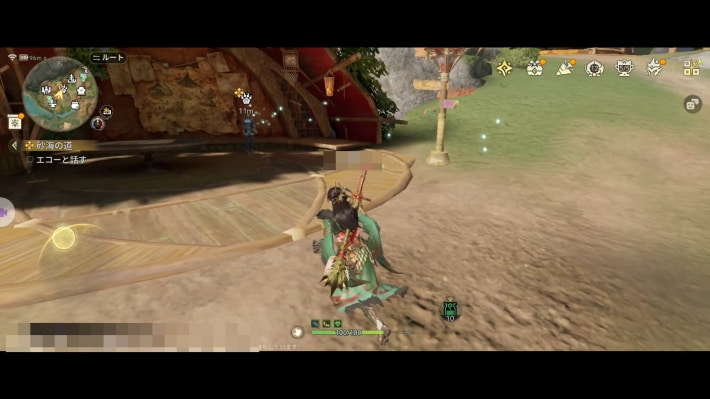
Talk to the attendant at the quest counter in Kulune.
Return to the Desert Oasis Camp
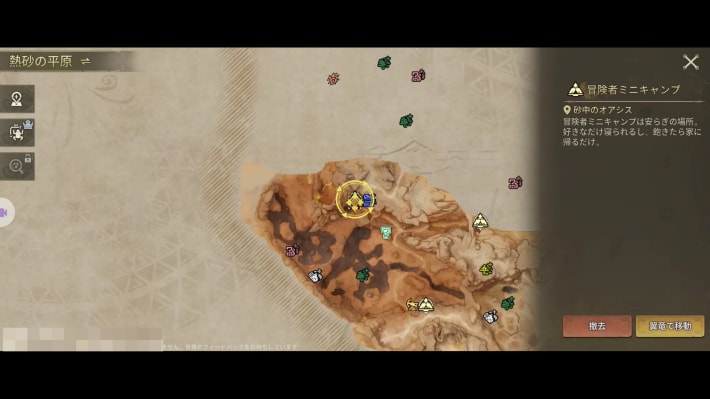
A fight starts when you return to the Desert Oasis Camp, so prepare beforehand.
Point!Have a Cool Drink ready!
Slay the Radiant Kulu-Ya-Ku
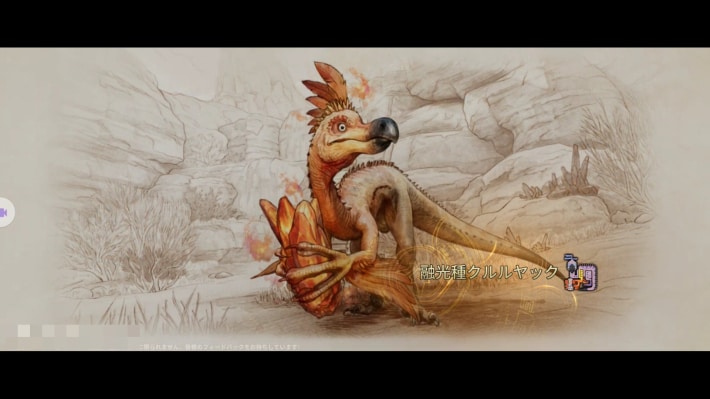
Slay the Radiant Kulu-Ya-Ku that appears at the Camp. Afterward, you need to carve it.
Return to the Camp
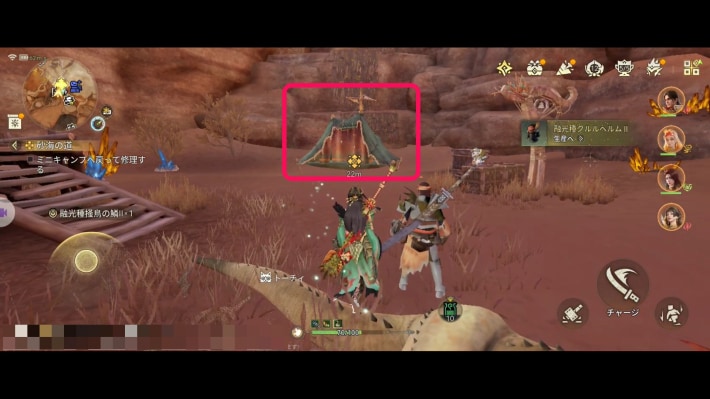
Approach the nearby Camp and the story continues automatically.
Path of Adventure
Raise Your Proof of Mastery
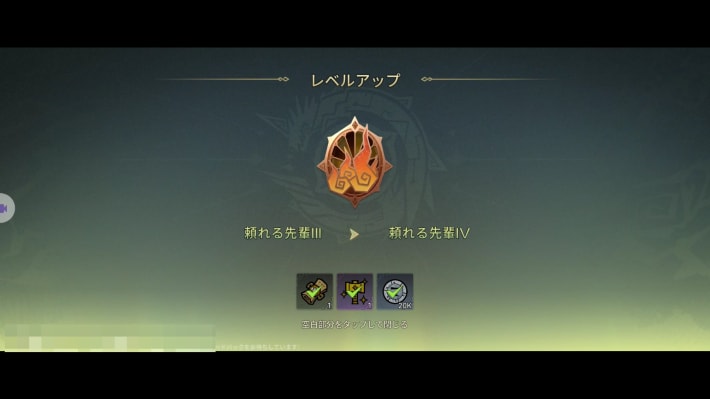
Raise your Proof of Mastery to Reliable Senior IV.
Advancing Through the Dust
Climb the Cliff North of the Camp
| What it looks like | Map screen |
|---|---|
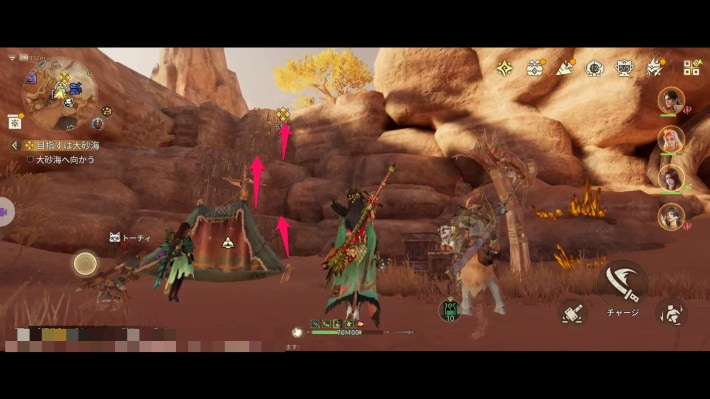 | 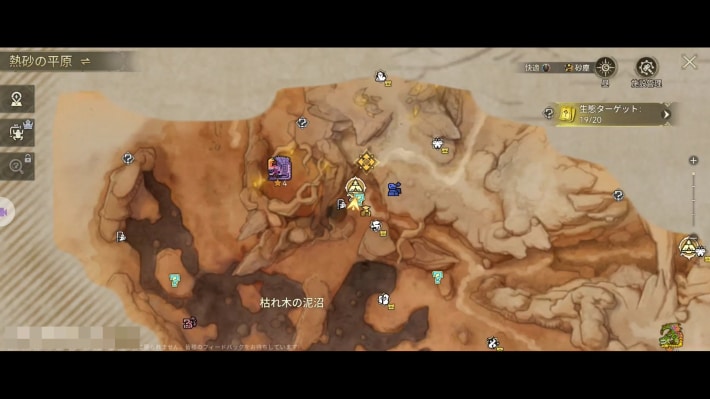 |
Climb the cliff on the north side of the Desert Oasis Camp.
Look for Dustbush
| Destination | Map screen |
|---|---|
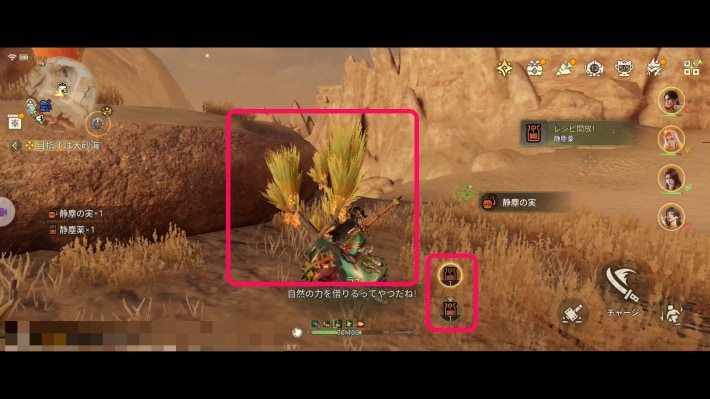 | 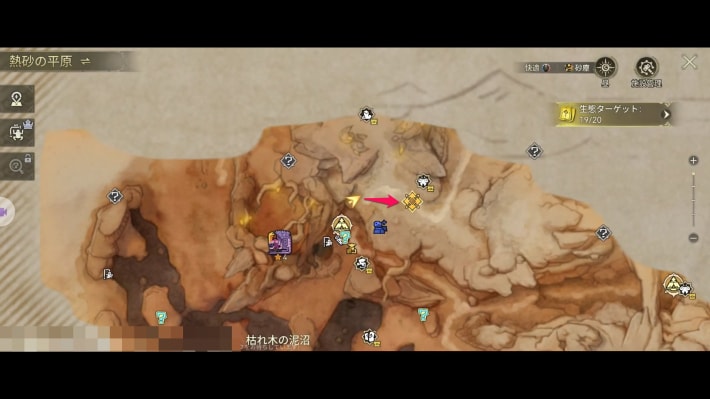 |
Head east once you're up the cliff. When you gather Dustbush, a Dustproof Potion is crafted automatically; use it.
Cross the Golden Expanse
| Destination | Map screen |
|---|---|
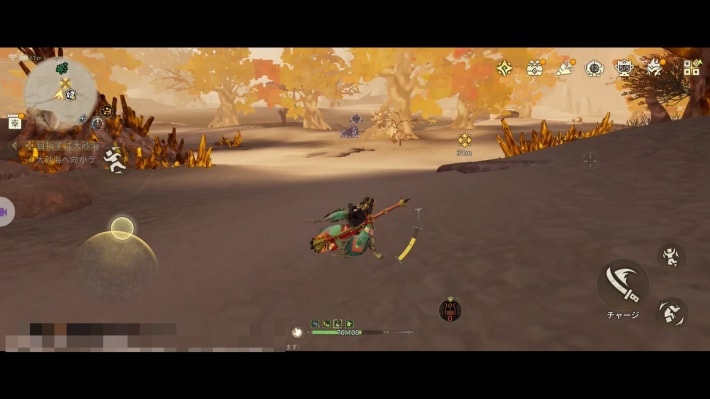 | 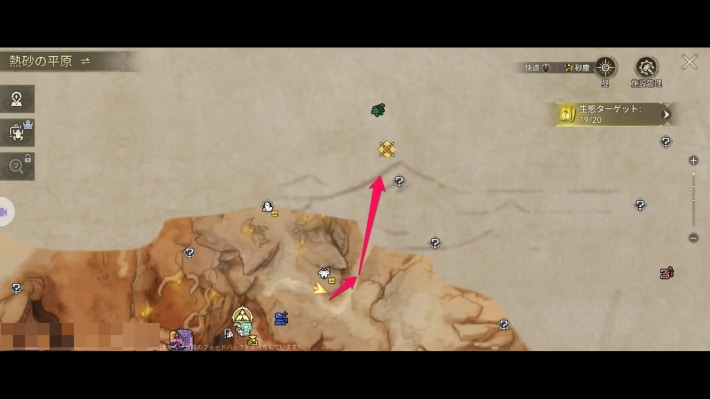 |
Keep heading north through the Golden Expanse.
Slay the Radiant Barroth
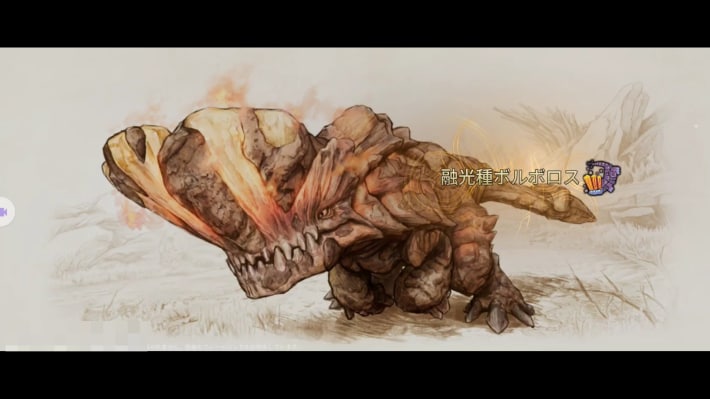
A Radiant Barroth appears; slay it. Afterward, carve it to complete the quest.
Wondrous Visages
Get Visages from the Newly Unlocked Field Hunts
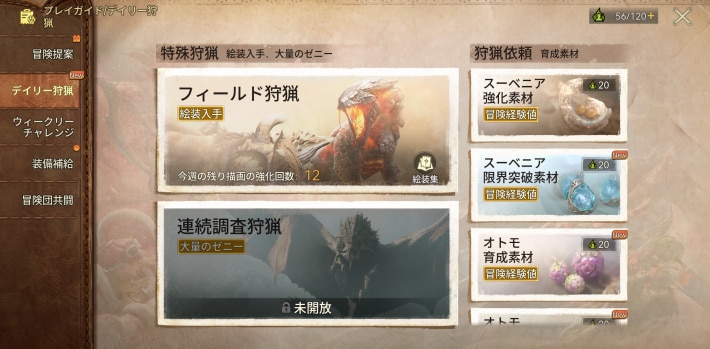
Field Hunts in Daily Hunts are now unlocked, so slay monsters to get visages. It isn't limited to the monsters shown when you tap Field Hunts: every field monster you can see on the map counts.
Point!You also get visages from captures, so walk up to the monster to collect them.
Equip the Visages You Got
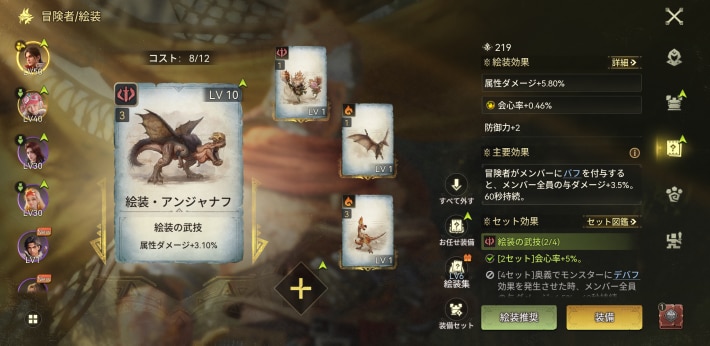
Equip the visages you got.
Visage GuideGet Upgrade Materials from Hunt Request and Upgrade
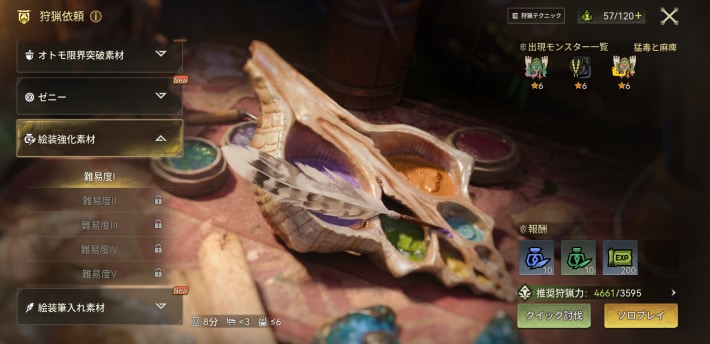
Get visage upgrade materials from Hunt Request and upgrade one of your equipped visages.
Raise Your Visage Album Level to 3
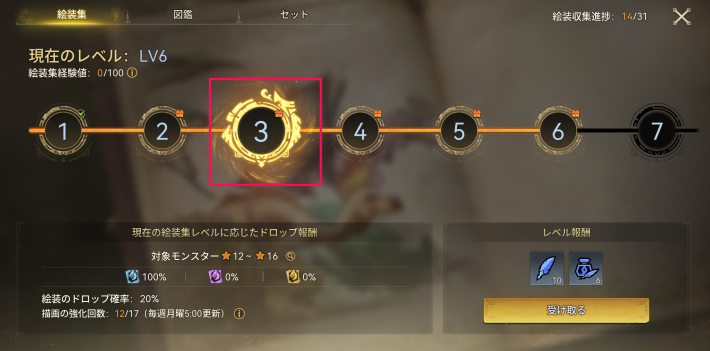
Raise your Visage Album to level 3. The Visage Album level goes up when you get a visage you didn't have, so slaying one more monster in Field Hunts for a visage gets you to level 3.
Visage GuideUnexpected Distress Signal
Keep Crossing the Sands
| Destination | Map screen |
|---|---|
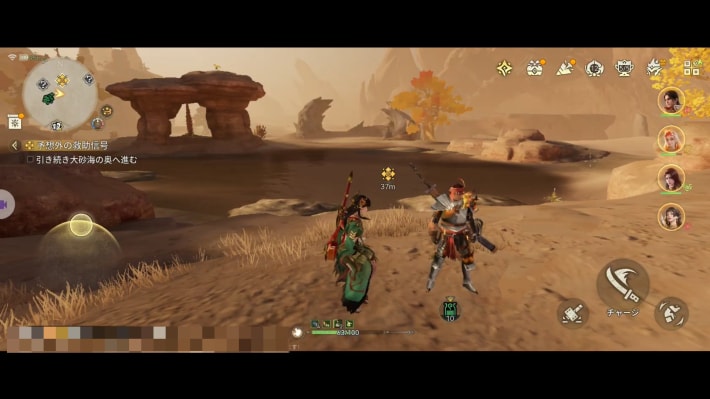 | 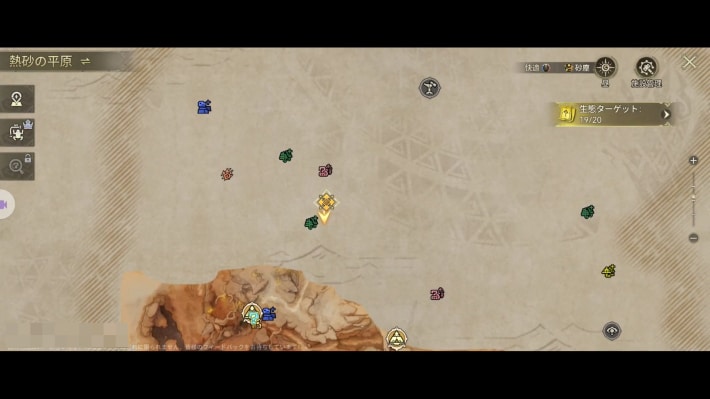 |
Keep heading north through the sands. Once you've gone some way into the water, the next quest marker appears.
Head to the Source of the Signal
| Destination | Map screen |
|---|---|
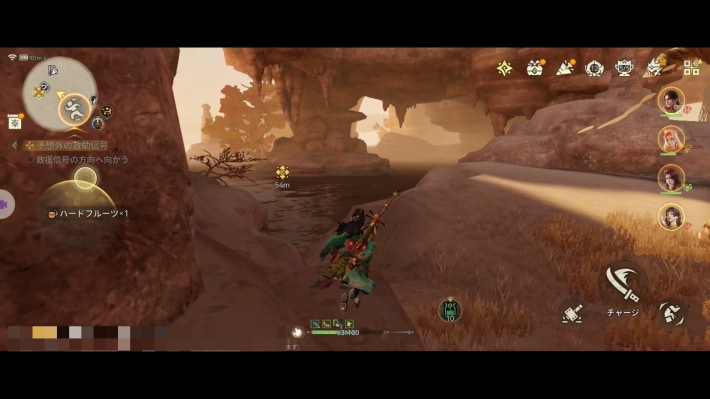 | 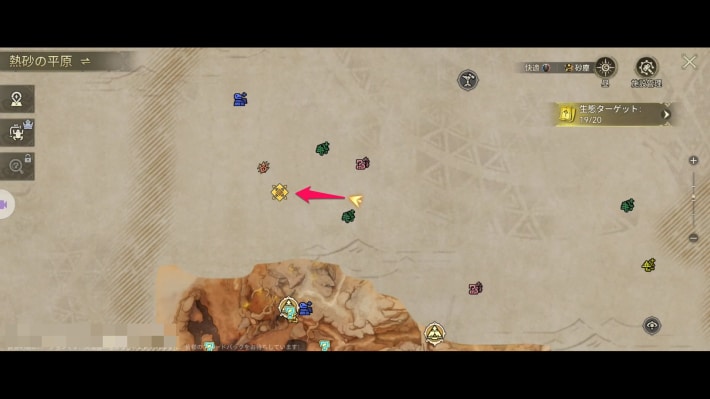 |
Head to where the signal was fired. There's a pond in the hollow beneath the rocky hill; the quest moves on when you get near it.
Slay the Radiant Jyuratodus
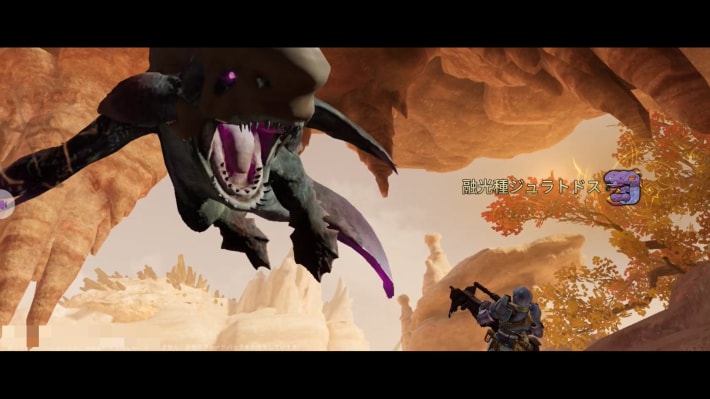
Slay the Radiant Jyuratodus. Afterward, you also need to carve it.
Meet Up with the Guild Member
| Destination | Map screen |
|---|---|
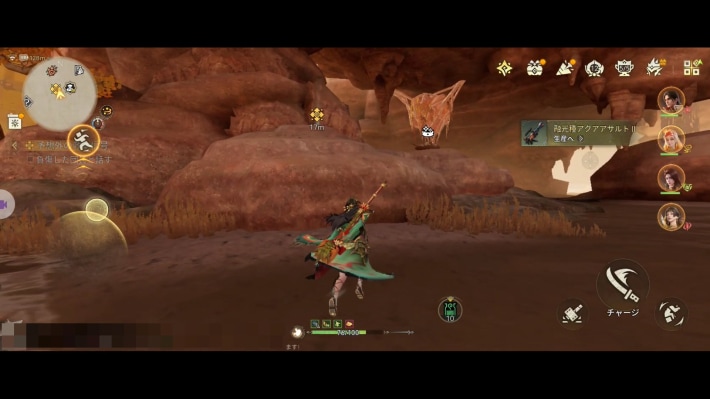 | 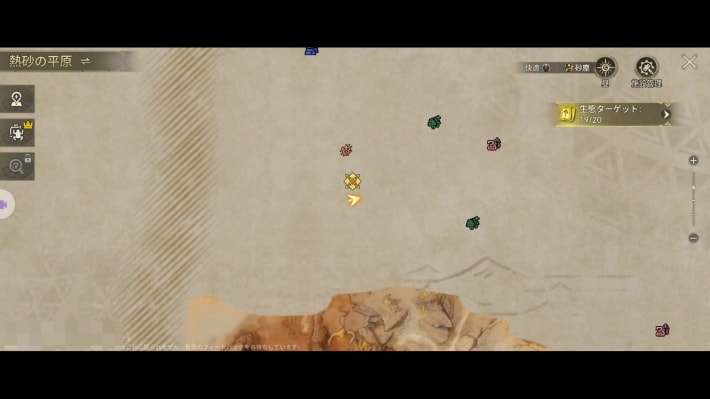 |
Meet up with the guild member on top of the rock nearby.
Head to the Observation Point
| Destination | Map screen |
|---|---|
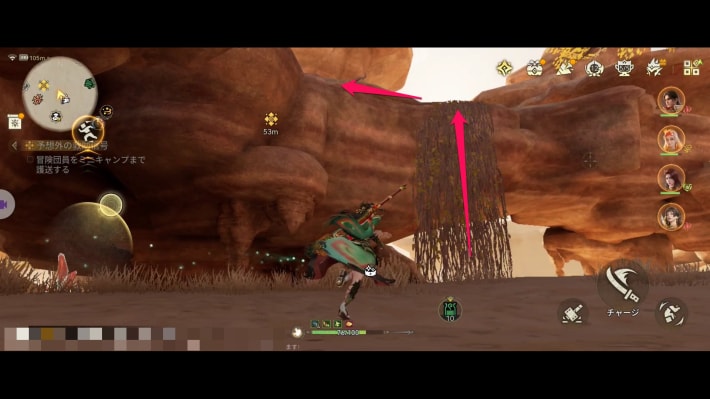 | 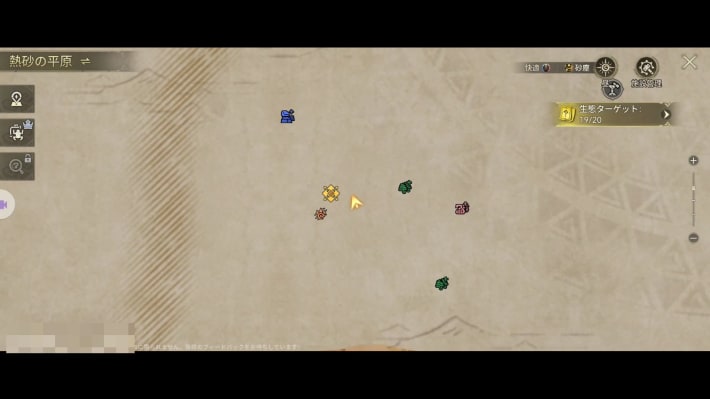 |
Head to the nearby observation point. It's above where you met the guild member, so go east first, then use a Wind Platform or the vines to get up there.
Set Up a Camp
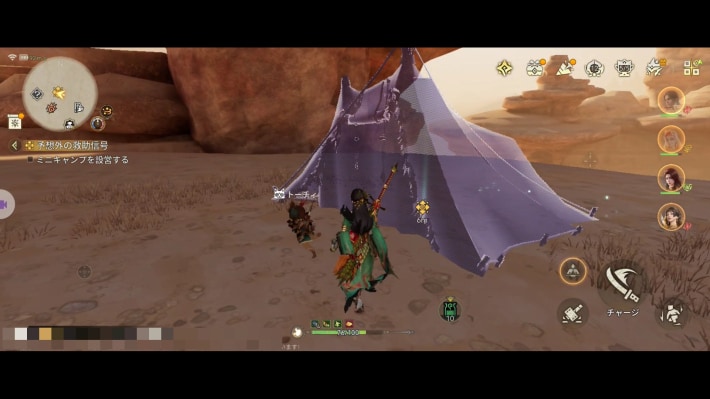
Set up a Camp at the observation point to move the story forward and complete the quest.
Path of Adventure
Raise Your Proof of Mastery
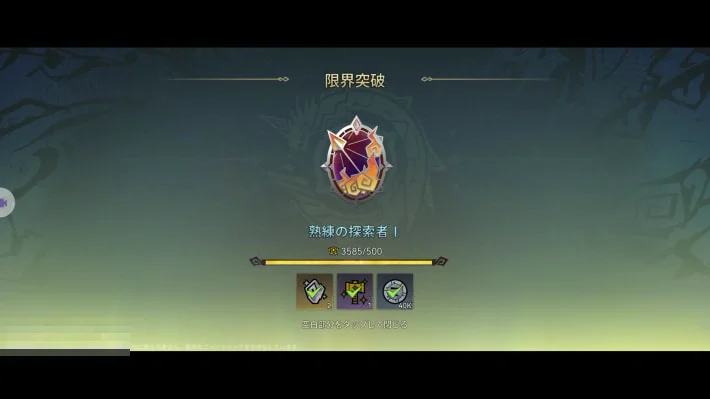
Raise your Proof of Mastery to Seasoned Explorer I.
Cradle in the Sandstorm
Return to the Sunken Oasis Camp
| Holly | Map screen |
|---|---|
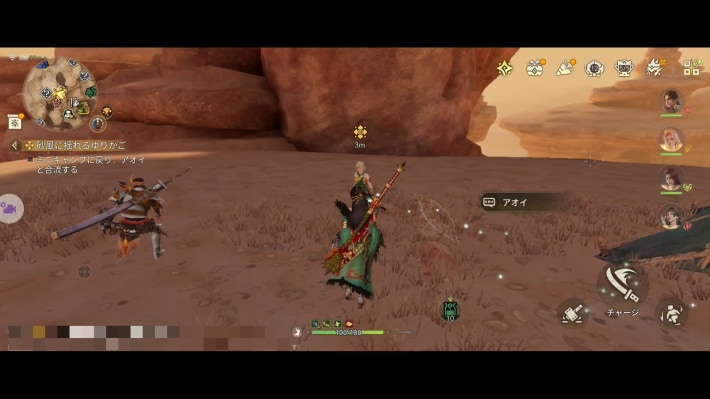 | 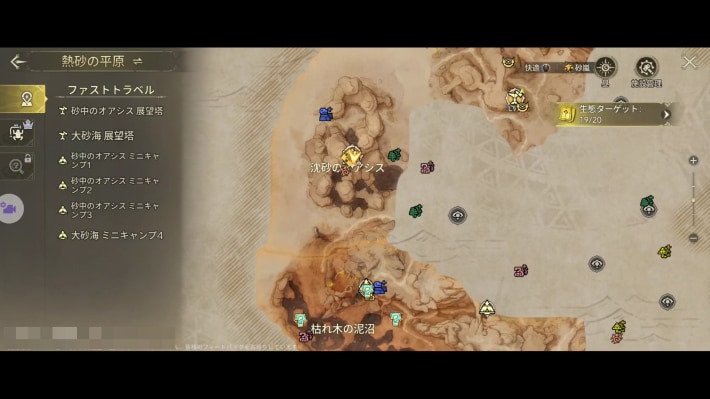 |
Talk to Holly, who's on the west side of the Sunken Oasis Camp.
Hunt a Rathian
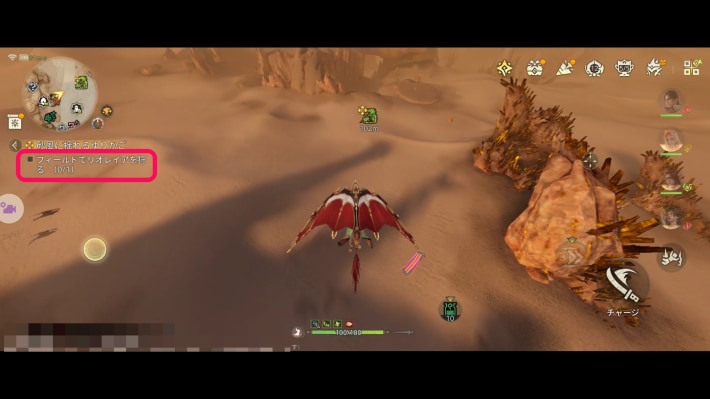
Hunt one Rathian in the field. If you slay it, you need to carve it. Tap the quest objective below the minimap and you'll track the Rathian automatically.
King of the Skies
Investigate the Rathian's Nest
| Nest | Map screen |
|---|---|
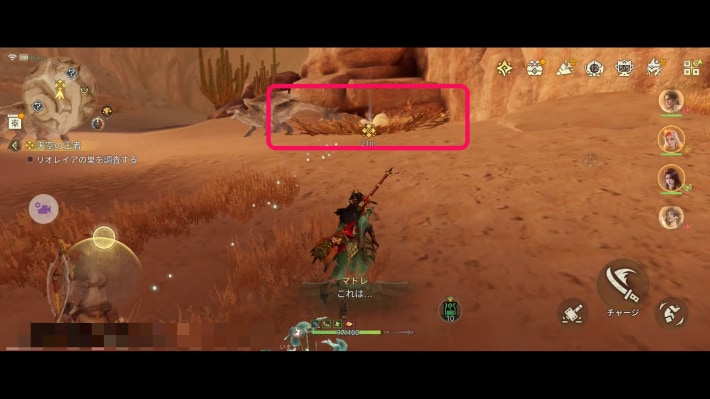 | 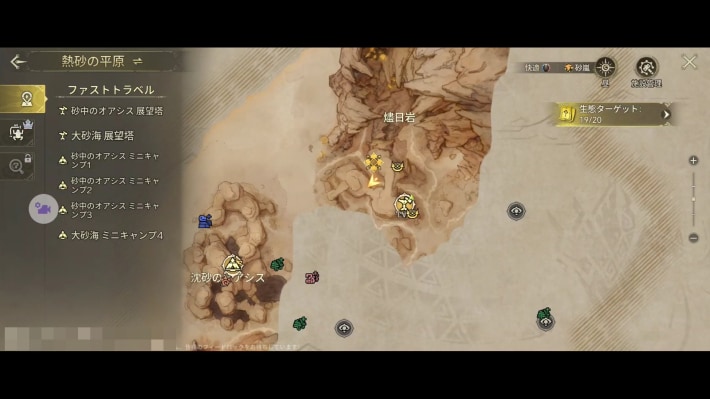 |
Investigate the Rathian's nest. Be careful: getting close moves the story on and starts a fight.
Hunt the Rathalos
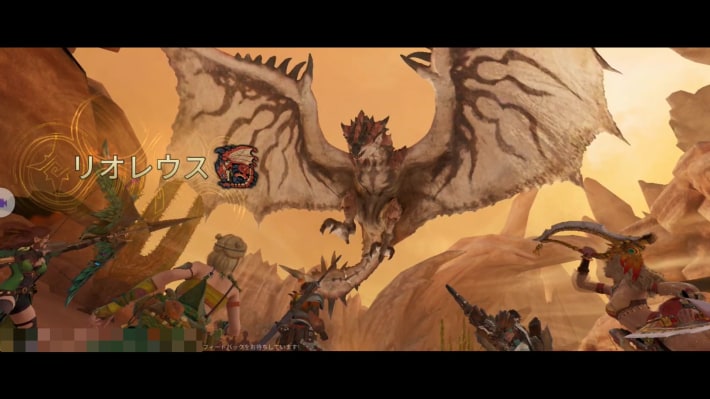
Hunt the Rathalos that appears. Afterward, carve it to complete the quest.
Vital Decision
Unlock the Glider's Ascend
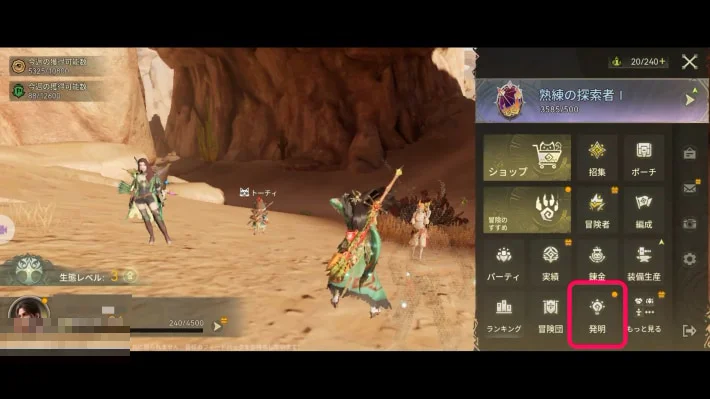 | 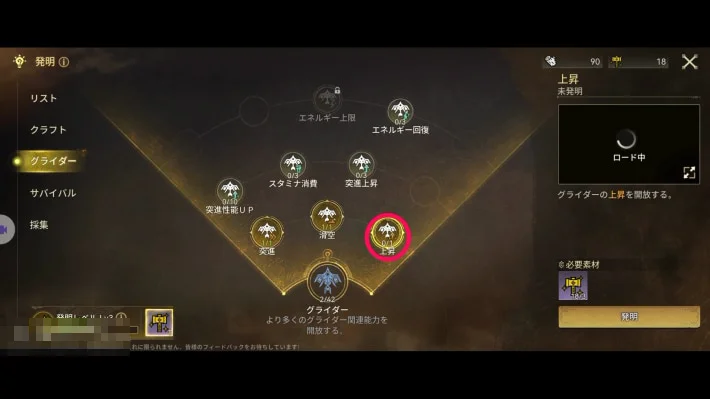 |
You can unlock Ascend under the glider in Research from the menu.
Research ListHead to the Golden Expanse Watchtower
| Destination | Map screen |
|---|---|
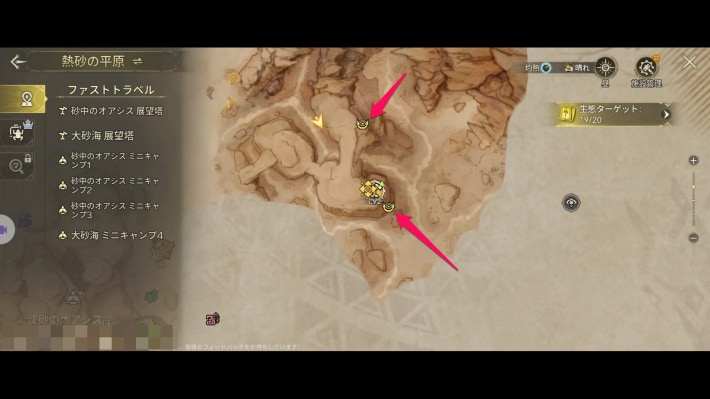 | 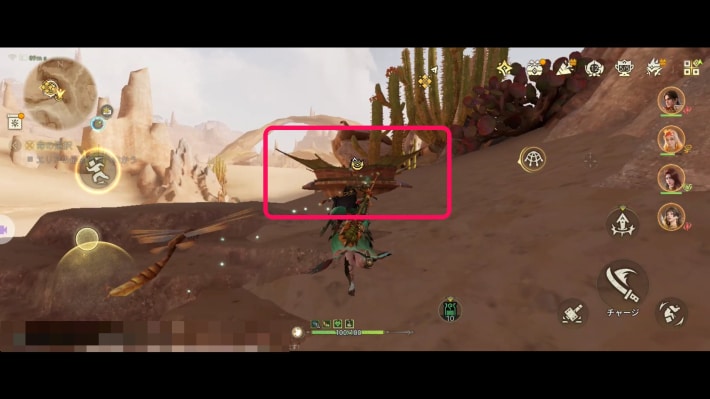 |
The Watchtower is on high ground, so we recommend placing a Wind Platform nearby and climbing with the glider's Ascend.
Get Stronger, Adventurer
You need to raise your Adventurer Rank to the required level. If you meet the requirement, the quest completes and you move on to the next chapter; if not, raise your Adventurer Rank with daily requests and Free Hunt.
Chapter 5 Walkthrough
Emergency! Sand Tyrant Rampage!
Hunt Diablos in the Field
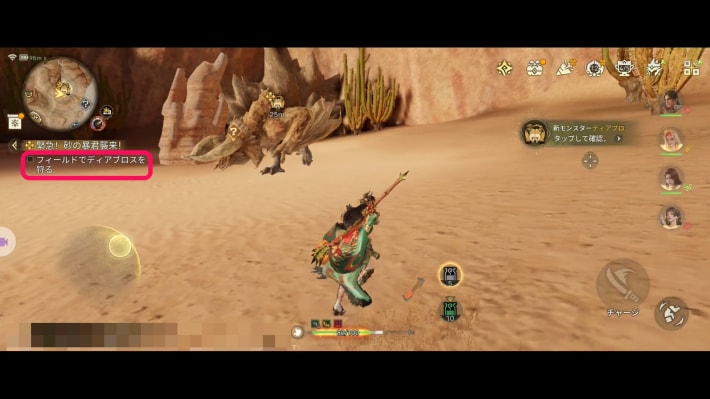
Hunt one Diablos. If you can't find it, tap the quest objective below the minimap to be guided to it.
Venomous Glow in the Dark
Take Down the Radiant Great Girros in Free Hunt
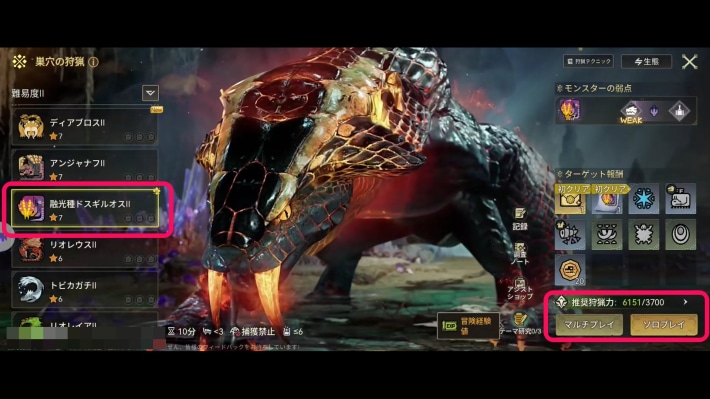
In Free Hunt, take down the Radiant Great Girros on Difficulty II.
Flash of Thunder
Take Down the Radiant Tobi-Kadachi in Free Hunt
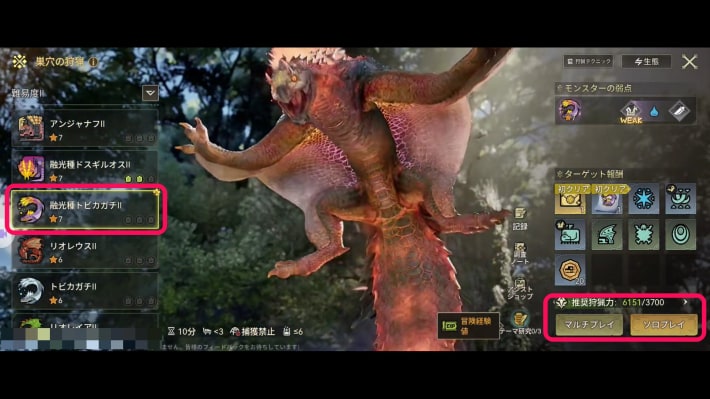
In Free Hunt, take down the Radiant Tobi-Kadachi on Difficulty II.
Path of Adventure
Raise Your Proof of Mastery
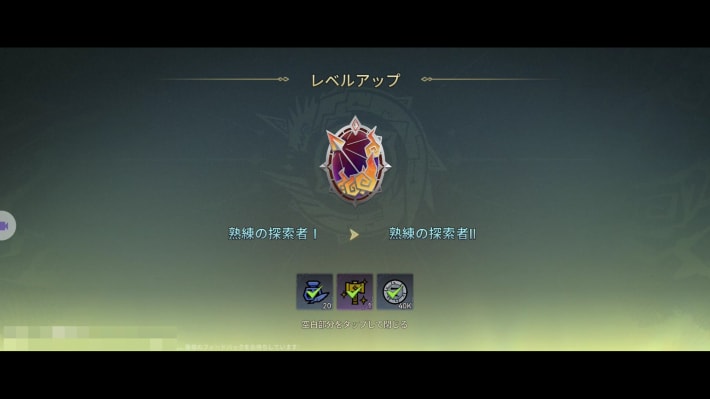
Raise your Proof of Mastery to Seasoned Explorer II.
Black Tar, White Chariot
Hunt the Radobaan in Free Hunt
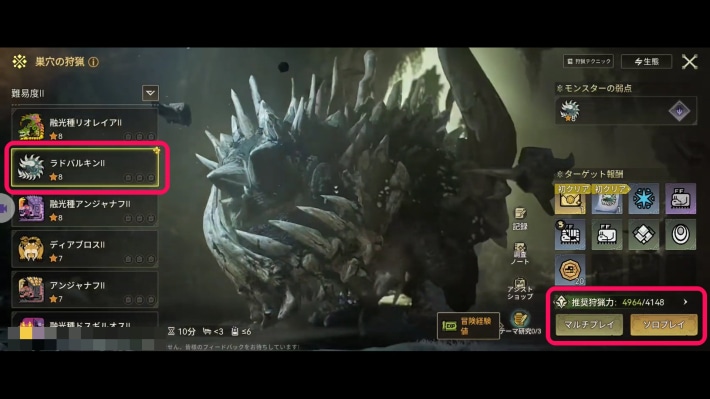
In Free Hunt, hunt the Radobaan on Difficulty II.
Red-Clawed Delicacy
Hunt the Odogaron in Free Hunt
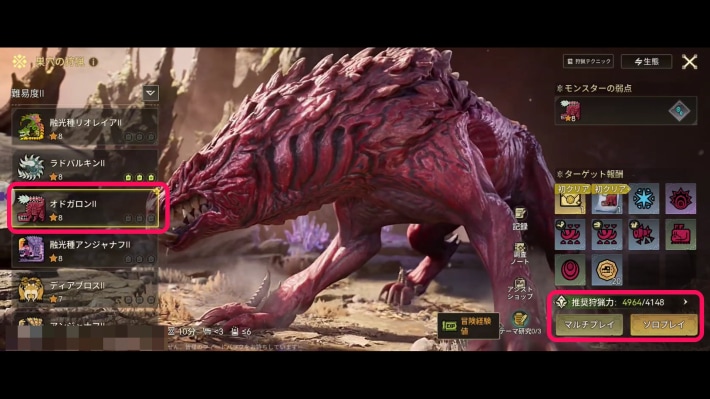
In Free Hunt, hunt the Odogaron on Difficulty II.
Marathon Hunt Permit
Do One Marathon Hunt
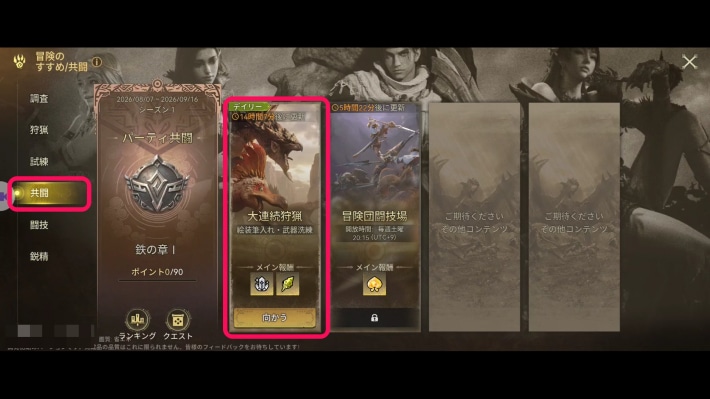 | 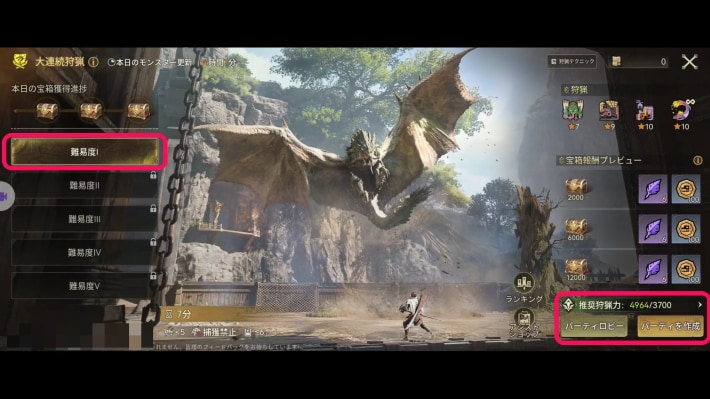 |
Take on one Marathon Hunt from the co-op tab of Game Modes. Just taking it on completes the quest.
Get Stronger, Adventurer
Raise Your Adventurer Rank
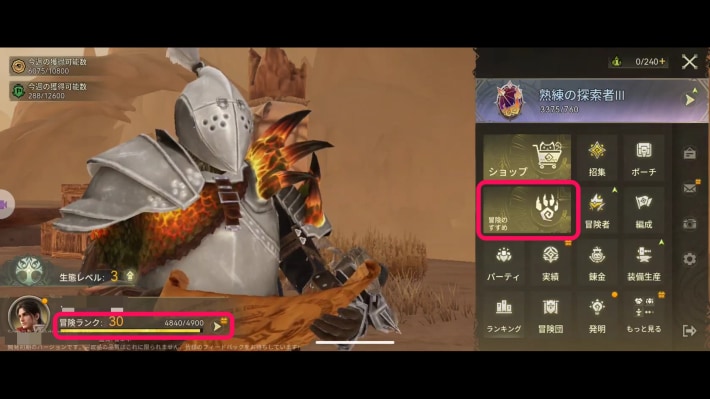
Raise your Adventurer Rank to 31. If you meet the requirement, the quest completes and you move on to the next chapter; if not, raise your Adventurer Rank with daily requests and Free Hunt.
Bursting with Light
Hunt the Tzitzi-Ya-Ku in Free Hunt
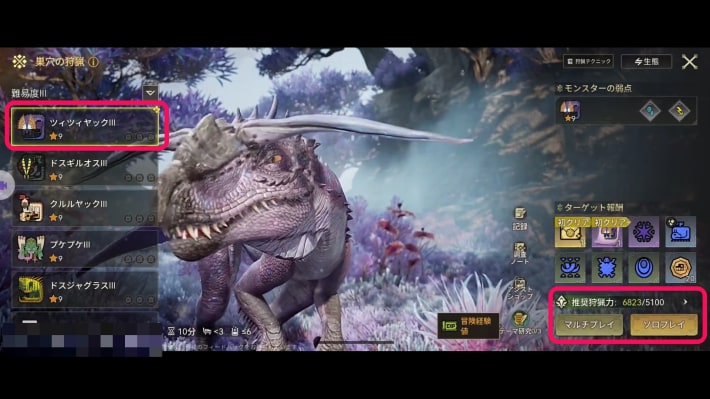
In Free Hunt, hunt the Tzitzi-Ya-Ku on Difficulty III.
Bringing Down the Troublemaker
Hunt the Paolumu in Free Hunt
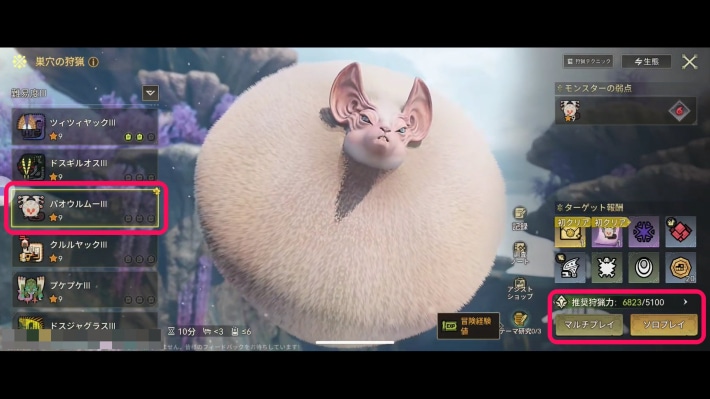
In Free Hunt, hunt the Paolumu on Difficulty III.
Windy Ambush From the Skies
Hunt the Legiana in Free Hunt
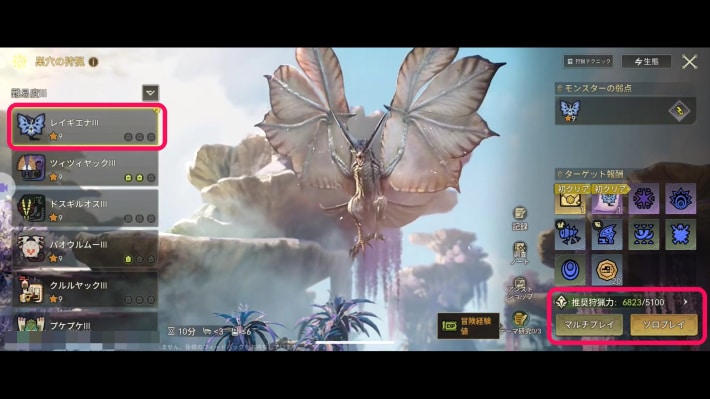
In Free Hunt, hunt the Legiana on Difficulty III.
Enter the Gauntlet
Take On the Monster Challenge Once
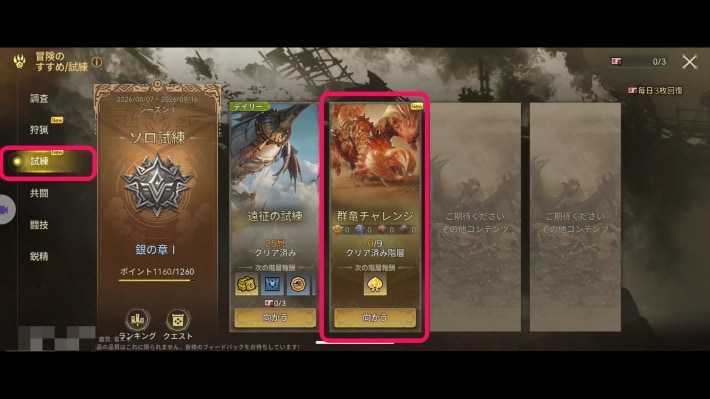 | 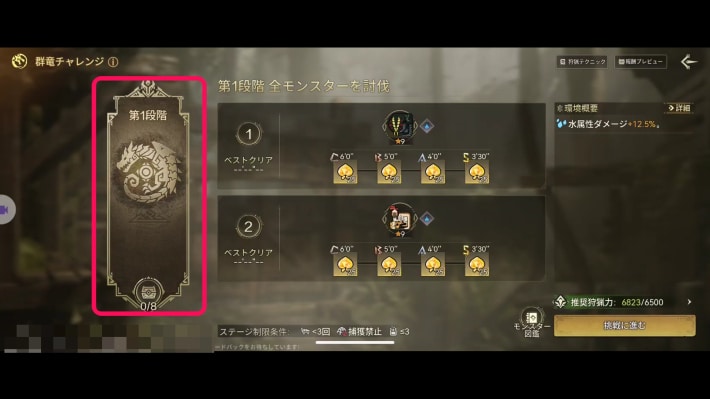 |
From the trials tab of Game Modes, take on the Monster Challenge once.
Get Stronger, Adventurer
Raise Your Proof of Mastery
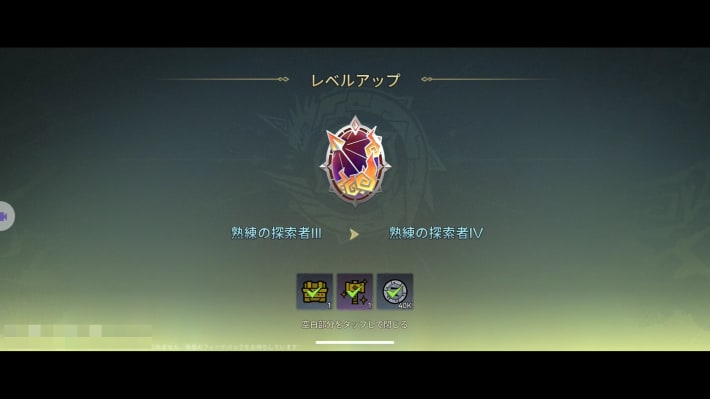
Raise your Proof of Mastery to Seasoned Explorer IV.
Raise Your Adventurer Rank
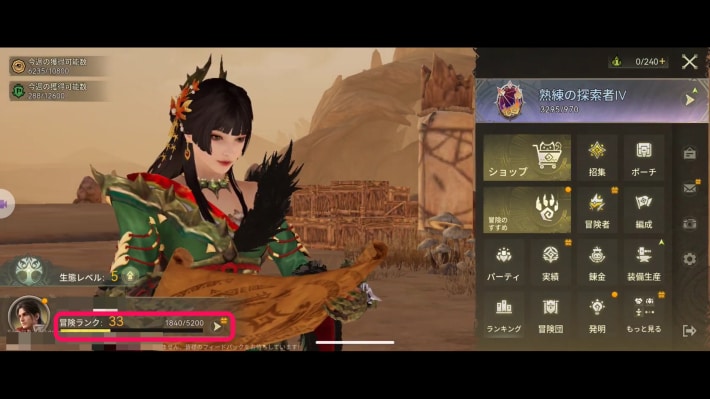
Raise your Adventurer Rank to 34. If you meet the requirement, the quest completes and you move on to the next chapter; if not, raise your Adventurer Rank with daily requests and Free Hunt.
Pretty in Pink, Yet Dangerous
Hunt the Pink Rathian in Free Hunt
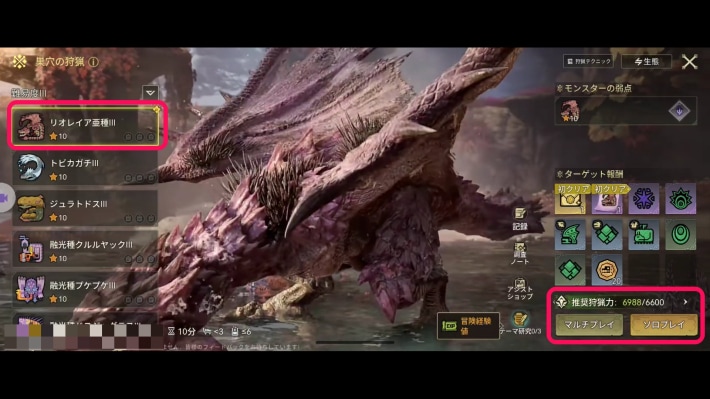
In Free Hunt, hunt the Pink Rathian on Difficulty III.
What's That Sparkling in the Sky?
Hunt the Radiant Paolumu in Free Hunt
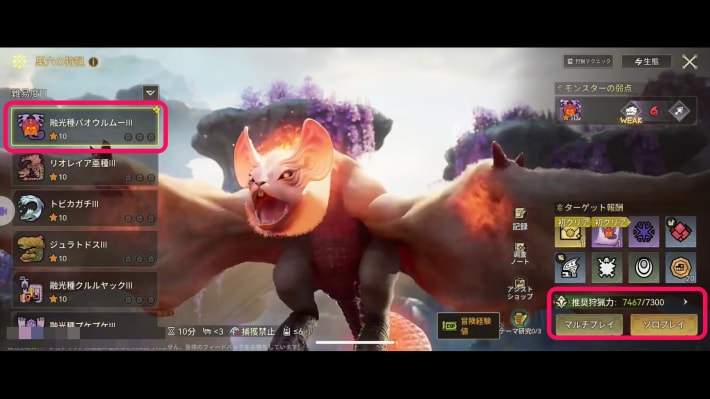
In Free Hunt, take down the Radiant Paolumu on Difficulty III.
The Challenger's Rite
Take On the Monster Challenge
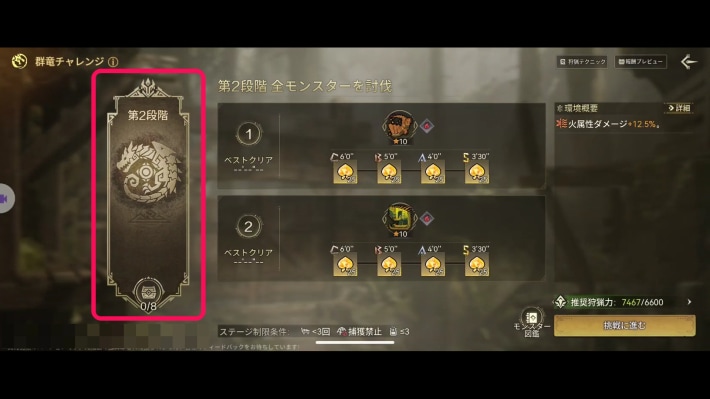
Clear stage 2 of the Monster Challenge in the normal Arena.
The Strong Keep Coming
Take On a Marathon Hunt
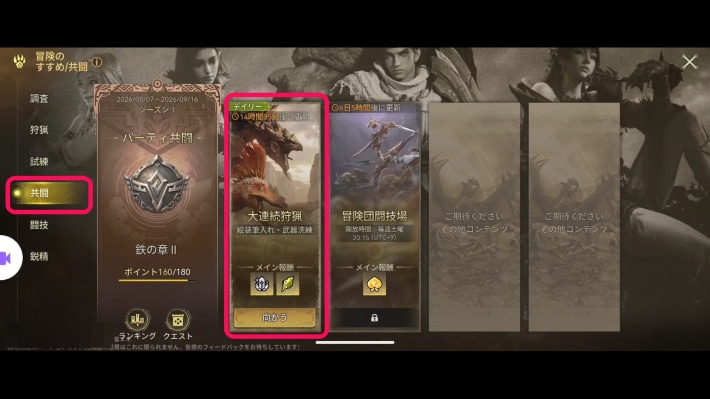 | 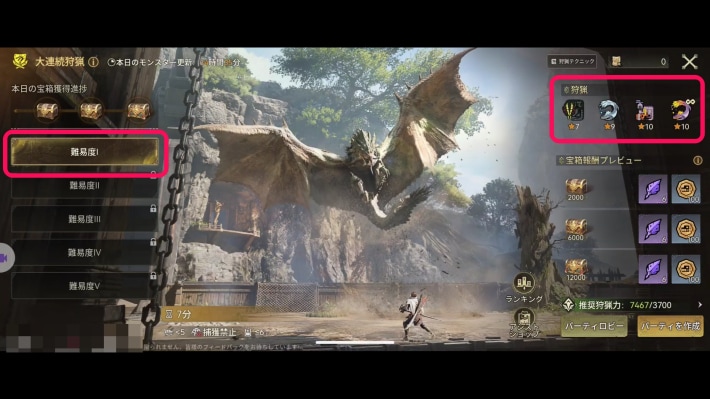 |
Slay three monsters in a Difficulty I Marathon Hunt. Three is all the quest needs, so you don't have to slay the fourth.
Bounty Contest
Take On the Bounty Contest Once
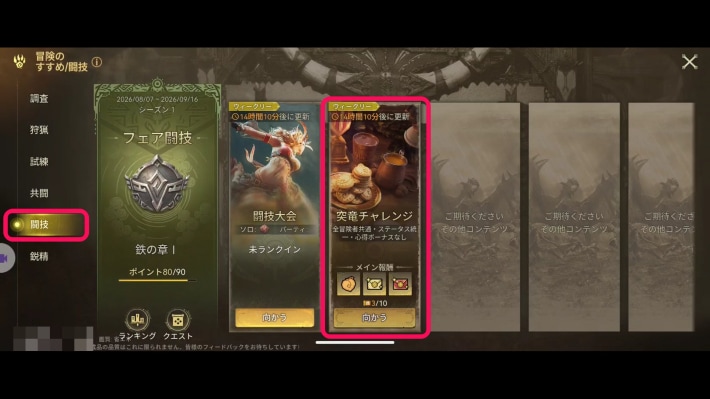 | 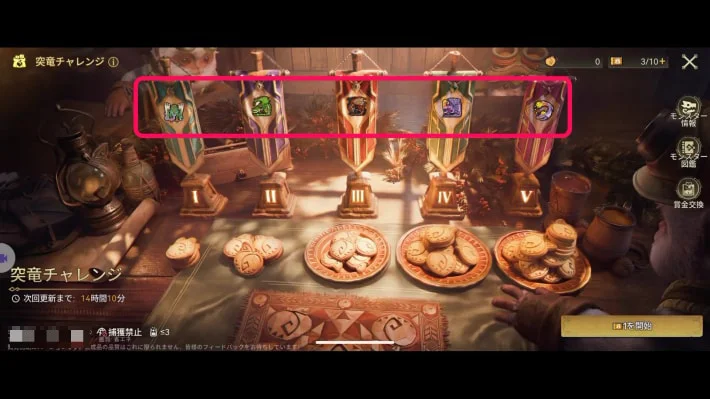 |
Go to the Bounty Contest from the Arena tab of Game Modes and take it on. Taking it on completes the quest, so it's fine to leave partway through.
Get Stronger, Adventurer
Raise Your Adventurer Rank
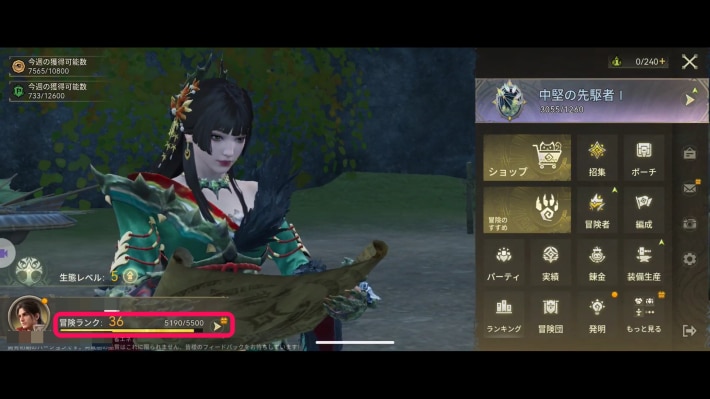
Raise your Adventurer Rank to 37. If you meet the requirement, the quest completes and you move on to the next chapter; if not, raise your Adventurer Rank with daily requests and Free Hunt.
Brilliance Unbound
Hunt the Radiant Tzitzi-Ya-Ku in Free Hunt
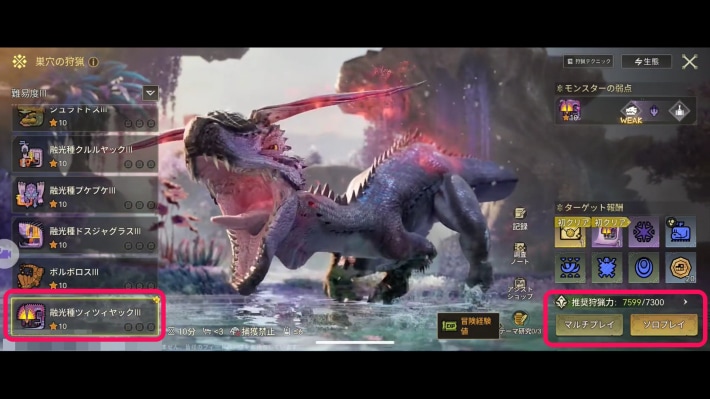
In Free Hunt, take down the Radiant Tzitzi-Ya-Ku on Difficulty III.
The Challenger's Rite
Take On the Monster Challenge
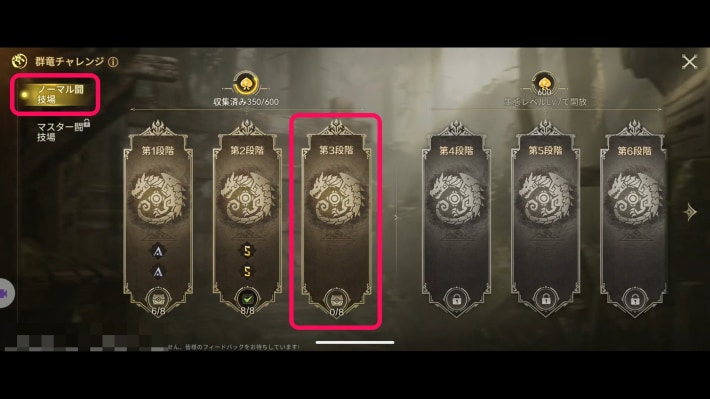
In the normal Arena's Monster Challenge, clear stage 3.
The Strong Keep Coming
Take On a Marathon Hunt
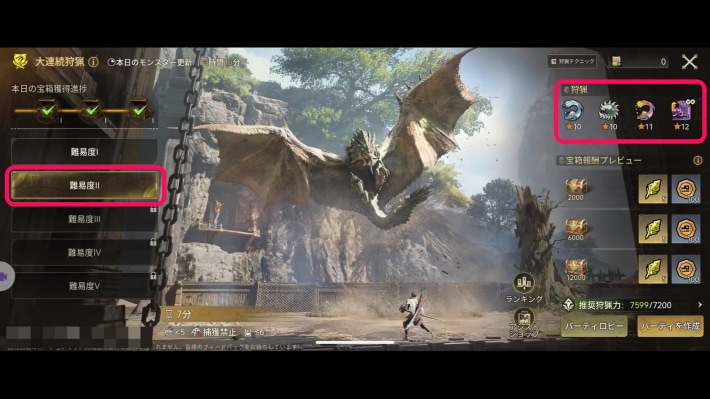
Slay one monster in a Difficulty II Marathon Hunt. Note that Difficulty II unlocks when your Ecological Rank reaches 7.
Get Stronger, Adventurer
Raise Your Proof of Mastery
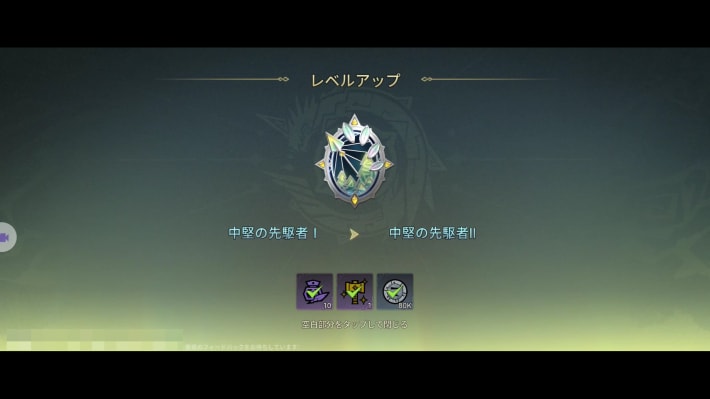
Raise your Proof of Mastery to Veteran Pioneer II.
Raise Your Adventurer Rank
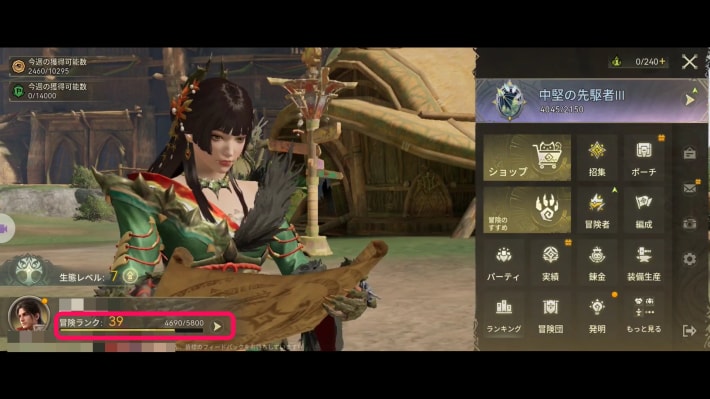
Raise your Adventurer Rank to 41. If you meet the requirement, the quest completes and you move on to the next chapter; if not, raise your Adventurer Rank with daily requests and Free Hunt.
Rend from the Shadows
Hunt the Radiant Odogaron in Free Hunt
The Challenger's Rite
Take On the Monster Challenge
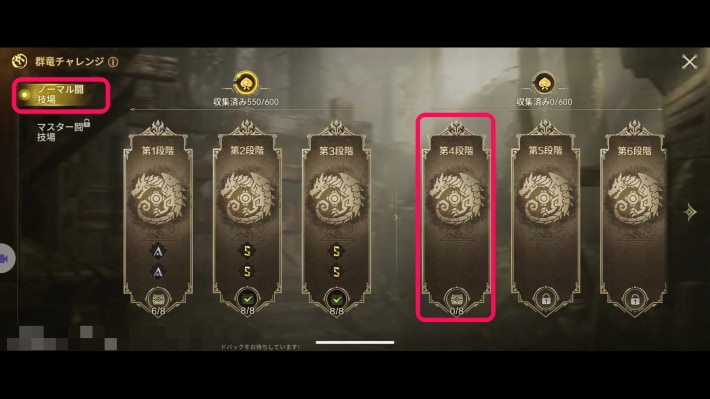
In the normal Arena's Monster Challenge, clear stage 4.
Get Stronger, Adventurer
Raise Your Proof of Mastery
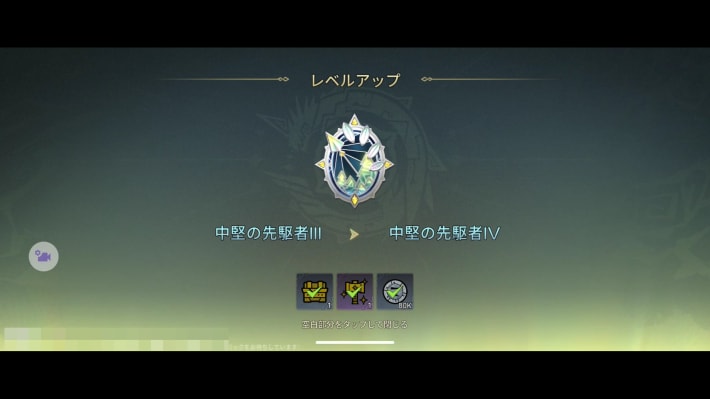
Raise your Proof of Mastery to Veteran Pioneer IV.
Raise Your Adventurer Rank
Raise your Adventurer Rank to 43. If you meet the requirement, the quest completes and you move on to the next chapter; if not, raise your Adventurer Rank with daily requests and Free Hunt.
Glowing Horns in the Cave
Take Down the Radiant Diablos in Free Hunt
The Challenger's Rite
Clear Stage 5 of the Monster Challenge in the Normal Arena
Get Stronger, Adventurer
Raise Your Proof of Mastery
Raise your Proof of Mastery to Battle-Hardened Master I.
Raise Your Adventurer Rank
Raise your Adventurer Rank to 44. If you meet the requirement, the quest completes and you move on to the next chapter; if not, raise your Adventurer Rank with daily requests and Free Hunt.
Story Tips
Tracking Story Quests
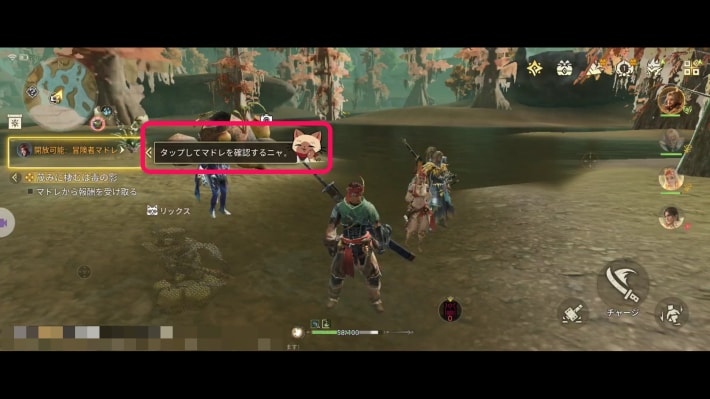
When you're working on a quest and don't know where to go or where something is in the menu, there's a tracking feature to help. Some tutorials start automatically during quests, but you can also trigger them yourself.
How to Track a Quest Objective
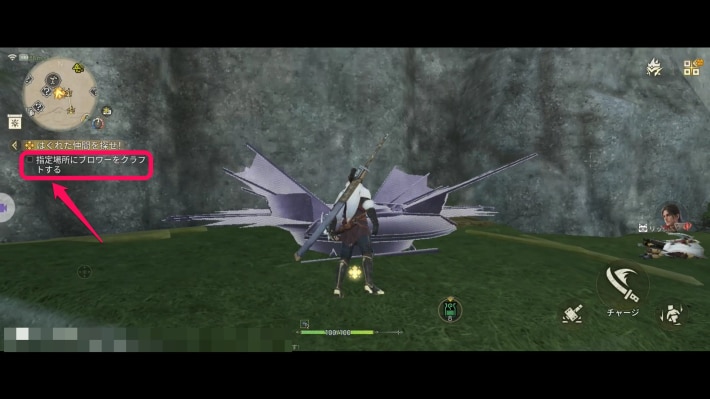 | 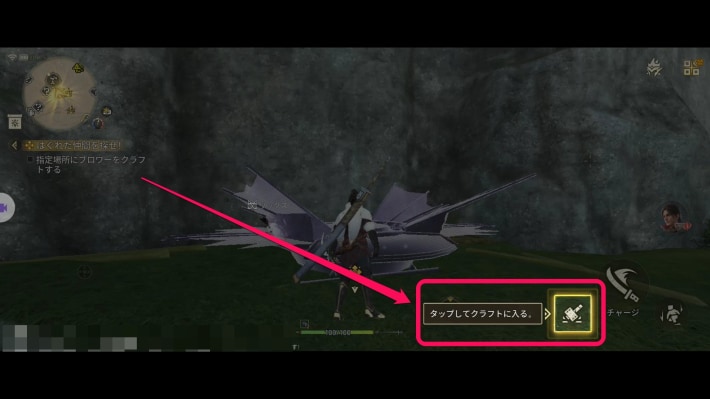 |
If you get lost during the story, tap the quest objective below the minimap and a tutorial or similar guidance starts automatically. Use it whenever you can't find a feature in the menu.
Getting Around the Field More Easily
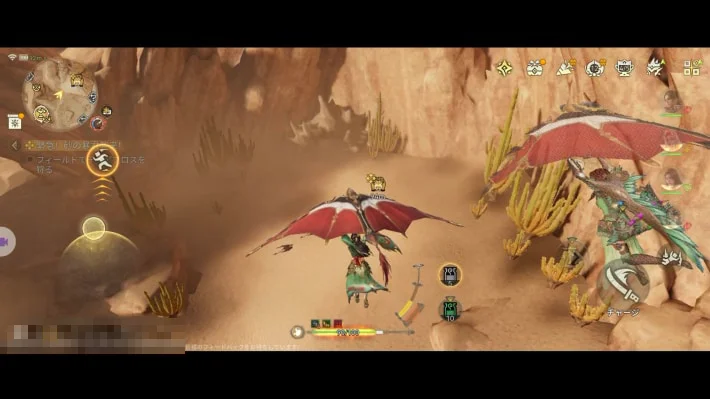
Quests have you travel around the field a lot, and there's no avoiding it as you play. There are several ways to make travel easier, such as building and fast travel.
Unlock the Map and Fast Travel Points
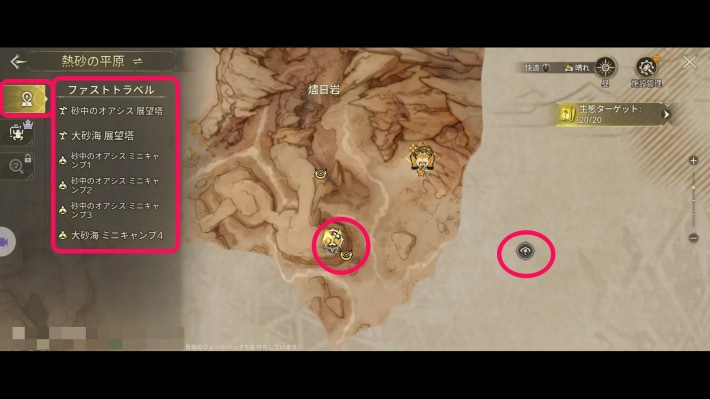
To make getting around easier during quests, repair Watchtowers and activate observation points ahead of time. Being able to fast travel nearby cuts the time it takes to reach objectives.
Build Catapults
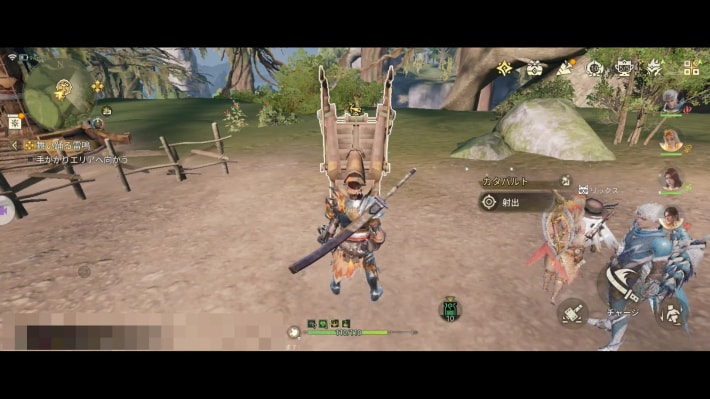
For getting around the field, build Catapults near fast travel points. They cover distance easily and give you more control over where you land than Zip Lines.
Prepare for the Weather
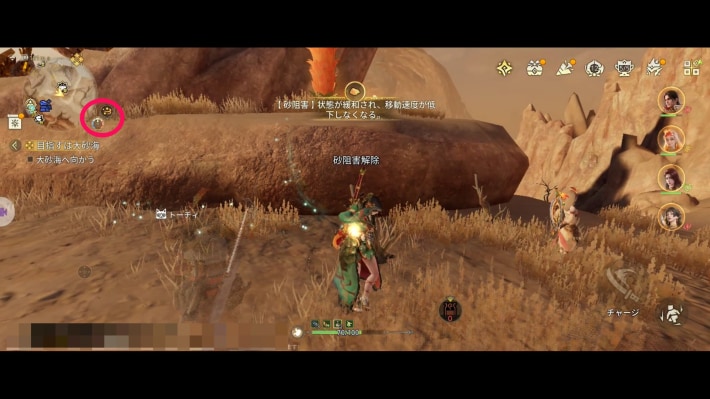
In the field, the weather keeps changing and can hit you with debuffs in combat. Prepare for it in advance so your quest fights go smoothly.
If You Can't Beat a Monster
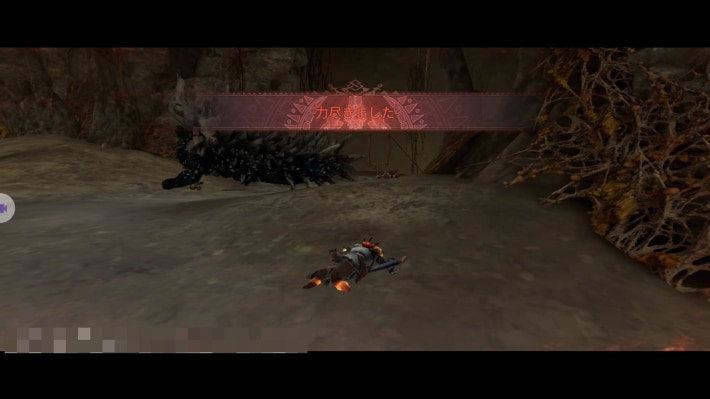
Many factors go into hunting a monster, and you can still faint even when fully prepared. Try different approaches, such as strengthening your adventurers, to beat the monster.
Beginner GuideStrengthen Your Adventurers
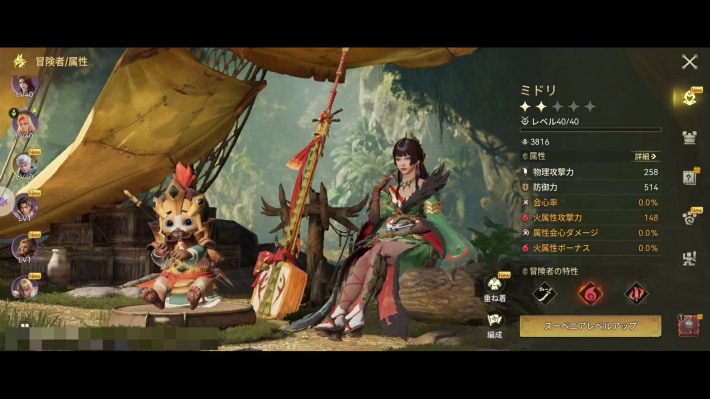
If you can't beat a monster, your stats may be falling short. Level up your adventurers and Buddies and upgrade your gear to raise your stats across the board.
Bring Several Ways to Heal
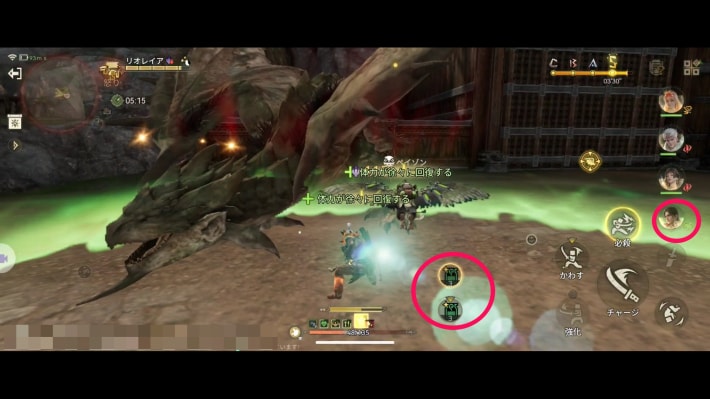
If you're getting hit a lot by the monster's attacks, have several ways to heal ready. Healing items help, and adventurers with support Ultimates are especially good to have in your party.
Rethink Your Party
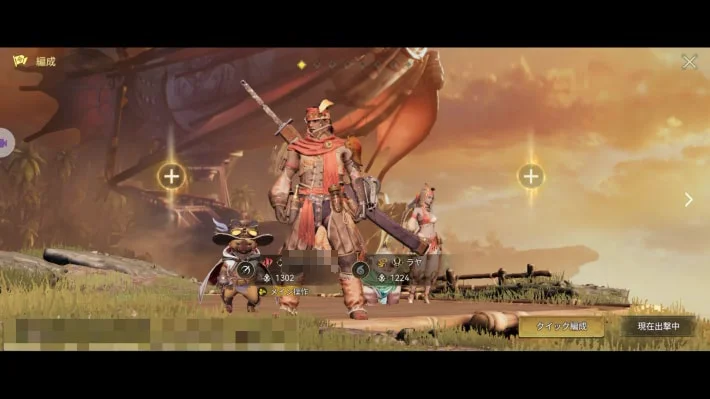
Your party makeup can strengthen its overall survivability and damage. Instead of focusing on one adventurer, build up a fixed party.
Raising Your Ranks
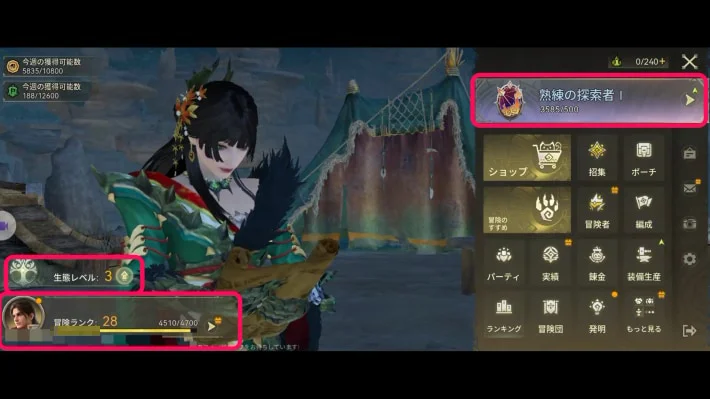
Clearing quests involves unlocking features, and some quest objectives require raising various ranks. It's worth raising your ranks actively, especially to unlock features and hunting quests.
Adventurer Rank and Proof of Mastery
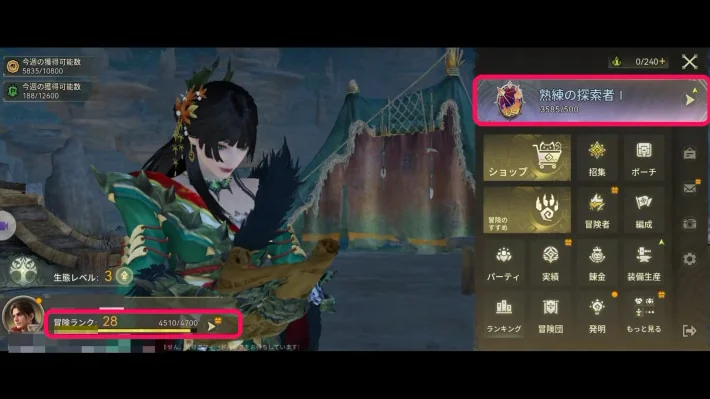
Proof of Mastery is easier to raise as you strengthen your adventurers. Adventurer Rank needs EXP, so keep clearing daily requests and Request Quests without delay.
Raising Your Ecological Rank Has a Downside
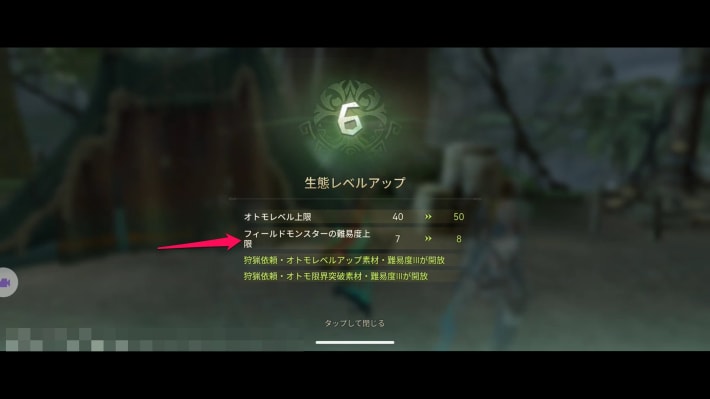
Your Ecological Rank is needed for things like ascending adventurers and Buddies, but it also makes field monsters tougher. When deciding whether to raise it, use whether you can beat the field monsters as your guide.
The screenshots are from the Japanese version of the game.