In Monster Hunter Outlanders, you design your main character at the start of the game, and you can change the look later with an appearance ticket. This guide covers how character creation works, how to redo it, how to share a look with an Appearance ID, and how to get layered armor to change how your gear looks. Information as of November 2, 2026.
How Character Creation Works
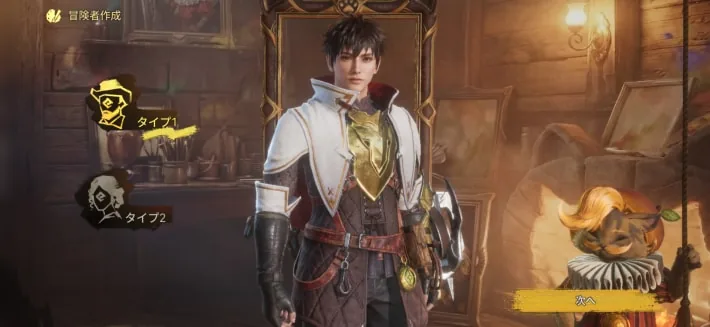
Character creation happens at the start of the game. First choose Type 1 or Type 2, then pick a base look and adjust it. There are many parts to choose from.
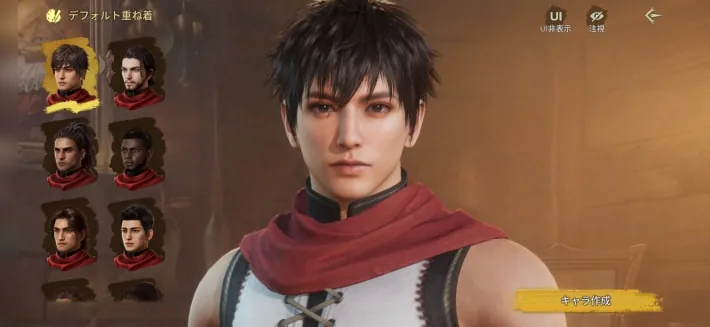
Presets and the Detail Tab
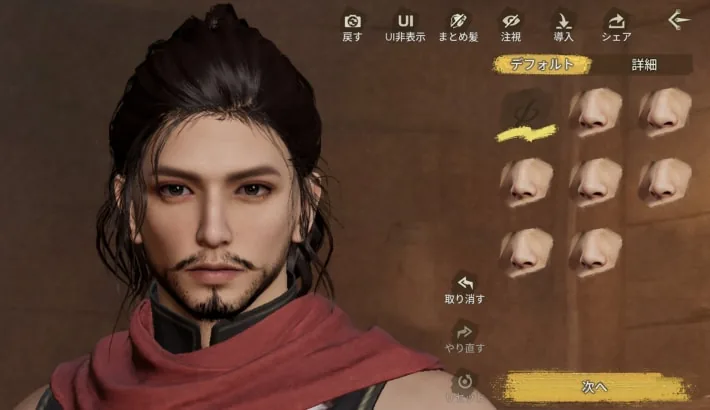
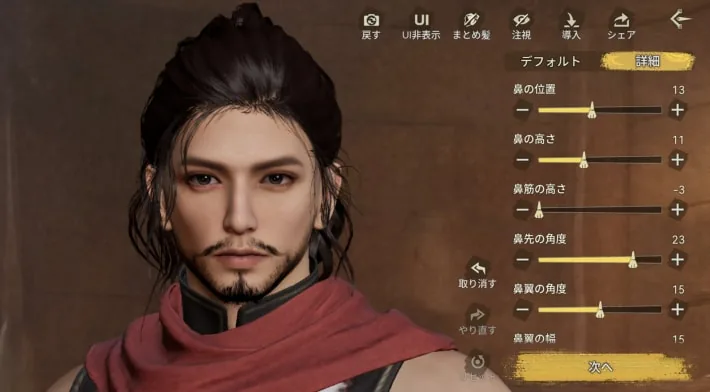
Each part has presets on the default tab. Switch to the detail tab to fine-tune it with sliders, such as the position and height of the nose.
What You Can Adjust
| Category | Options |
|---|---|
| Look | Skin, hairstyle, body type |
| Face | Face shape, brow shape, eyes, nose, mouth |
| Makeup | Eyebrows, eyeliner, eyeshadow, eyelashes, pupils, blush, lip gloss, face paint, beard (Type 1 only) |
Type 1 vs Type 2
- Controls and stats are the same for both. You can wear the same gear, and it performs the same.
- Body shape and the face presets you can choose from differ a lot, and armor looks different on each.
- Only Type 1 can choose a beard.
- You can't pick a voice. The voice depends only on the type.
Can You Redo Character Creation?
Yes. You can change your main character's look at any time with an appearance ticket. A ticket costs 150 Rutacoin, though, so it's worth taking your time the first time around.
You Get One Ticket Free
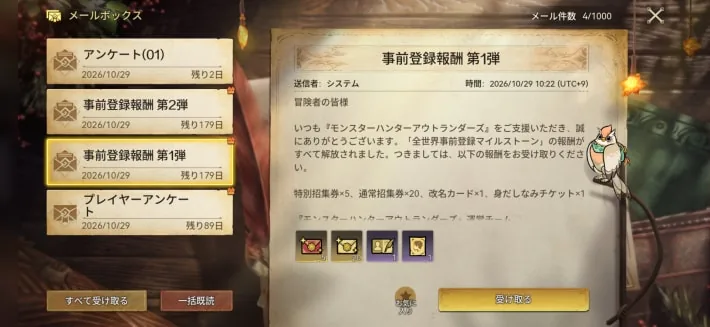
The first wave of pre-registration rewards includes one appearance ticket. It arrives by mail, so claim it from your mailbox.
Save Up to 10 Looks
You can save up to 10 appearance sets. Only the first one is free; each new set after that needs an appearance ticket. Once a set is made, you can switch to it at any time from the appearance screen on your profile page.
Use an Empty Slot to Change Type 1 or Type 2
When you edit a look you've already made, you can't switch between Type 1 (male) and Type 2 (female). To change it, create a new look in an empty slot.
How to Redo Character Creation
The steps are as follows.
- Open the menu, go to the shop, and buy an appearance ticket for 150 Rutacoin under item exchange in the Exchange tab.
- Open your Item Pouch from the menu and use the appearance ticket in the treasures tab.
- Pick the appearance set to change. You can edit a look you've made or choose an empty slot, then redo character creation.
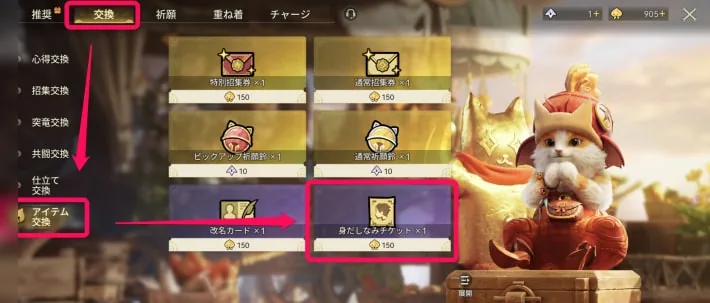
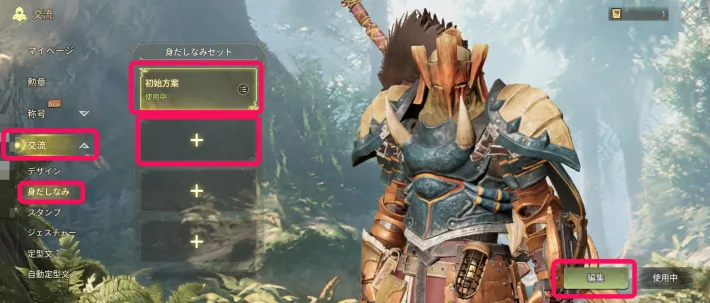
You Can Also Start From Your Profile
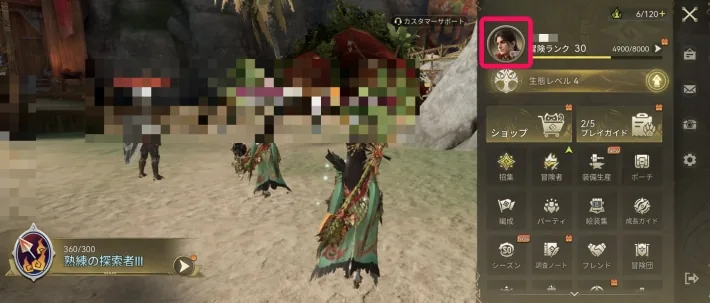
Tap your portrait at the top of the menu to open your profile page, then open the social section and choose appearance. If you have no appearance ticket, the game sends you to buy one.
How to Share and Import a Look
Share Your Look With an Appearance ID
Press the share button on the character creation screen to share a screenshot that includes your Appearance ID. Send it to friends or post it on social media.
Import a Look With an Appearance ID
Press the import button on the character creation screen and enter an Appearance ID to load that look.
Cosmetic Gear: Layered Armor
Your character's look normally changes with the armor you wear. Layered armor fixes the look to the layered armor you set, while your real gear keeps its stats.
How to Get Layered Armor
| Source | Details |
|---|---|
| Hunting monsters | First-clear rewards from Free Hunt quests and rewards for hunting monsters in the field. |
| Research Points | Trade Research Points for an Aesoland Style Crate with Garnett at the Meld workshop in Kulune. |
| Supply depot | Buy layered armor from Ruck at the supply depot in Kulune. The lineup changes every day. |
| Area tasks | Complete each map's area tasks, the exploration and challenge quests set for that map. |
| Shop exchanges | Mostly from the tailoring exchange in the shop's Exchange tab. A few are also in the Co-op Exchange. |
| Events | Some events give layered armor as a reward. |
| Paid | Buy them in the shop's layered armor tab, or get them from the first top-up bonus and cumulative top-up bonuses. |
| Wish banners | Spend Crimson Crest Coins on Wish banners to get adventurer-exclusive skins. |
Event List: Rewards and Dates / Current Banners
How to Equip Layered Armor
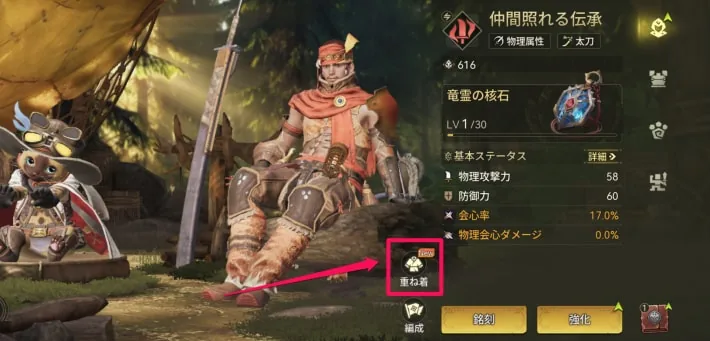
Open the menu and tap Adventurer to open the adventurer's screen, then tap the layered armor button at the bottom and choose the layered armor you like. You can change the look of your weapon and charm as well as your armor.
Hide Your Helmet
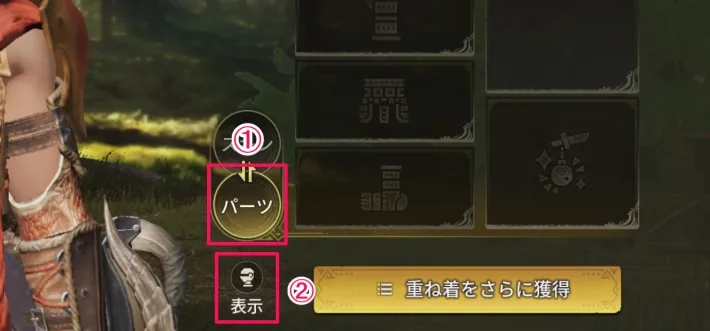
On the layered armor screen, tap the parts button at the bottom, then tap the button labeled Show that appears to hide the head armor. Your character's face then shows, and this works for adventurers from the gacha too.
You can only hide the head armor of adventurers in your party, so add them to your party first.
The screenshots are from the Japanese version of the game.