Here's how breaking parts and severing tails works in Monster Hunter Outlanders: the rewards and benefits, which parts you can break on each large monster and what they drop, and the weapons, skills and squad members that break parts best. Checked on November 11, 2026.
Part Break Rewards and Benefits
You Get More Materials
Breaking a part gives you a high chance at that part's materials. Some materials you need to craft gear are much easier to get by breaking a specific part.
Check Part Rewards in Free Hunt
The rewards for each monster in Free Hunt include part-break rewards, and the part to break is shown at the top left of each material. If you need a specific material for gear, check there whether breaking a part can get it.
Broken Parts Open Up the Monster
Monsters often flinch when a part breaks, which can cancel the attack they're doing. Breaking legs or wings can leave them unable to move for a while, so it's a good time to attack. Severing a tail makes them flinch too.
Some Monsters Get Weaker
On some monsters, breaking a certain part weakens them. For example, breaking a Flying Wyvern's wings makes it harder for it to fly. Each monster has its own weakening effect.
Radiant Monsters: Break the Weak Part to End the Rage
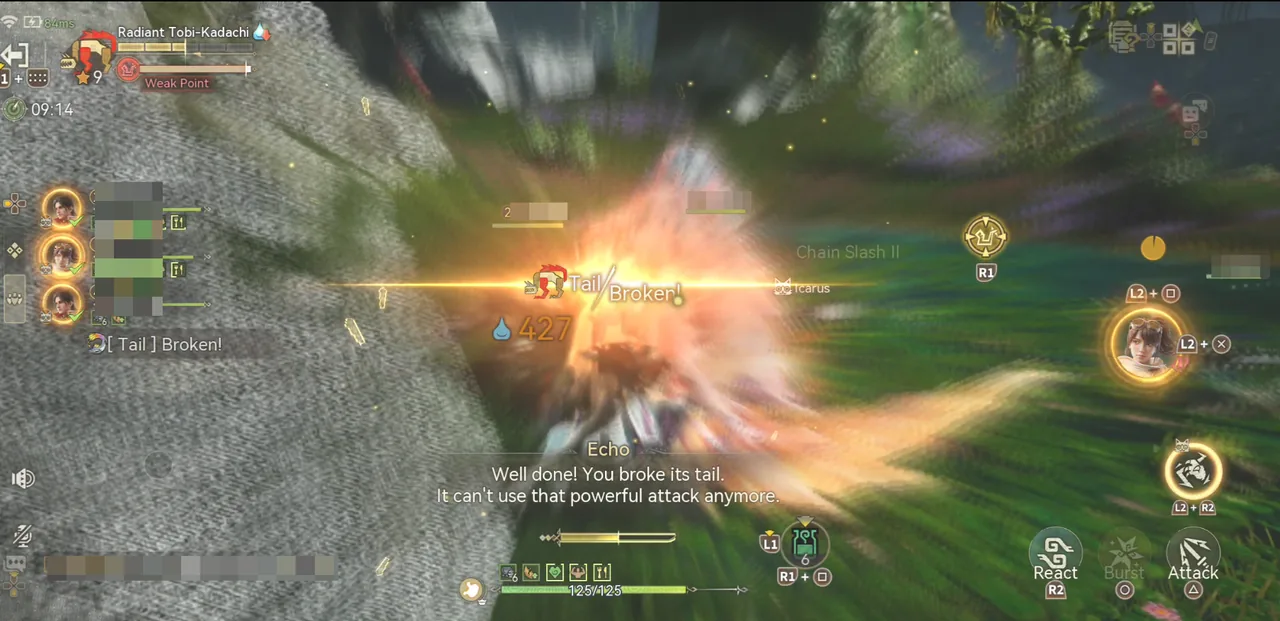
Radiant monsters, new to Outlanders, have their own weak part. Breaking it ends their Radiant Rage.
Radiant Monsters / Radiant Rage Tips
Tail Sever Rewards and Benefits
Carve the Severed Tail for Extra Materials
On monsters with a tail, you can carve the tail after severing it. You get these carves on top of the quest rewards, so go for the tail when you want more materials.
Some Monsters Lose Attacks
On some monsters, such as Rathian and Tzitzi-Ya-Ku, breaking a certain part limits the attacks they can use. It's especially worth it on monsters that inflict troublesome status effects, so go for those parts.
How to Break Parts
Deal Enough Damage to the Part
You break a part or sever a tail by dealing a set amount of damage to that part. You need to hit it directly, so make sure your attacks land on the part you're aiming for.
Broken Parts Are Easy to Spot
A broken part turns red in the on-screen display, so you can tell at a glance. The monster also keeps a visible wound there, so once a part is broken, switch to another one.
Use Lock-On on the Part
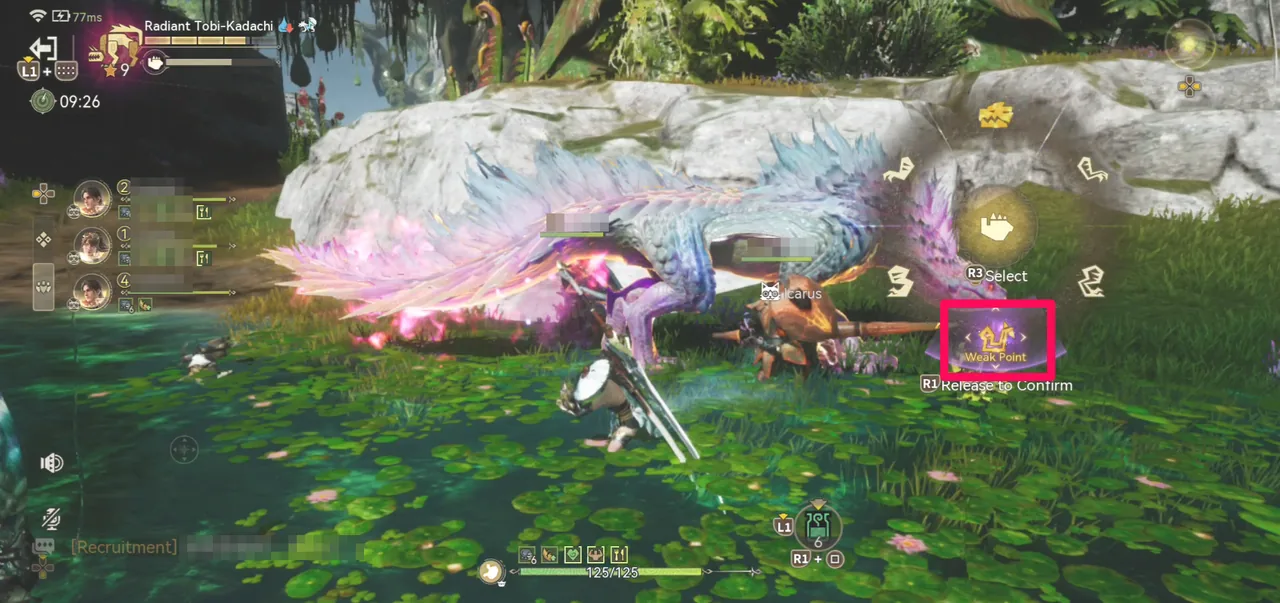
Outlanders lets you lock on to a specific part with Lock-On, which makes part breaks much easier to aim for. It keeps tracking the part even on big monsters, so use it often.
Check Breakable Parts in the Monster Field Guide
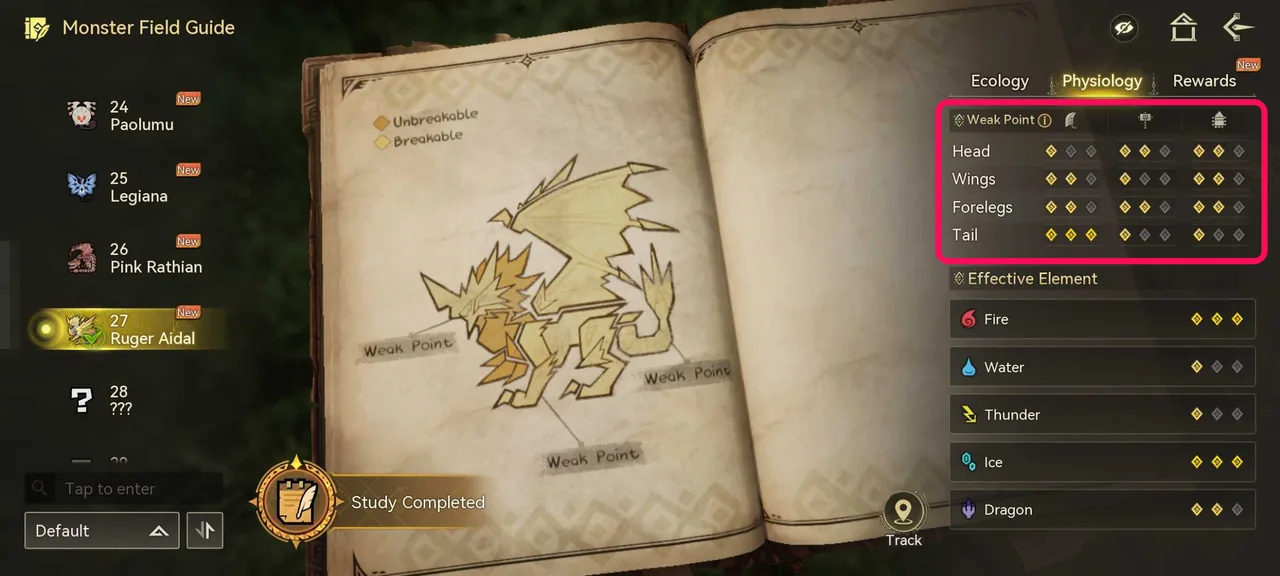
The weak points page of the Monster Field Guide marks which parts are breakable, and shows how well Sever, Blunt and Ammo attacks work on each part. More diamonds mean more effective.
Breakable Parts and Rewards by Monster
Here are the breakable parts of every large monster and the materials you get by breaking them. Small monsters have no breakable parts. The table leaves off the grade at the end of each material name (a Roman numeral that changes with the rank); see each monster's page for drops by rank.
The materials column uses the part shown on each reward, so its part names can differ from the breakable parts list (for example, Radobaan). A dash means no part-break materials are listed for that monster.
Large Monsters
| Monster | Breakable Parts | Materials From Part Breaks |
|---|---|---|
 Great Jagras | Head / Forelegs / Body | Body: Great Jagras Hide Forelegs: Great Jagras Claw Head: Great Jagras Mane |
 Tobi-Kadachi | Head / Forelegs / Body / Tail | Body: Tobi-Kadachi Pelt Forelegs: Tobi-Kadachi Claw Tail: Tobi-Kadachi Electrode Head: Tobi-Kadachi Electrode |
 Great Girros | Head / Forelegs / Tail | Forelegs: Great Girros Hide Head: Great Girros Hood Tail: Great Girros Tail |
 Odogaron | Head / Forelegs / Hind Legs / Tail | Hind Legs: Odogaron Sinew Forelegs: Odogaron Claw Head: Odogaron Fang Tail: Odogaron Tail |
 Kulu-Ya-Ku | Head / Forelegs | Head: Kulu-Ya-Ku Beak Forelegs: Kulu-Ya-Ku Plume Foreclaws: Kulu-Ya-Ku Plume |
 Pukei-Pukei | Head / Wings / Body / Tail | Body: Pukei-Pukei Shell Wings: Pukei-Pukei Quill Head: Pukei-Pukei Sac Tail: Pukei-Pukei Tail |
 Tzitzi-Ya-Ku | Head | Head: Tzitzi-Ya-Ku Photophore |
 Barroth | Head / Forelegs / Hind Legs / Tail | Hind Legs: Barroth Shell Forelegs: Barroth Claw Head: Barroth Scalp Tail: Barroth Tail Foreclaws: Barroth Claw |
 Anjanath | Head / Hind Legs / Tail | Hind Legs: Anjanath Scale Head: Anjanath Nosebone Tail: Anjanath Tail |
 Radobaan | Jaw / Body (Side) / Tail | Body: Radobaan Shell Head: Radobaan Oilshell Tail: Radobaan Oilshell Hind Legs: Wyvern Bonemass |
 Rathian | Head / Wings / Body / Tail | Body: Rathian Scale Head: Rathian Shell Wings: Rathian Webbing Tail: Rathian Spike |
 Pink Rathian | Head / Wings / Body / Tail | Wings: Rathian Webbing Head: Pink Rathian Carapace Body: Pink Rathian Carapace |
 Rathalos | Head / Wings / Body / Tail | Body: Rathalos Scale, Rathalos Plate Head: Rathalos Shell Wings: Rathalos Webbing Tail: Rathalos Tail |
 Diablos | Head / Body / Tail | Body: Diablos Ridge Tail: Diablos Tailcase Head: Twisted Horn |
 Black Diablos | Head / Body / Tail | — |
 Paolumu | Chest / Wings / Body / Tail | Head: Paolumu Pelt Body: Paolumu Pelt Wings: Paolumu Webbing Tail: Paolumu Shell |
 Legiana | Head / Wings / Body / Tail | Head: Legiana Hide Body: Legiana Hide Wings: Legiana Webbing Tail: Legiana Tail Webbing |
 Jyuratodus | Head / Body / Tail / Fin | Tail: Jyuratodus Scale Body: Jyuratodus Scale Hind Legs: Jyuratodus Fin Head: Jyuratodus Fang |
 Kushala Daora | Head / Wings / Tail | — |
 Ruger Aidal | Head / Forelegs / Hind Legs / Wings / Tail / Body | — |
Radiant Monsters
| Monster | Breakable Parts | Materials From Part Breaks |
|---|---|---|
 Radiant Great Jagras | Head / Forelegs / Body | Body: Radiant Great Jagras Hide Forelegs: Radiant Great Jagras Claw Head: Radiant Great Jagras Mane |
 Radiant Kulu-Ya-Ku | Head / Forelegs | Head: Radiant Kulu-Ya-Ku Beak Forelegs: Radiant Kulu-Ya-Ku Plume Foreclaws: Radiant Kulu-Ya-Ku Plume |
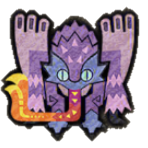 Radiant Pukei-Pukei | Head / Wings / Body / Tail | Body: Radiant Pukei-Pukei Shell Wings: Radiant Pukei-Pukei Quill Head: Radiant Pukei-Pukei Sac Tail: Radiant Pukei-Pukei Tail |
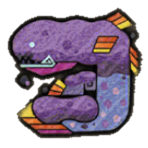 Radiant Jyuratodus | Head / Body / Tail / Fin | Tail: Radiant Jyuratodus Scale Body: Radiant Jyuratodus Scale Hind Legs: Radiant Jyuratodus Fin Head: Radiant Jyuratodus Fang |
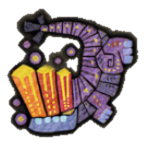 Radiant Barroth | Head / Forelegs / Hind Legs / Tail | Hind Legs: Radiant Barroth Shell Forelegs: Radiant Barroth Claw Head: Radiant Barroth Scalp Tail: Radiant Barroth Tail Foreclaws: Radiant Barroth Claw |
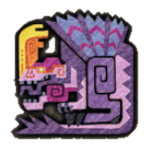 Radiant Anjanath | Head / Hind Legs / Tail | Hind Legs: Radiant Anjanath Scale Head: Radiant Anjanath Nosebone Tail: Radiant Anjanath Tail |
 Radiant Rathian | Head / Wings / Body / Tail | Body: Radiant Rathian Scale Head: Radiant Rathian Shell Wings: Radiant Rathian Webbing Tail: Radiant Rathian Spike |
 Radiant Diablos | Head / Body / Tail | Body: Radiant Diablos Ridge Head: Radiant Twisted Horn |
 Radiant Legiana | Head / Wings / Body / Tail | Head: Radiant Legiana Hide Body: Radiant Legiana Hide Wings: Radiant Legiana Webbing Tail: Radiant Legiana Tail Webbing |
 Radiant Paolumu | Chest / Wings / Body / Tail | Head: Radiant Paolumu Pelt Body: Radiant Paolumu Pelt Wings: Radiant Paolumu Webbing Tail: Radiant Paolumu Shell |
 Radiant Rathalos | Head / Wings / Body / Tail | Body: Radiant Rathalos Scale Wings: Radiant Rathalos Webbing Head: Radiant Rathalos Shell |
 Radiant Pink Rathian | Head / Wings / Body / Tail | Wings: Radiant Rathian Webbing Head: Radiant Pink Rathian Carapace Body: Radiant Pink Rathian Carapace |
 Radiant Black Diablos | Head / Body / Tail | — |
 Radiant Radobaan | Jaw / Body (Side) / Tail | Body: Radiant Radobaan Shell Head: Radiant Radobaan Oilshell Hind Legs: Radiant Wyvern Bonemass |
 Radiant Great Girros | Head / Forelegs / Tail | Forelegs: Radiant Great Girros Hide Tail: Radiant Great Girros Tail Head: Radiant Great Girros Hood |
 Radiant Tobi-Kadachi | Head / Forelegs / Body / Tail | Body: Radiant Tobi-Kadachi Pelt Tail: Radiant Tobi-Kadachi Electrode Head: Radiant Tobi-Kadachi Electrode Forelegs: Radiant Tobi-Kadachi Claw |
 Radiant Tzitzi-Ya-Ku | Head | Head: Radiant Tzitzi-Ya-Ku Photophore |
 Radiant Odogaron | Head / Forelegs / Hind Legs / Tail | Forelegs: Radiant Odogaron Claw Hind Legs: Radiant Odogaron Sinew Head: Radiant Odogaron Fang |
Best Weapons and Boosts for Breaking Parts
Match Your Attack Type to the Part
Each part has an attack type it's weak to: Sever, Blunt or Ammo. If you're farming a monster's part-break materials, check that part's ★ on the monster's page and bring a weapon of the type that works best on it.
Severing Tails Needs Sever Damage
Hammer is a Blunt weapon, so it can't sever tails, though it can still break the head and other parts. Heavy Bowgun can sever tails only with Slicing Ammo, so switch ammo before you go for the tail. Fire it from behind the monster, where the head and wings won't block your shots.
Hammer Guide / Heavy Bowgun Guide
Great Sword Is Great at Breaking Parts
Great Sword hits hardest with charged slashes, and its damage goes up through three charge levels. That makes it great at breaking parts.
Equip Armor With Breaker
The Breaker skill raises the damage your attacks build up on parts: ×1.1 at Lv1, ×1.2 at Lv2 and ×1.3 at Lv3.
Adventurers and Buddies That Boost Part Breaks
Some adventurers raise part break efficiency or part damage through their skills and insights, and some buddies do it through their support effect. Keep them in mind when you farm a monster's materials with a squad you use often.
| Name | From | Effect |
|---|---|---|
 Ouyang Varen | Insight: Ironclad Glory | When performing ultimate, increases the part break efficiency by 30.00% for the whole squad for 15s. |
 Midori | Insight: Shadow Legion | Upon unleashing ultimate, skill damage is increased by 40%, and part break efficiency is increased by 20%. |
 Luxheart | Squadmate Skill: Starlight Devastation | Activates when the Main Adventurer performs a successful react, following up on the monster. Extends the duration of the next daze inflicted on the monster by 2s, and deals sever damage with very high part break efficiency. Can only trigger once every 40s. |
 Pepper | Squadmate Skill: Devastating Pressure | Activates when the Main Adventurer performs a successful react, following up on the monster and applying a debuff, increasing the airborne damage it takes by 20% for 15s, and dealing ammo damage with very high part break efficiency. Can only trigger once every 40s. |
 Keres | Squadmate Skill: Feral Intimidation | Activates when the Main Adventurer performs a successful react, following up on the monster and applying a debuff, increasing the dragon part break efficiency it takes by 35% for 15s, and guaranteeing a suppression to stagger it. This effect cannot trigger assault Squadmate Skills. Can only trigger once every 40s. |
 Fated Adventurer (all weapons) | Insight (Assault): Monsoon | When the Ultimate is activated, increases skill damage by 10% and part damage by 10% for 20s. |
 Tidal Claw | Tidal Claw's Aid | Increases part break efficiency by 6.00% for all adventurers in the squad. |
 Falee Hendsom | Falee Hendsom's Aid | Increases part break efficiency against suppressed monsters by 12.00% for all adventurers in the squad. |
Eat Vibrant Sashimi Platter
Vibrant Sashimi Platter raises part break efficiency by 24%, the most of any meal. Eat it before hunts where you're after part-break materials.